 jdelbe
*** Hackaday Prize 2021 entry ***
Anatomy
- Muscles: Electronics
- Heart: Power
- Brain: Software
- Face: Aesthetics
- Body:
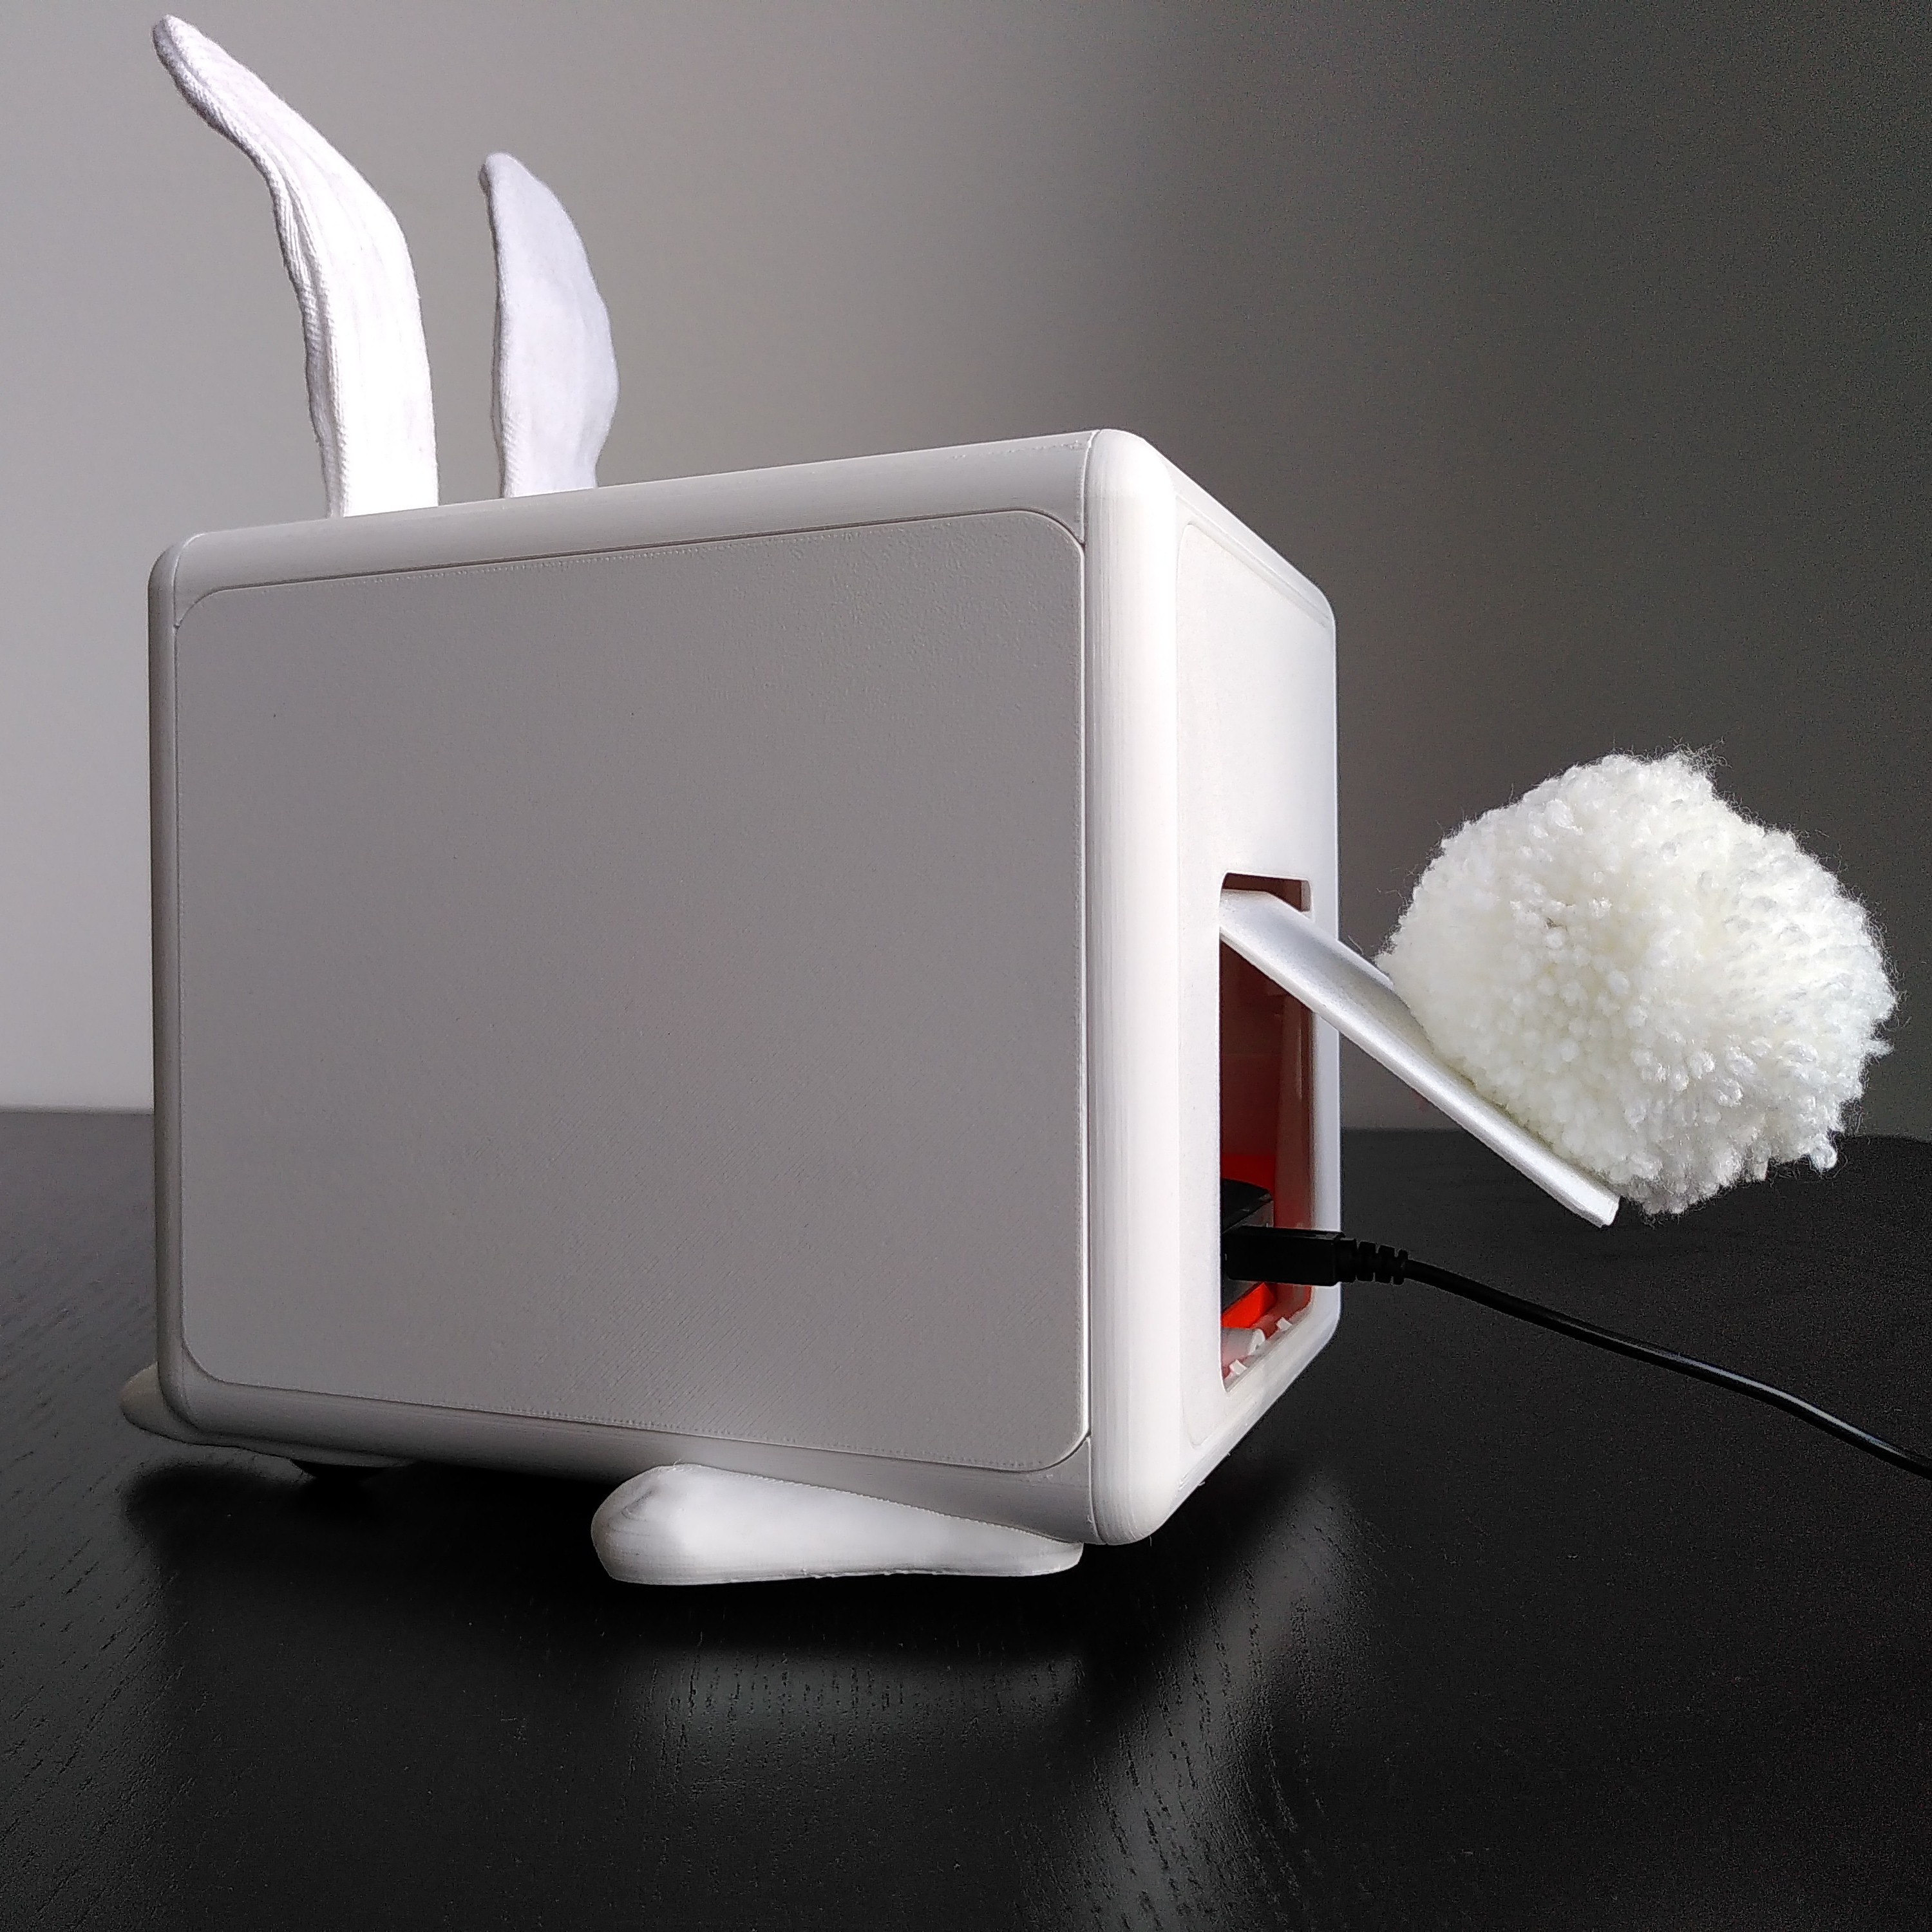
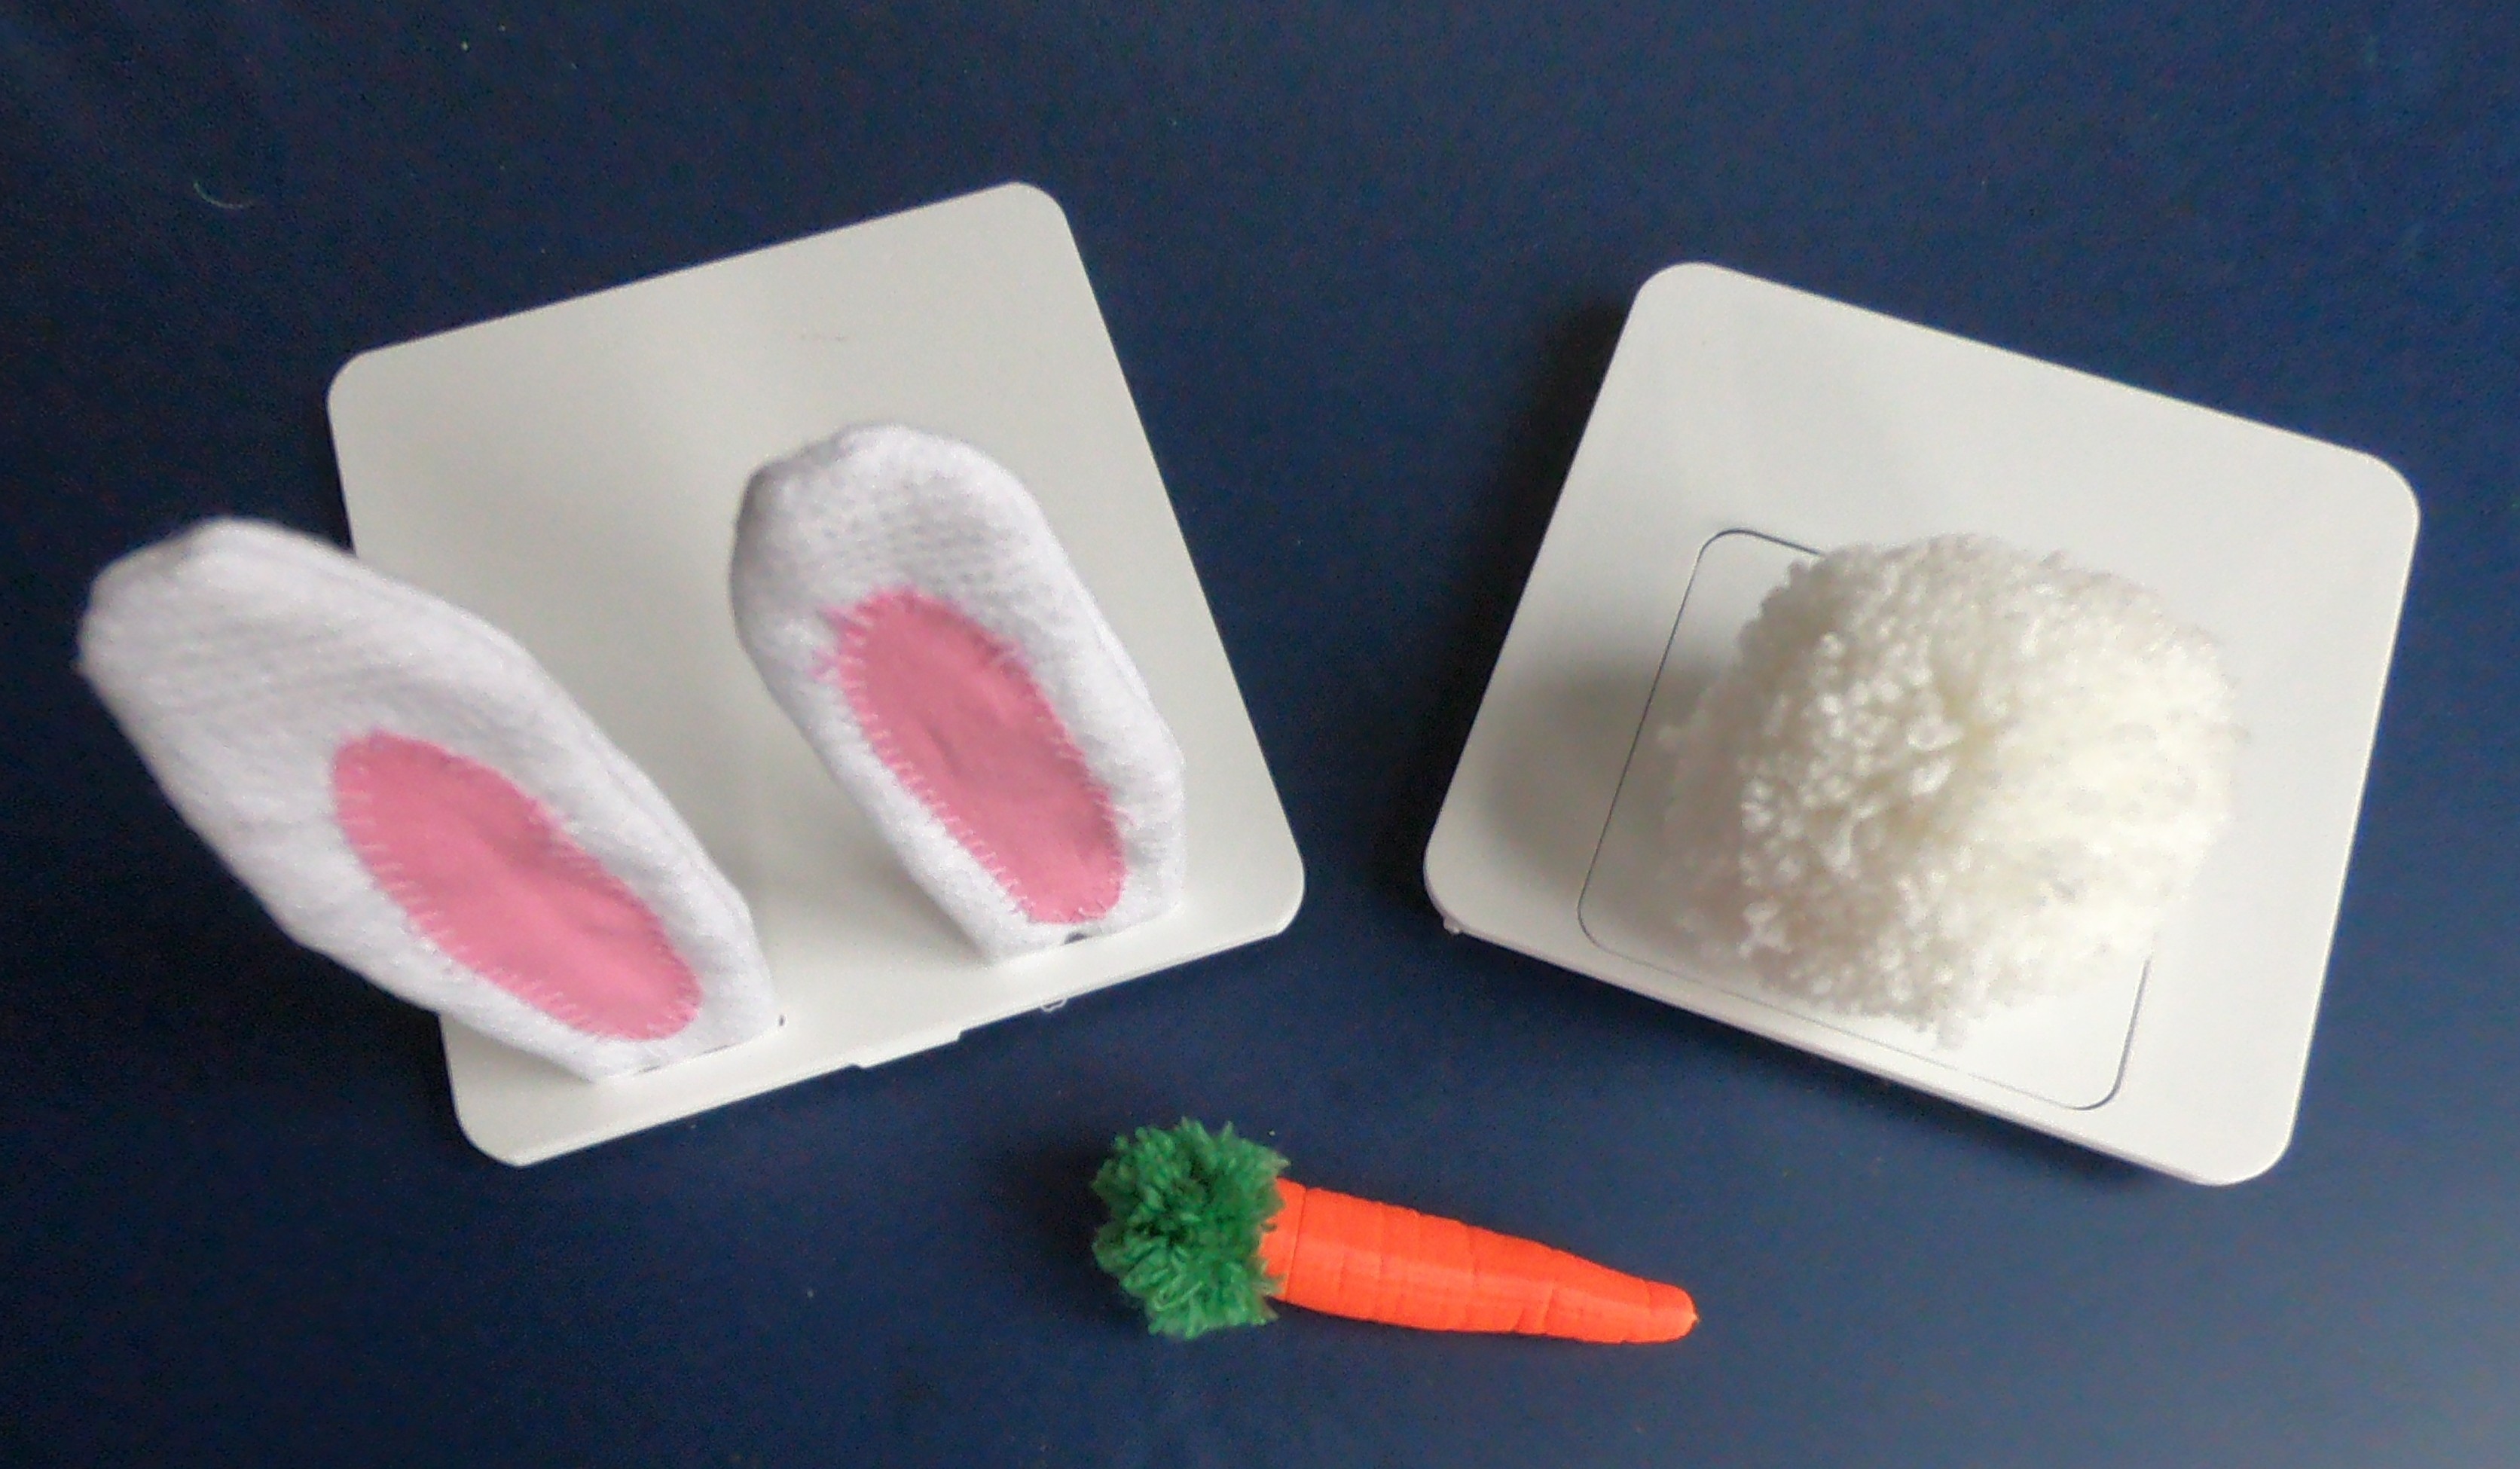
A cute, cubic and curious companion with a tilt camera. And a carrot.
Already have an account? Log in.
To make the experience fit your profile, pick a username and tell us what interests you.
*** Hackaday Prize 2021 entry ***
|
spreadsheet - 18.21 kB - 09/24/2021 at 10:02 |
|
Our little friend has received a complete software update, the v1.0 has been tagged for this occasion!
It is now running ROS Noetic, on the latest Raspberry Pi OS Lite. I have also increased the swap a bit, it seems to help the poor Pi 1 when under a lot of stress.
The control application has also been polished, it now plays well with the latest Android Studio, and the controls feel smoother than ever. There is now a proper signed release apk in the repo for convenience, feel free to examine the certificate ;)
I will try to make a video soon to celebrate the milestone.
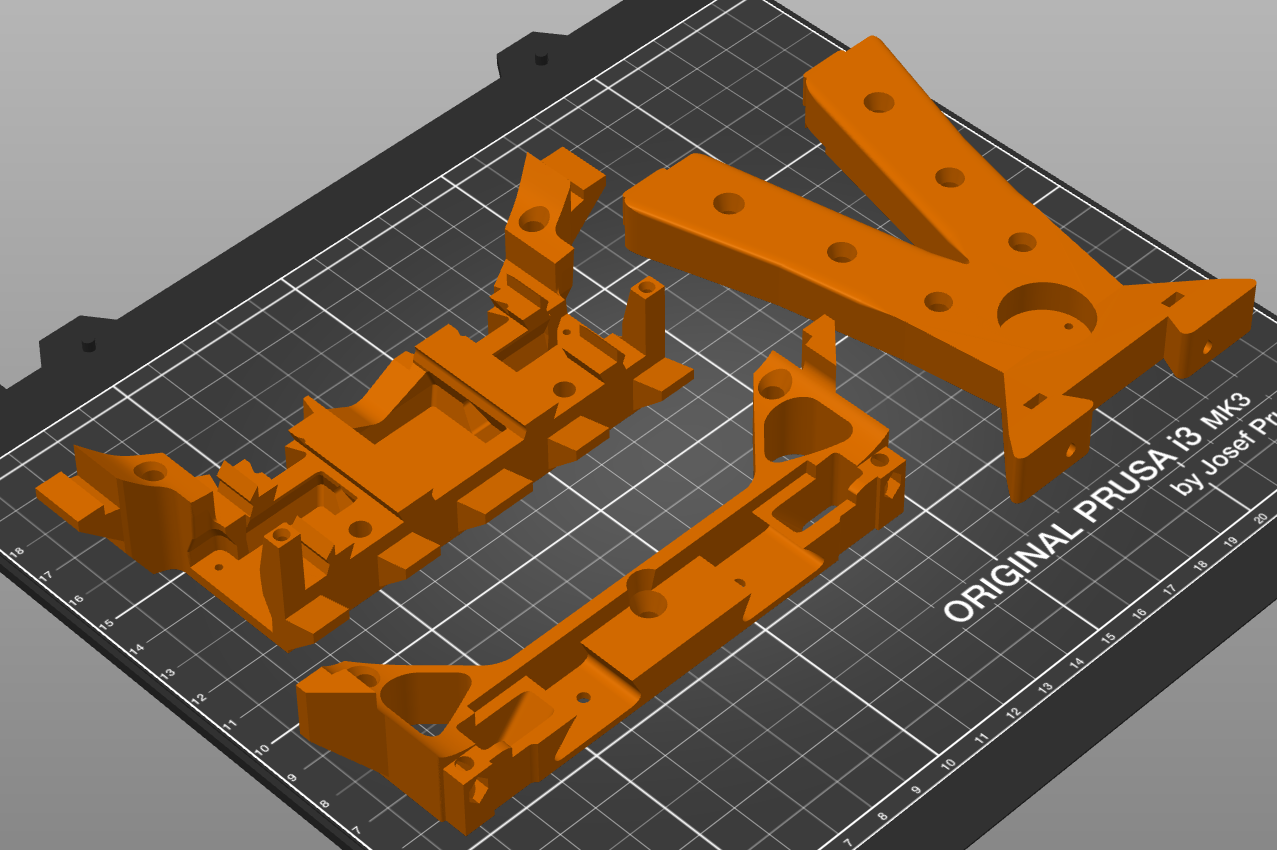
All the 3D printing details can be found on the dedicated Thingiverse page.
The slicer software is the latest PrusaSlicer (2.3 at the time of writing), combined with the latest firmware for the MK3 (3.9).
And now that all the parts have been printed, we can see what worked really well in the design and what did not:
I have definitely over-engineered the internal parts. Being the first time as well that I was using PETG for its mechanical properties, I wanted to make sure that it would be robust enough for the payload. So for the first parts, I started adding an extra perimeter, and even switched to a honeycomb infill pattern with increased density... Well, those are VERY robust!
There are also enough holes and fastening possibilities, in case a "fix" or add-on is needed.
For the parts that have to be printed identically multiple times, I realized that versioning is - as for software - almost mandatory. Actually printing the version number onto the part is a very good idea, otherwise similar pieces that have only very minor differences between them (tolerance for instance) cannot be distinguished anymore.
Another cautious trick was to start printing the outer case from the back, so that potential early mistakes may not disturb the general look too much. I am glad I did that, this way I could correct some of the flaws for the sides and the front.
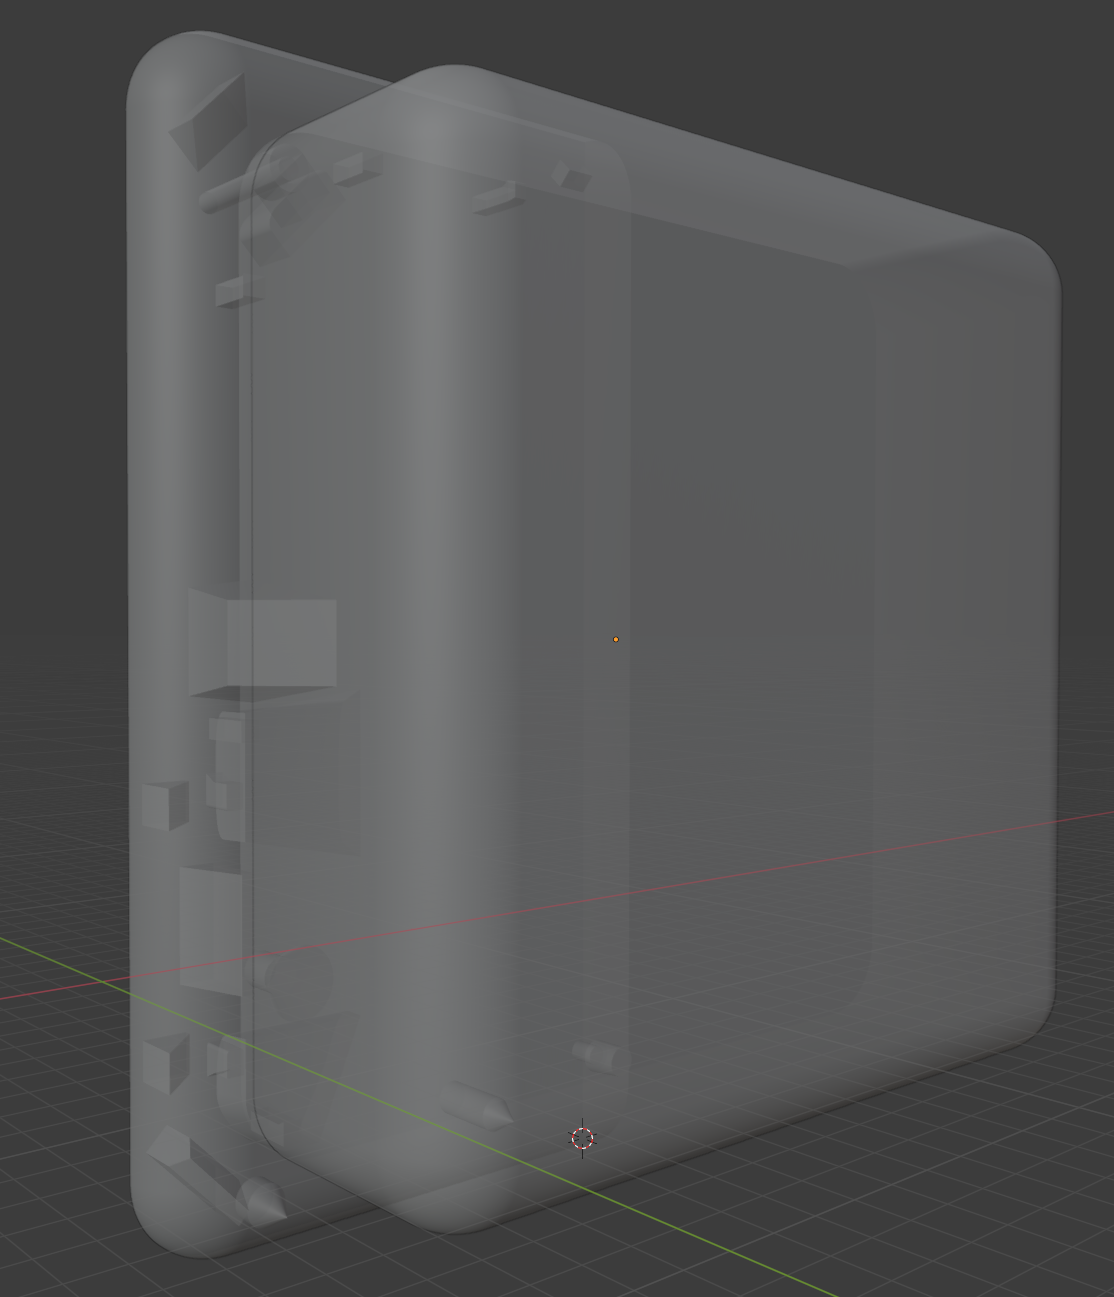
Though the split of the cube in frames and panels worked well to achieve smooth edges without support, this has required a lot of work. The panels themselves do not always fit very well, and being thin and white, they turn out to be more transparent than expected. But at least they are very light on filament usage.
One of the very new features of PrusaSlicer that I have tried is Ironing. It has potential, but it did not really pay off in this case.
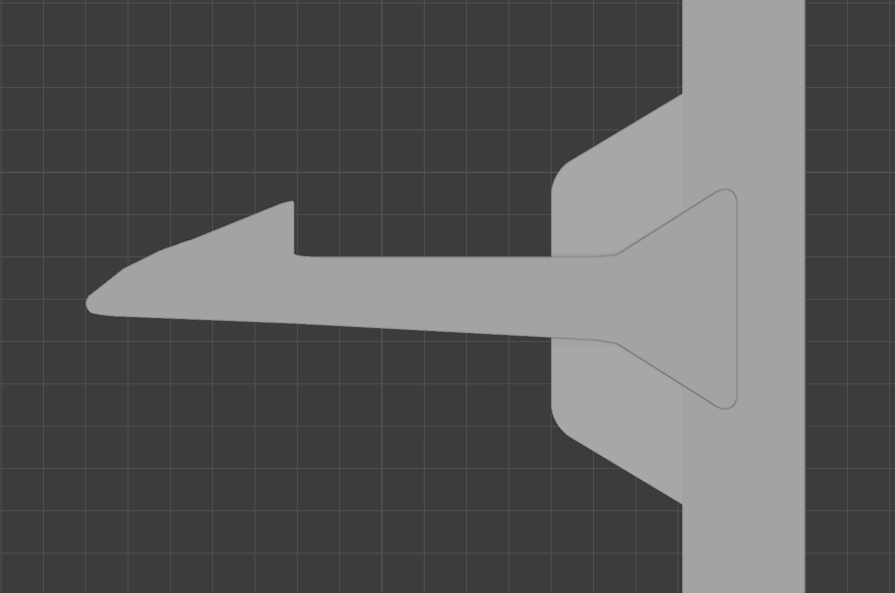
I have made a mistake by designing the snap-fits between the back panel and frame. Though I knew already about the importance of the build direction for a cantilever snap-fit joint, I thought it would not matter too much since there is almost no force applied to this area. I was wrong.
Some of these snap-fits did not even print correctly (very sensible to stringing and to Z-layer shifts, because there are far apart and very thin), some broke right away the first time the panel was fitted into the frame. Luckily I had put enough (too many) of them in the design, so that it still fits and holds well enough.
I have learnt from that experience and had the occasion to rethink the snap-fits for the front part, with a satisfying modular result. It might come in handy for other projects.
Overall I'm really happy that I didn't have to reprint any part, and didn't have any major failure. I might rework the back or improve smaller things there and there, but I don't need to. This a real success for a first project done like this.
The sum of all the gcodes for Tobi-P says that there has been 5000 minutes of printing time so far, which is about 83 hours.
![]()
This ended up being the longest part of the project, and by far. It is also a proof that with perseverance, one can achieve a lot, even with a rather unfitting tool. I definitely wanted to use Blender though, for its amazing UI (since version 2.8) and rendering capabilities (this is also important).
The case design came unforeseen, long after the components where chosen and the first prototype ready. I thus decided to use this opportunity to do something new and quite ambitious: designing a pleasant 3d-printable case entirely tailored for the existing components, with no reference or prior experience, and all the while still learning to use the software.
On top of it, I had additional objectives:
And the following challenges came as well during the process:
In the end I went for a kind of two-layer solution, one inner structure to hold all the components, and one outer cover for the overall shape and look. This way it is a bit the best of both worlds, and it allows for interesting possibilities: two colours, different densities, objects that are easy to print versus smooth looking ones, etc.
Free and Open-Source Software is used as much as possible throughout the project. On the robot of course, but also for the tools around it: the source code is written on Linux and hosted on GitLab, the case is designed with Blender, sliced with PrusaSlicer, and a Fairphone running /e/OS is used for the Android app.
The rock-solid OS for the Pi, based on Debian.
The reference framework for roboticists. I actually wanted to ramp up on ROS 2, however this proved to be way more complex than I expected (at least a couple of years ago). So I stuck to the traditional one, ROS 2 will have to wait for another time.
An option would have been to cross-compile the latest version from sources, but that seemed too tedious. And in spite of being quite slow, the direct installation on the target from the available arm packages was sufficient in the end.
A dedicated ROS 1 node for the Raspberry Pi camera module, which worked out of the box.
This excellent tool enables using hardware PWM on the desired GPIO pins of the Pi, and is thus very efficient.
The complete code running on Tobi-P can be found in the dedicated GitLab repository (see the README for instructions). In particular there is an installation script that takes care of almost everything. It even has a nice little spinner displayed while waiting for completion.
The wireless network is provided by an Access Point running on the robot, therefore there is no need for an existing Wifi connection. Stand-alone usage is really practical, it means that Tobi-P can for instance run outdoors. He is also - by the way - the ROS master. Obviously.
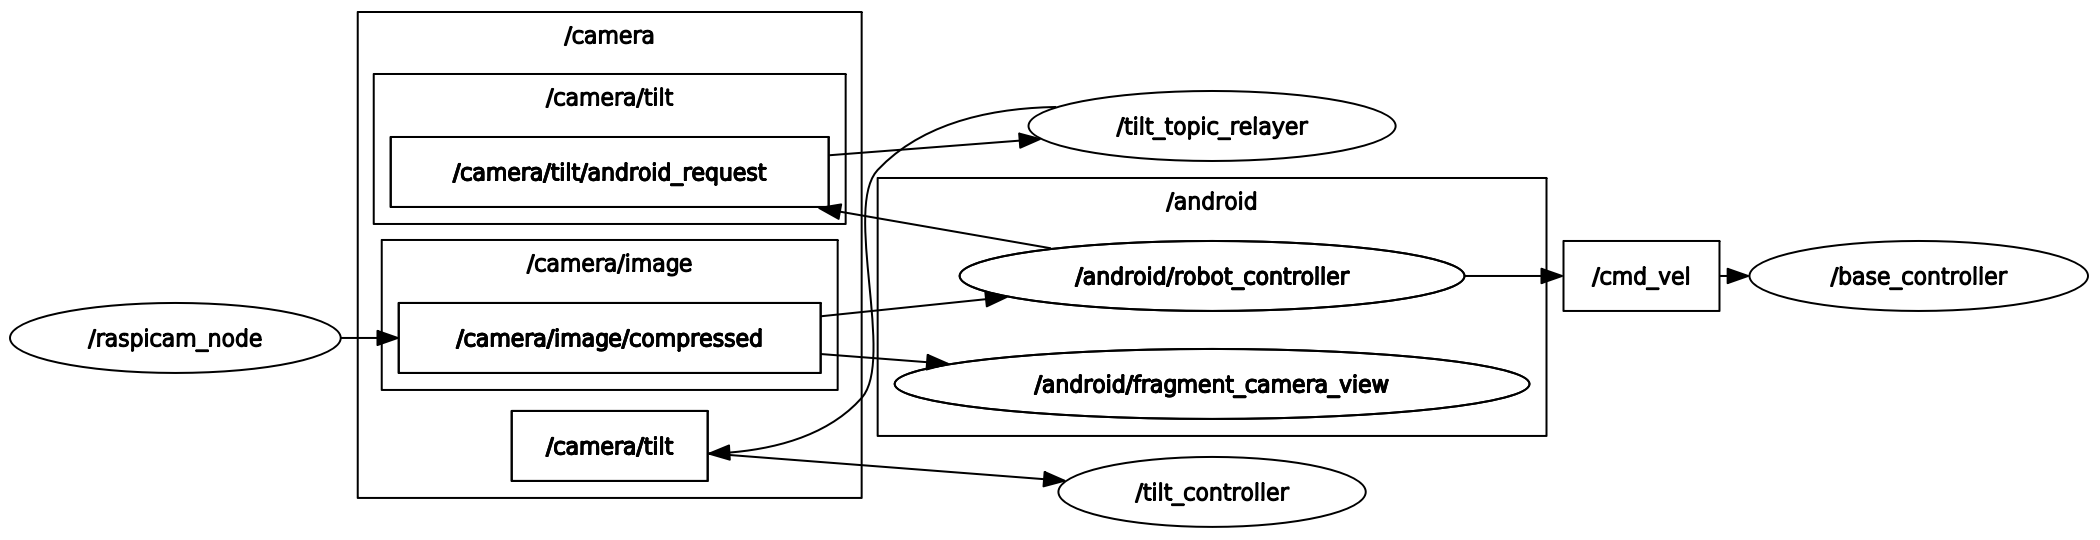
The nodes are written in C++, and there are a couple of helper files (launch, machine) for flexible configuration. There is a launch file that enables controlling a turtlesim simultaneously, which is always helpful for quick network tests when dealing with multiple machines.
The min and max angles of the servomotor have been limited by software, in order to account for the connecting rods behind the face, that physically reduce the rotation range. The servo angle is also always reset when the application starts, meaning that the camera/face comes back to its initial vertical position. This way it matches the behaviour of the tilt slider on the Android application.
The ROS Control fork for Tobi-P contains everything needed to generate the apk from Android Studio (be sure to carefully follow the instructions in the README).
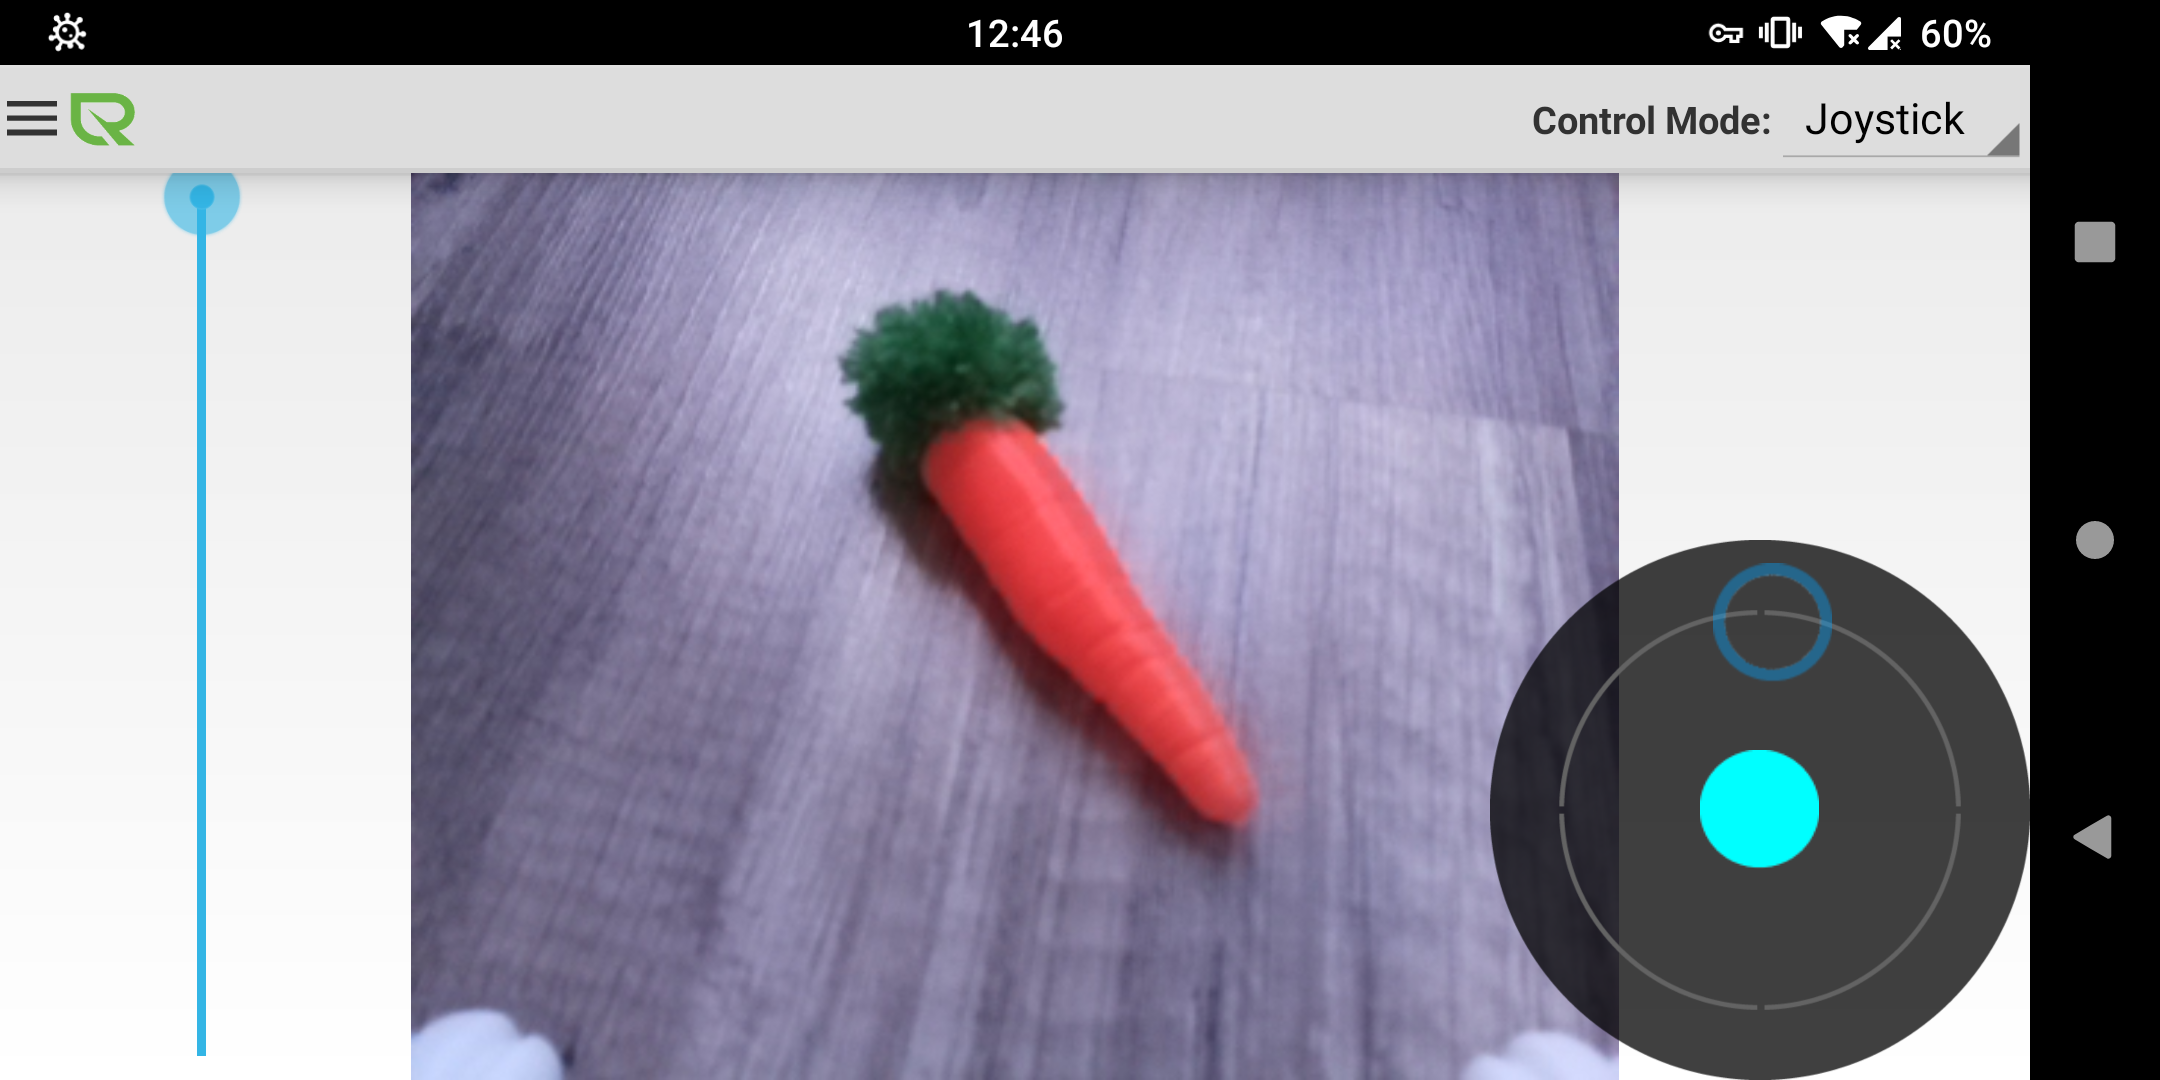
While most of the elements I had in mind for an app were already present in the upstream repo, I still wanted to tailor it for this use case, hence the fork. First I wanted a lighter version, so I stripped down the interface and removed the features not required (mapping, HUD, other control modes and advanced options). Then to tilt the camera, a vertical slider was missing. This was solved by using a seekBar from the SDK.
The application now directly starts in the camera view mode with the desired layout for the controls. It also handles portrait and landscape orientations. The new ROS parameters and topic names can as well be changed directly in the options.
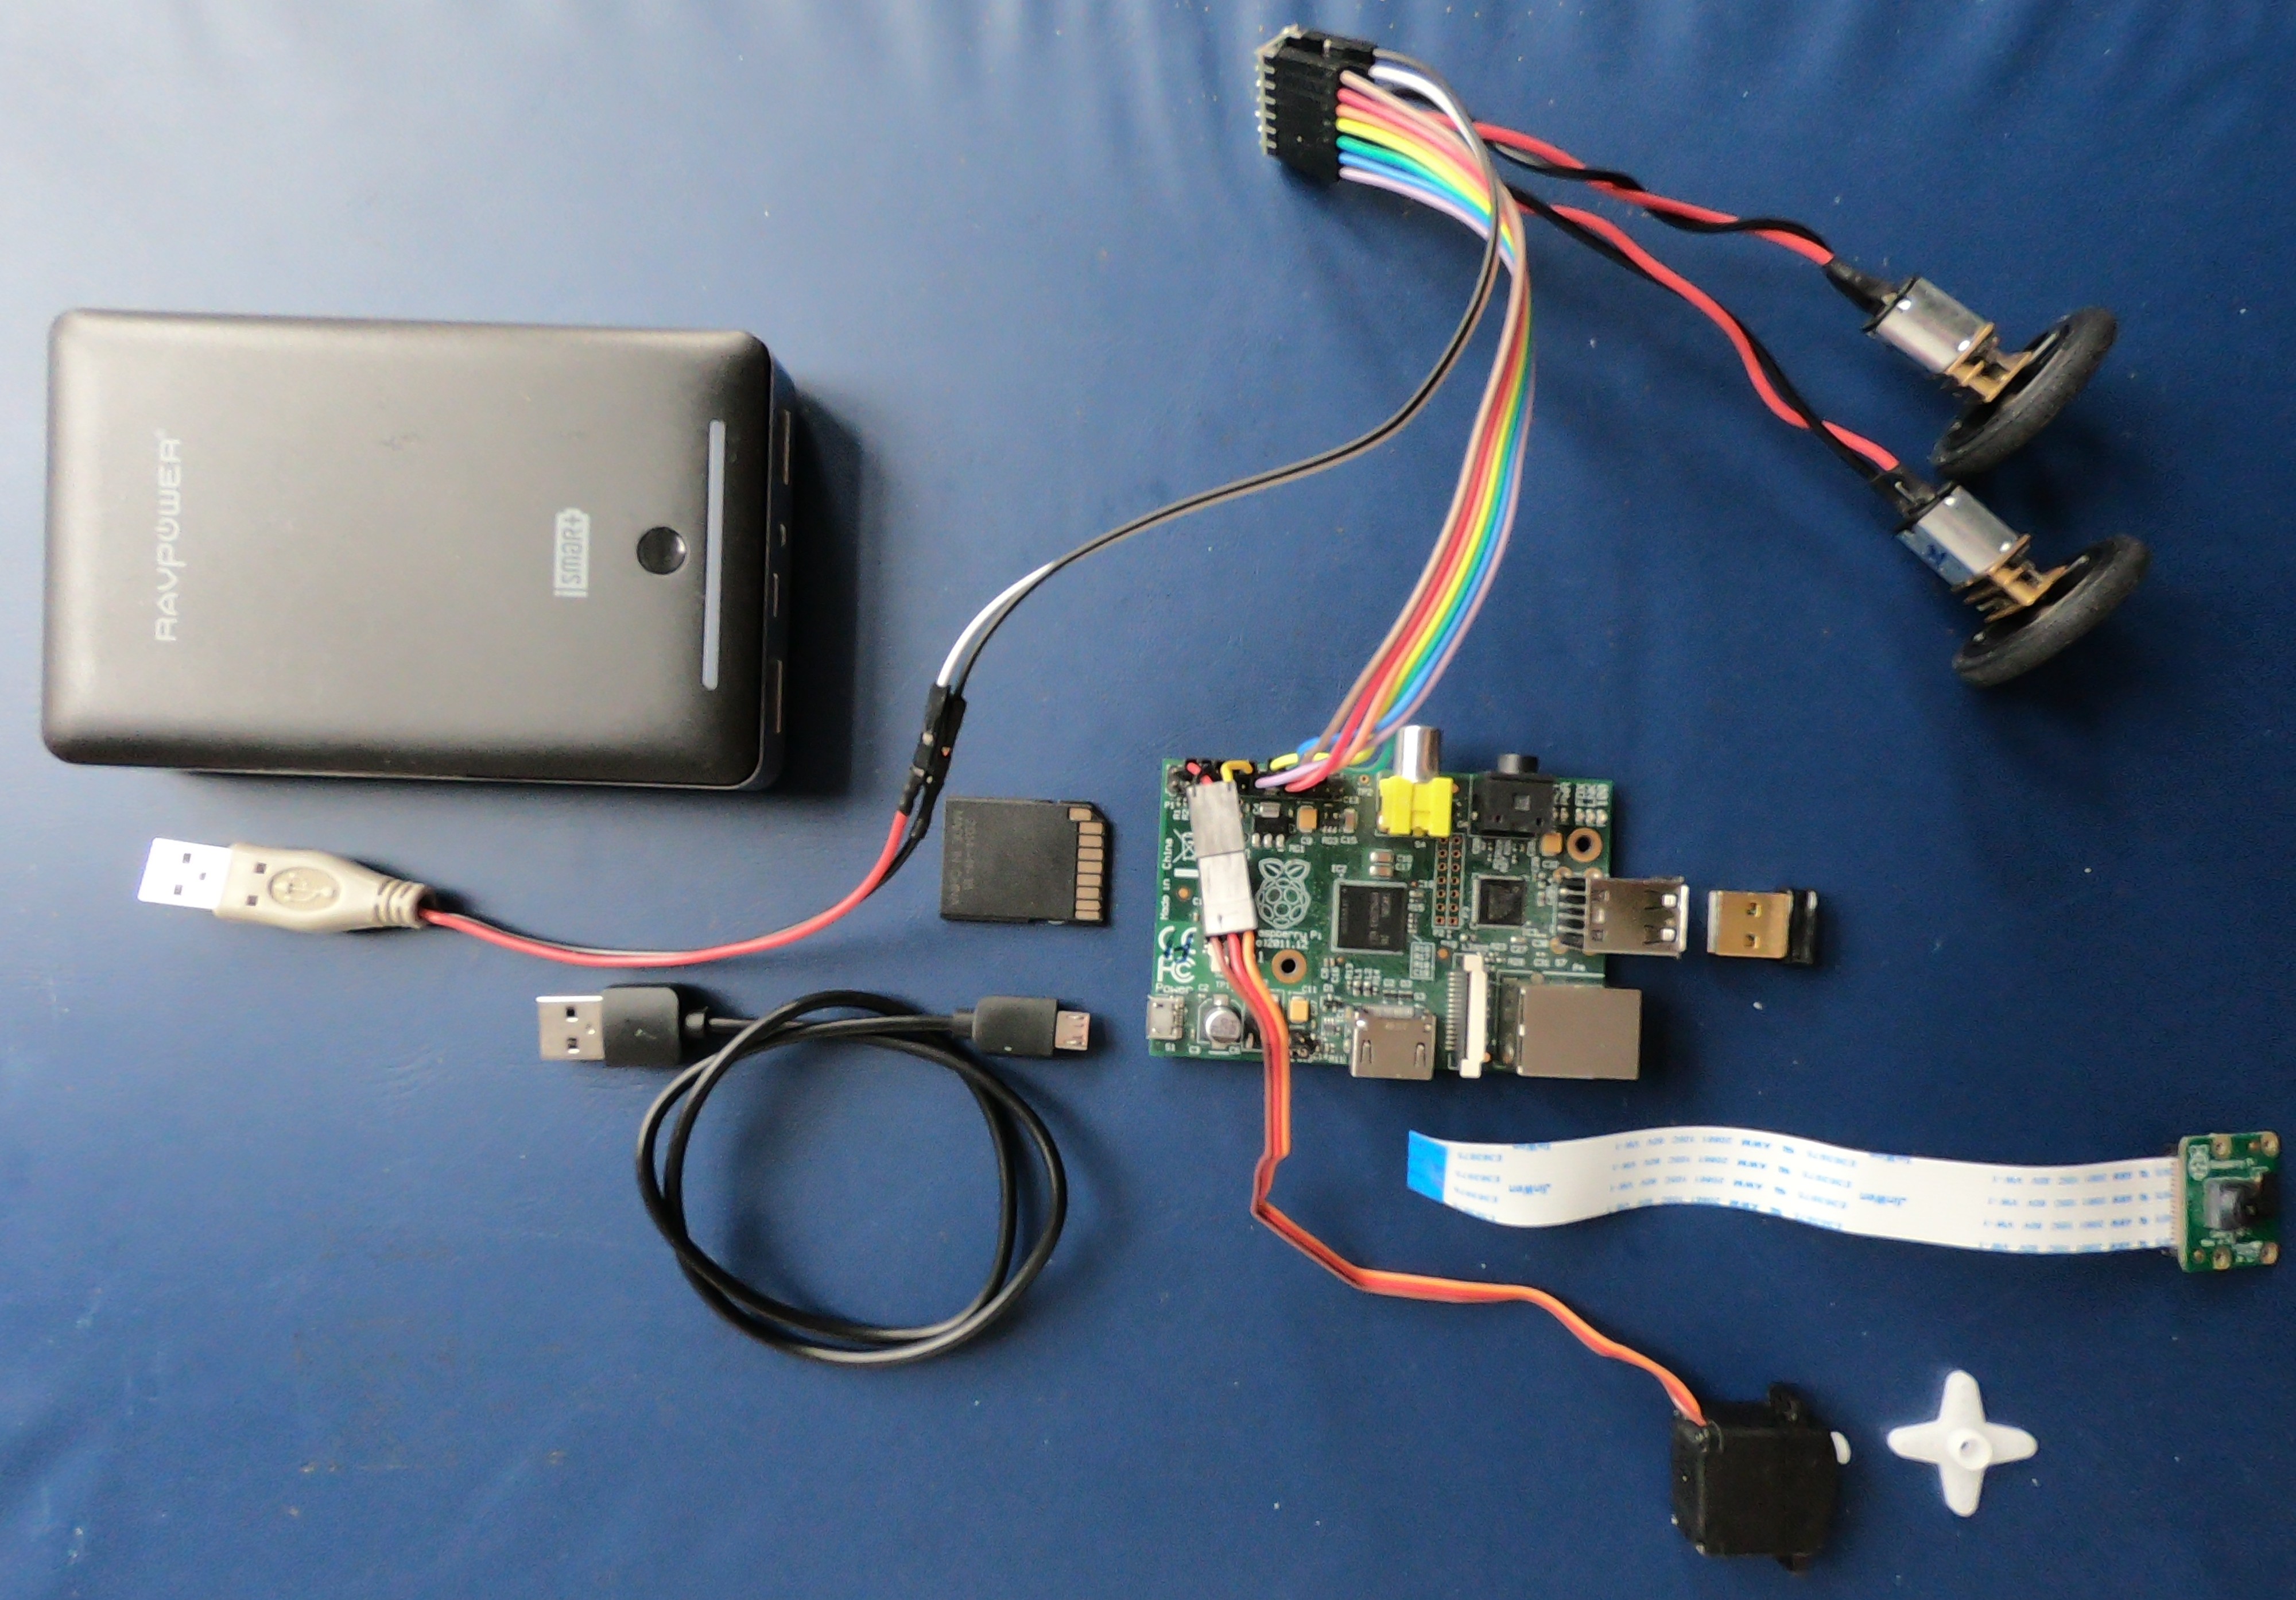
This project started because I absolutely wanted to make use of something I had lying around for some time: a Raspberry Pi 1 Model B (with a whopping 512MB of RAM !!). This was great a few years ago, though it lacked wireless connectivity.
Nowadays a Pi Zero W would probably replace it perfectly and make the whole build much smaller.
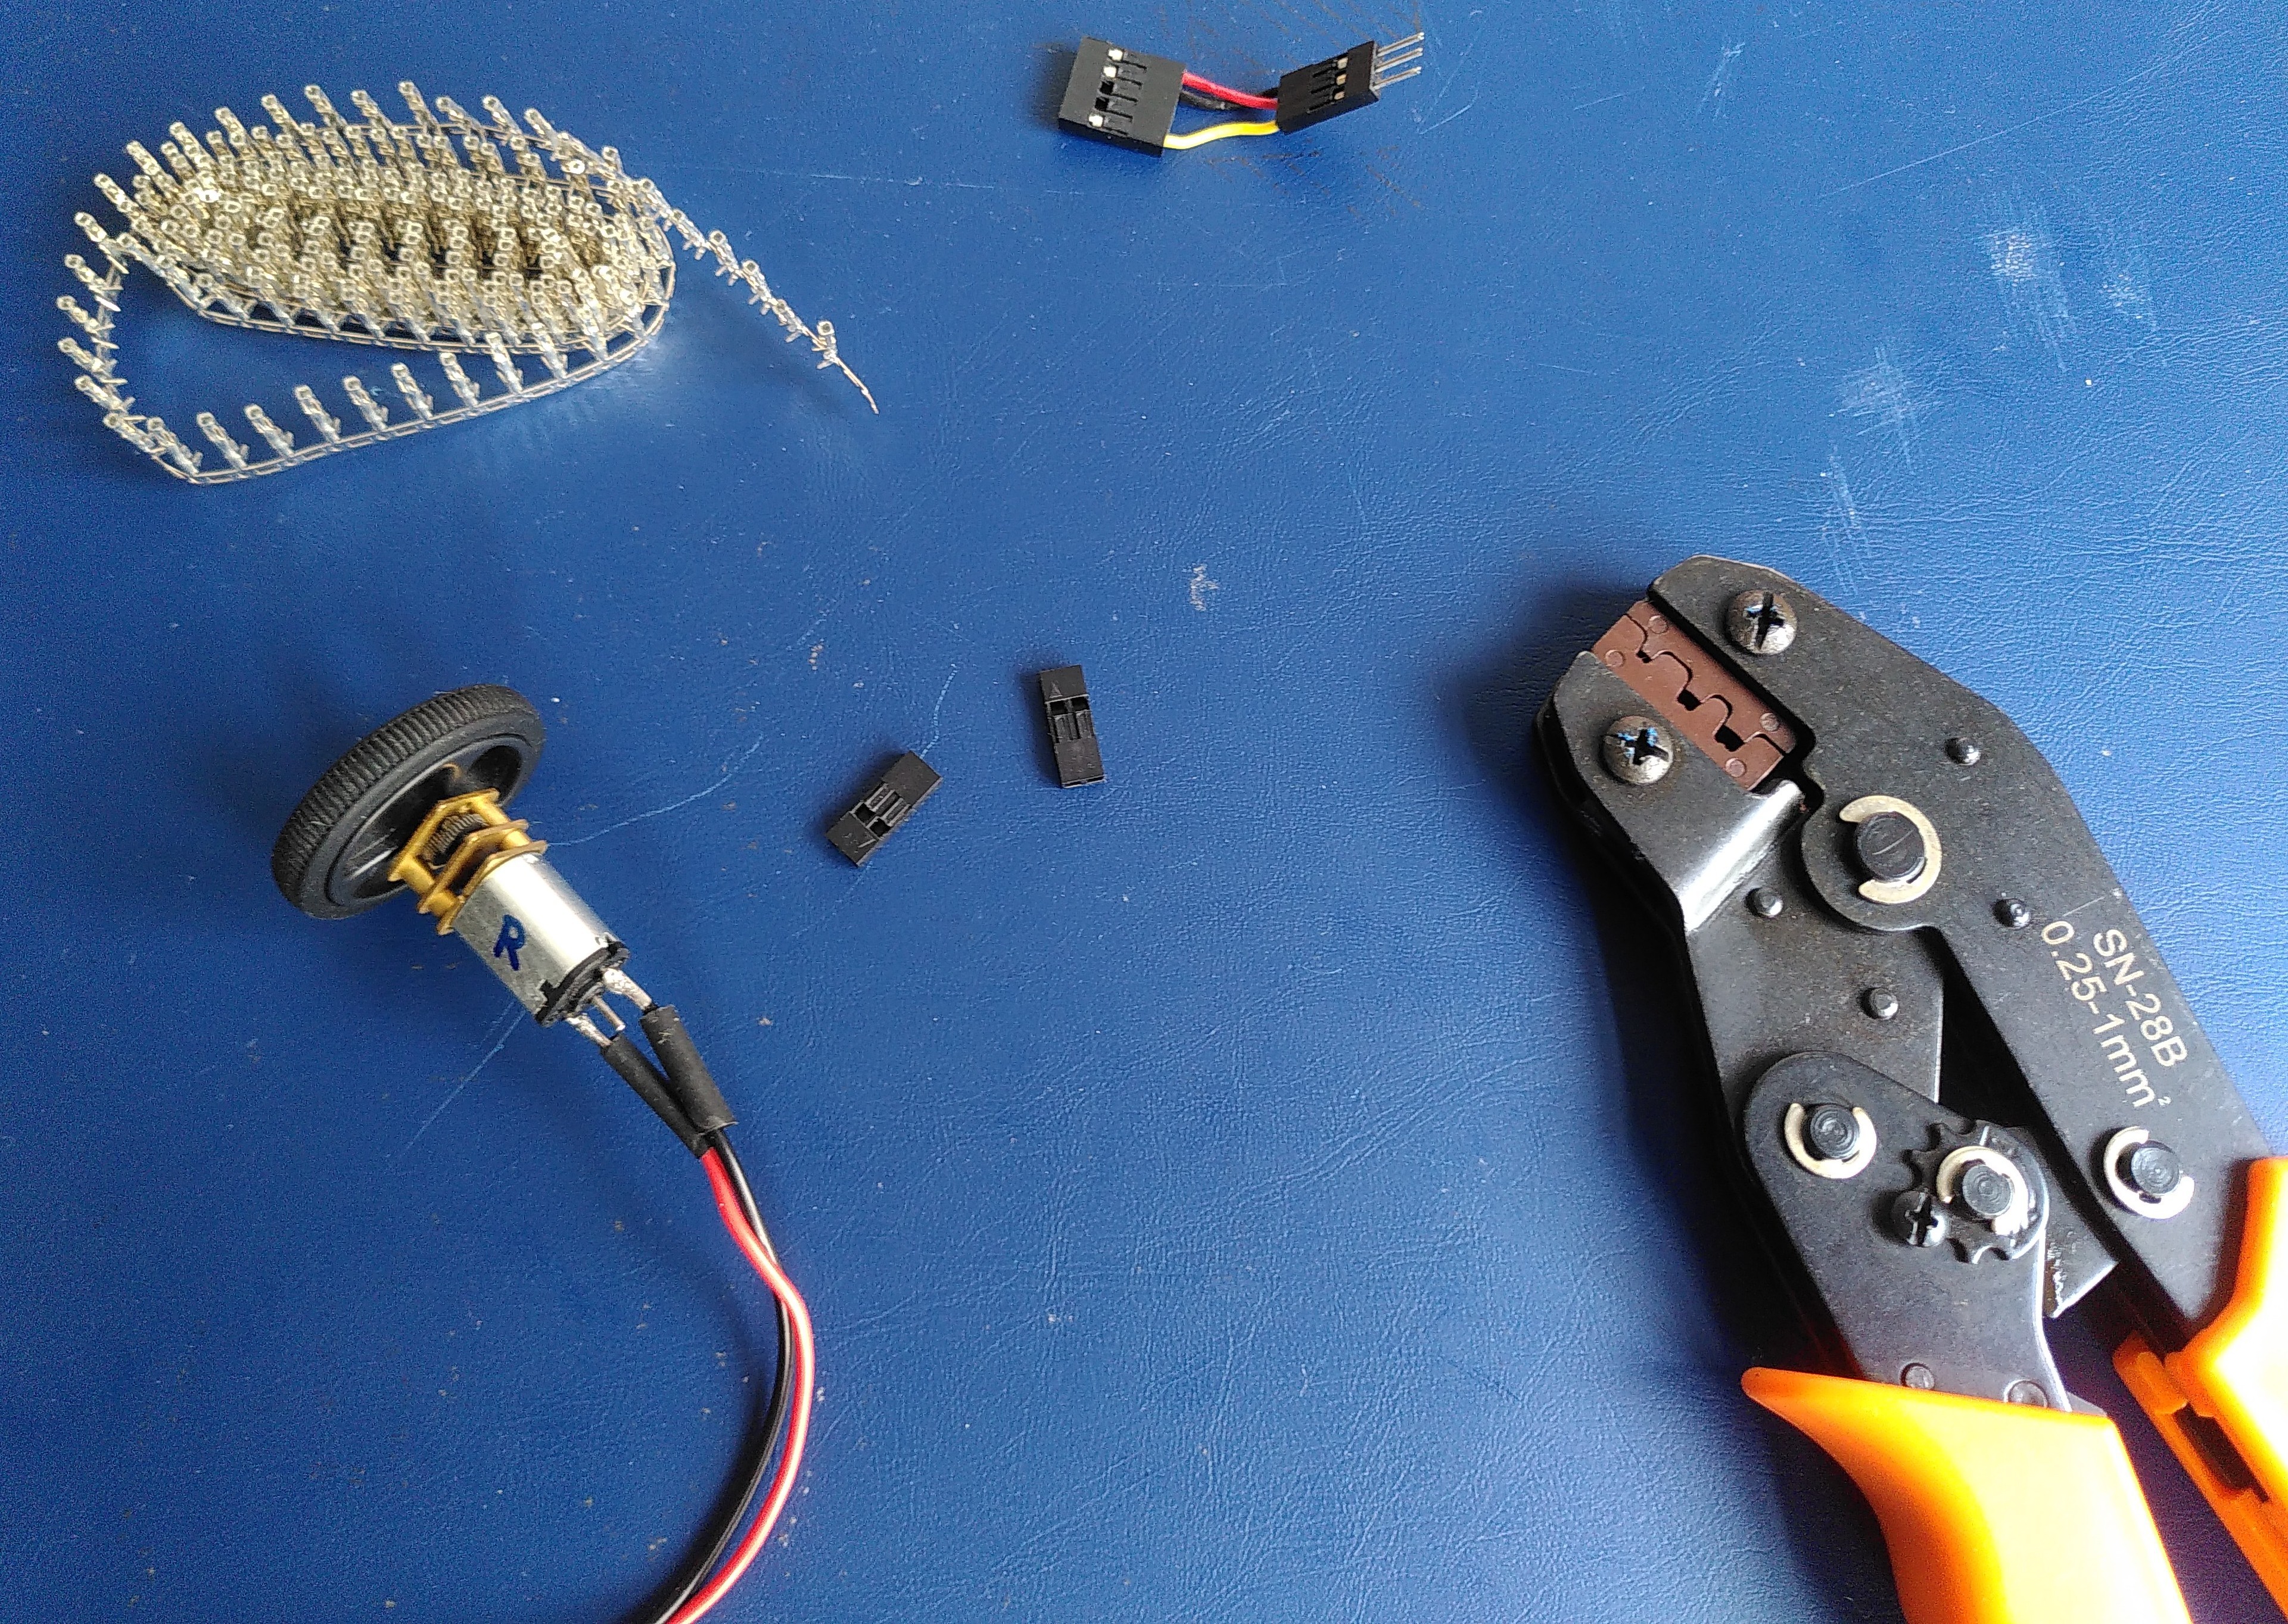
Pololu has an extended choice of micro brushed DC motors. I had determined that I wanted the 100:1 version, meaning enough torque to carry a real payload (speed was not so much a priority). I even took the extended shaft option for encoders, since I wanted room for potential evolution.
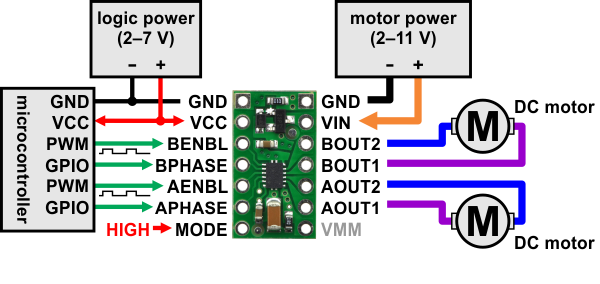
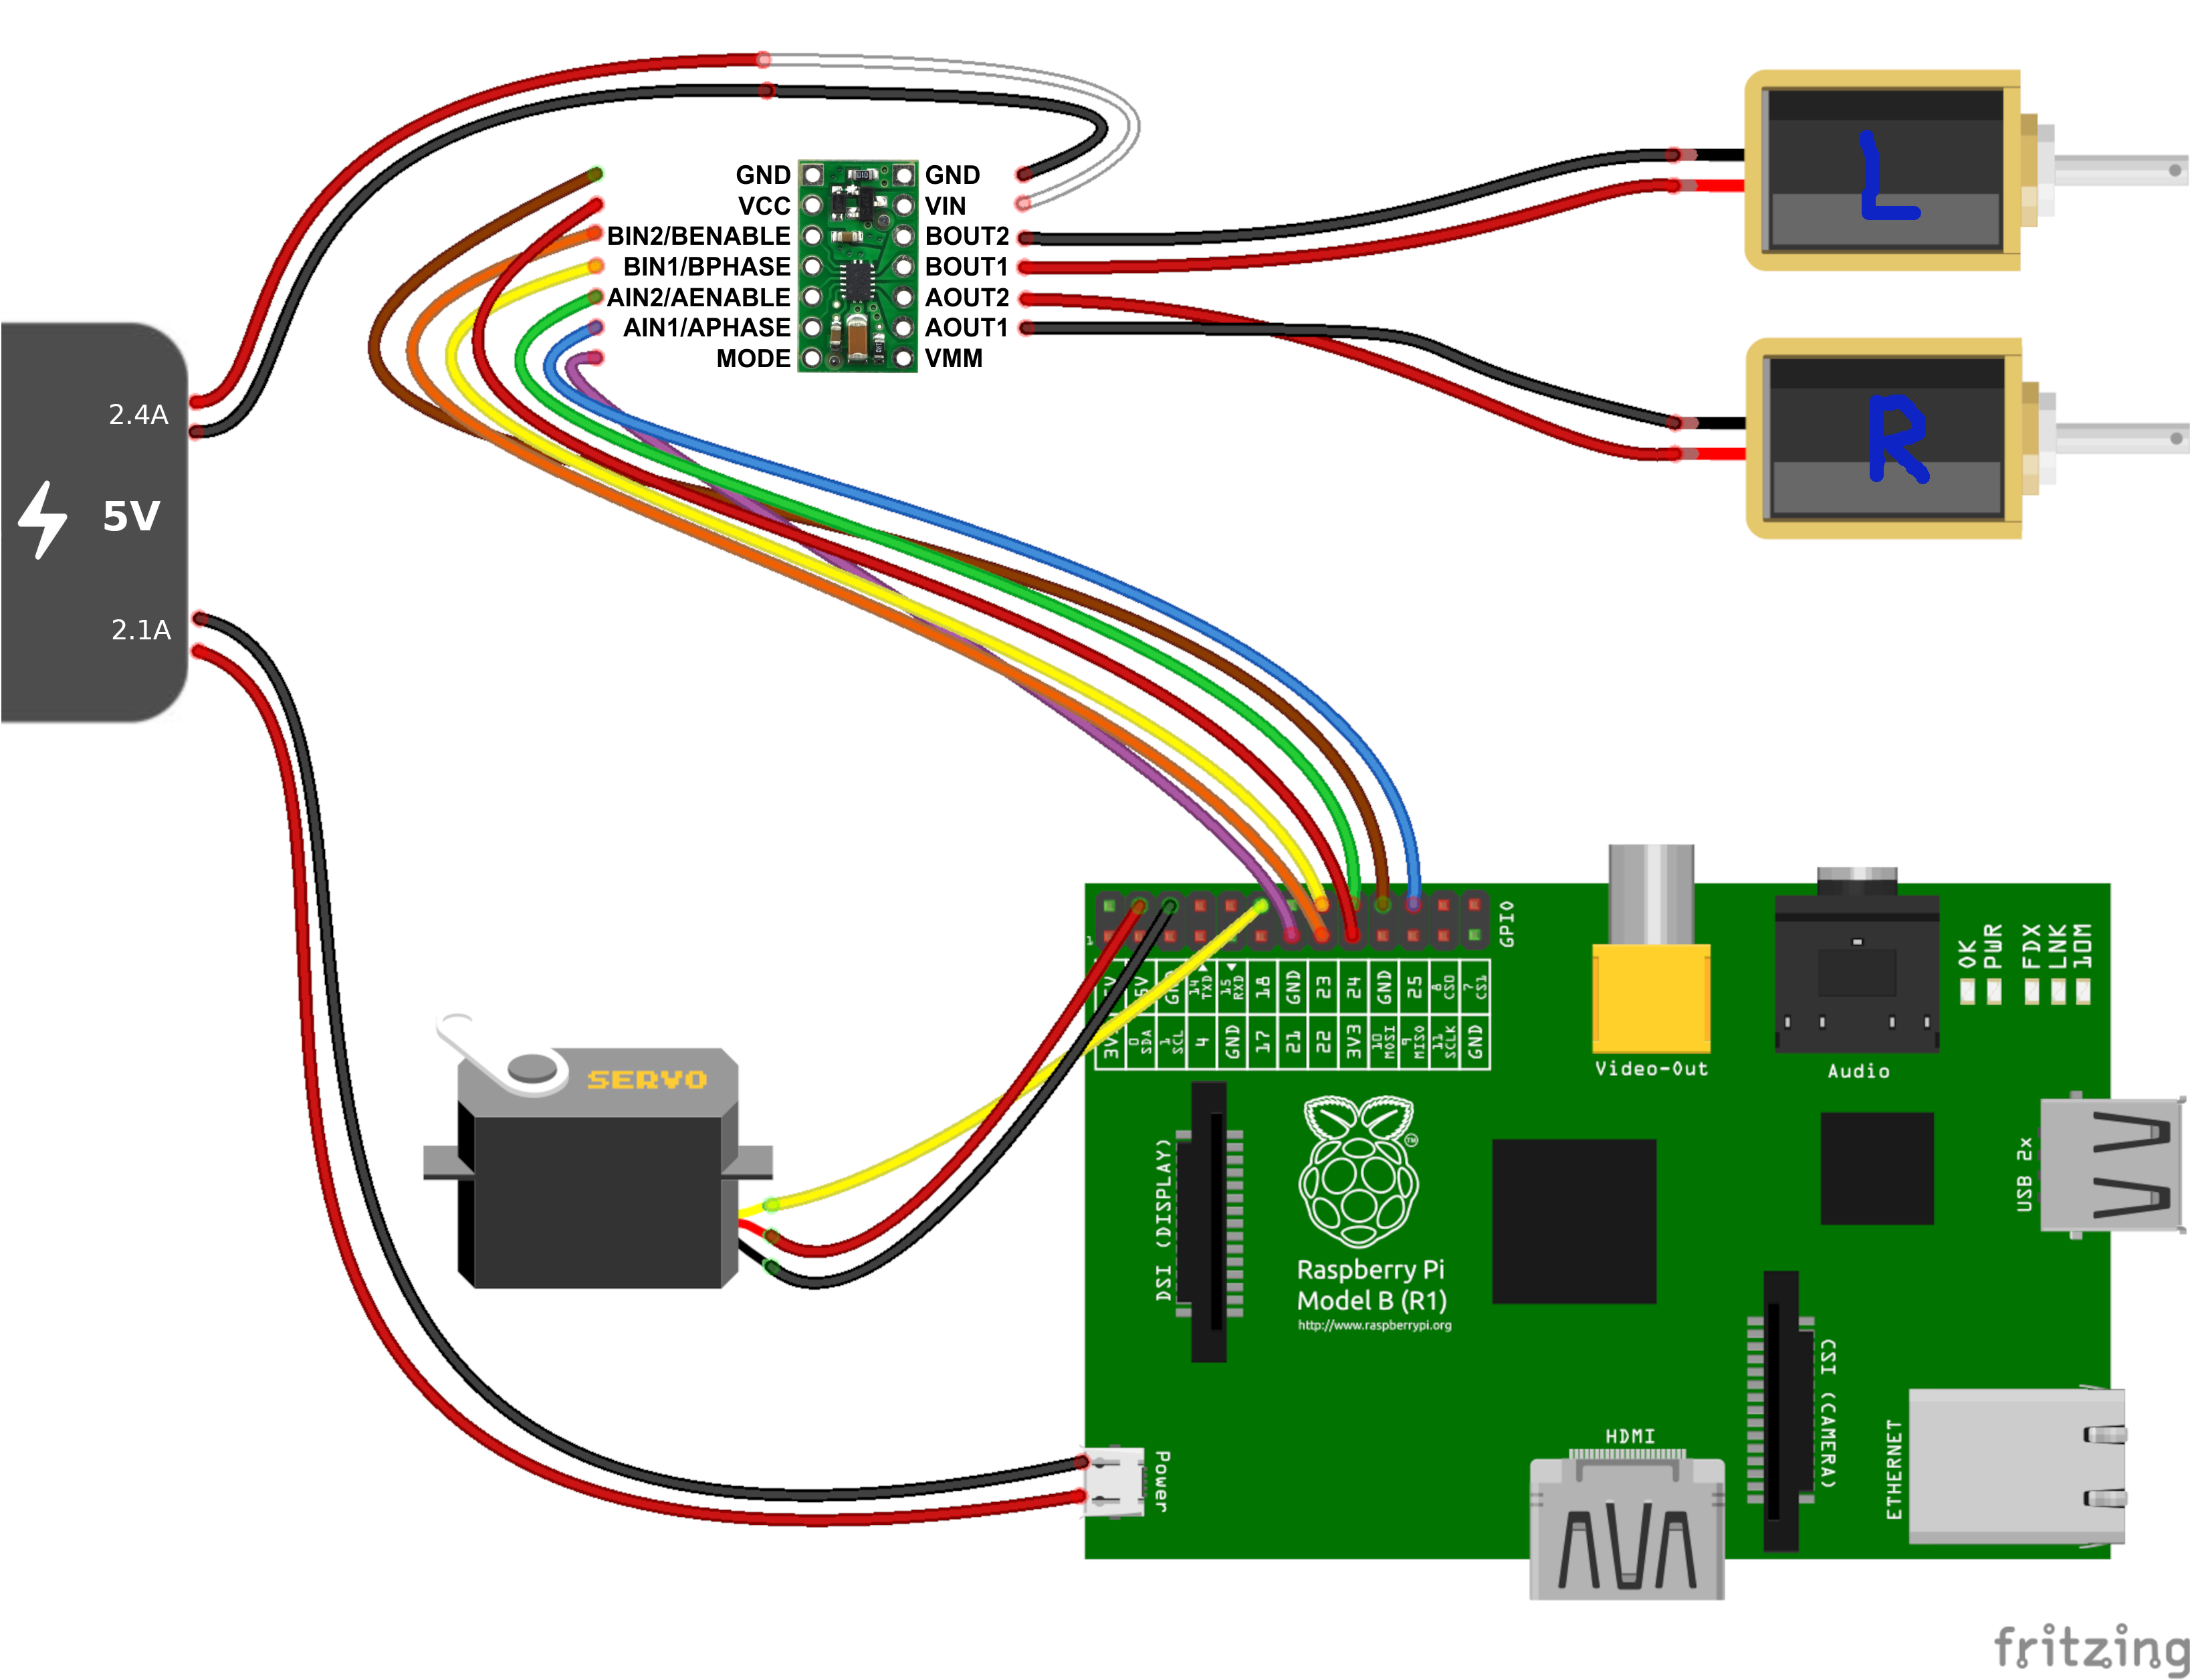
The DRV8835 page has all the information needed. It is perfect for the selected motors and supports a simple differential drive mode that I wanted. It also states "built-in protection against reverse-voltage, under-voltage, over-current, and over-temperature", so I did not need to add important safety features myself.
To power everything up, I opted for a convenient and standard USB power bank. I was able to find one with dual output: One is rated 2.1A max, plenty enough for the Raspberry Pi, the other 2.4A. This covers exactly the continuous 2 x 1.2A per channel that the motor driver can deliver. It does not cover the 2 x 1.5A peak it can reach, but in practice this has been good enough.
While deciding to get a an embedded camera for the robot, I did not know exactly what I would do with it (video streaming? image processing?). Having no quality-vs-speed criteria yet, and because I definitely wanted good software compatibility from the start, the official camera module from the Raspberry Pi Foundation seemed like the natural choice.
The last component is a simple and standard 5V-compatible analog micro servo, directly power by the Raspberry Pi. It provides the tilt for the camera, thus avoiding any blind spot when teleoperating.
I try to avoid soldering whenever possible, hence making Dupont connectors and crimping pliers my first choice.
This GPIO pinout website is very complete when it comes to the Raspberry Pi, and the truth table and schematics of the motor driver are on its product page.
The complete wiring diagram:
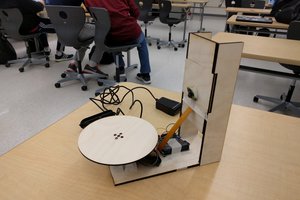
And the result in action:
Working without prior knowledge gave me an opportunity for (almost) boundless experimentation while designing the case. It was a great playground to learn and see for myself what I could do with 3D printed parts, in order - among other things - to not use additional screws or glue.
This was achieved by using some of the joinery techniques I knew, as well as a few others that are a bit more exotic. Some of them come traditionally from the woodworking world, whereas some are specific to plastic, or even exclusive to 3D printing.
The most basic possible joint, where two pieces are put in contact, only connected by two flat surfaces. Here for instance between the white back frame and orange base back.
This is the main joint used for the panels. Their edges are slightly overlapping the frame parts.
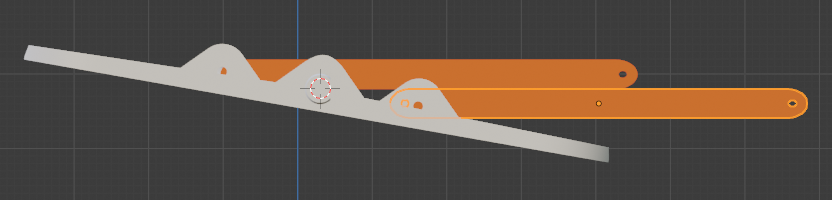
A variation of the box joint is here used to interlock the orange axle and the white front frame.
By far the form that I have used the most in Tobi-P, especially for inner structure, as it is very solid.
Some are quite lose, some tight, and some make for a sliding joint which is later constrained, when a subsequent piece blocks the remaining degree a freedom.
A common and fairly easy one to make, where a smaller piece is inserted inside others. It is very practical to reinforce an existing joint for instance.
I am unsure about the name of this one, but the idea is there.
I have used this for the top side frame, where one end is more or less cylindrical, and is inserted into the front frame. A 90° rotation then prevents further translation. The rotation itself is later on stopped when the other end is fitted in the back frame.
This the typical and emblematic plastic joint. I have used cantilever snap-fit connections only for the outer case, where space was more limited, and robustness not so much a concern.
And last but not least, I had to try the print-in-place concept. This is not really a joint type per se, but it also does bring two or more pieces together. This techniques - specific to 3d printing - allows embedding one piece (or part of it) into another one during the printing process. This results in a compound piece, which potentially has moving parts, but whose individual components cannot be de-assembled without breaking it.
I have used that to tie the back panel and back door together, where the hinge pins are embedded in the panel during printing. The created door does rotate (with friction), and it cannot be separated from the panel.
In the end this turned out really well for a first try! I will definitely keep that trick in mind for future projects.

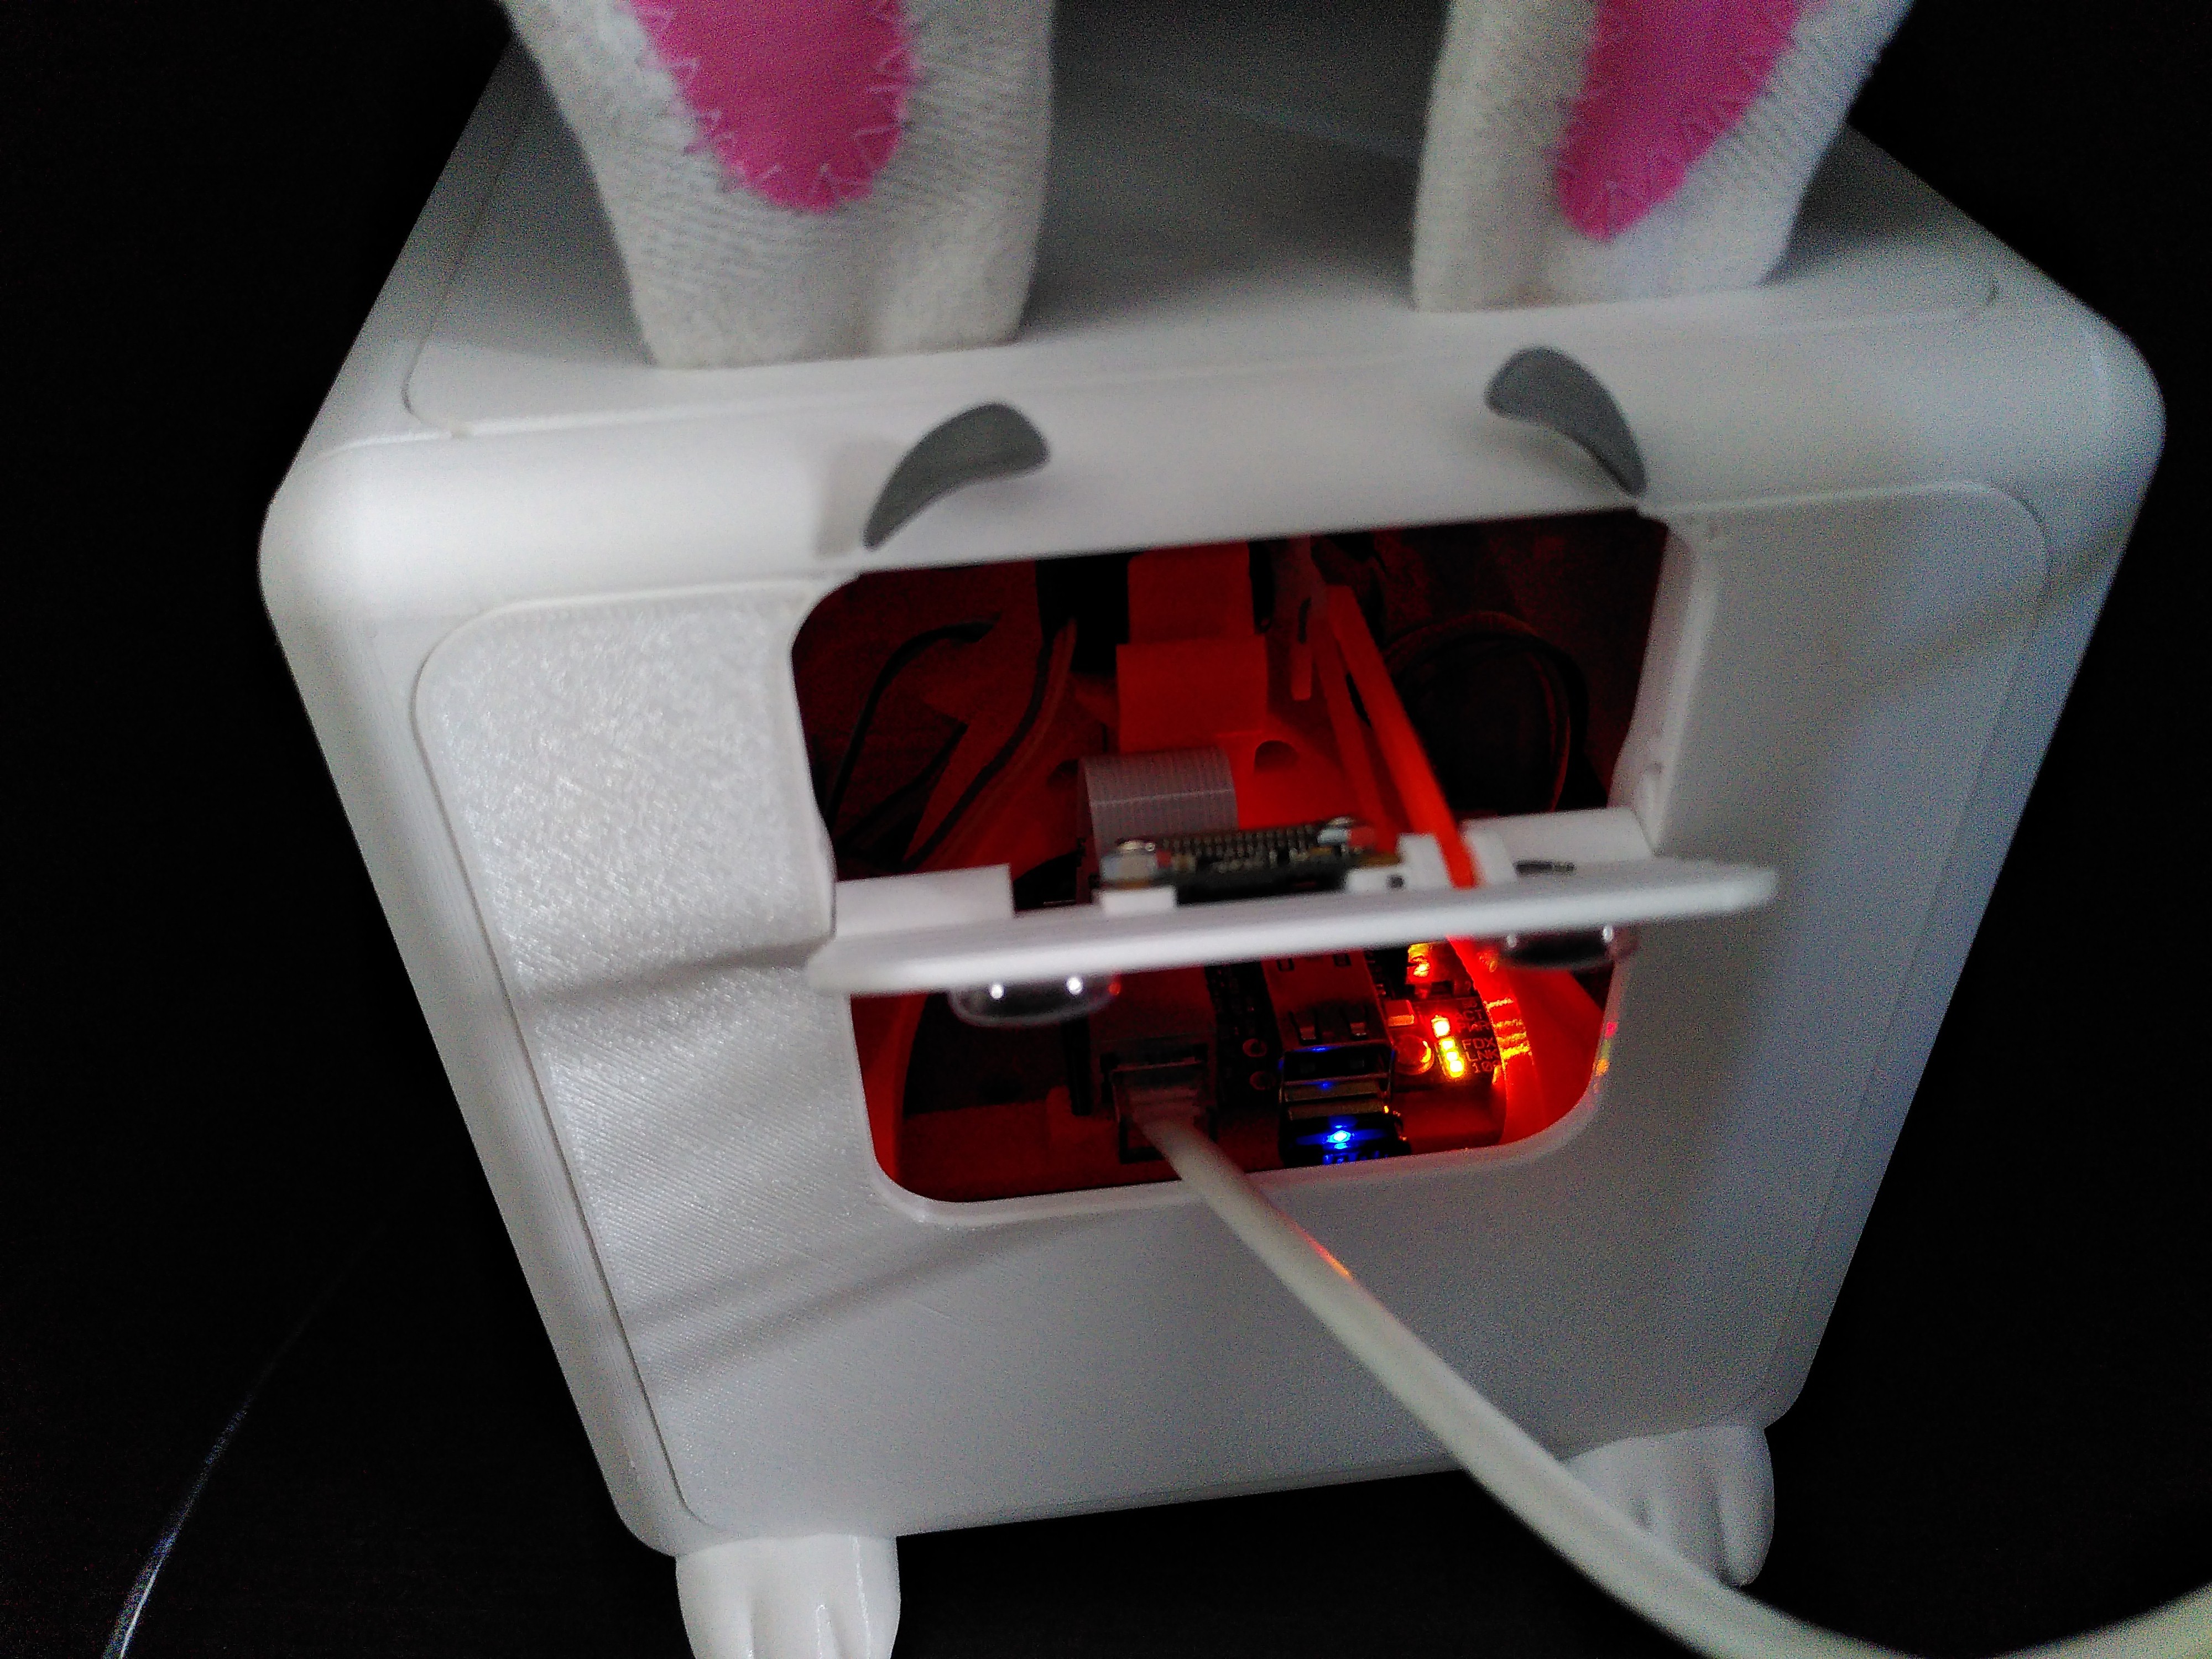
Here is how the power bank can easily be recharged or swapped.
This is my first public project ever, and the first robot I am building from A to Z.
Unlike so many other robots on this website, Tobi-P is not extremely complicated, technically speaking. There is no novel algorithm or some crazy optimization going on here. But it does look different, and is working great for its intended purpose (not to mention that using Blender as a CAD software is just a gigantic hack in itself).
And this is why Tobi-P fits so well into this year's challenge "Redefine Robots". I have literally had to redefine what for a robot it was going to be.
To give a bit of background, this project actually started over 5 years ago.
It was initially supposed to be yet another cheap robotic platform for experimentation, without real purpose or added value. The prototype would have gone through several more iterations, getting rotary encoders, then maybe a LiDAR, and so forth. It then stalled for years, before the COVID-19 crisis came in, and with it the first lock-down.
This is where the focus changed. Suddenly with much more time to spend at home, the project gained momentum again. But it was not anymore about learning some tech stuff (not only at least). It had to become something more. Something tangible would be really helpful in this particular context. Something that one can relate to, maybe almost like a pet substitute?
"It must be cute!" I was also told. And so the journey to design a friendly companion had begun, with a new emphasis on aesthetics.
People who have seen Tobi-P so far reacted at first with surprise, then with enthusiasm. They are smiling, some even laughing. The question then often comes up: “And what can the robot actually do now? What is it good for? What is its function?"
The simple answer to this is: to be friendly. Tobi-P's job is to put a smile on people's faces. It is neither a pet nor a toy, but it is still an excellent companion in everyday life, especially when one has to stay at home for longer periods of time.
The secret is not in Tobi-P's technology, but in its appearance. In this way, it attracts interest, detracts from worries and spreads a good mood. The perfect example for this category of robots is the fluffy Paro, used for therapeutic purposes.
A key
factor in the design of Tobi-P is
that it should look
cute but
harmless.
There should be nothing creepy
about it, an
effect (the uncanny valley) that
can occur with robots that imitate nature too
perfectly. This
does not happen with
Tobi-P because it is still
clearly
recognizable as an
artificial being.
And it is
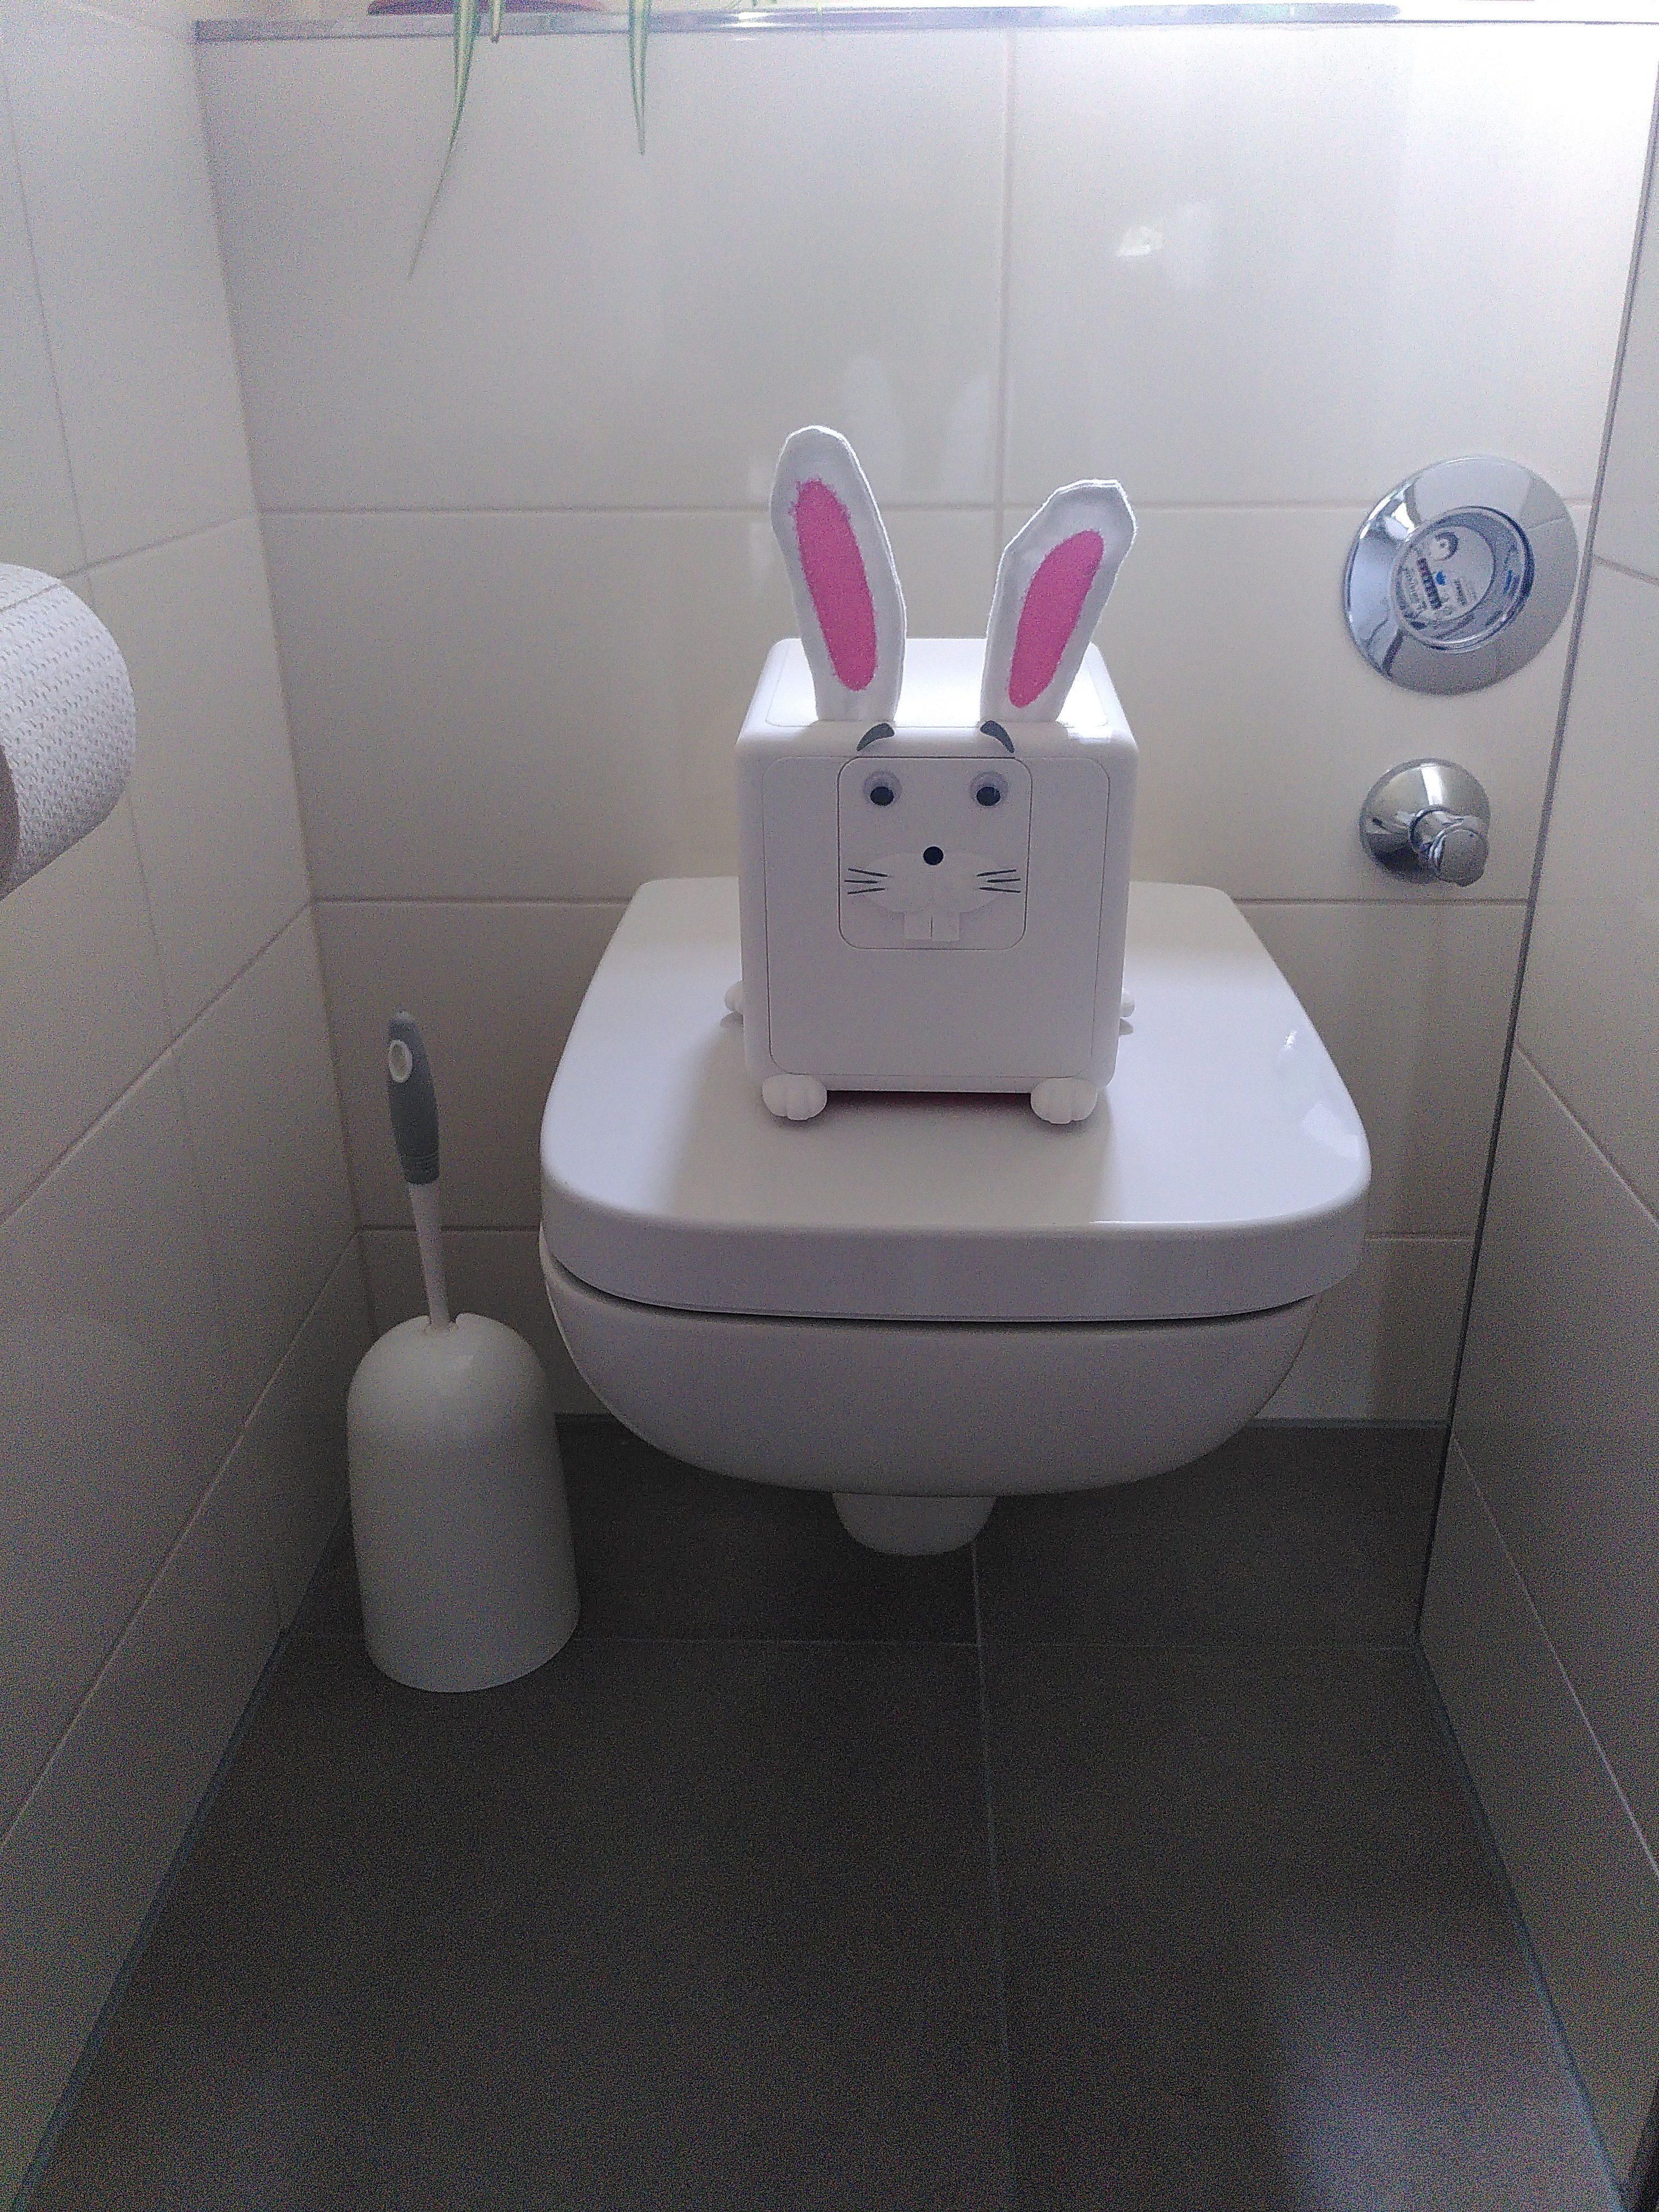
also quickly identified as a bunny:
only a few of
its multiple accessories are
needed
to make it
clear.
Through his (googly) eyes, Tobi-P can create an emotional bond in seconds, because people automatically react to beings that look at them. They project their own emotions onto the robot, give it a character, and thus almost bring it to life.
Many
people tend to associate technology
and robotics
with coldness and functionality. Tobi-P is also technology, but one that
awakens warmth and joy and evokes positive emotions. It represents
an easy and alternative way to connect with robotics at home.
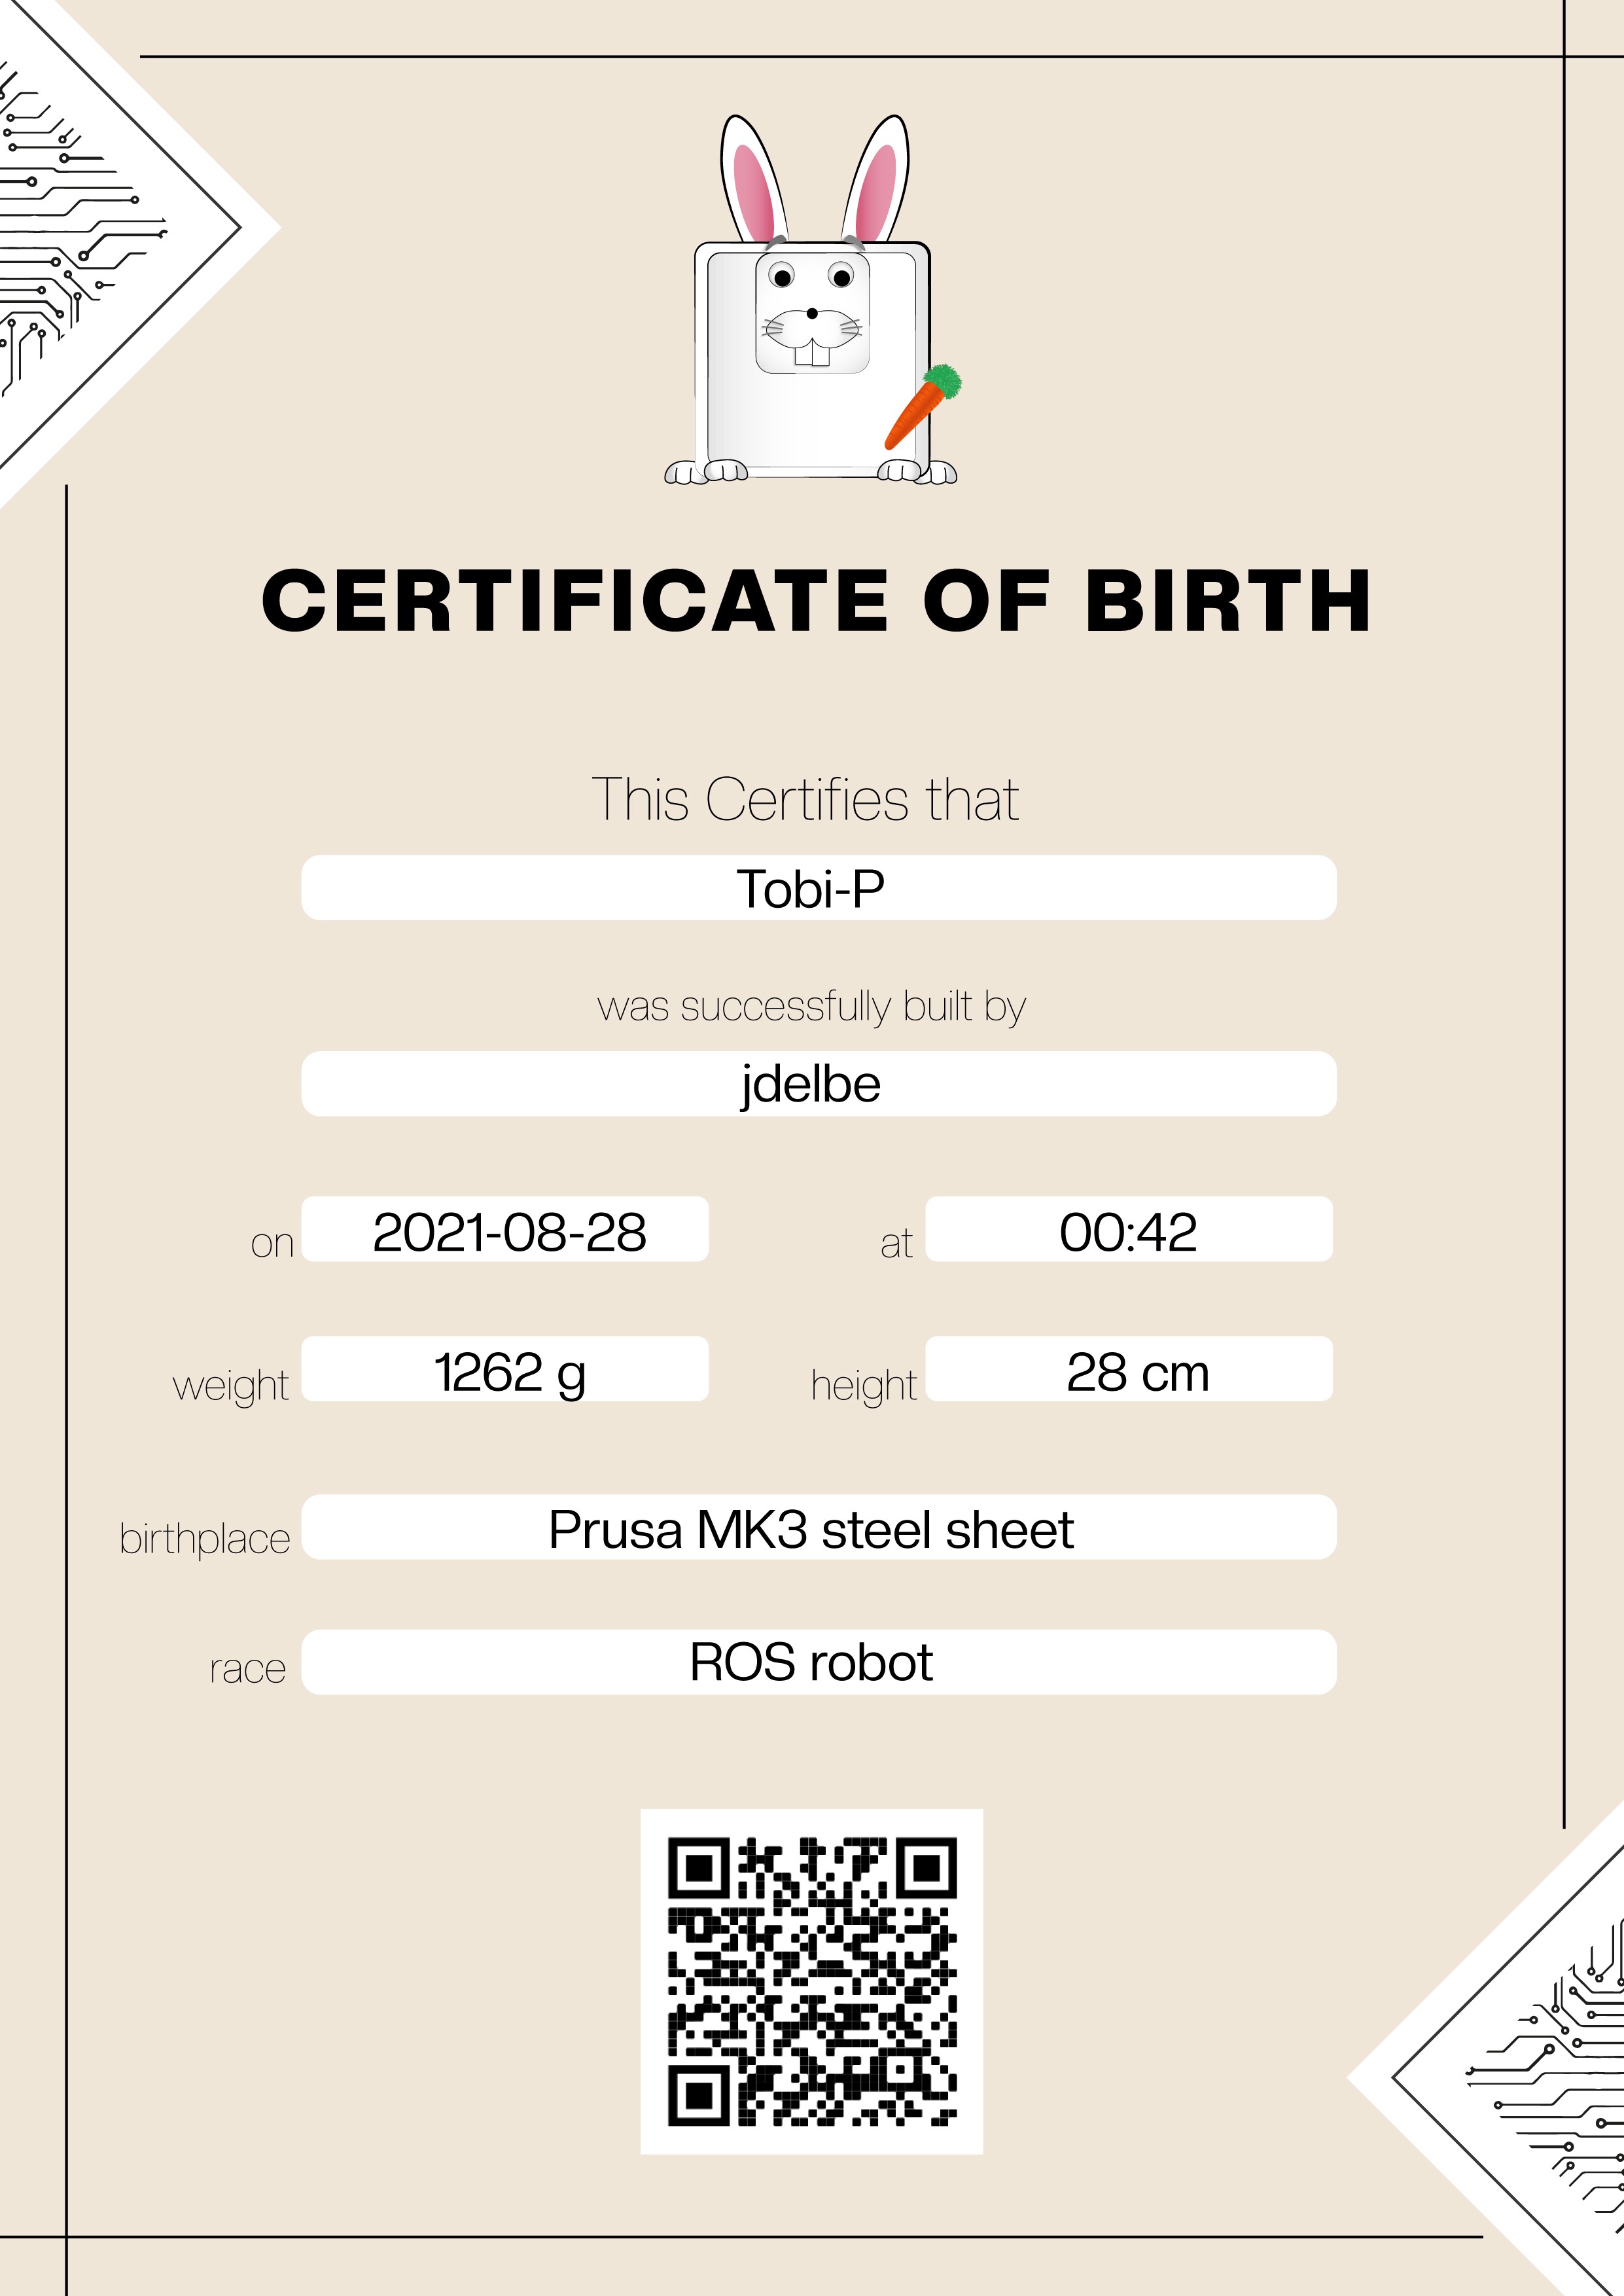
After a hiccup during the assembly, the little white companion is well, and ready for this world!
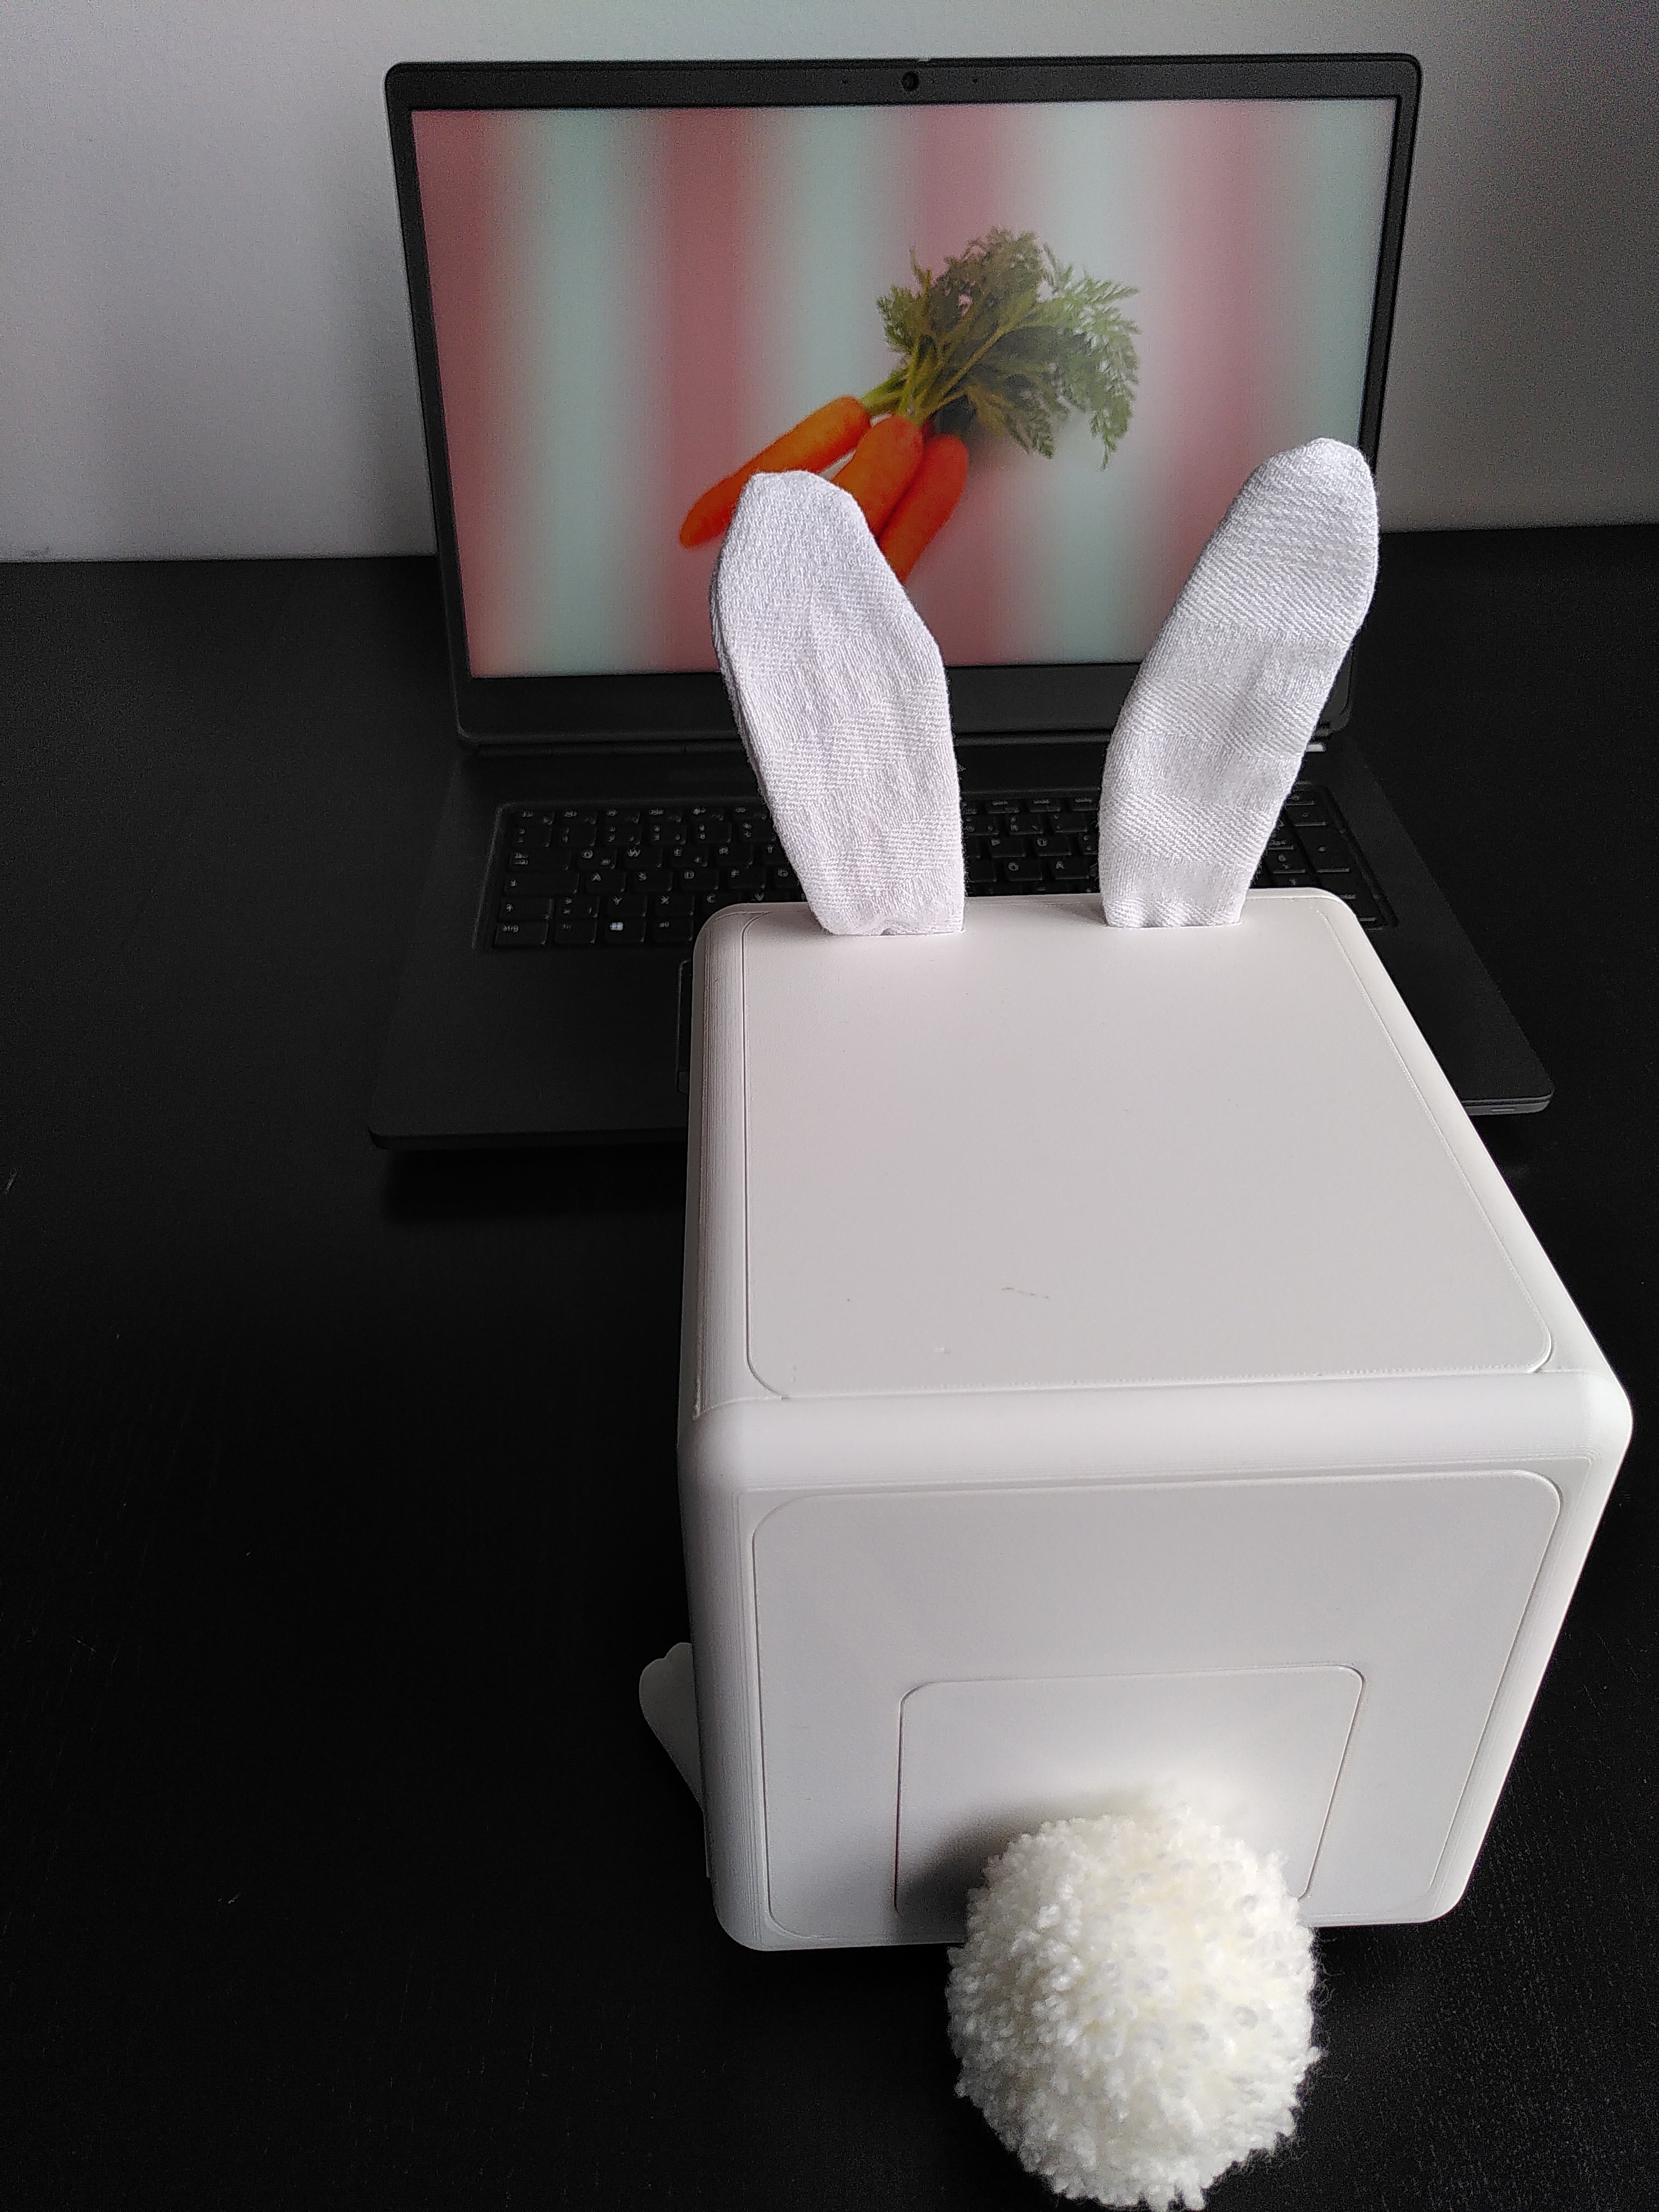
It is now running (rolling, to be precise) all over the place, and has already made its first encounter.
It even has a proper certificate, with a QRabbit code, to easily share this page!
And here the video of the complete process:

Tobi-P is an FPV robotic companion that is completely open-source. A Raspberry Pi 1 running ROS is at its heart, with a custom Android app for teleoperation. It also makes use of common and readily available components, making it simple to construct and affordable. Hope they upgrade it for more features like playing top monster hunter world weapons and getting some crime fighting games are better than ever.


 Eric Link
 Jacob David C Cunningham

 David Gitz
https://serialeturcestion.com/
<a href="https://serialeturcestion.com/">serialeturcestion.com</a>
Seriale Turcesti Online Subtitrate in Romana - Urmăriți gratuit cele mai recente seriale turcești
Doar un loc mai rapid și mai bun pentru a viziona gratuit Seriale Turcesti și seriale online!