 mras2an
There are two micro-controllers on VinyGo. The master uses an ESP32, and the slave uses a stm32 for the HMI on the LCD touchpad. Both communicate via an UART protocol.
It can be downloaded on the VinyGo git project. https://github.com/Mras2an/VinyGo/tree/master/03_Software
7.1) UART protocol
I created an UART protocol for the slave and master communication. Each frame is made as follows:
Frame example to enter in system mode: 0x55 42 53 06 53 79 73 74 65 6d 54
Start byte | Header byte | Command byte | Data size | Data | End byte |
0x55 | 0x42 | 0x53 | 0x06 | 0x53 0x79 0x73 0x74 0x65 0x6d | 0x54 |
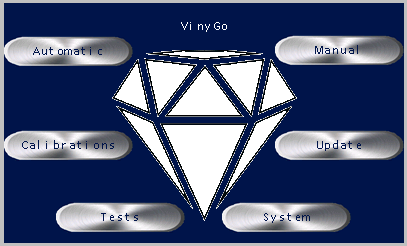
7.2) IHM on LCD touchpad
I chose a Nextion LCD touchpad and Nextion editor v0.53. With this LCD screen, we can design an HMI simply with drag and drop. Each text and button uses the UART protocol seen above.
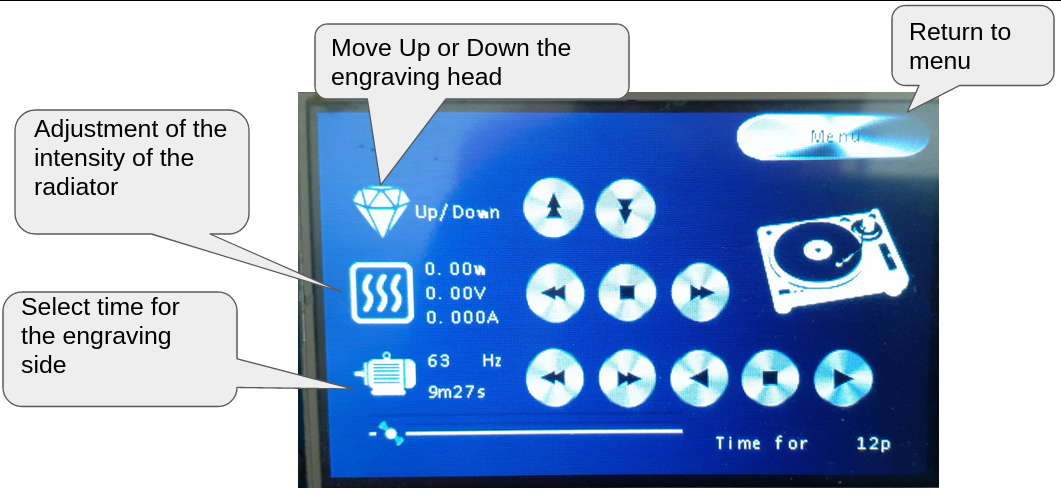
7.2.1) Manual mode
With the manual mode we can adjust all the parameters of the burner one by one, like motor speed, stylus heating.
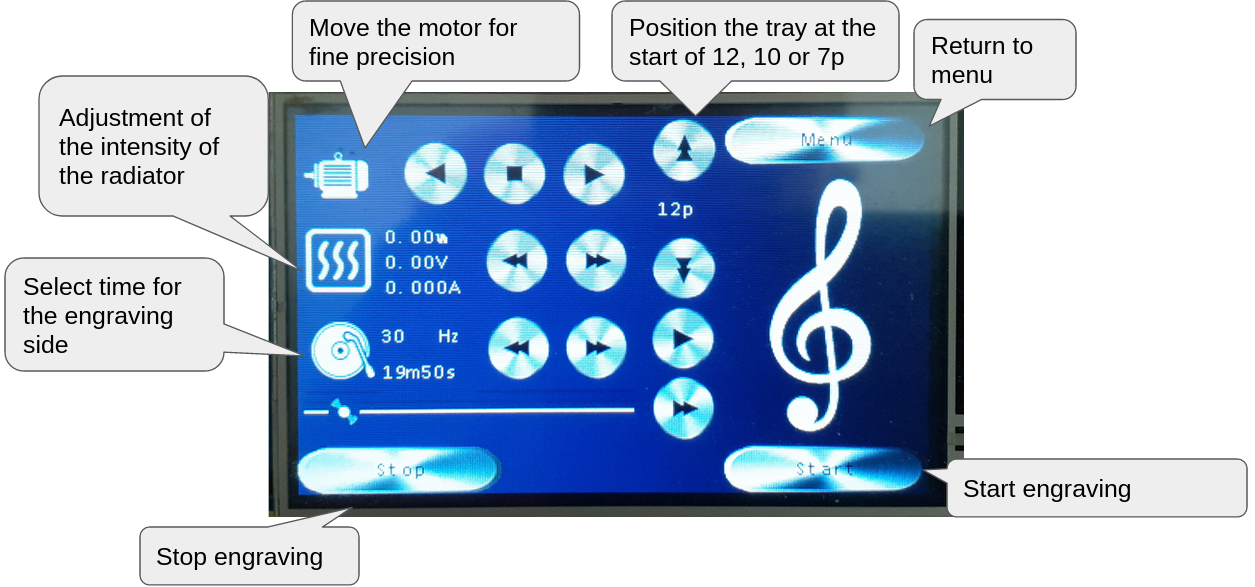
7.2.2) Automatic mode
With the automatic mode we just need to choose the vinyl size (7", 10", 12") and the time of your playlist. After that all is made automatically. The MIDI commands received in this mode increase or decrease the motor to create the start, middle, and end groove on the vinyl.
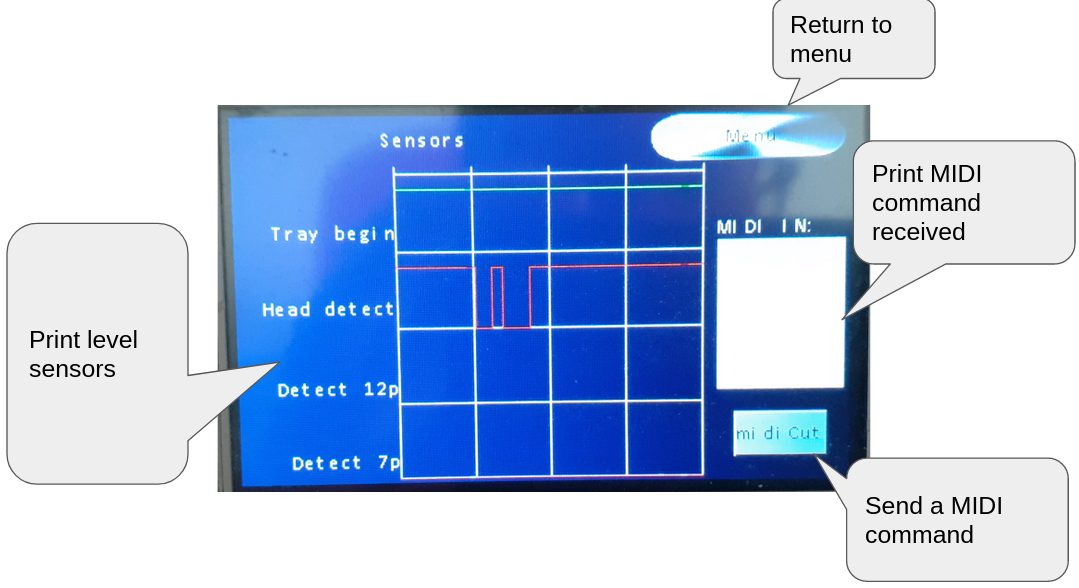
7.2.3) Test mode
If you have operating issues this mode is for you. You can test all sensors and commands.
7.2.4) Update mode
Very useful to send an update on VinyGo by OTA. VinyGo create its own AP, once connected to it you can send new software with a python tool (https://github.com/Mras2an/VinyGo/tree/master/03_Software/Utils)
7.2.5) System mode
System information like RAM, AP, ...
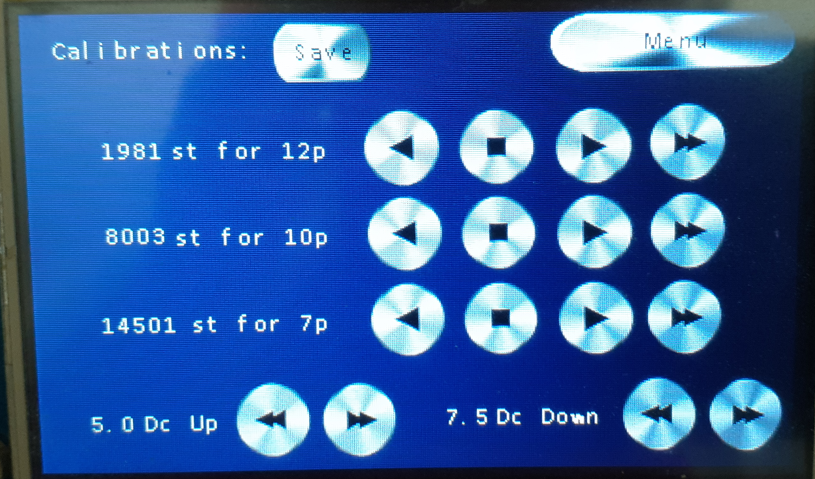
7.2.6) Calibration mode
VinyGo board is designed for several mechanics, so if you have your own mechanic you can use this mode to define the start of a 12, 10 or 7p vinyl.
7.3) Master
7.3.1) WROOM-32 module
I chose the Wi-fi WROOM-32 module because this module has a nice memory capacity, a simple and complete SDK with a lot of examples. It is also very practical to update the binary by OTA to avoid having to connect wires during the development phase.
7.3.2) SDK-IDF
I chose SDK-IDF on the v3.1 branch. The SDK-IDF has a lot of contributors. It is available on github: https://github.com/espressif/esp-idf.git
7.3.3) Flash partition
To allow the update of the system via the wifi we need more partitions. Espressif proposes the possibility to create a cvs file to define the addresses. Here is the one of the VinyGo:
# Name, Type, SubType, Offset, Size, Flags otadata,data,ota,0xd000,8K, phy_init,data,phy,0xf000,4K, factory,app,factory,0x10000,1M, ota_0,app,ota_0,0x110000,1M, ota_1,app,ota_1,0x210000,1M, nvs,data,nvs,0x315000,500K, |
So we have a partitioned memory as follows:
| Addr | Binaries ------------------------------------- | 0x001000 | Bootloader.bin | 0x008000 | Partitions.bin | 0x010000 | Factory.bin | 0x110000 | OTA_0.bin | 0x210000 | OTA_1.bin | 0x315000 | NVS (500Ko) | 0x3F0000 | Free |
7.3.4) The architecture
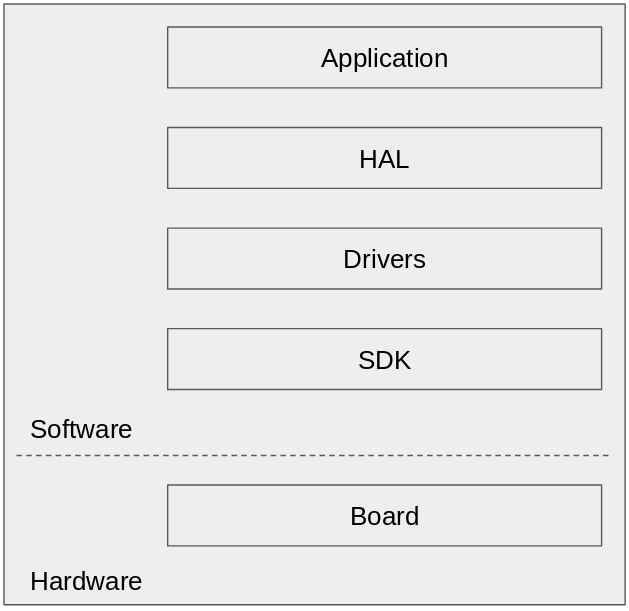
7.3.4.1) The Espressif SDK
The SDK used is the SDK-IDF on the v3.1 branch available on github at (https://github.com/espressif/esp-idf). This is the official development system of the ESP32 chip.
7.3.4.2) The drivers
Used for different hardware interactions such as motors, or the functionality of the WROOM32 module (Gpio, wifi, OTA, UART, PWM, ...).
7.3.4.3) The HAL and OSAL
HAL and OSAL allow simple porting of VinyGo to another SDK, OS, or hardware platform.
7.3.4.4) The application
This is the VinyGo application. We found six modes, manual, automatic, test, update, system, and calibration accessible by the LCD. For more detail of these modes, see “IHM on LCD touchpad” chapter.
7.4) Mastering music
For mastering the music you have several possibilities, use Pro software like Cubase, use Free software like Audacity. Whatever software you use, the principle is the same. We need to filter the sound before. For that we need an iRIAA equalization. RIAA equalization is a specification for the recording and playback of phonograph records, established by the Recording Industry Association of America (RIAA). The purposes of the equalization are to permit greater recording times (by decreasing the mean width of each groove), to improve sound quality, and to reduce the groove damage that would otherwise arise during playback (If this chapter interests you, you can read more about RIAA on the internet).
Here is an example of a record without iRIAA and with iRIAA. We have too much bass, the head jumps. We can see the issue on the photo below:
|
Bad mastering (too much bass) Good mastering |

7.4.1) Create calibration filters for mastering
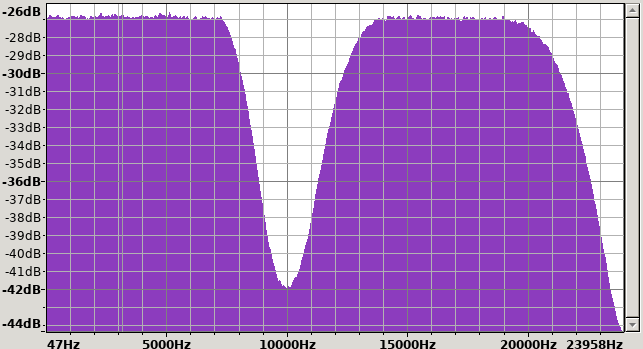
If you burn a vinyl without mastering, you will see that the spectrum of the original music is not the same that your music engraved. To have the same audio spectrum you need to create filters with iRiaa and an equalization.
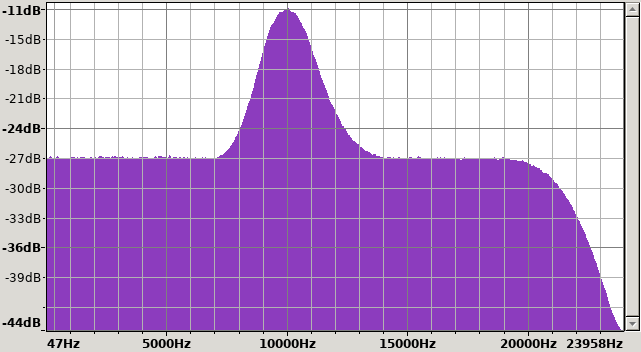
To create these filters you need to burn white noise (White noise is a random signal having equal intensity at different frequencies, giving it a constant power spectral density) (download it in VinyGo/utils git). After the engraving, it must be re-recorded and you need to compare the spectrum between the original signal and the engraved one. If there are some differences in spectrum on a frequency (example 10 KHz below) then the equalizer must be used to increase or decrease the intensity of the original signal on the frequency. That is the mastering! Repeat the operation to get the same spectrum between both original and burn signal. When it is OK you can save your filter. Use the filter on your playlist before each burn. If you use Audacity software these steps are manual, with Pro software like Cubase and fabFilter, the equalization will be calibrated automatically.
Note: Increase or decrease the amplification sound to get a sound at 0dB on your vinyl
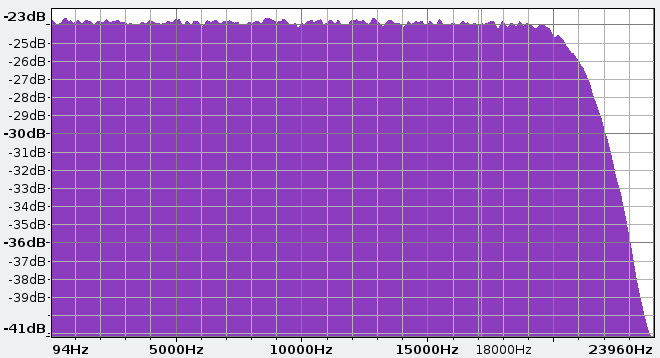
Spectral representation of original white noise:
Example of signal attenuation on vinyl after white noise engraving (On 10KHz).
Example of original white noise equalization to increase the signal intensity (On 10KHz).
Discussions
Become a Hackaday.io Member
Create an account to leave a comment. Already have an account? Log In.
hello do you check chap 8 ans 9?
Are you sure? yes | no
Good night!
So I couldn't understand what software(s) were used to compile the code and write to ESP32.
Could you clarify which exactly were used in the program?
Thanks.
Are you sure? yes | no