 Brian
BrianThis is a better version of a Raspberry Pi Police Radio as we are using OP25 alone, in lieu of DSD paired with GQRX. The DSD/GQRX combo was initally chosen because of its visual impression, however OP25 works much better, it doesnt suffer from having to reconfigure the RTL-SDR every time should it loose parity on the device. Also It can be just turned off if needed but (not recommended), or if loss of power occurs, it doesnt need any configuration data from the user, it just starts (zero touch). OP25 doesnt have the choppy audio issues. It decodes P25 phase 2 as well as phase 1, unlike DSD, it auto-corrects frequency offsets, and it trunk tracks. This is a much more simplified aproach and is also more reliable.
Steps:
1- Get a Raspberry pi3b+, power supply, and an enclosure:
https://www.microcenter.com/product/601561/raspberry-pi-3-model-b
https://www.ebay.com/itm/391757769177
I used this exact style of case, however I dont think micro center carries them any longer.
I did modify it to accomodate the lcd screen by using a dremil and taking most of the top off.
A nice 3d printed alternative:
https://www.thingiverse.com/thing:1601055
(you can get these in many places)
2. Purchase an RTL-SDR dongle, I have tried a few, they are all prety good:
another one:
You can also get them in alot of different places.
3- Install Raspian OS:
You can use raspberry pi imager to download and install the OS
https://www.raspberrypi.org/blog/raspberry-pi-imager-imaging-utility/
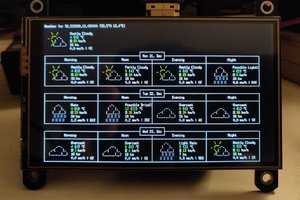
4- Obtain the 3.5 inch touchscreen display:
https://www.waveshare.com/3.5inch-rpi-lcd-a.htm
Note: the newer drivers on this are real slow and slicy a better driver for these which is normal:
Install them like this:
----------------------------------------------------
sudo rm -rf LCD-show-retropie
git clone https://github.com/lcdwiki/LCD-show-retropie.git
chmod -R 755 LCD-show-retropie
cd LCD-show-retropie/
----------------------------------------------------
LCDON.sh:
-----------------------------------------
#! /usr/bin/sh
cd /home/pi/OCD-show-retropie/
sudo ./LCD35-show 180
-----------------------------------------
LCDOFF.sh
-----------------------------------------
#! /usr/bin/sh
cd /home/pi/OCD-show-retropie/
sudo ./LCD-hdmi
-----------------------------------------
5- Install Libreoffice:
---------------------
sudo apt update
sudo apt upgrade
sudo apt install libreoffice
---------------------
6- Install Onboard: (On Screen Keyboard)
---------------------
Open the main menu.
Go to Preferences > Add/Remove Software.
In the search field, type “matchbox” and press Enter.
In the results, find the “on-screen keyboard” package. The package name is something like matchbox-keyboard. ...
Click on “Apply” to install it
---------------------
7- Install OP25:
---------------------
git clone https://github.com/boatbod/op25.git
cd op25
./install.sh
8- Set it up:
a. I created an op.sh file in the /home/pi/ folder:
-----------------------------------
#! /usr/bin/sh
cd /home/op25/op25/gr-op25_repeater/apps/
lxterminal -e ./op25.sh --geometry=77x20
-----------------------------------
b. I created a desktop file to point to the op.sh script file:
------------------------------------
[Desktop Entry]
Name=OP25
Comment=Run OP25
Terminal=false
Exec=lxterminal -e /home/pi/op.sh
Type=Application
Encoding=UTF-8
Catagories=None;
------------------------------------
9-Using Libreoffice, open and edit /home/op25/op25/gr-op25_repeater/apps/trunk.tsv to reflect the frequency that you have chosen to listen to directly or trunk from.
------------------------------------
If you wish to start the program up on boot up, I simply copied...
 Hpsaturn
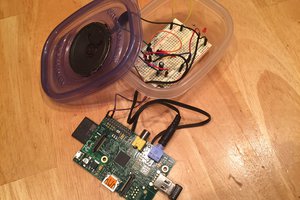
 Eric
Eric
 Jarosław Mazurkiewicz