 grossofabian
1.Preparing to use the device with the "built-in" Attiny 85
In case of having the device with the micro already installed and to use it with our project we will need the following:
-Download the Arduino IDE: https://www.arduino.cc/en/software
We download the version and desired and then we will need to make an initial configuration.
-Bookstores and cards:
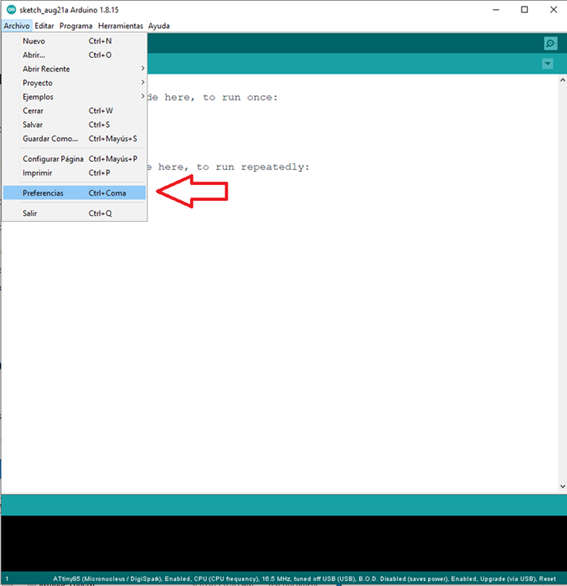
Open the downloaded program and a window will open with a blank project. We proceed to select the preferences option in the files tab.
Once the window is opened, enter the following URL:
https://drazzy.com/package_drazzy.com_index.json
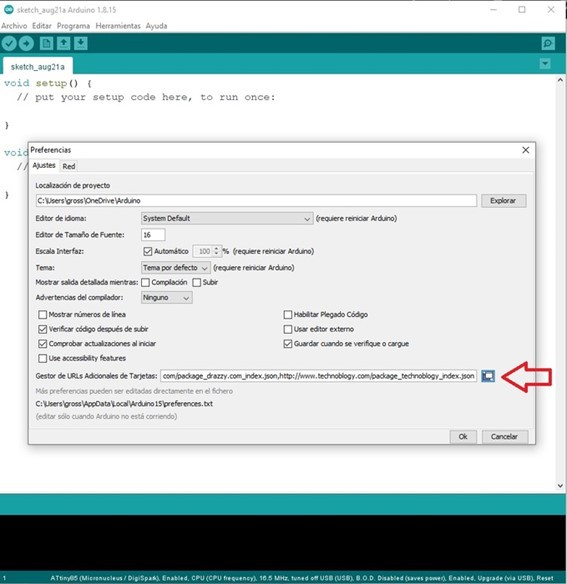
If we have a URL already entered, it is not necessary to delete it, we simply add the new one below. We give OK to all windows to save the changes.
Then we must go to Tools-Board-Card Manager.
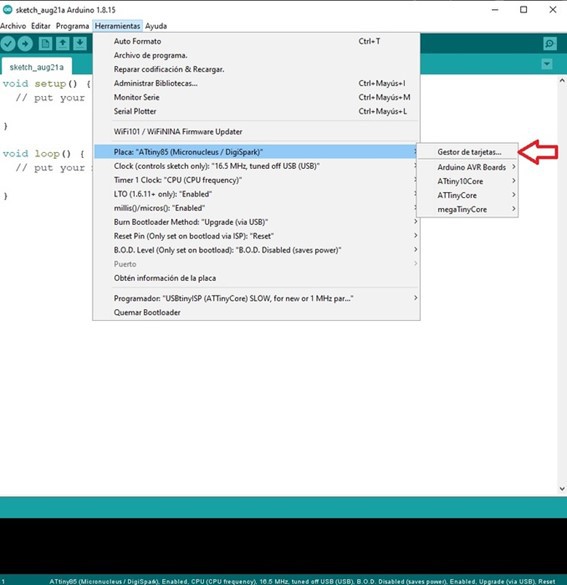
When the card manager opens we will need to look for AttinyCore and install it to have support for our ATTiny85.

Once this is done, we will have support to program the microcontroller integrated into the card.
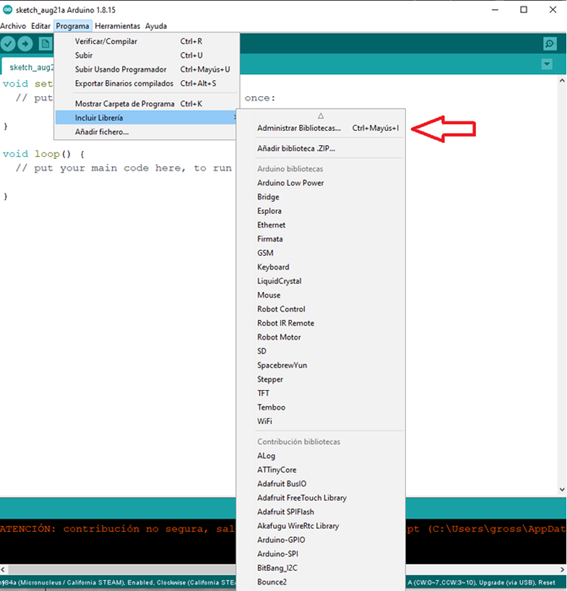
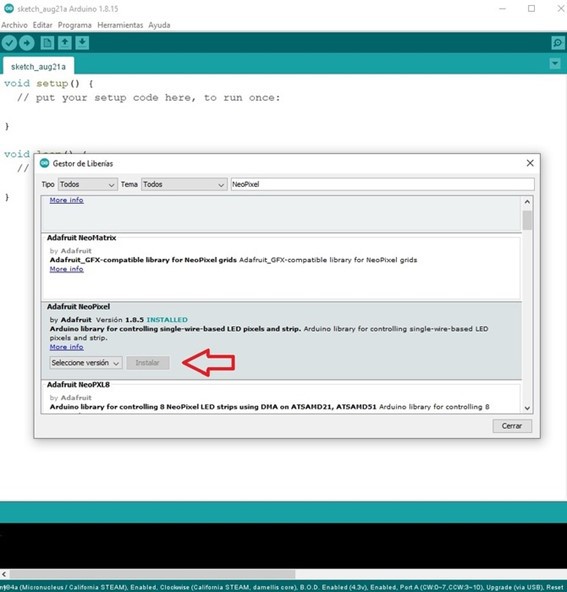
Now we will need to install the library of the NeoPixels to be able to use them easily. This is done from Program-Include Library-Manage Library.
We searched for NeoPixel and installed the library as shown below.
We will also need to install the RTClib library to have real-time clock support that the card has integrated.
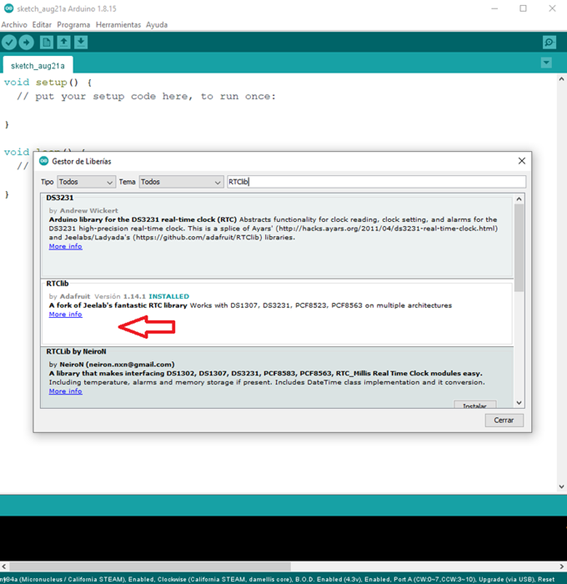
Once this is done we are ready to start programming our card.
The good thing about the Arduino IDE is that there are many libraries available to execute functions or integrate peripherals in a very simple way, you can install as many as you need since these are installed on the PC but when integrating them into the project you must be careful since these consume resources of the microcontroller and we can easily run out of space.
2.Create a program, compile it and upload it to the microcontroller to run it.
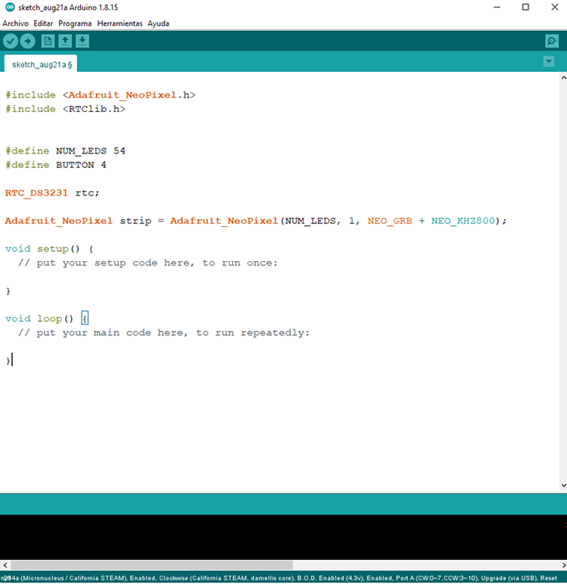
To create an Arduino program we must first of all integrate the libraries that we download for that you can copy the following text at the beginning of the sketch without deleting anything.
#include <Adafruit_NeoPixel.h>
#include <RTClib.h>
#define NUM_LEDS 54
#define BUTTON 4
RTC_DS3231 rtc;
Adafruit_NeoPixel strip = Adafruit_NeoPixel(NUM_LEDS, 1, NEO_GRB + NEO_KHZ800);
Now you are ready to write your programs and make use of all the functions to program the ATtiny 85 microcontroller you can follow this tutorial to use an Arduino one as a programmer.
https://create.arduino.cc/projecthub/arjun/programming-attiny85-with-arduino-uno-afb829
To use as a display from another microcontroller:
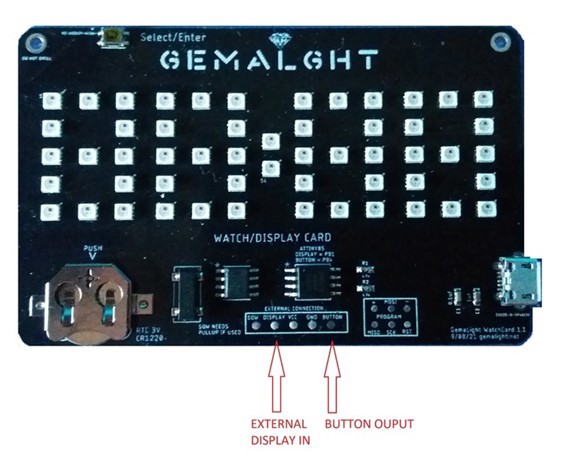
You can use the display from any microcontroller for your project by welding the pin corresponding to the data of the NeoPixels to the pad "Display", you can also take the input of the button present on the card by welding to the button pin.
You can find examples of how to use the display and more information in the code examples.
User manual for the watch function.
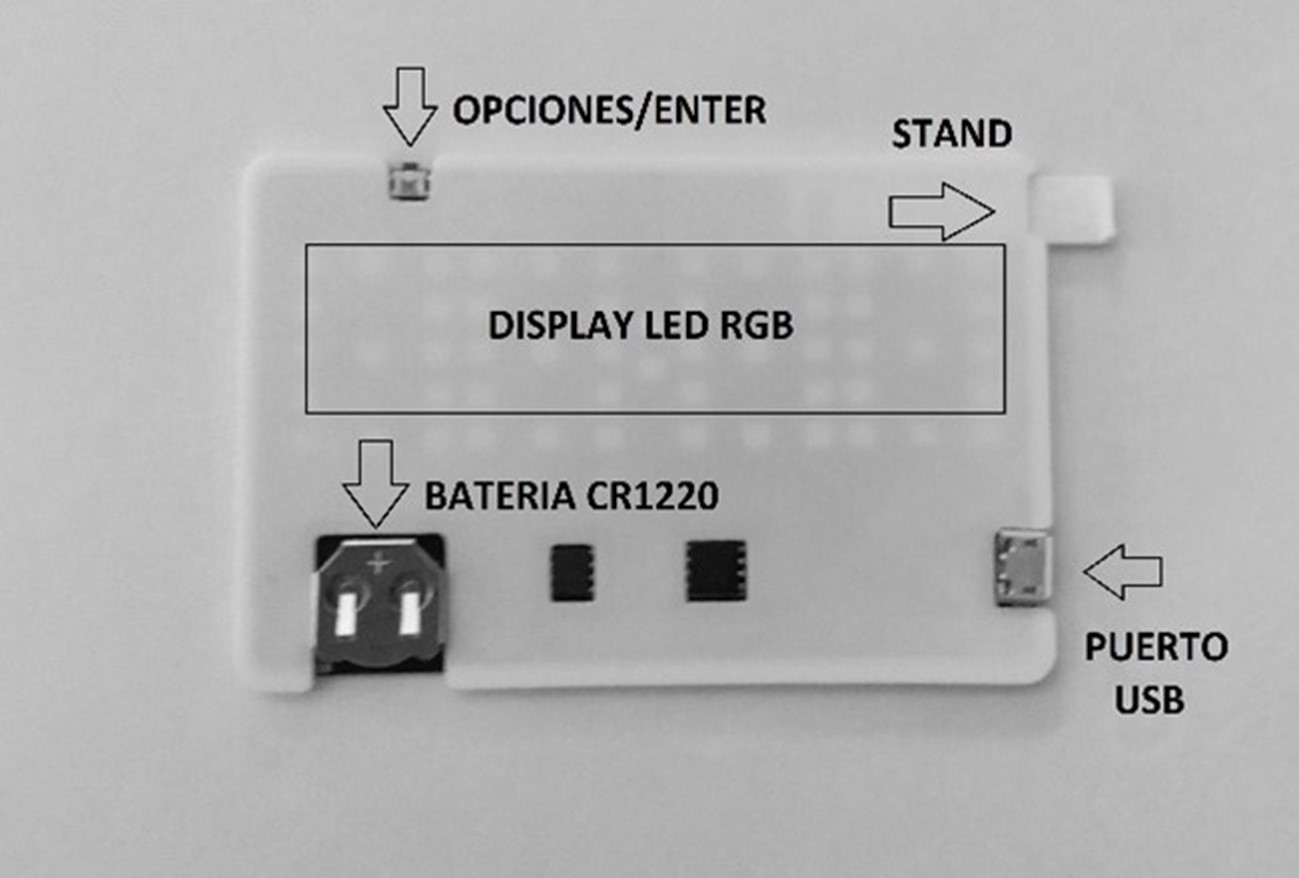
Fig1.

Fig2.
-To turn on the card simply connect the USB cable to the micro USB port of the card and the other end to any available USB port.
-You will be shown the welcome message and then the last hour set with the color and brightness due to defects or saved by the user in the last configuration will be shown.
-To place the card in a vertical position, remove the stand as indicated in fig1. Then with the USB cable connected slide the notch of the stand from the bottom up as indicated in fig2.
-To adjust the time simply press the OPTIONS/ENTER button at the top of the card...
Read more »
 mikeneiderhauser
 Scott Clandinin
 Put'n'Play
 Insight Machines Lab