 vishal soni
Hi,
How are you? I hope everything is going well.
Check out my youtube for more amazing projects.
Halloween is about to come and do you want to look cool in between your friends and family with your hunted or unique dress? But for those people who don’t know what is Halloween let me give you a quick introduction.
Halloween:-
In simple words, Halloween is a calibration day, on this day people wear costumes like ghosts and light bonfires. Kidswear unique costumes and go to the neighborhood’s house to get candy and chocolates. I think now you know about Halloween.
On the day of Halloween, you can wear your unique costume of ghosts, witch, or devil, I know you will choose a great costume that makes you unique in between your friends and family, but to add some spice to your costume I made an uncanny eye pendant.
Uncanny Eye Pendant
I made an uncanny eye pendant, which is scary at first sight. In the pendant, a real-looking eye mimics a real human eye which looks cool. You can wear it on your Halloween costume to add some spice to it. This pendant is so simple and good looking so you can wear it on a normal dress too. The pendant has an on/off button and a switch so you can turn it on when you want to show up in front of people. It also has Micro USB charging so you can charge your pendant when it’s discharged.
Also, if you want to buy this pendant on Tindie Page! (This eye is not visible in sun light but in room light and in night it looks cool)
If you want to make it your self then Let’s start the tutorial, So you can make it in an easy way with an ESP8266, TFT display, and other few components.
Quartz components :-
A big thank you to quartz components for sending me stuff for this project, Do check out quartzcomponents.com , to buy components at affordable prices.
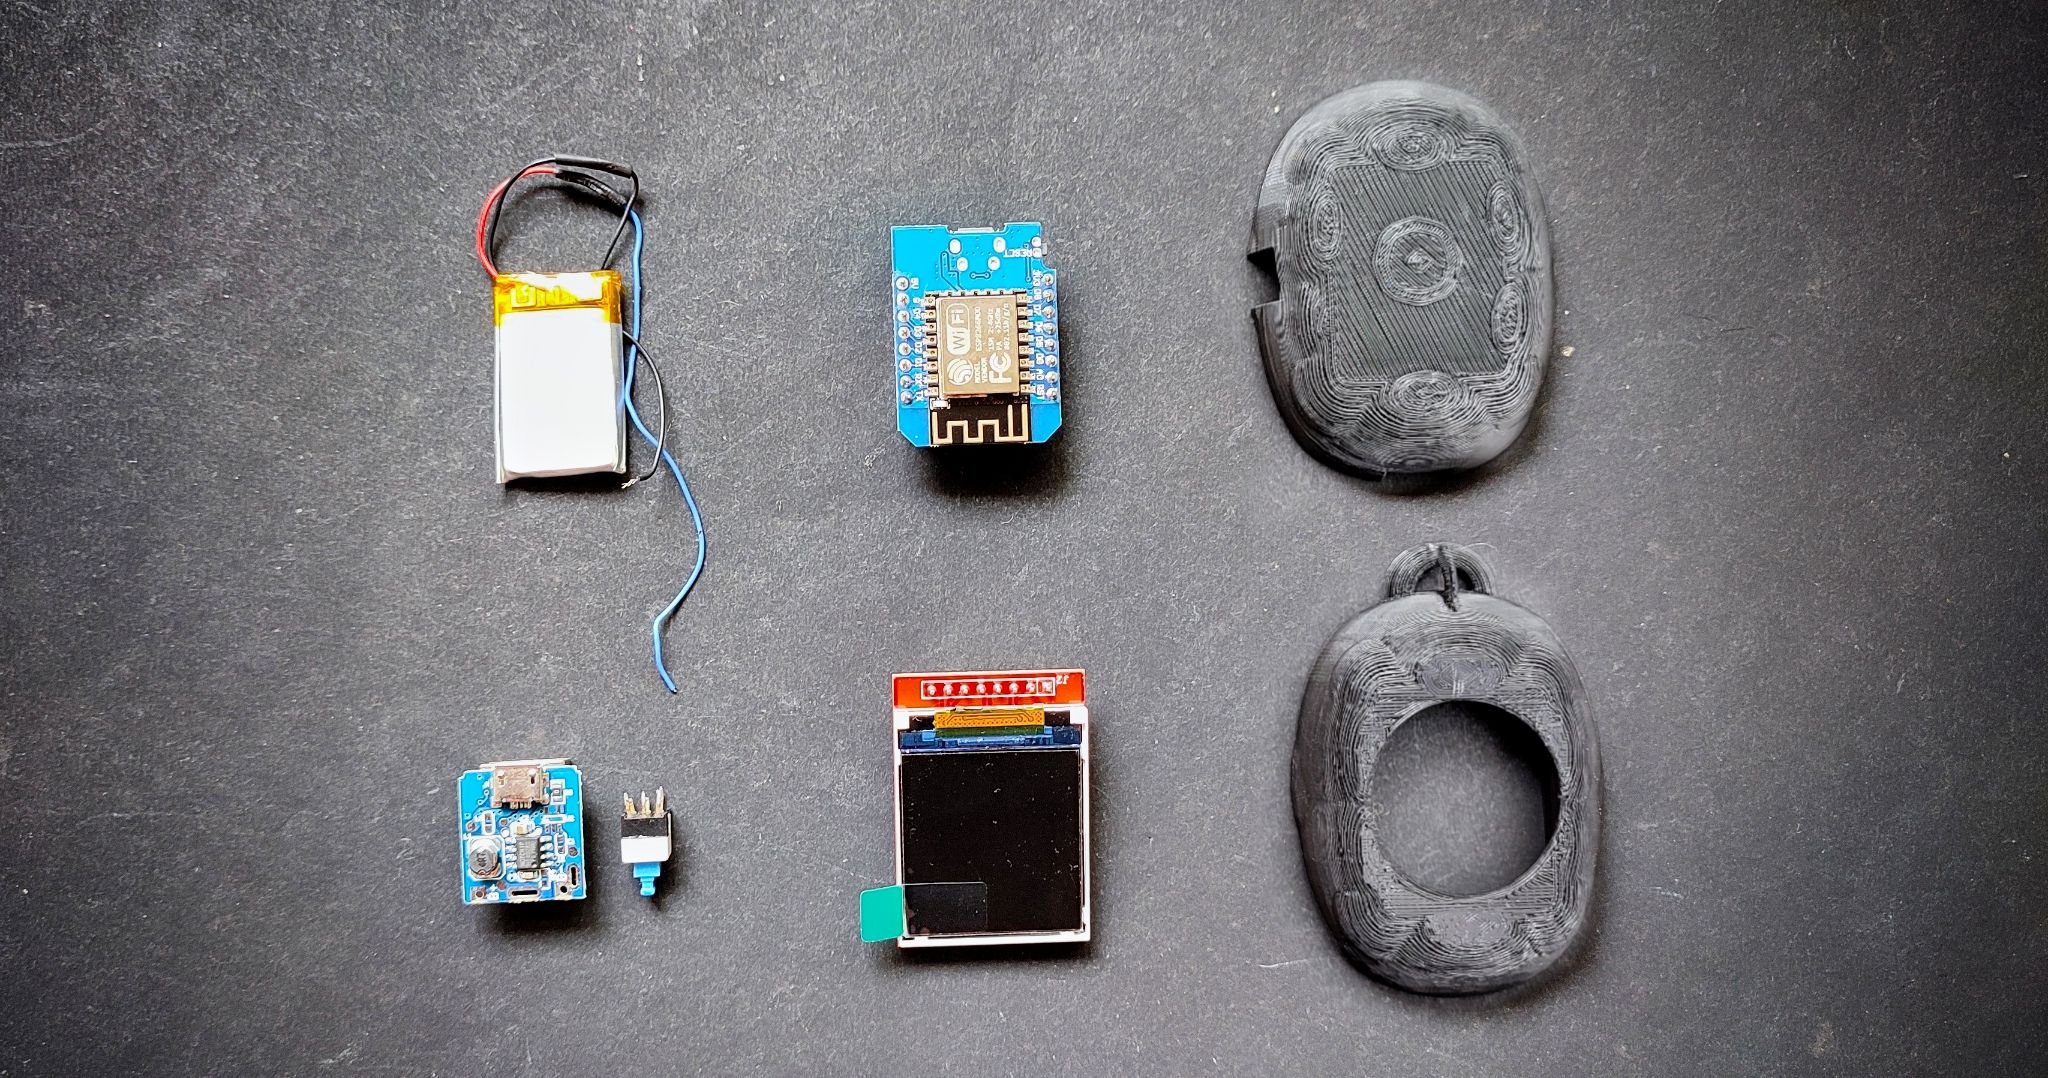
Supplies
Electronics
- 3D print of Pendant
- Wemos D1 mini
- 1.44” Inch TFT
- On/ off switch
- 134N3P module
- 3.7v 500mAh battery
- A 330 Ohm resistor
- Some wires
Tools
- 120 number sandpaper
- 600 number sandpaper
- Black mat spray paint
- Soldering iron
- Solder wire
- Hot Glue
- Laptop
3D print of pendant
The encloser or a case is one of most parts of the project, for this project I designed a 3D pendant, which can hold all of the electronics.
You can download the STL file of this pendant from my GitHub page or you can get it from the tinker cad, embedded file is given below.
Print the 3D case from your 3D printer or give it to any 3D printing company which can print for you.
Now take sandpaper, firstly I used 120 number sandpaper, which has a large grip, and sands the 3D print, make sure you are gentle at the time of sanding so you can get an even surface.
After sanding the print with 120 number sandpaper, now use 500 to 800 number sandpaper to get a smooth surface. I used 600 number sandpaper.
After sanding it, you will feel a smooth surface on the print and some dust. Wash the print to remove the dust from the print. If you have wood filler then you can fill it in the print surface to get a super smooth surface, But I don’t have the wood filler so I am not using it.
After washing it, when it gets dry, it’s time to paint it. I have used black matt paint to paint the 3D print. Place a newspaper or unnecessary paper below the 3D print and put some heavy thing on paper I have used some rocks so it won’t go away from air. Shack your paint can well and spray it on the 3D print in all directions. Before using the spray paint there are some precautions, which can be read behind the spray can.
Until your paint gets dry we will do some electronics part.
Connect TFT with Wemos D1 mini board
Until your paint on the 3D print is dry, we will do the circuit part of this project.
As you can see here I am using a 1.44 inch TFT display and instead of ESP8266, I have used a Wemos D1 mini, But what is Wemos D1 mini?
Wemos D1 mini:-
Wemos D1 mini is an ESP8266 breakout board. It has CH340 ic to easily communicate with...
Read more »

 Tony E. Nazzal
 igorfonseca83
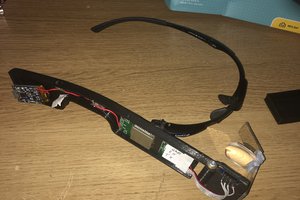
Wow such a cool project, planning to make a similar kind of thing for me one day