Close
0%
0%

Braiding Machine - Maypole Braider and bobbins

Basic design concepts for a 3D printable maypole braiding machine with bobbin carriers designed with tension control.

Similar projects worth following
Basic guidelines on designing a 3D printed maypole style braiding machine. Also includes a bobbin carrier with yarn tension control.

All design files (Fusion 360) are included, see the files.

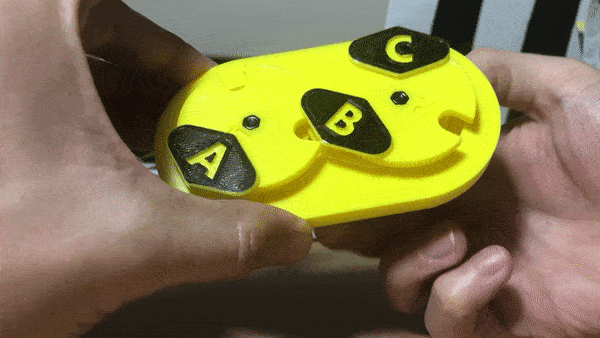
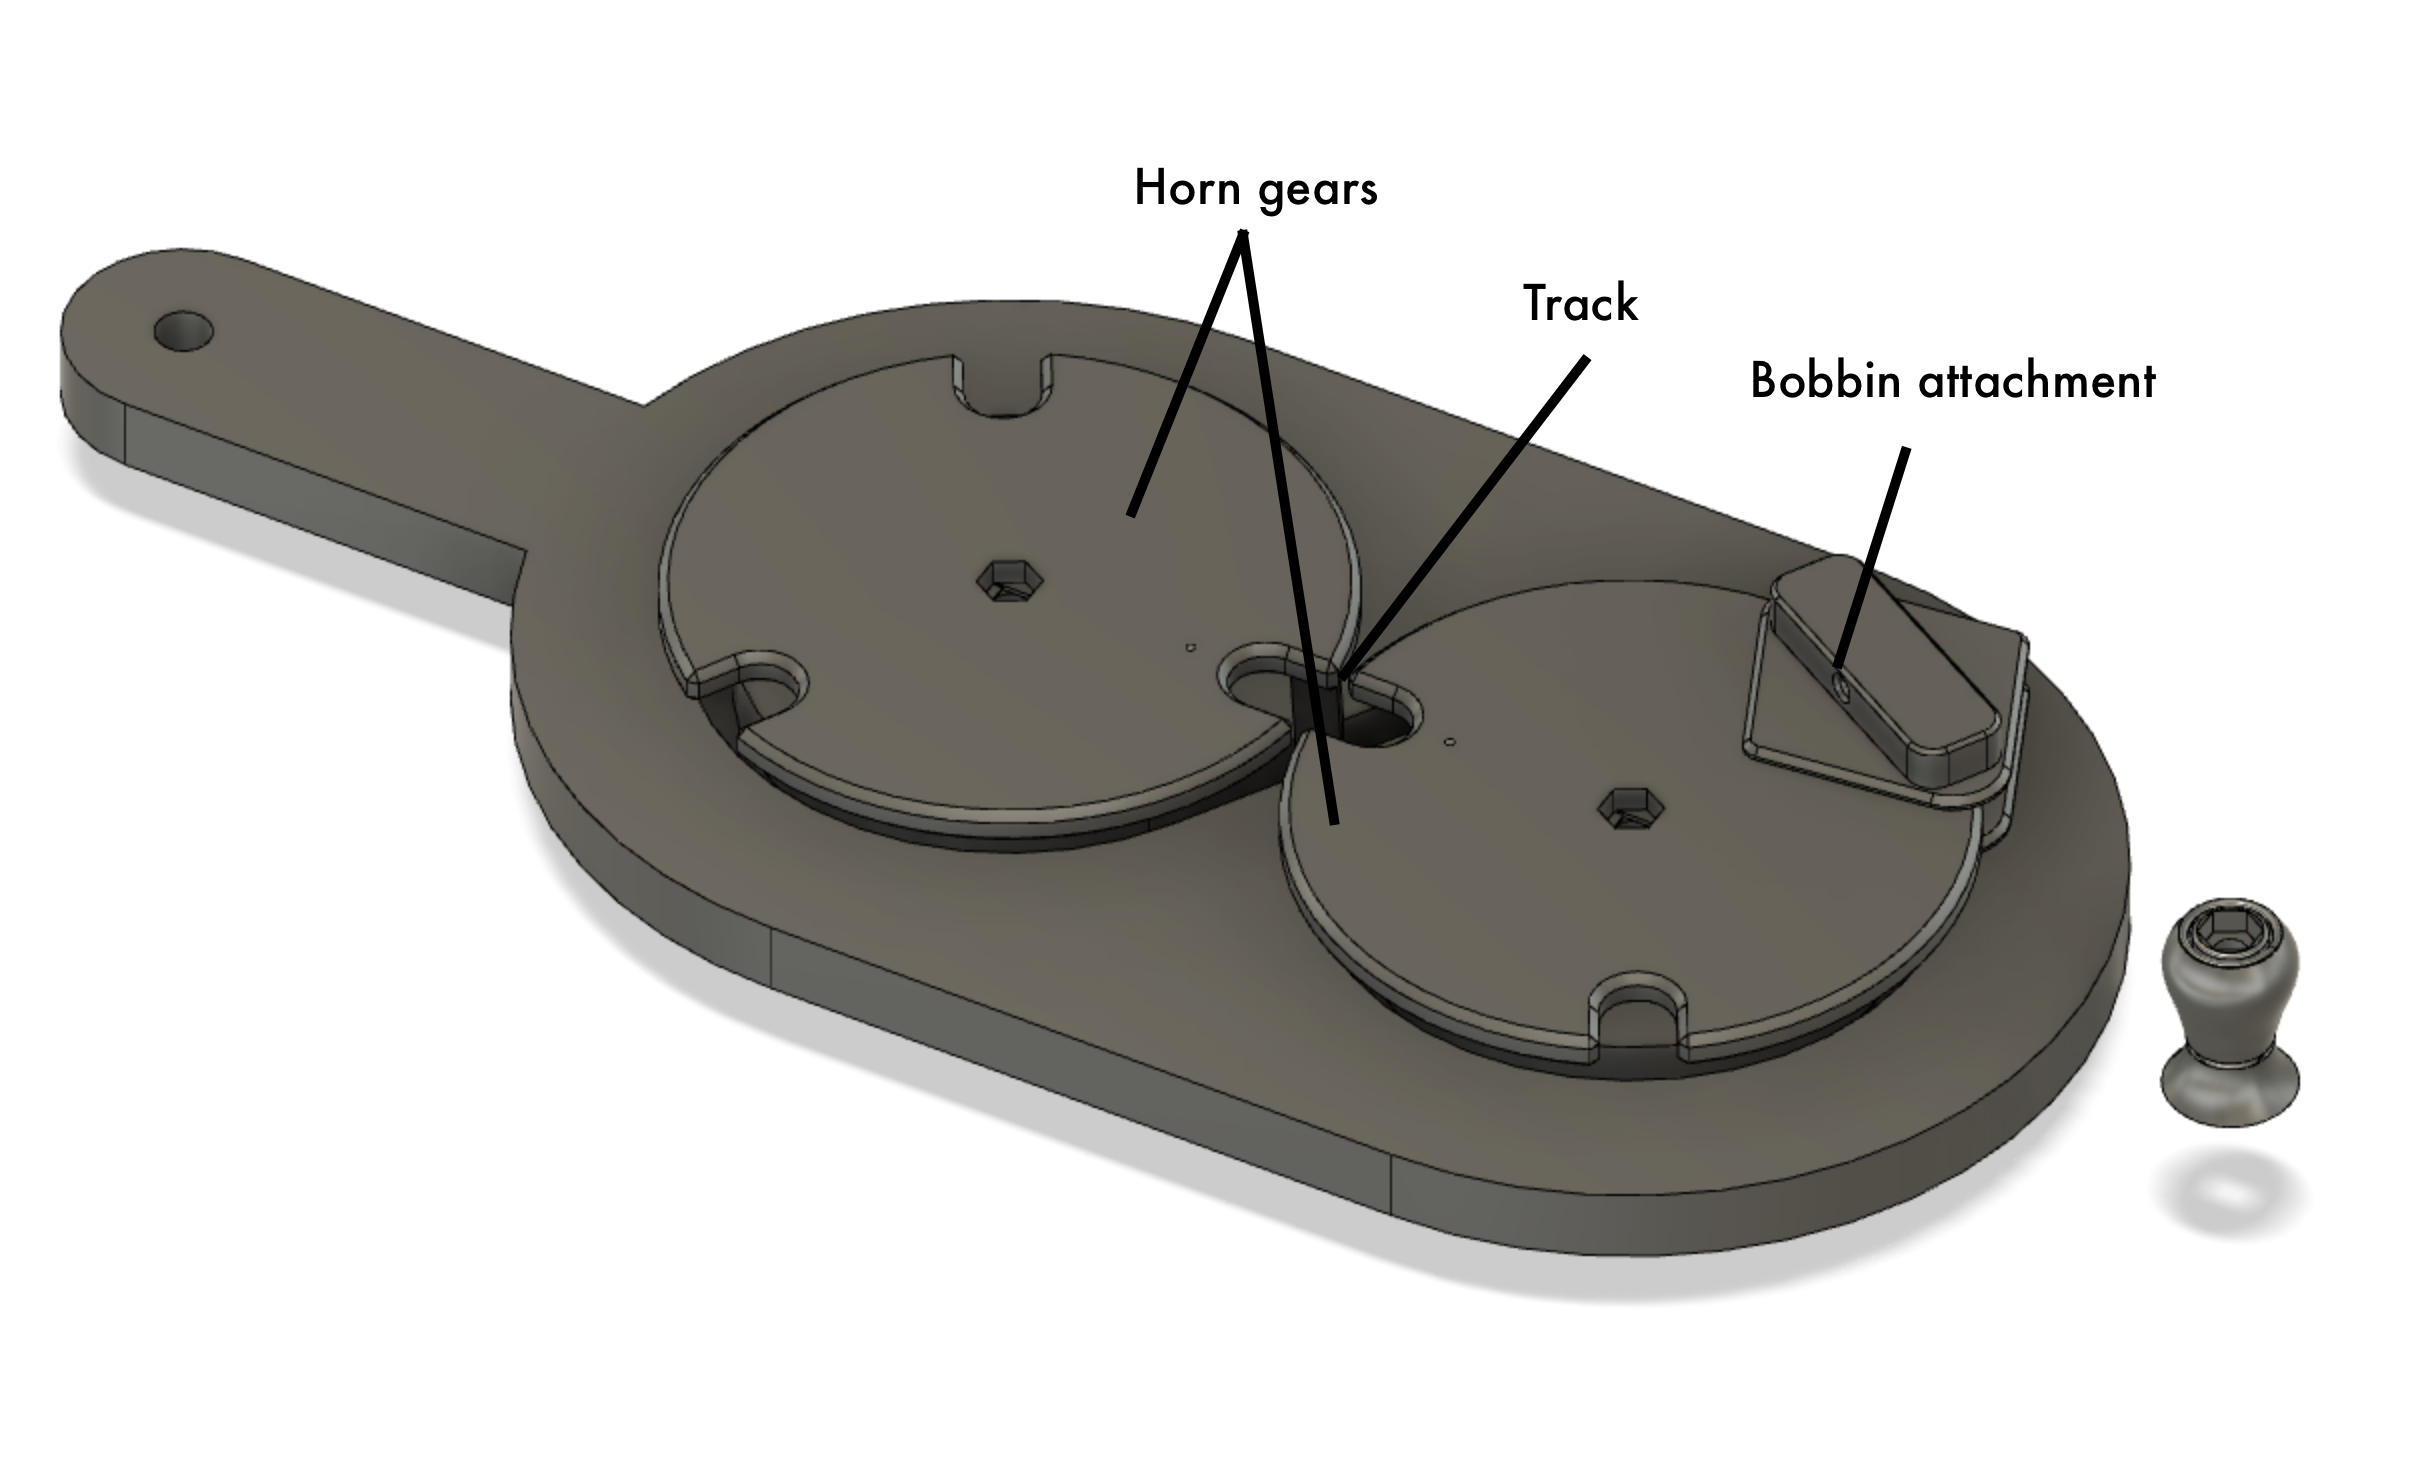
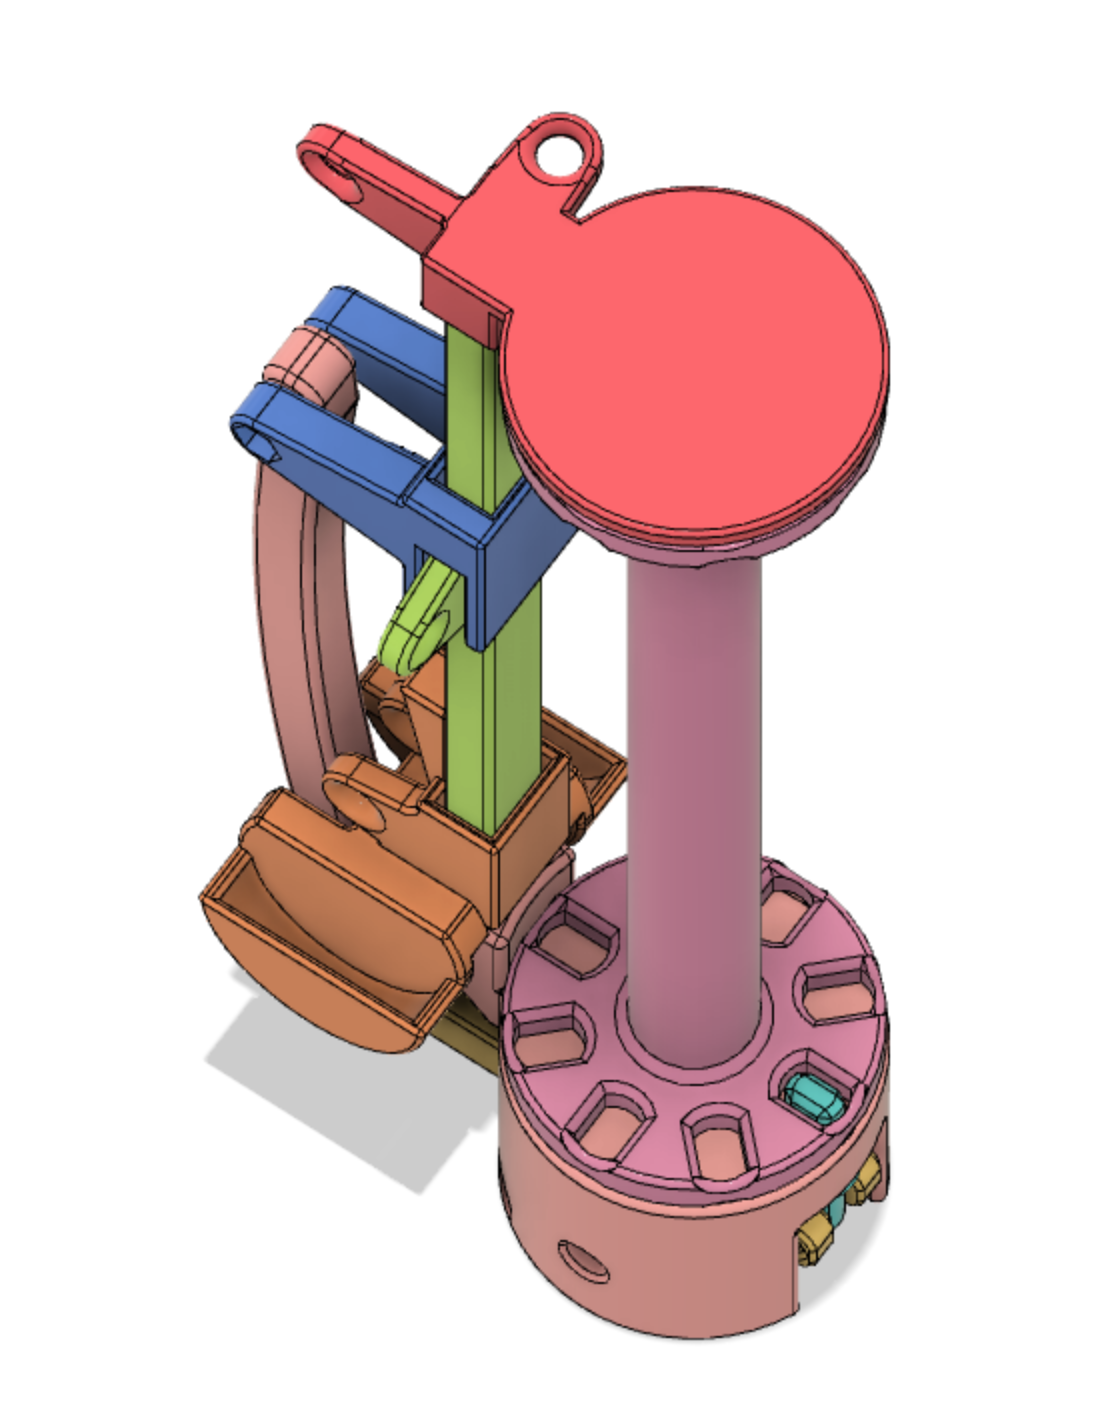
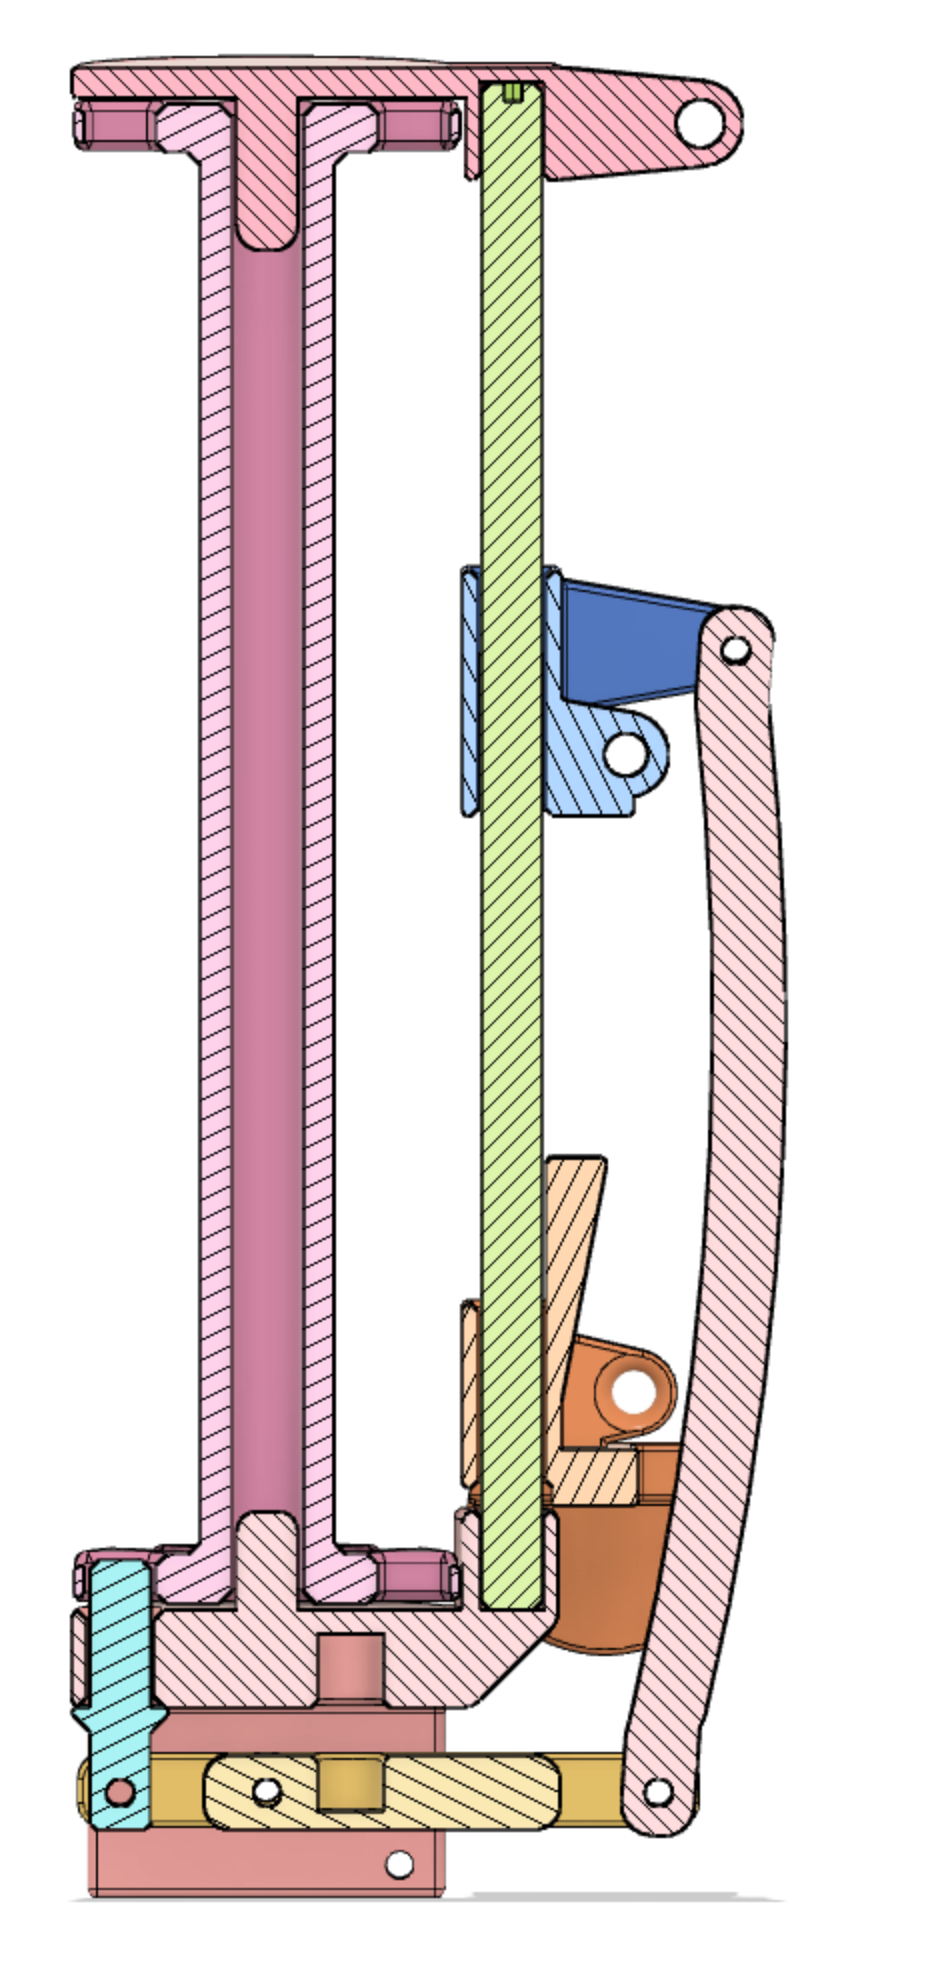
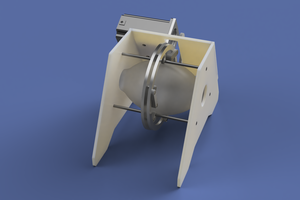
A braiding machine consists of spur gears, a frame with a track, horn gears, a foot (guide) for each bobbin carrier and the bobbin itself.   

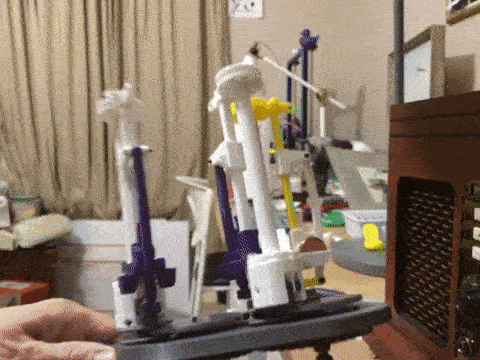
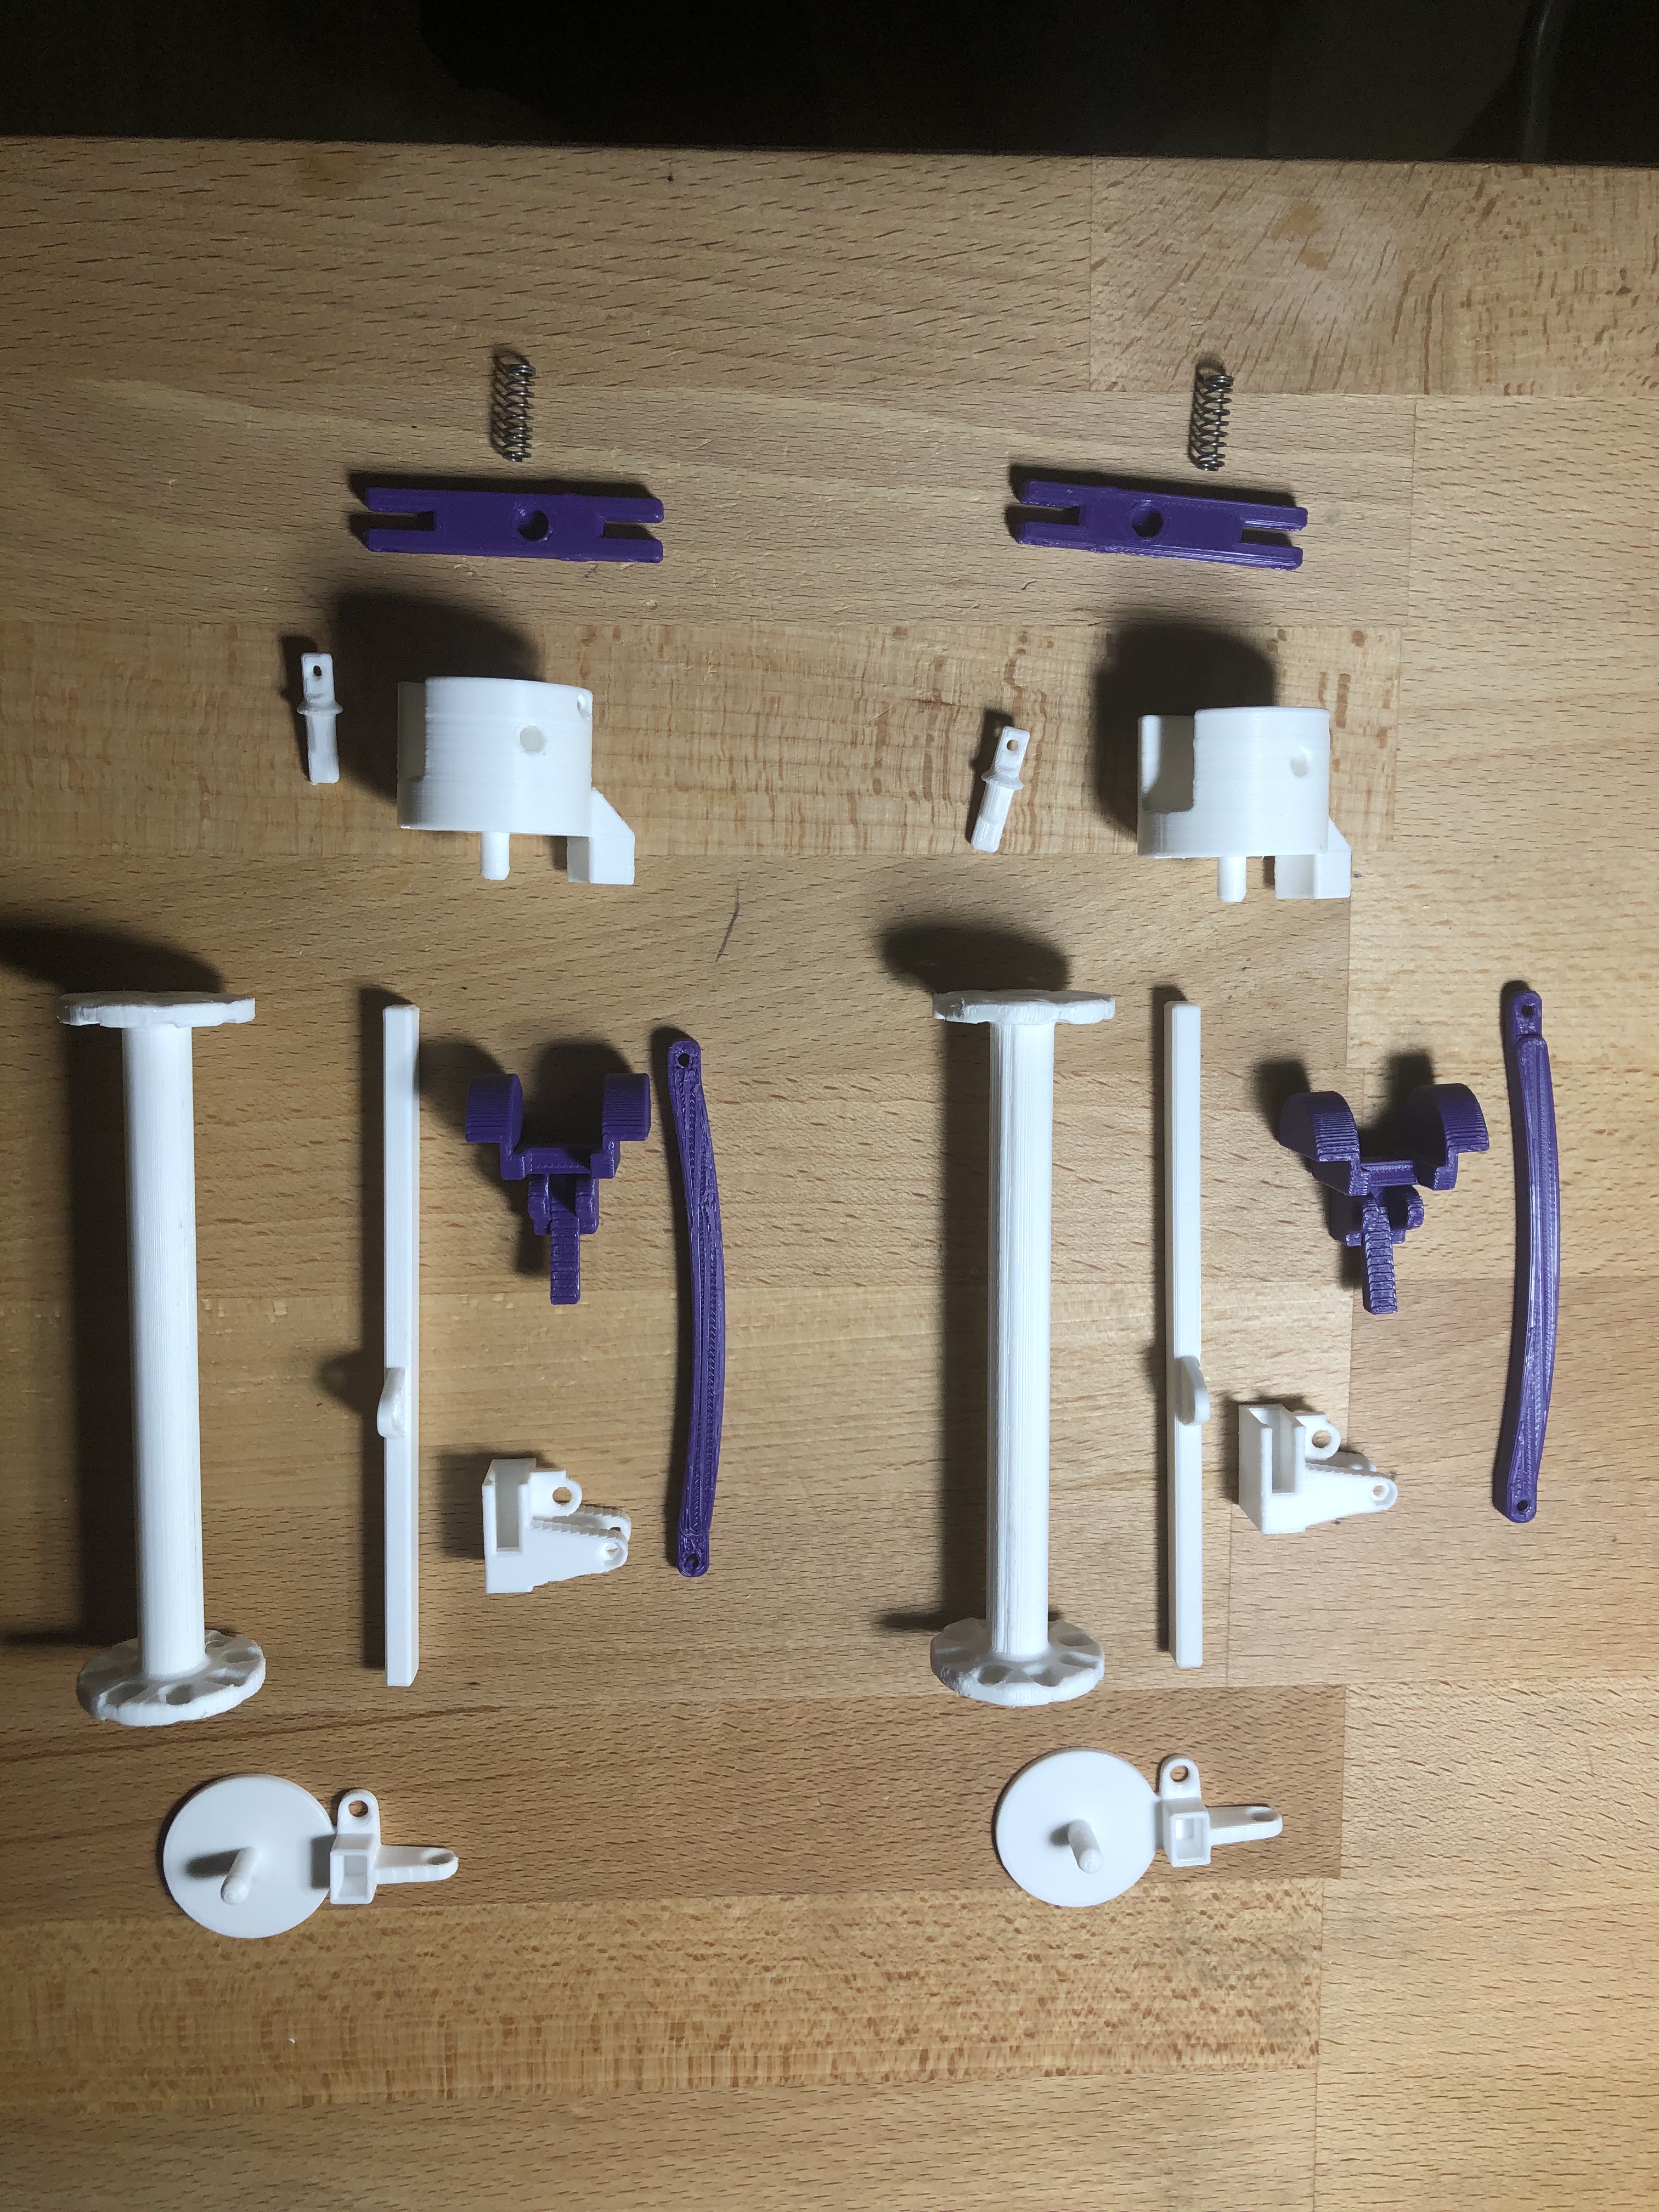
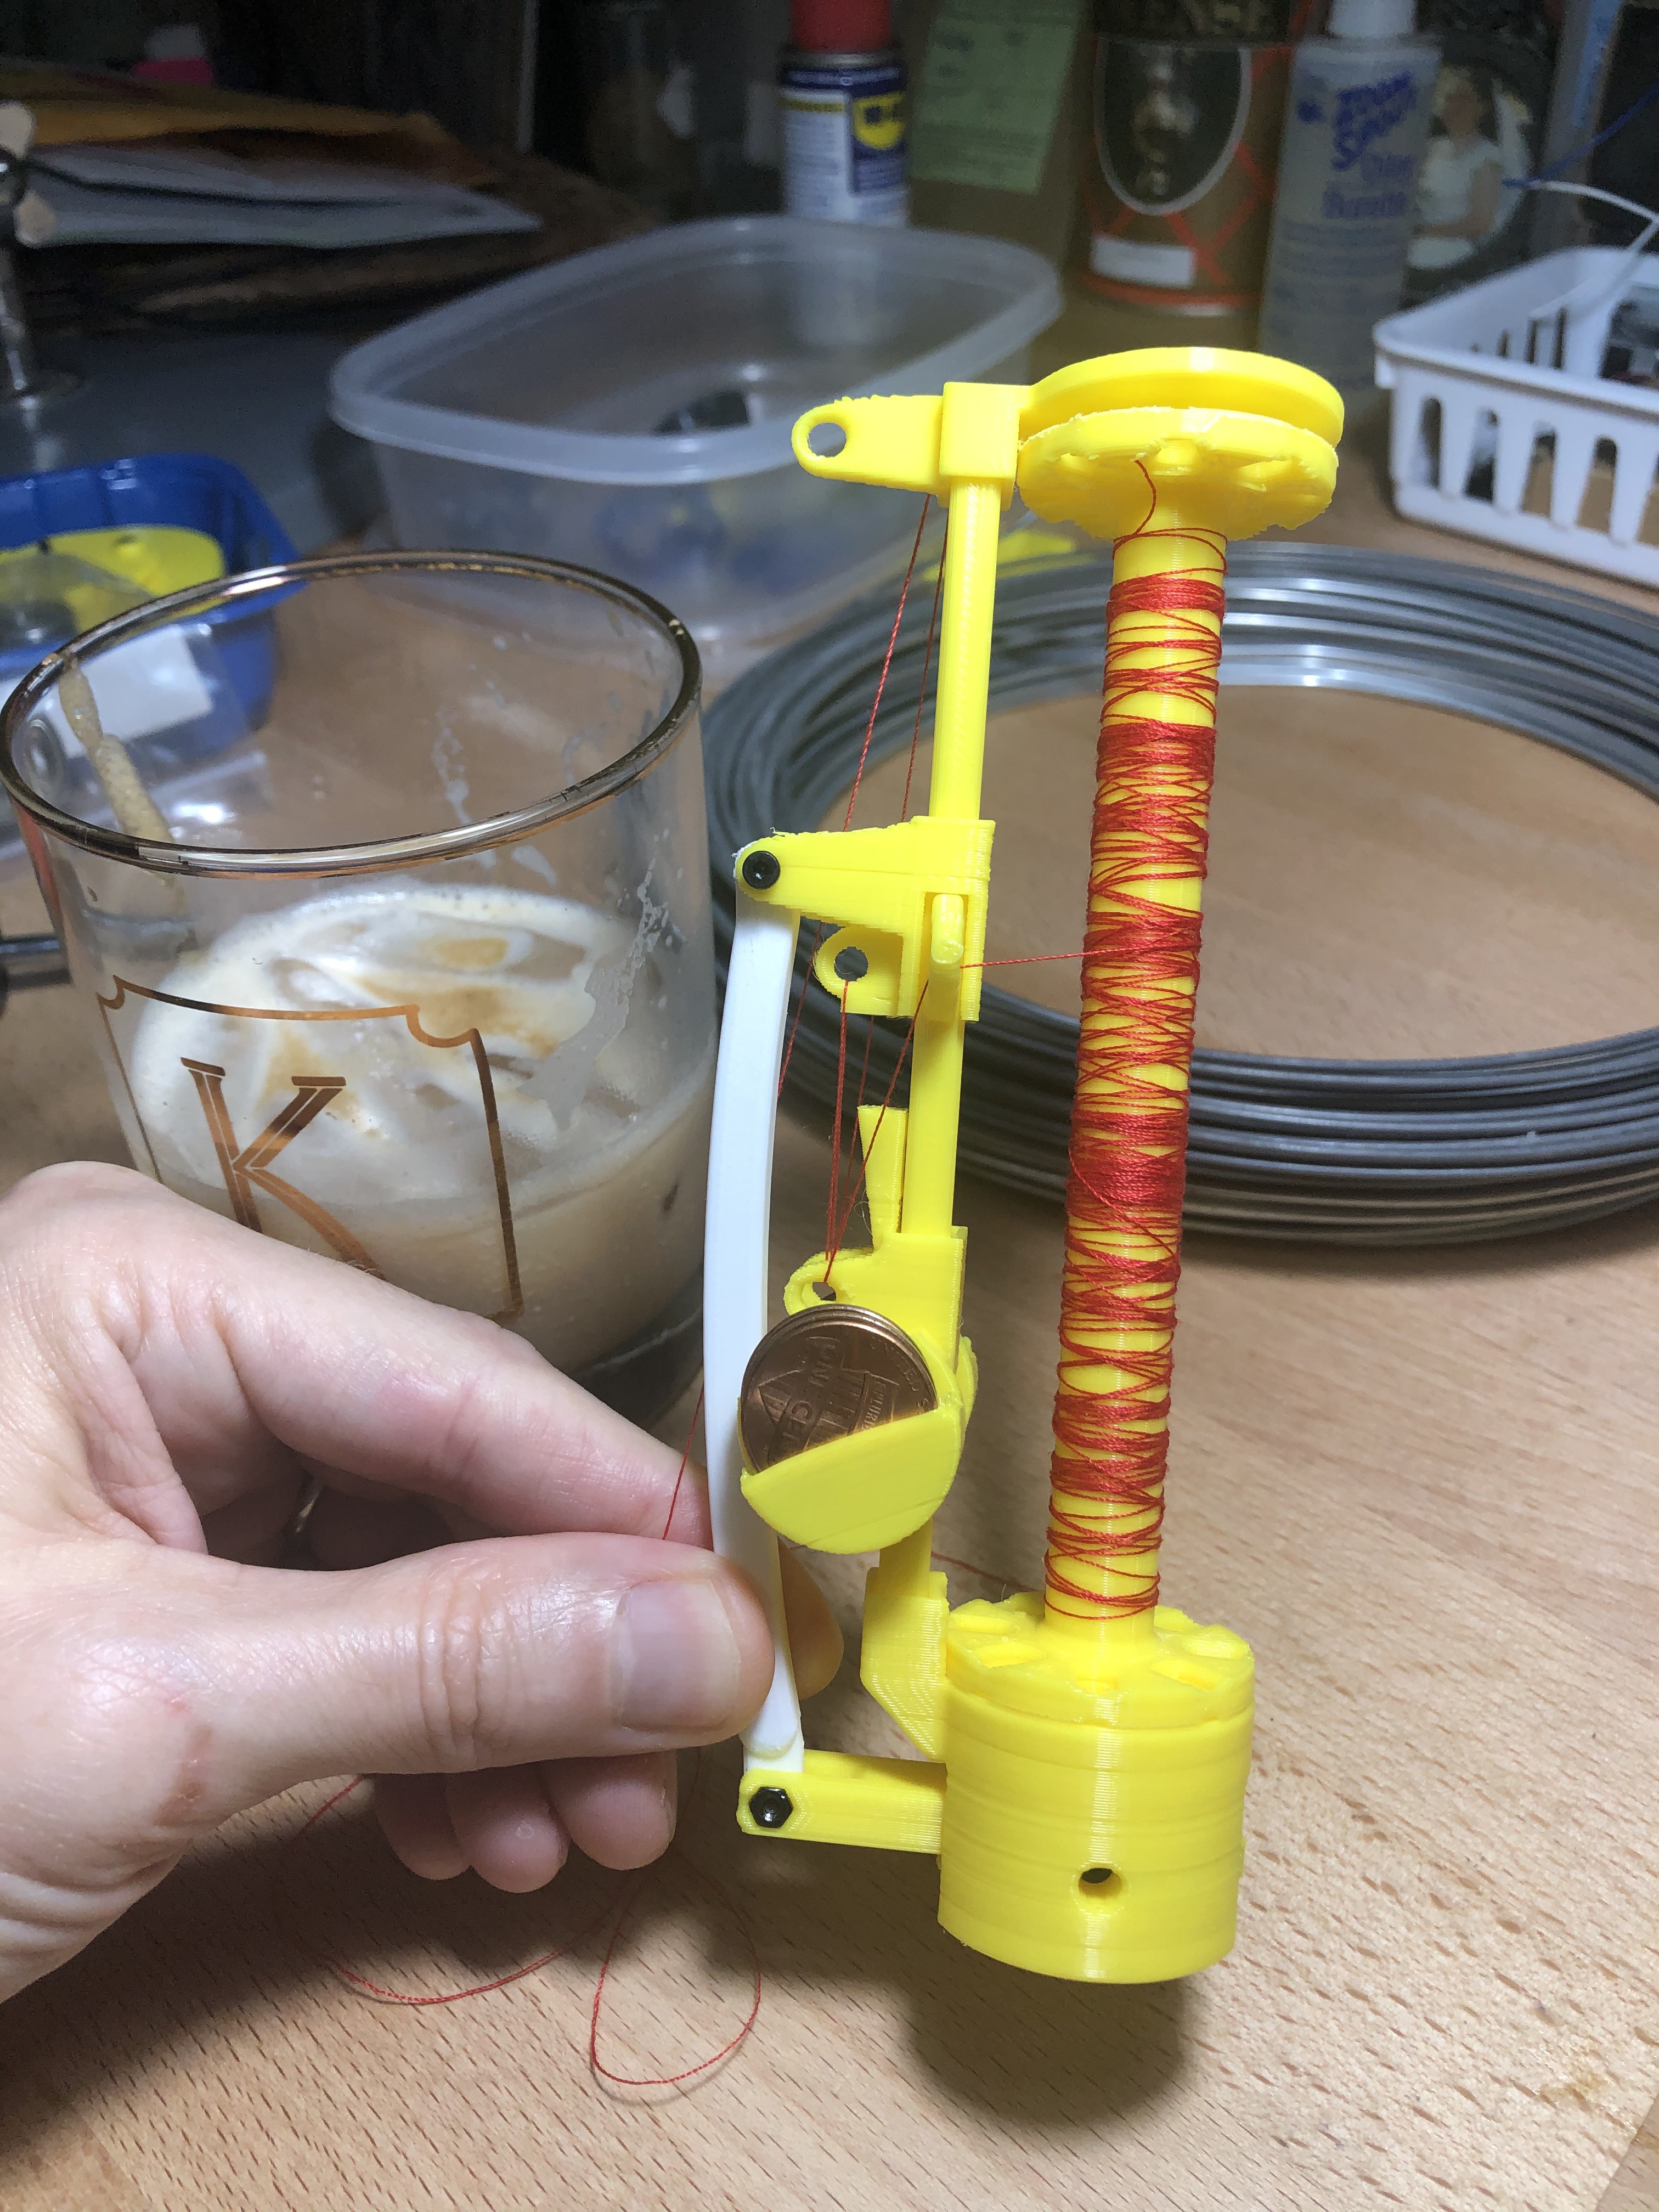
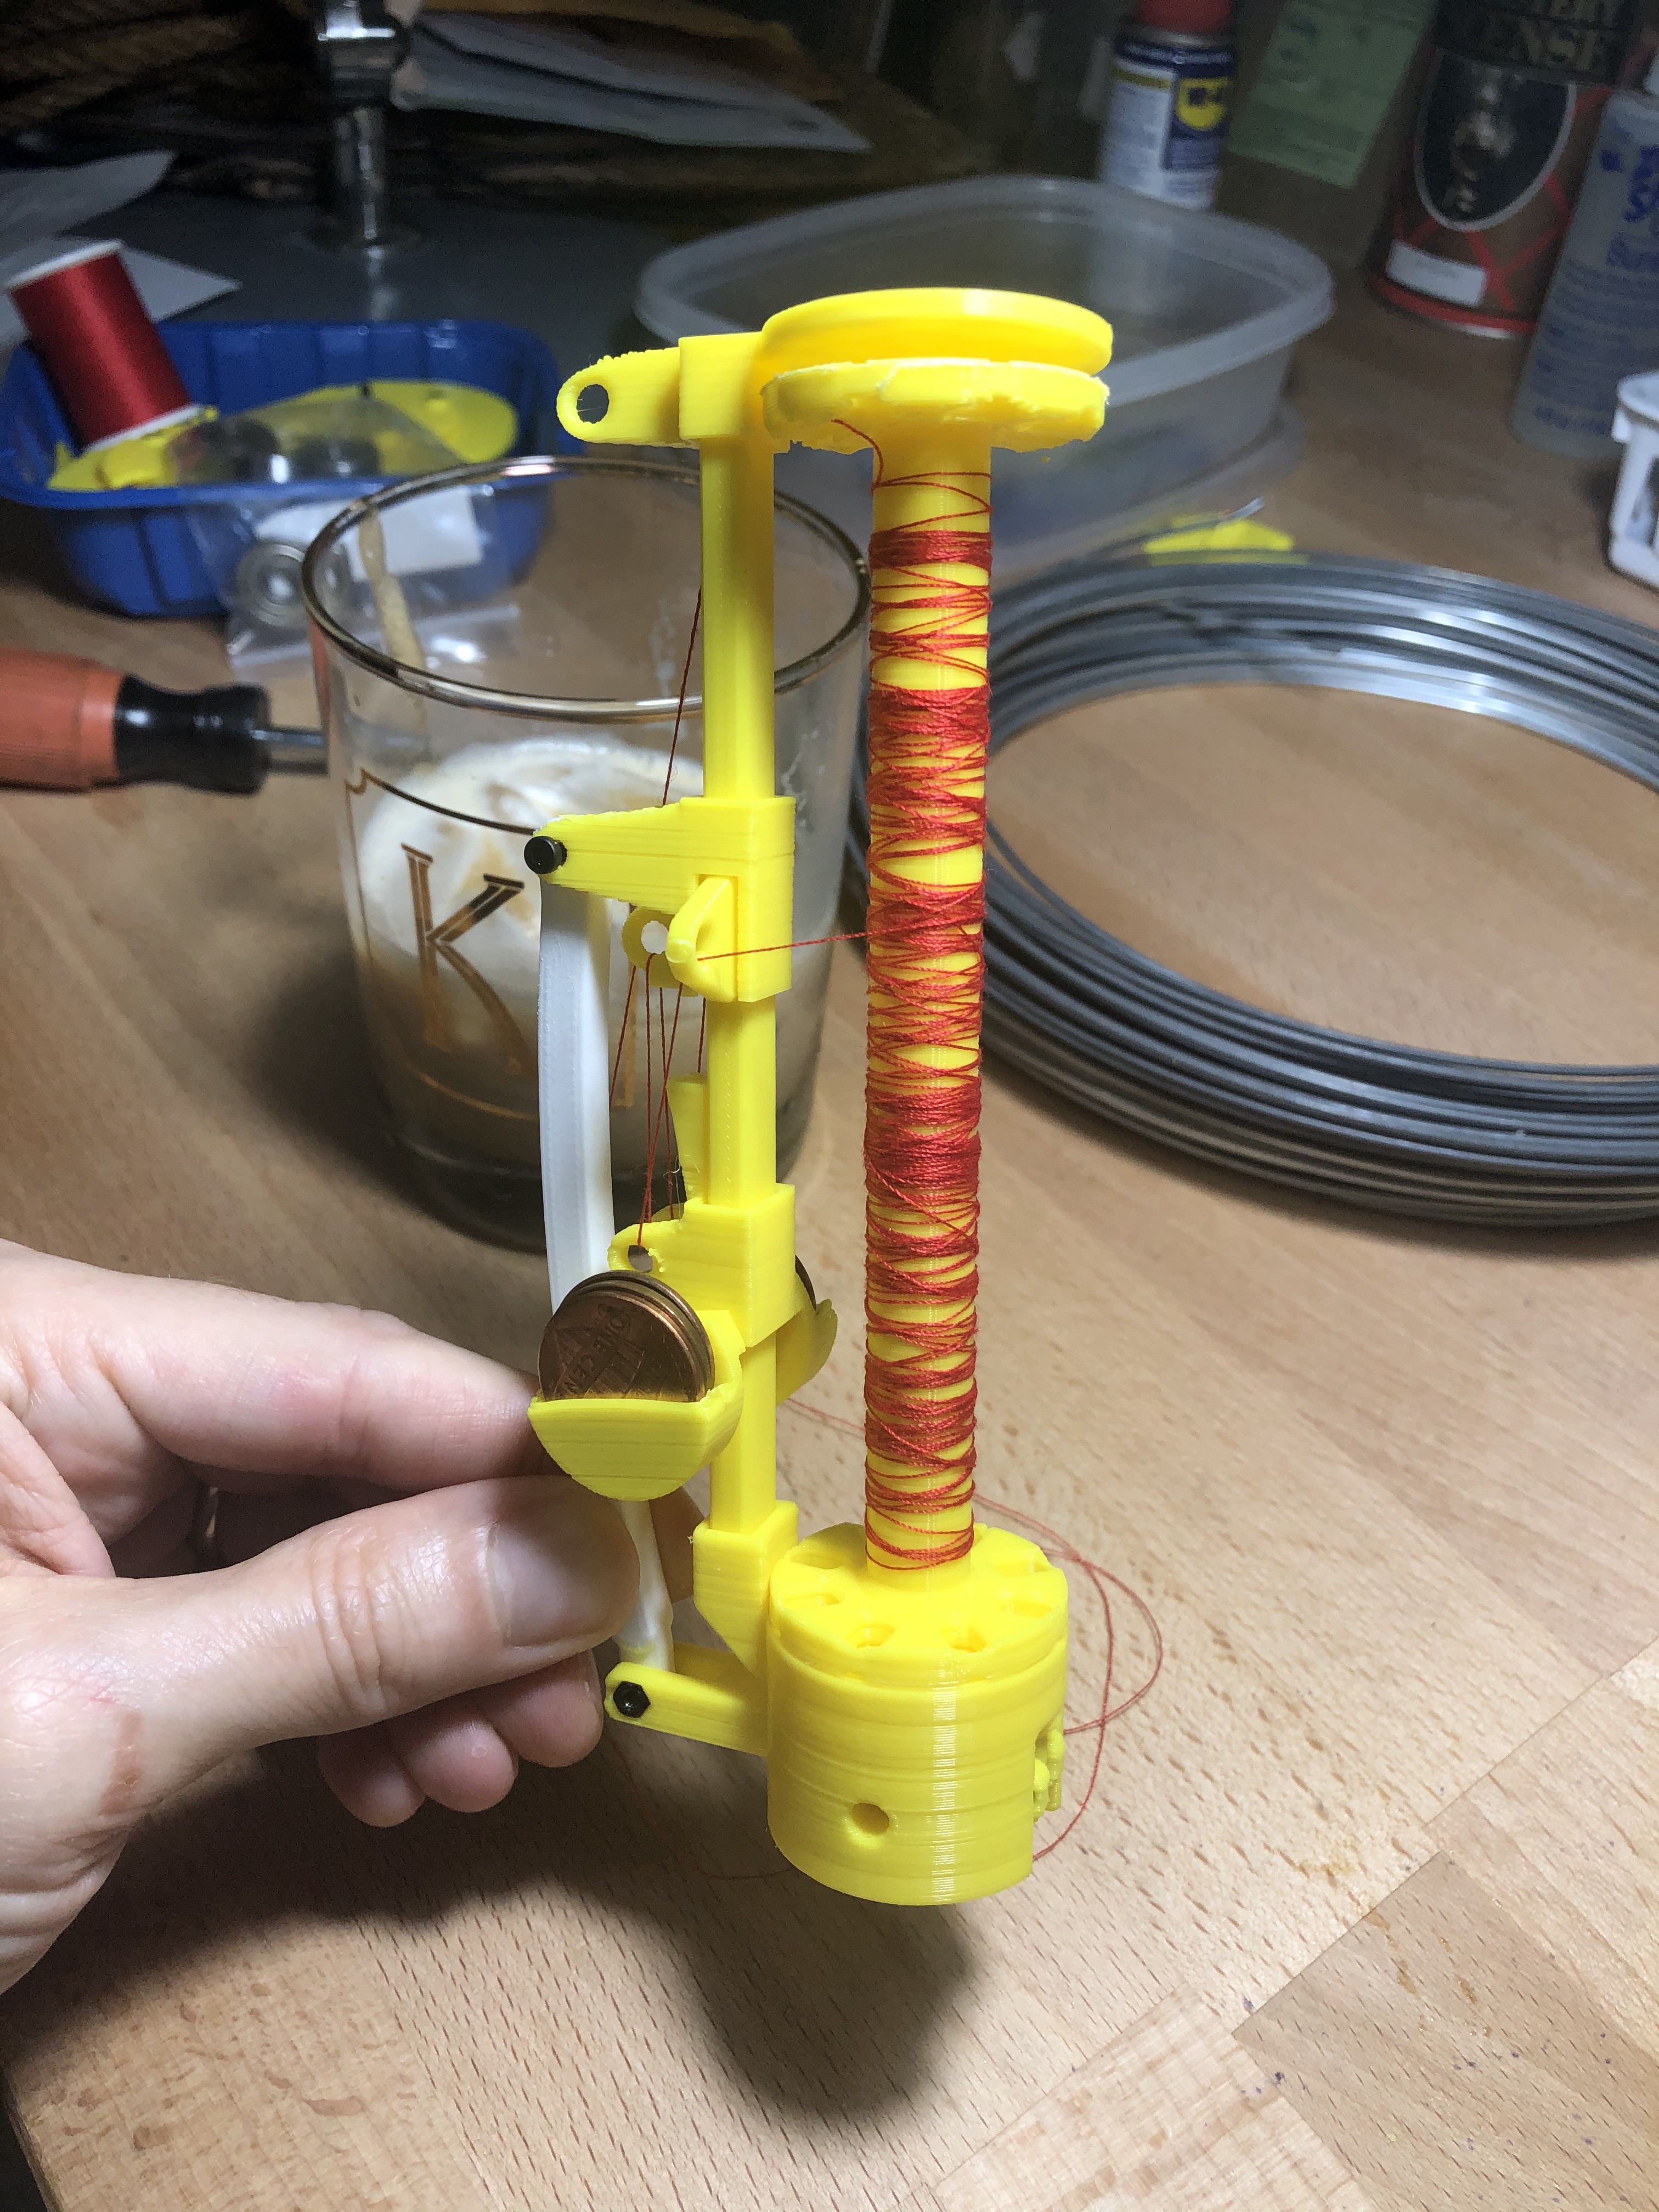
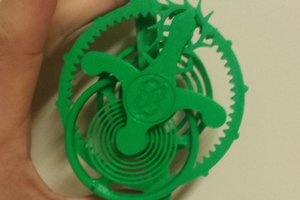
First, start by visualizing and understanding how the bobbins pass from one horn gear to another.  I made a fidget spinner version to help me understand the basic functionality.  Then, the bobbin carriers are actually more complex, since they have to keep a constant yarn tension, but release yarns when the tension gets too high.  I studied images of commercial bobbin carriers and came up with a single-spring design (in contrast to a two-spring design in commercial units) by using gravity to maintain the primary yarn tension and then the spring for the bobbin release.

Watch the GIF above to see the fidget-spinner version in action showing how the horn gears pass the individual sections back and forth.

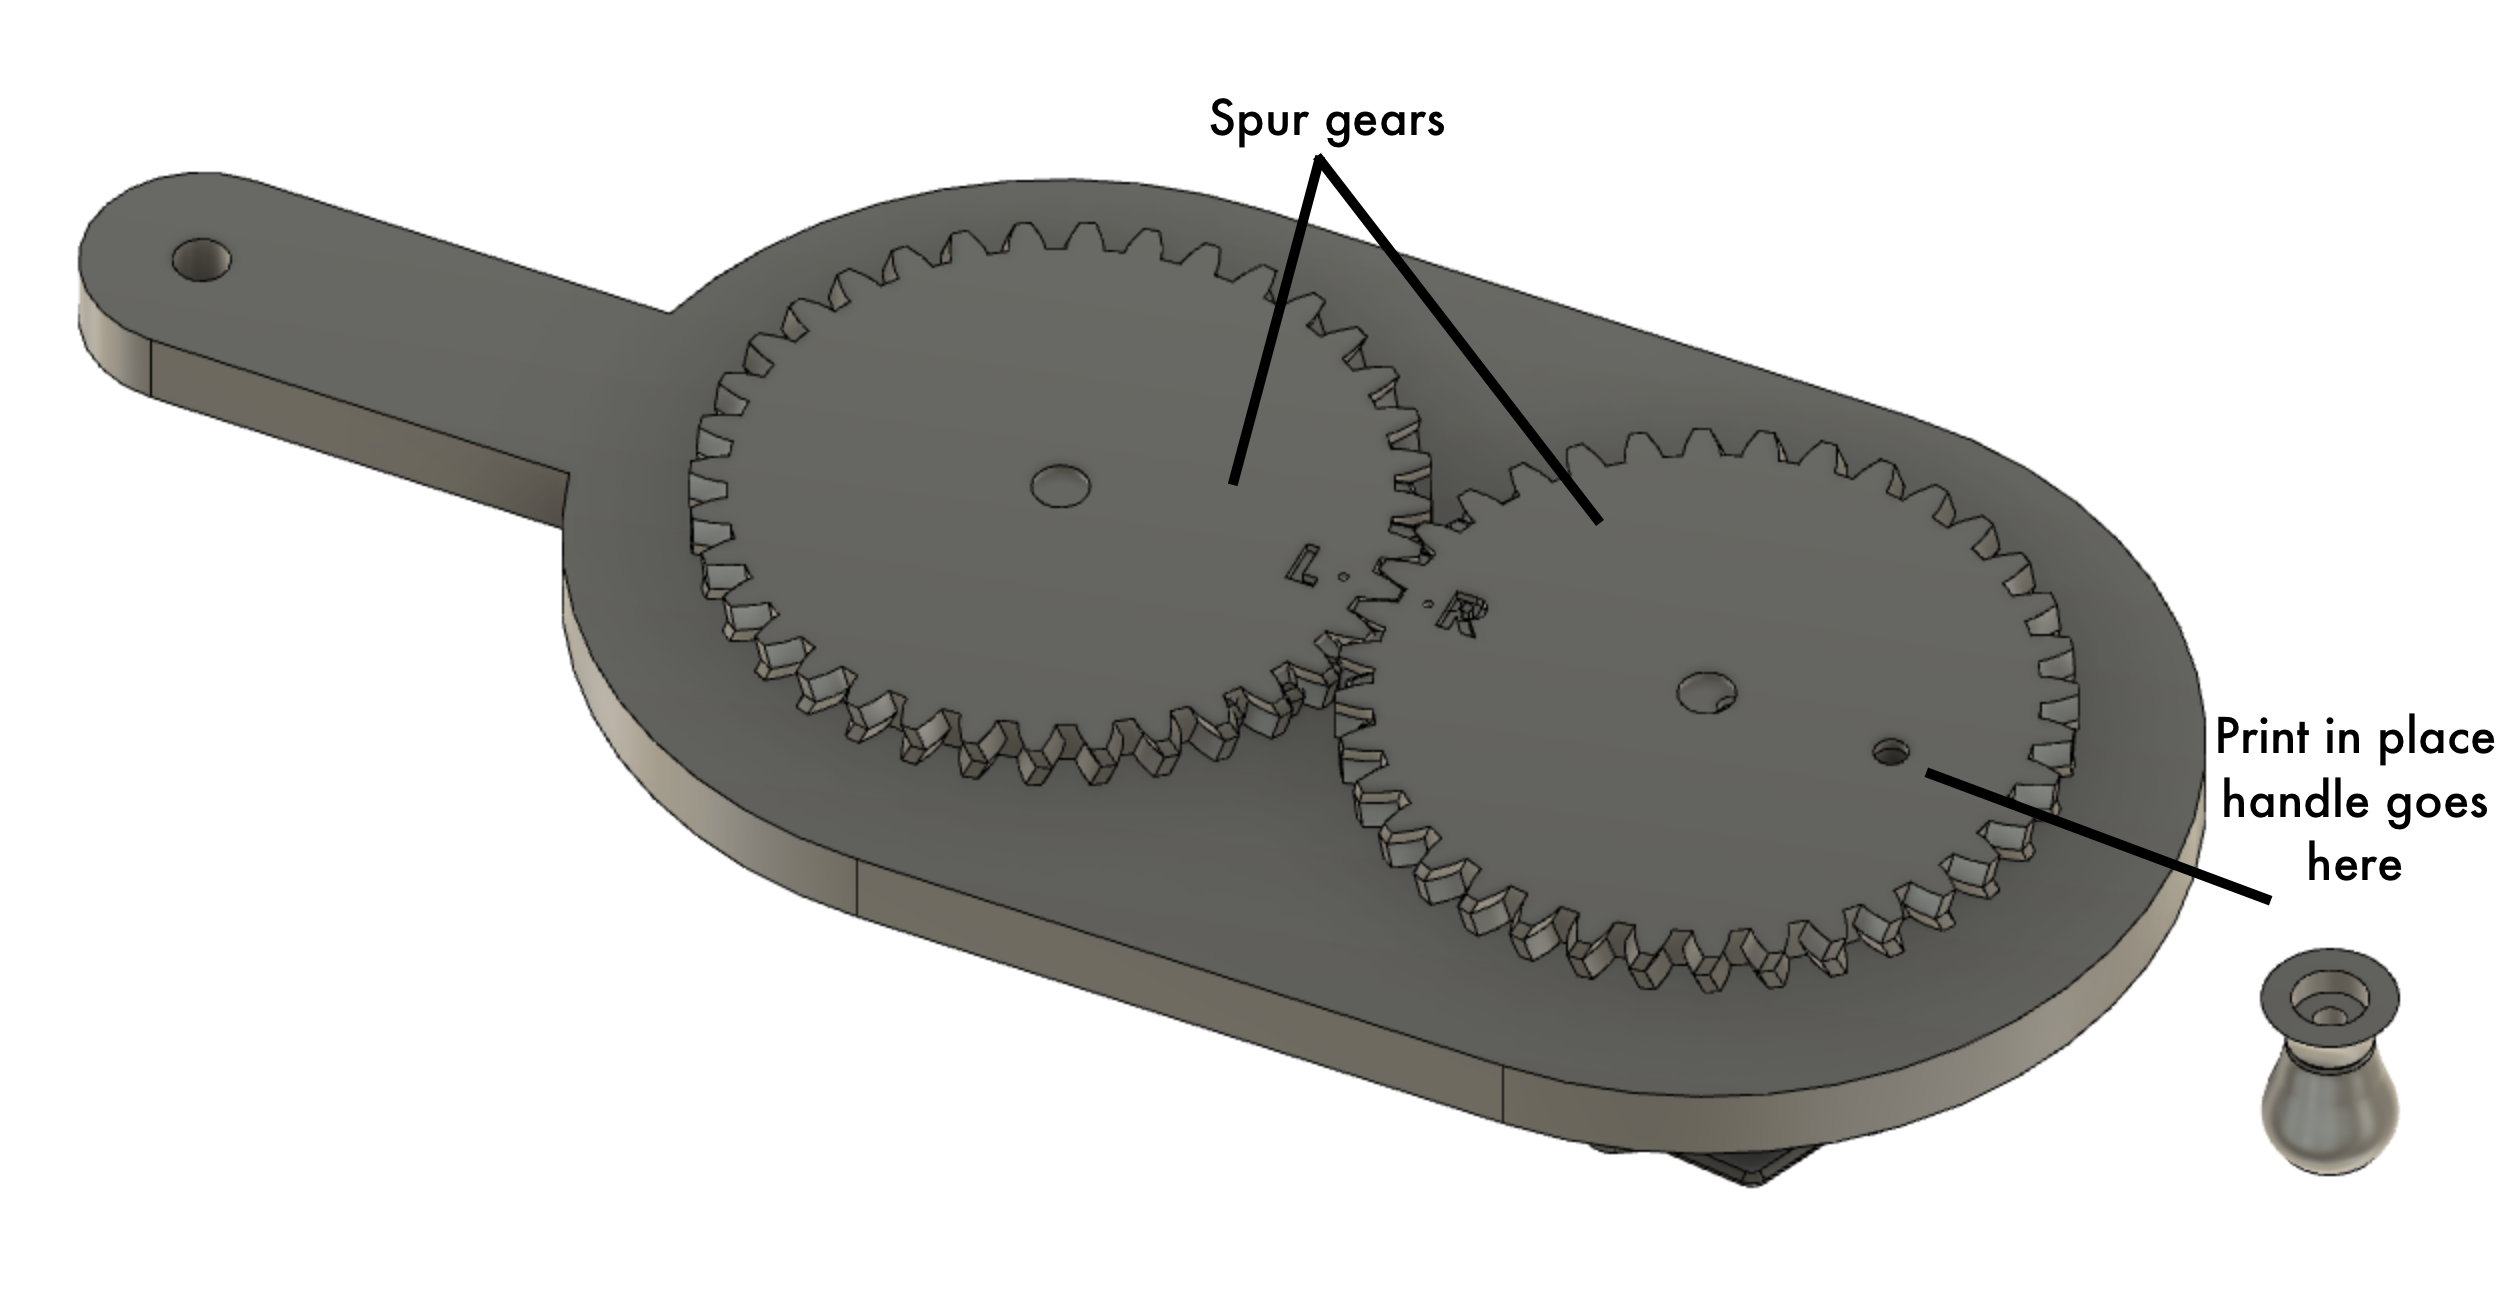
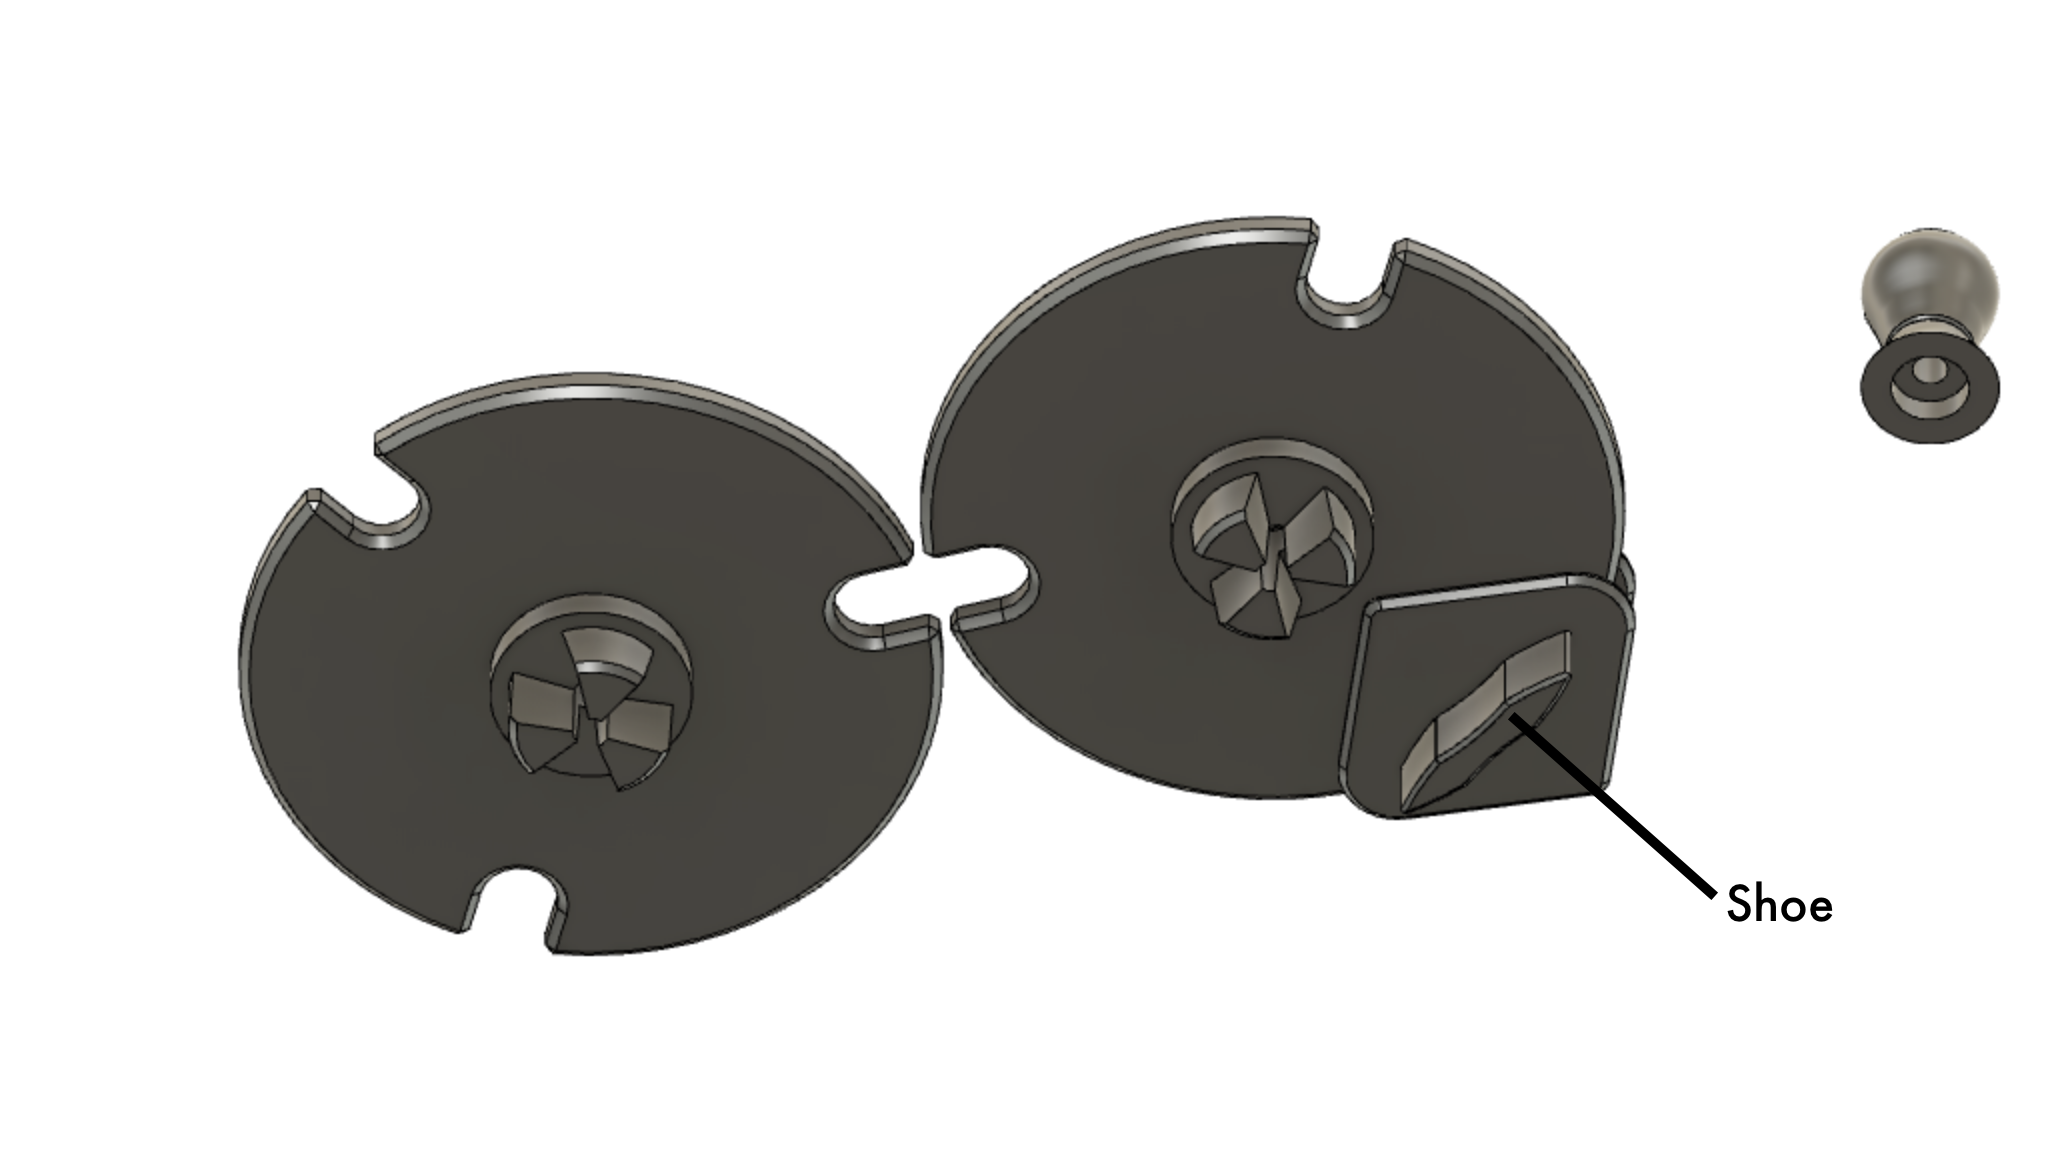
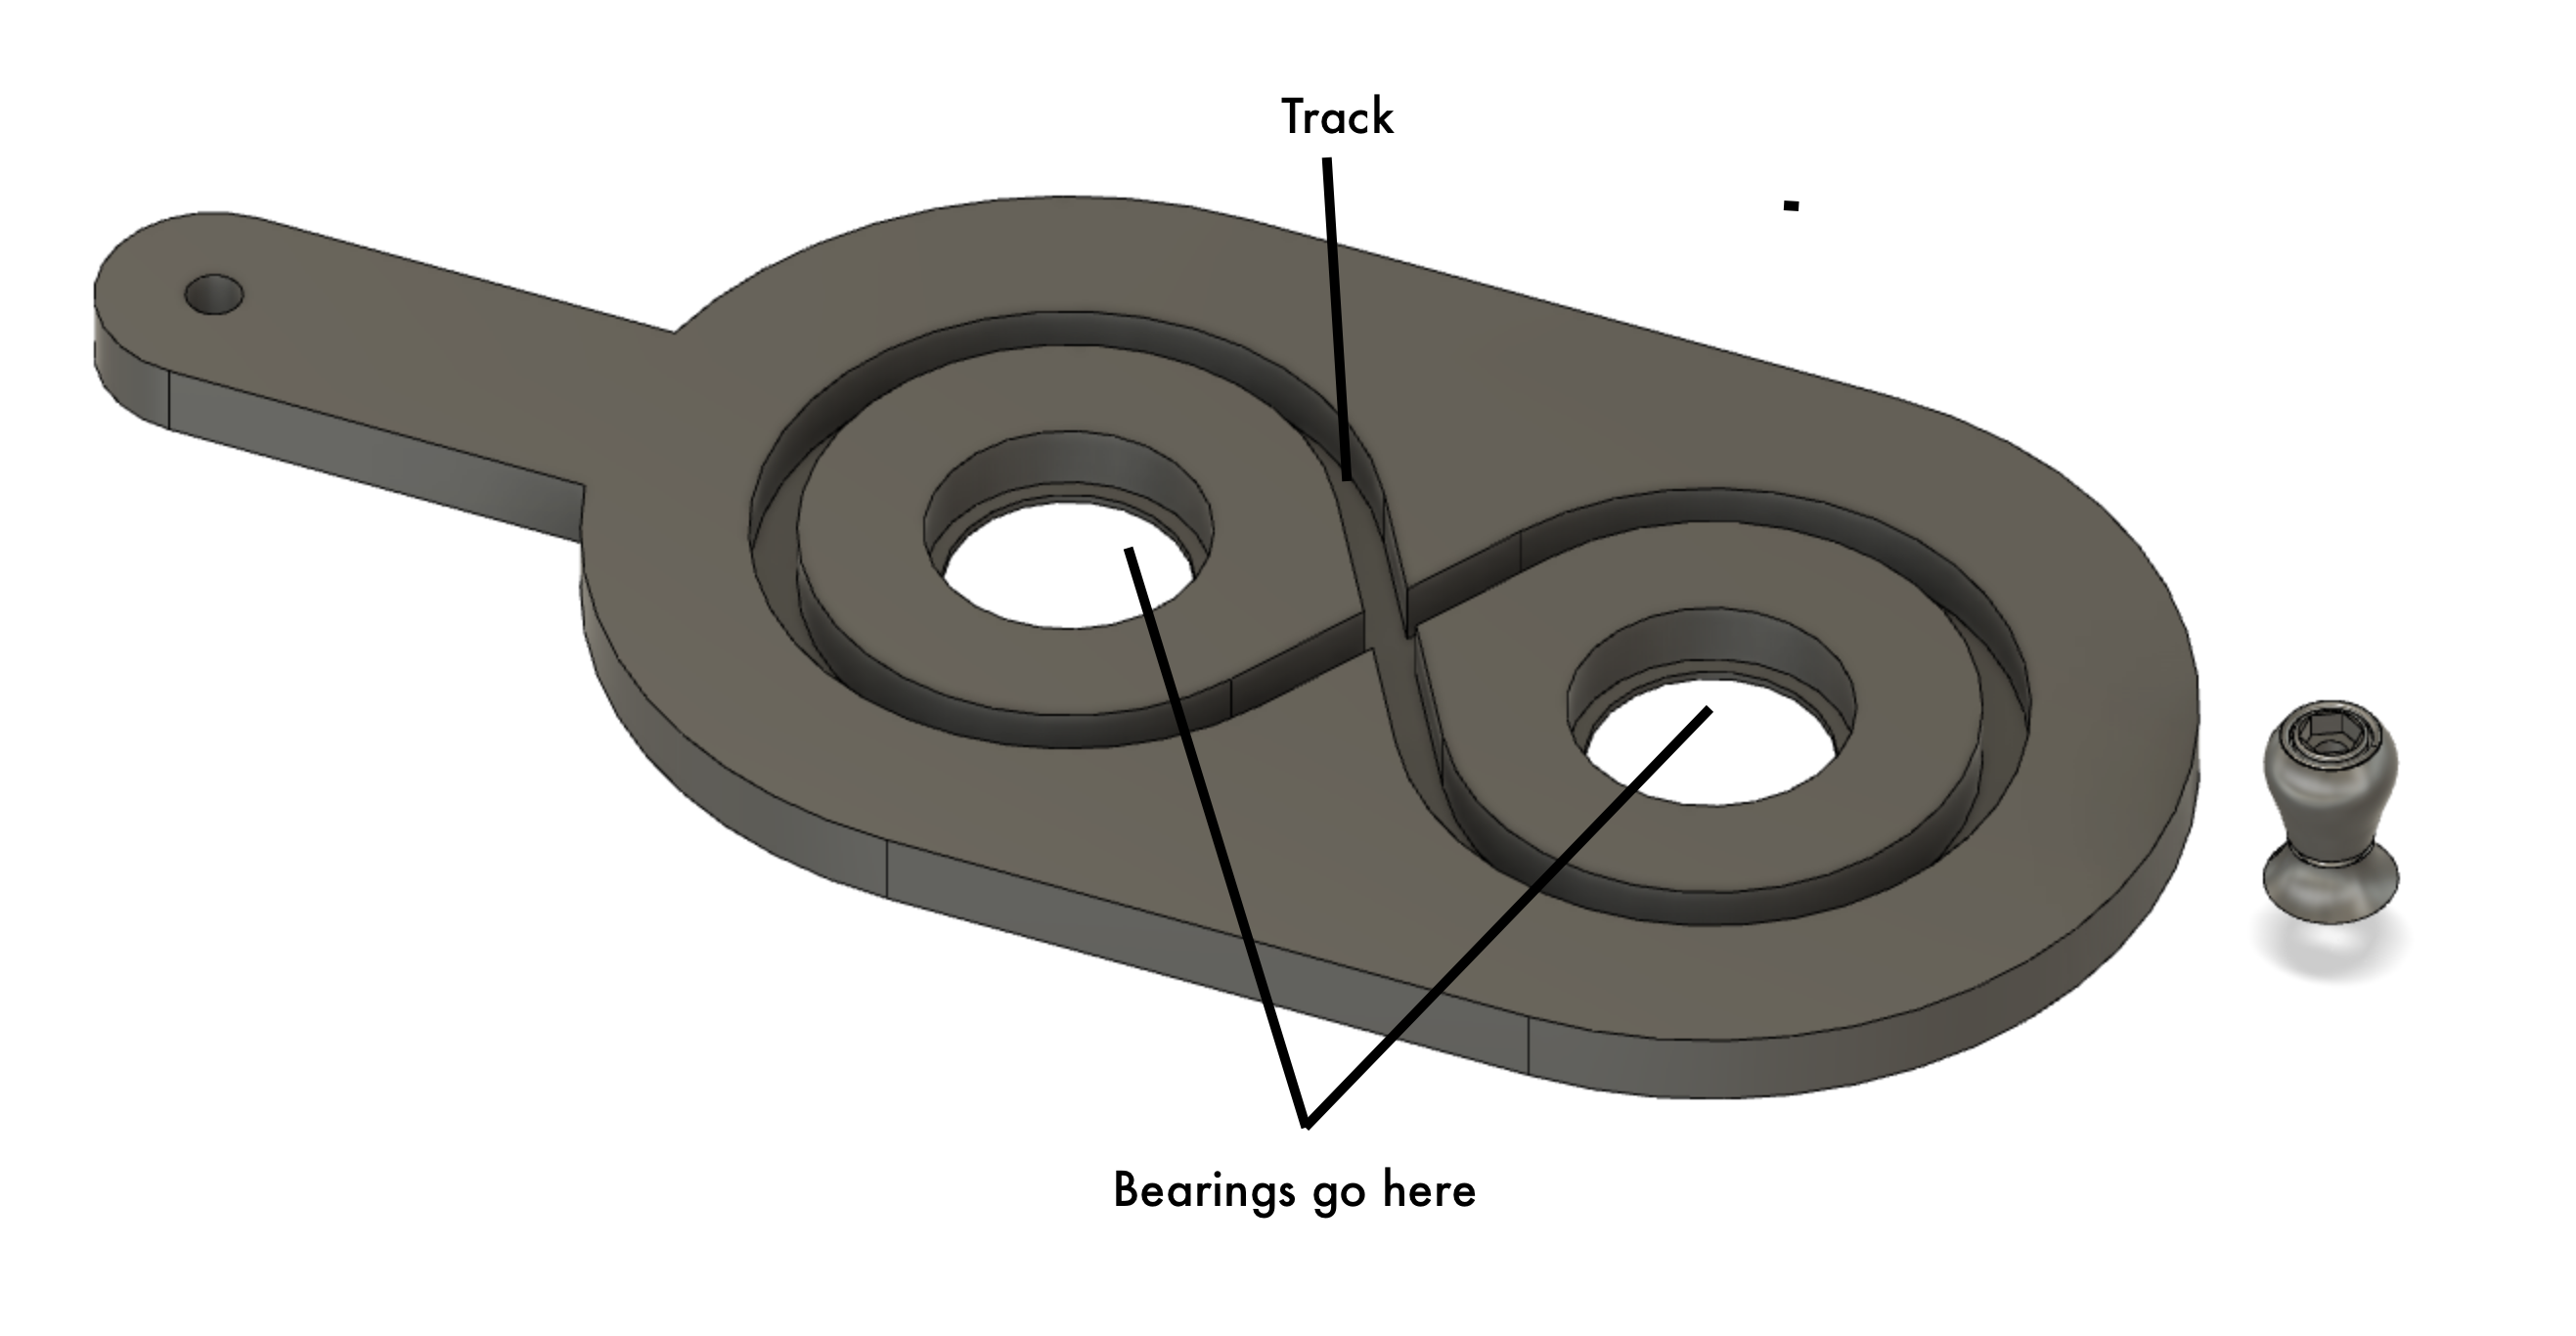
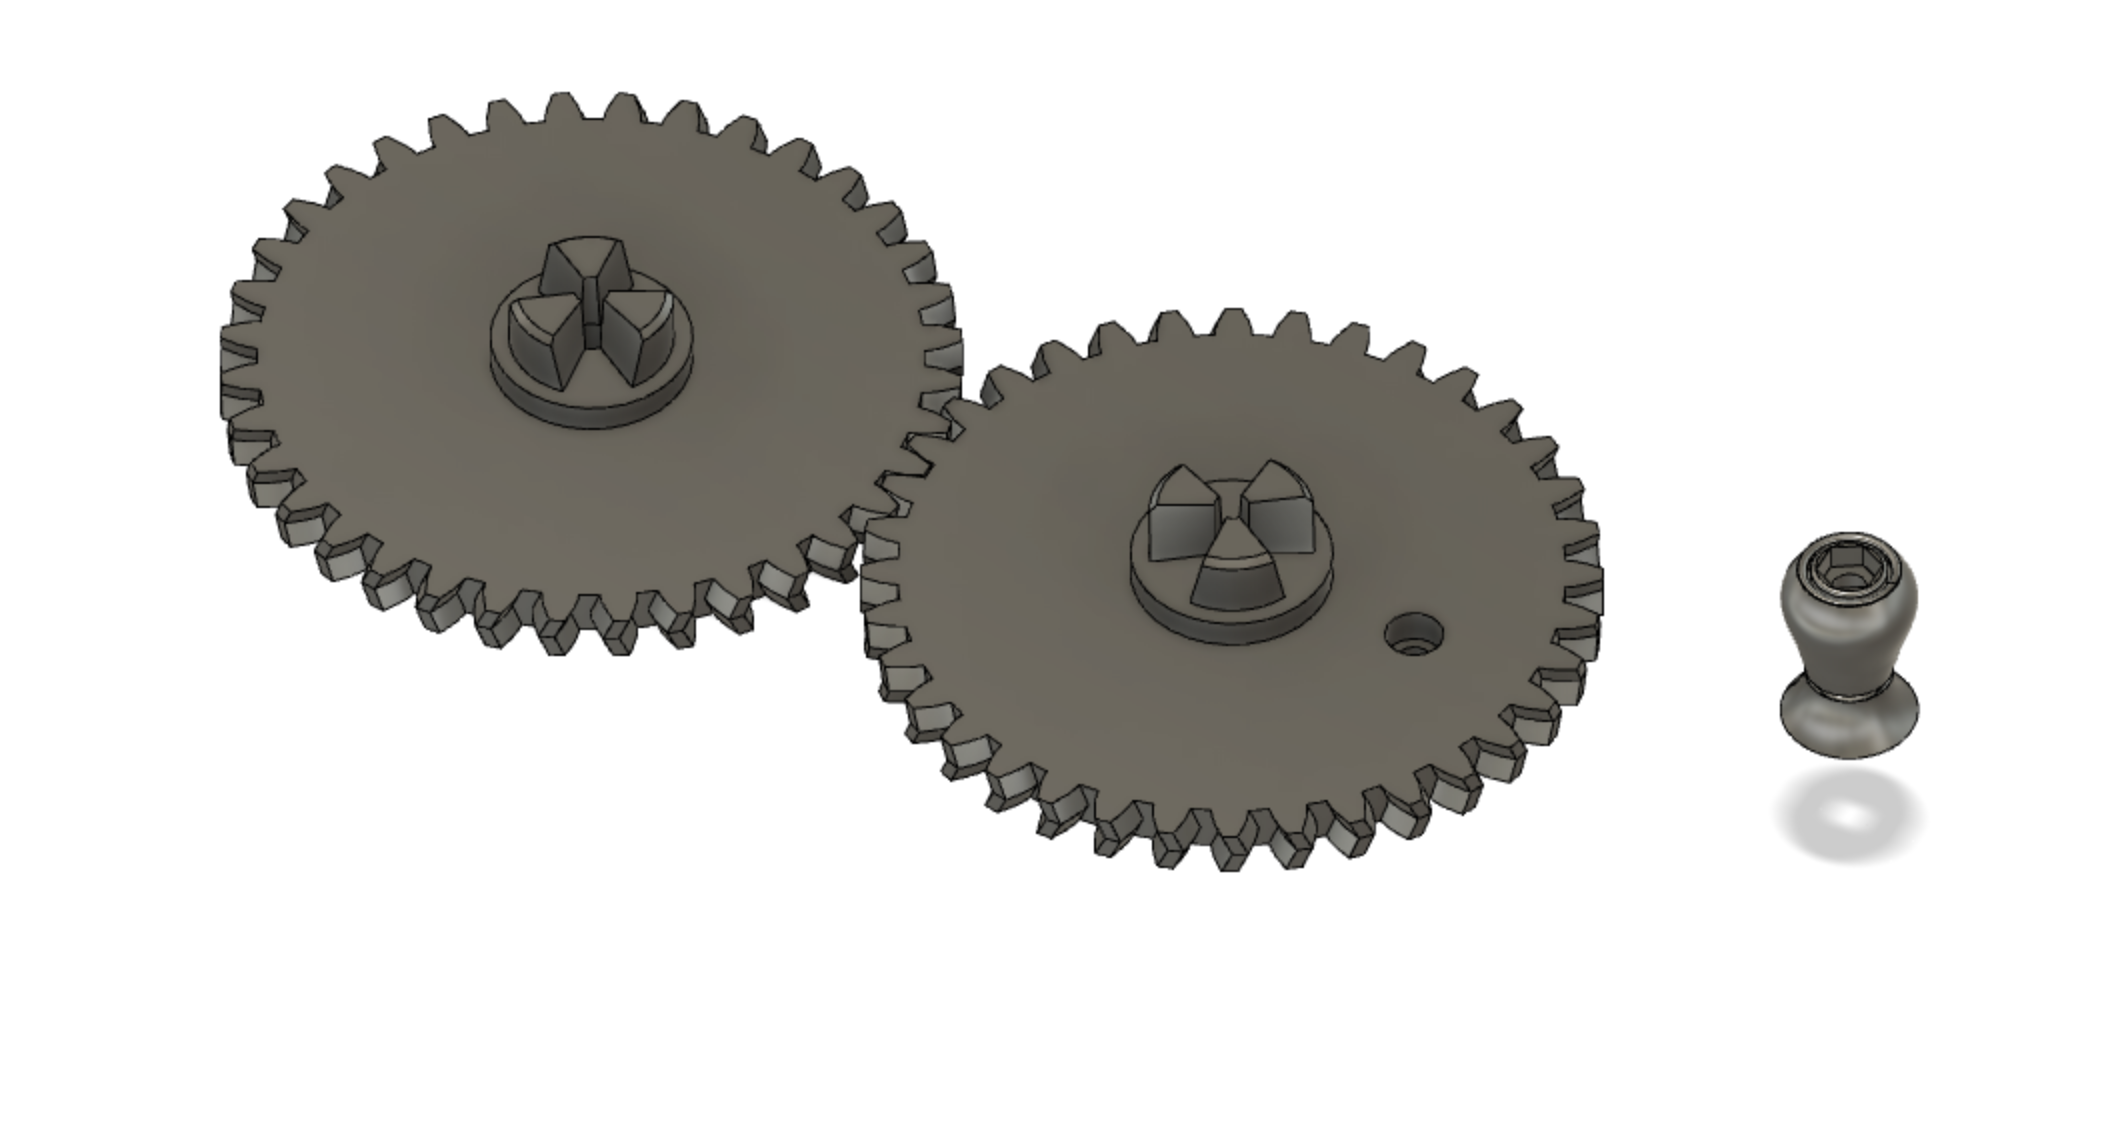
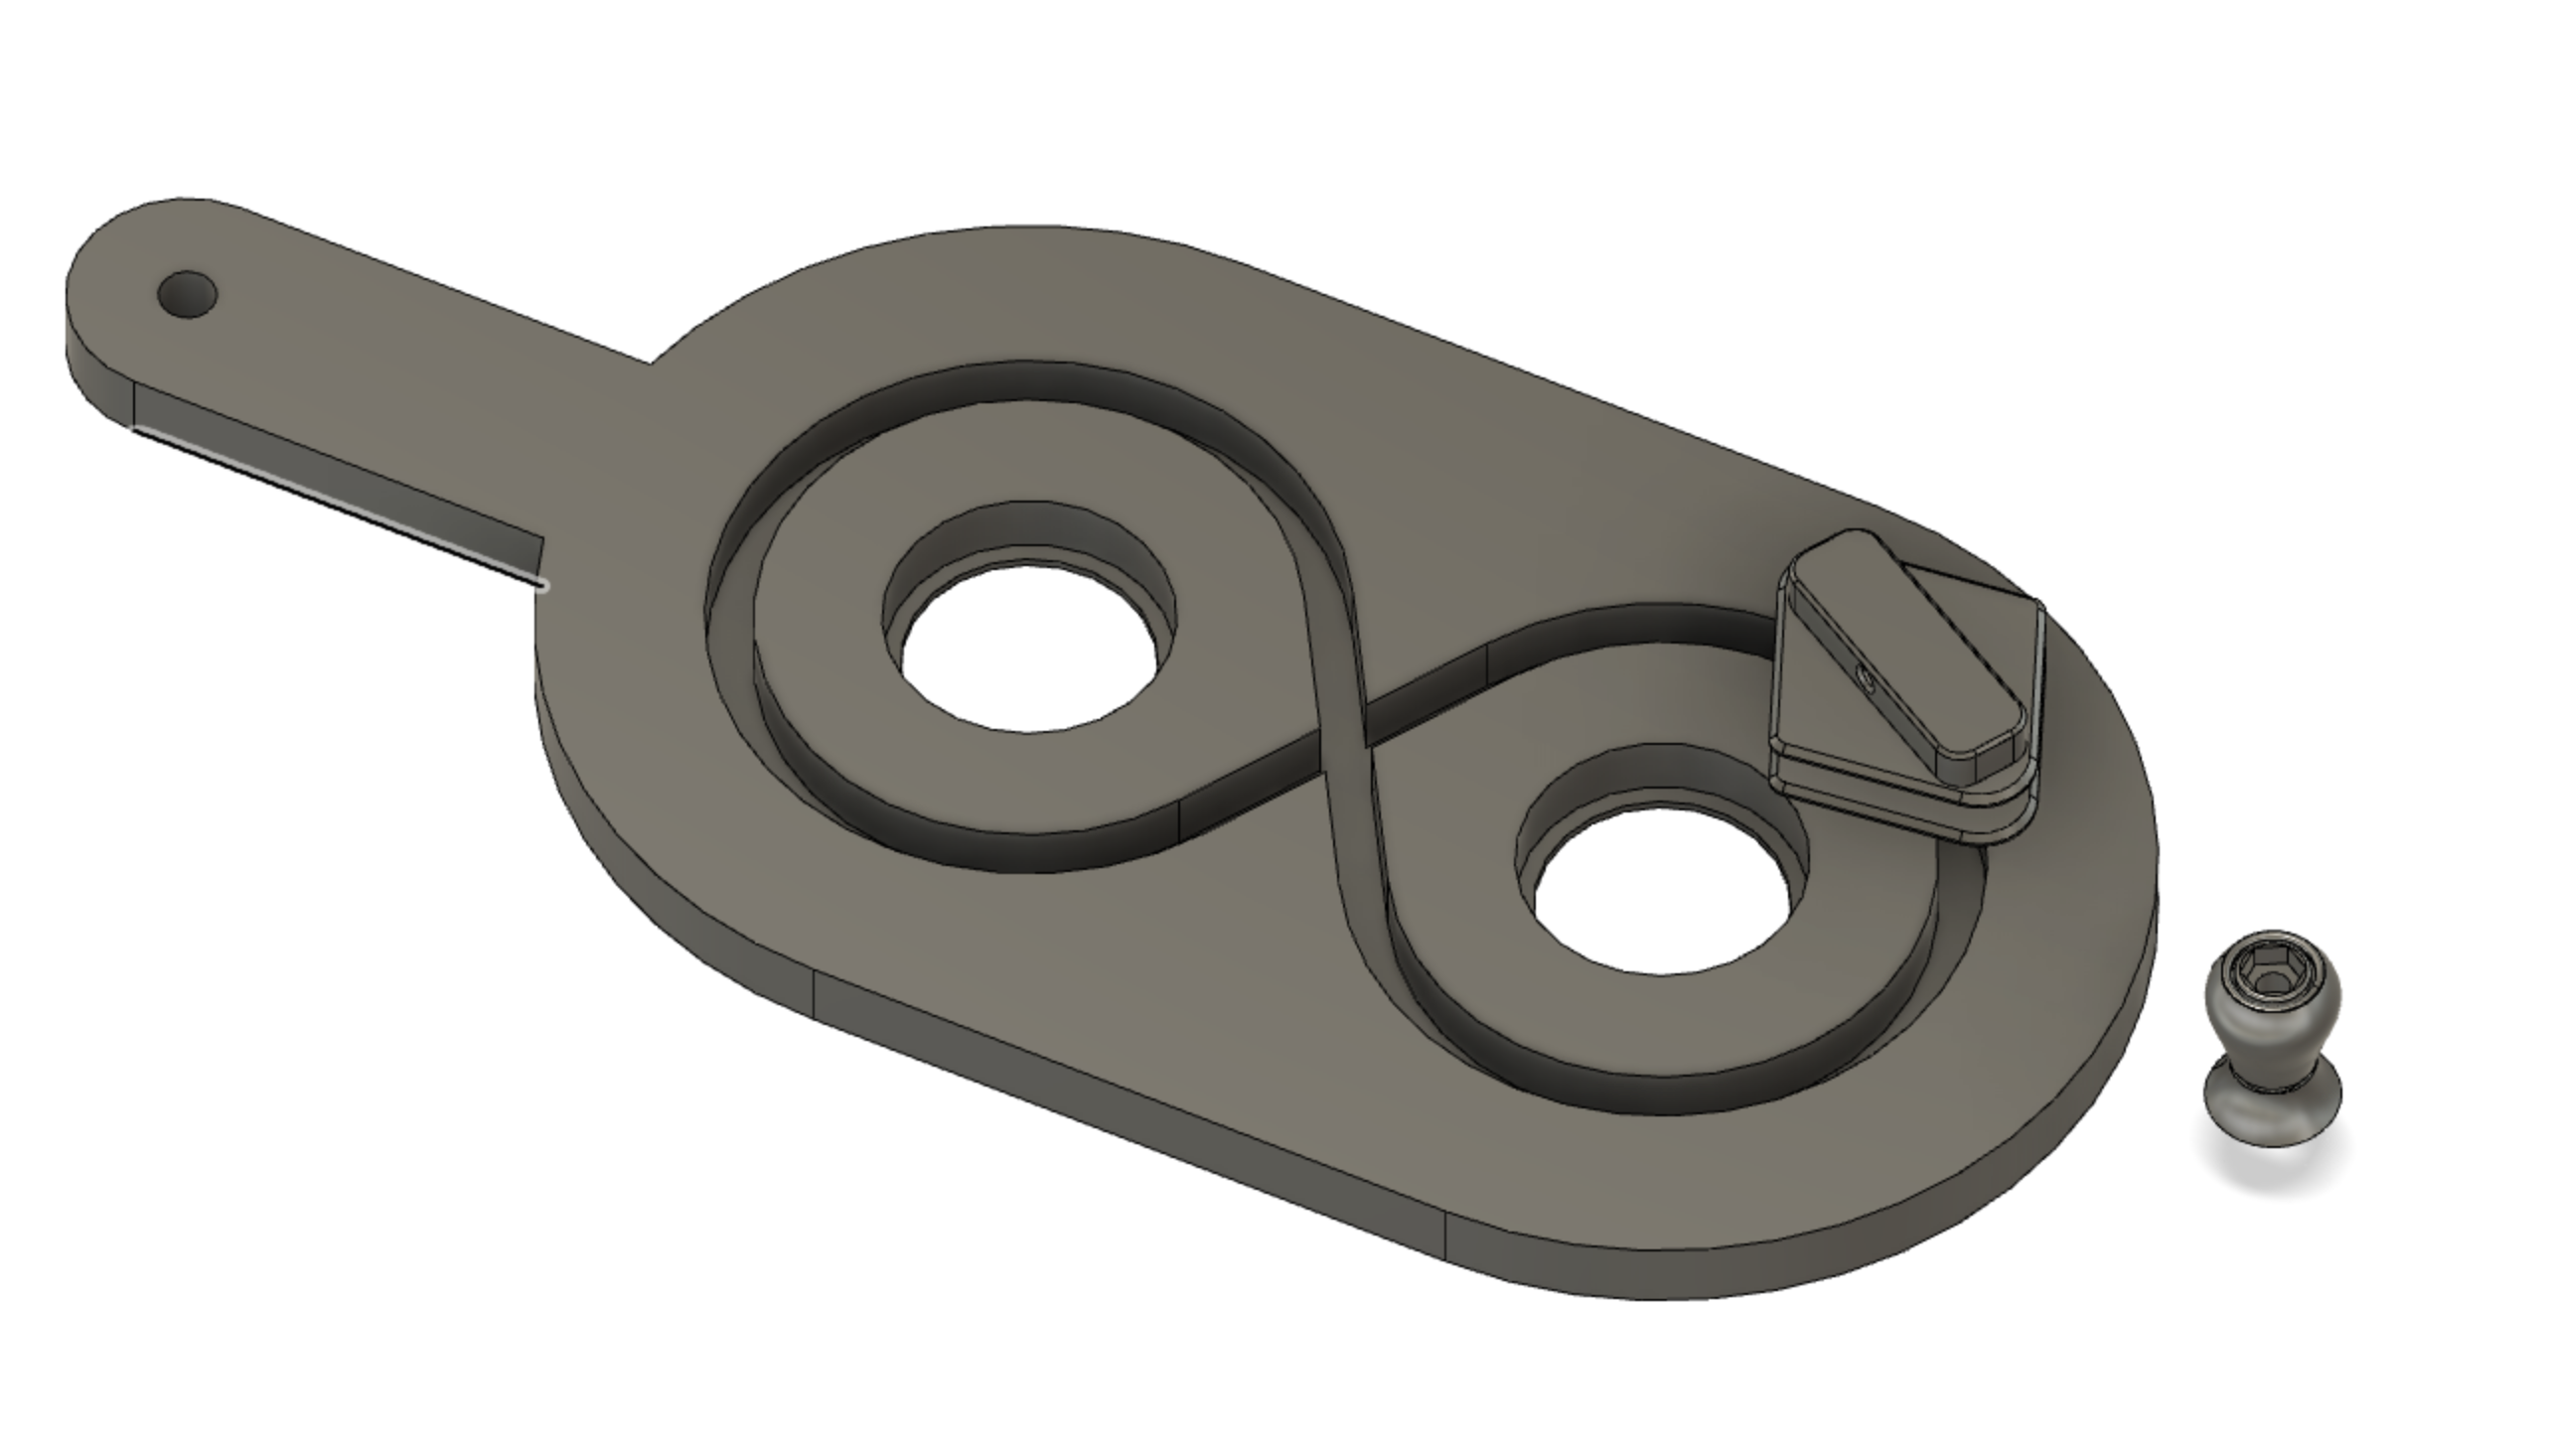
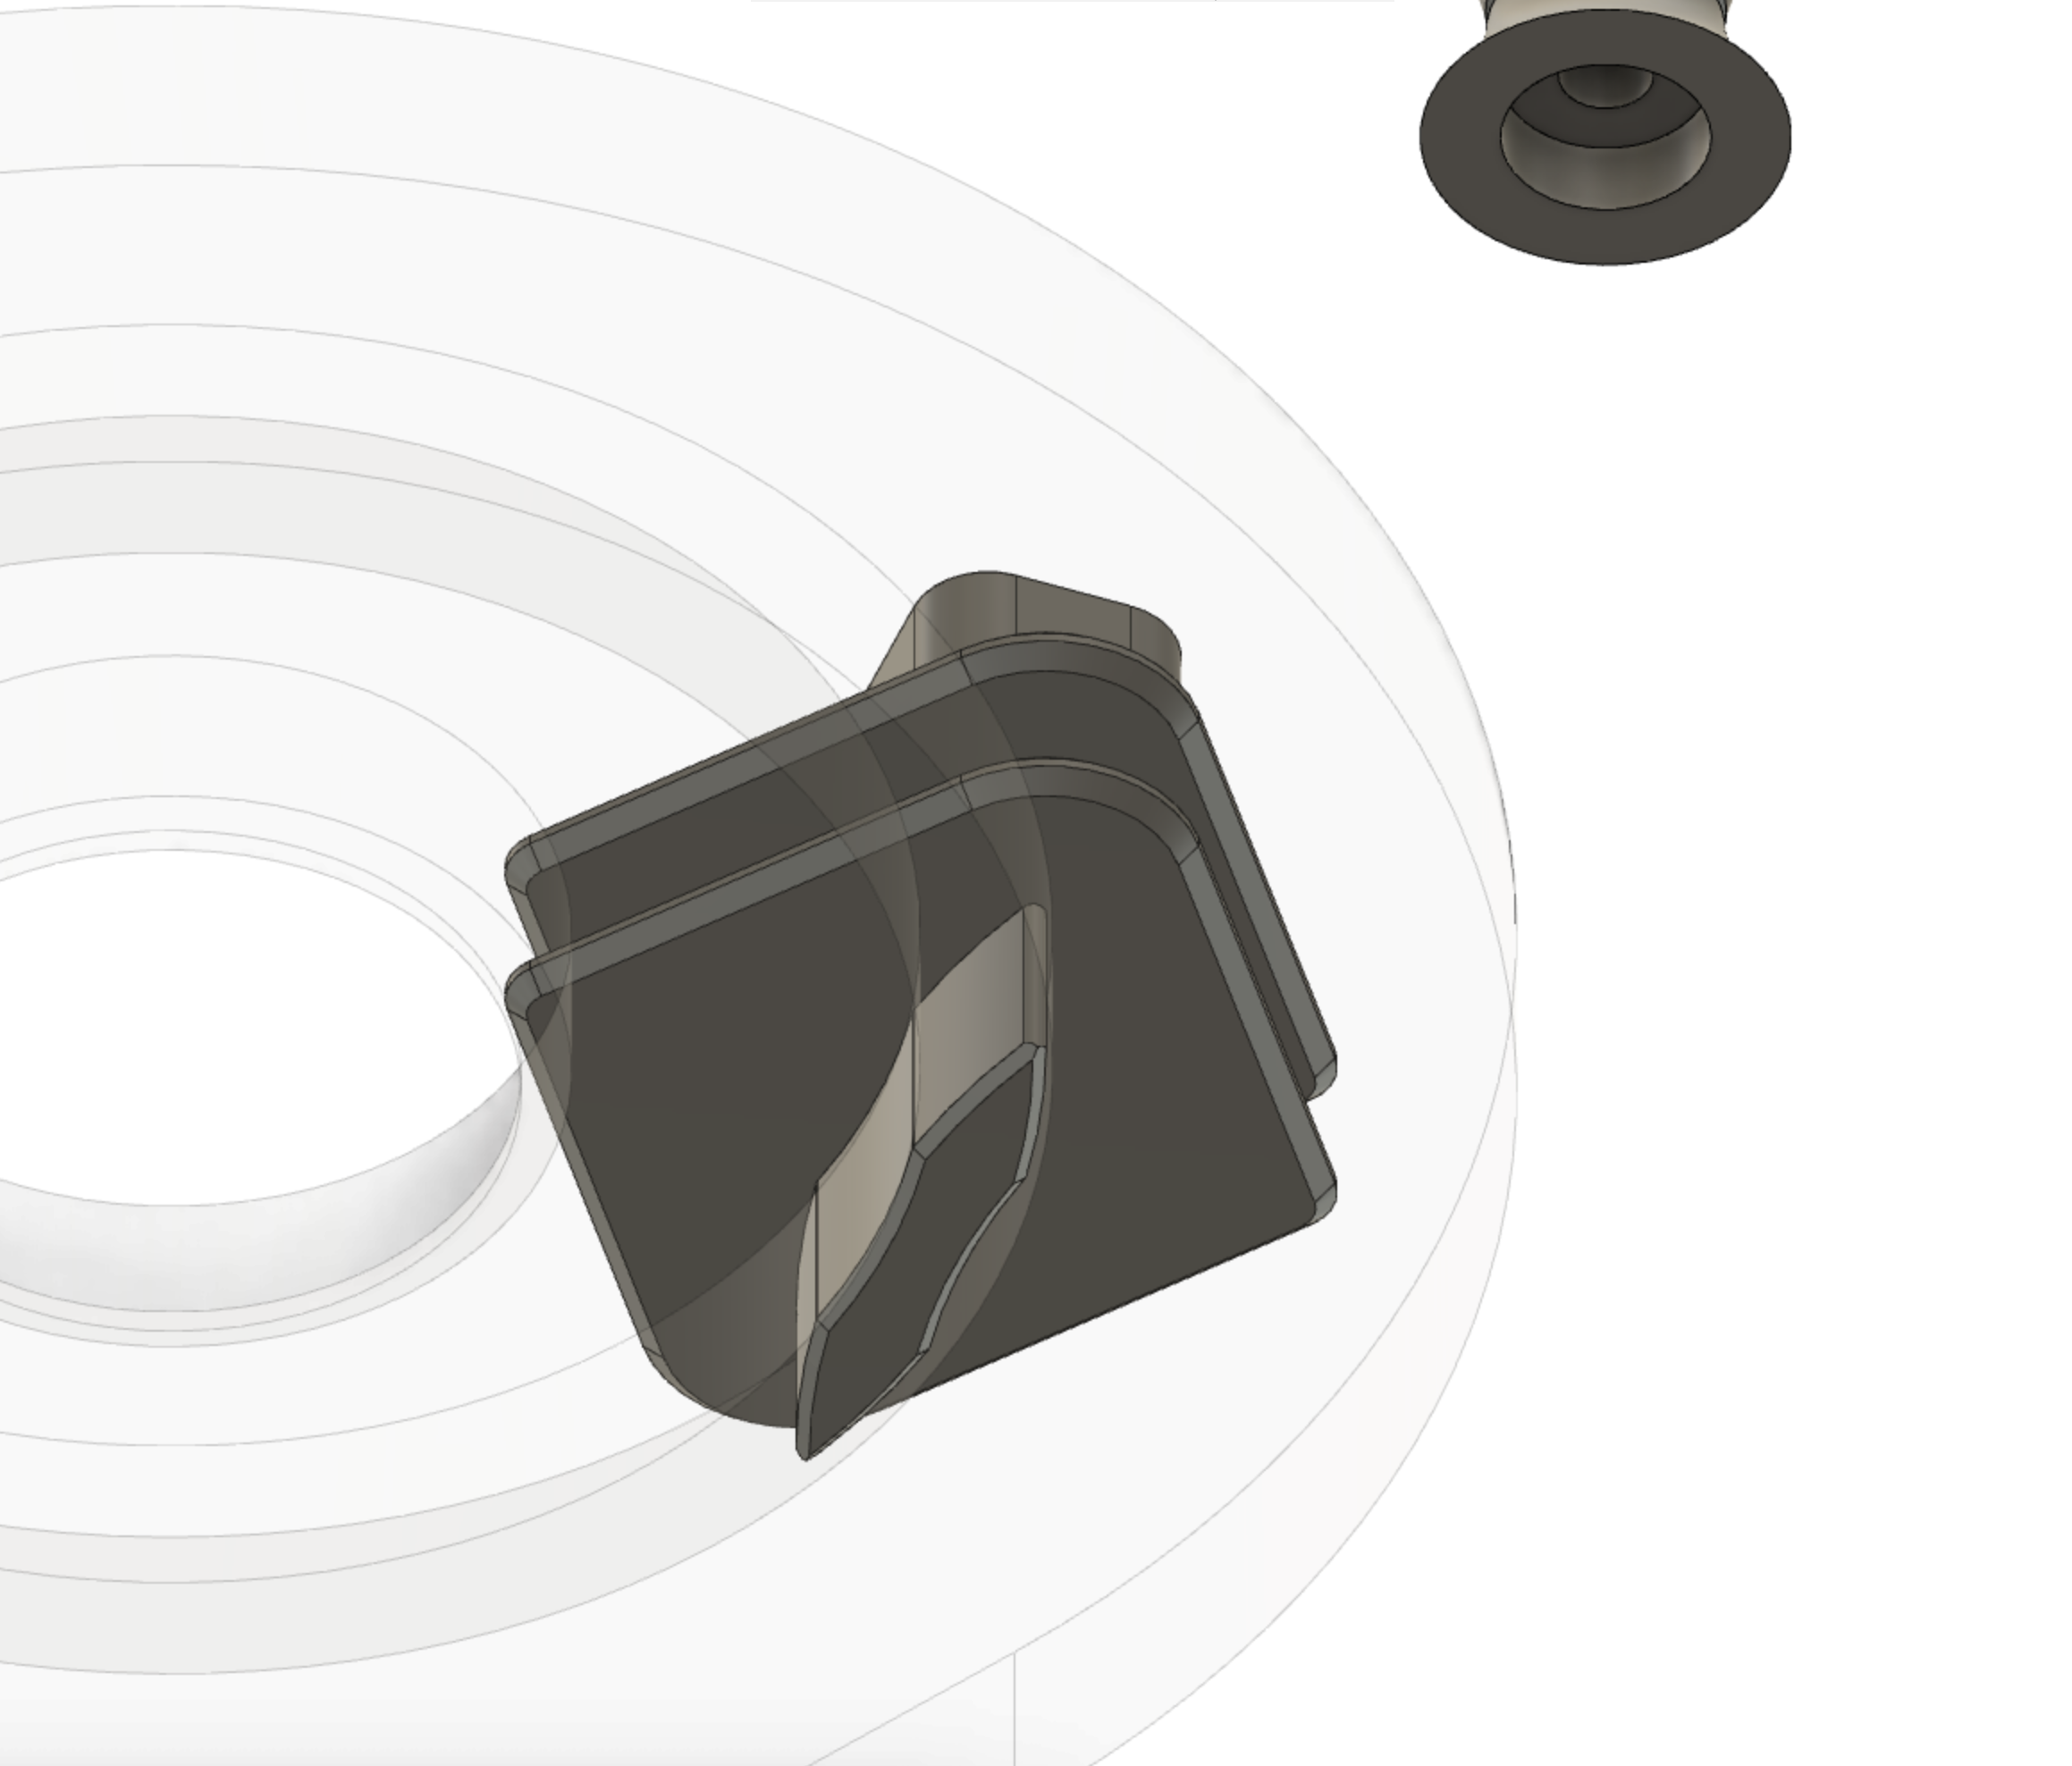
The spur gears are interconnected to each other and these spur gears are usually driven by a motor. The spur gears attach directly to a horn gear via a shaft passing through a bearing in the frame.  The rotation of the spur gears drives the rotation of the horn gears.  The horn gears grab the bobbin carrier and push it along the track and pass it to the next horn gear. The foot slides in the track and ensures that the bobbin carrier follows the correct path, carefully traversing the intersections of two tracks. The bobbin carrier contains a peg that is grabbed by the horn gear slot. The bobbin carrier rides on top of the horn gear. Also, the bobbin carrier has attachment points for a bobbin. 

With the spur gear arrangement driving each adjacent gear, note that the horn gears next to each other will always rotate in opposite directions. 

Here's a GIF of a braider with three bobbin carriers attached.  This guide shows all the parts to make one of these.

f3z - 29.72 MB - 10/10/2021 at 17:51

Download

f3z - 16.07 MB - 10/10/2021 at 17:51

Download

step - 11.36 MB - 10/10/2021 at 17:51

Download

f3d - 3.15 MB - 10/10/2021 at 17:51

Download

step - 2.41 MB - 10/10/2021 at 17:51

Download

View all 6 files

  • 1
    Braiding mechanism components

    The main components of the braiding machine are shown in the diagrams below.  

    Top view showing horn gears.

    Bottom view showing spur gears and location for attaching the print-in-place handle.

    Underside view of horn gears showing the horn gear shafts and the "shoe" that slides in the track.

    View of the track and bearing holders.

    Top view of just the spur gears showing the shafts.

    Top view of the bobbin carrier in the track.

    Here's a view with a transparent track showing how the shoe slide along the track.

  • 2
    Bobbin carrier

    The bobbin carrier's function is to:

    • Hold the bobbin
    • Release yarn from the bobbin
    • Maintain constant tension on the yarn while the carrier moves around the tracks

    Because the bobbin weaves back and forth around the track, the distance between the bobbin and the braiding point is perpetually changing.  To keep an even braid, its desirable to maintain an even tension on the yarn even as it moves on the track.

    This design of a bobbin has two main mechanism.  The first is a gravity tension control.  This consists of a weighted platform that slides up and down the vertical bar.  This helps maintain constant tension while the distance to and from the braiding point changes.  The second is a thread release mechanism.  This consists of a slotted bobbin and release pin and a release mechanism.  When the tension on the yarn becomes high enough, the tension release the pin and the bobbin spins to release more yarn.  Suddenly the tension drops and the release pin recaptures the bobbin.  The release tension is controlled by a spring, a release lever and the threading of the yarn through the mechanism.

    The slot at the bottom houses the release pin spring.

    The weighted orange piece slides up and down on the vertical shaft.  When the tension becomes high enough, it pushes up on the blue bracket.  This blue bracket pulls the yellow lever through the link, thus releasing the blue release pin.  The bobbin then release additional yarn, suddenly the tension drops and the release pin re-engages the bobbin.  

    Here are the all the bobbin carrier pieces laid out separately, also showing the spring.  

  • 3
    Bobbin carrier threading

    The bobbin carrier must be threaded property to actuate the weight tension mechanism and the release pin.

    All directions (right/left) are looking at the back of the actuator link (the white piece)

    1.  Bobbin yarn goes directly to the bracket opening on the right.

    2. Down through the right side weight slot.

    3. Up through the bracket (feeding from right to left).

    4. Down through the left side weight slot.  

    5. Up through the final top slot.

    This shows some images of the threaded bobbin carrier, with a Dalgona coffee for scale.

    Threading diagram:

    Be sure to load the bobbin the correct direction so that the yarn comes off the bobbin in the direction of the first slot.  

View all 6 instructions

Enjoy this project?

Share

Discussions

fraens123 wrote 04/16/2022 at 14:44 point

Hi, very nice machine you have built there.
I have built a motorized braiding machine after old photos. The biggest problem is to keep the cord always under tension. I had also thought of a construction similar to your bobbin holder. I think this construction becomes a problem when the bobbins can be turned very easily and the weight unwinds the bobbin. Or have I overlooked something? Here you can see my braiding machine if you are interested:
YT: https://www.youtube.com/watch?v=xj4MgT5iLL0&list=PL9Jzxu1vDldMNZdv_c5Pis4F-nQ77MFtc

  Are you sure? yes | no

kmatch98 wrote 10/11/2021 at 20:39 point

ins-and-outs. I see what you did there. 

  Are you sure? yes | no

Mike Szczys wrote 10/11/2021 at 18:22 point

Cool build! I've always been fascinated by these mechanisms that pass the bobbin off. No better way to learn the ins-and-outs than building one for yourself :-D

  Are you sure? yes | no

Similar Projects

Does this project spark your interest?

Become a member to follow this project and never miss any updates