First of all this documentation is a bit of a mess, I just wanted to gather what we have so far and throw it somewhere. If anyone want to actually build something similar, by all means have fun and feel free to use what you want. However if you're not already skilled enough to know how to do most of this already, this probably won't work as a very good guide, sorry. Also, it's work in progress and there is a few ugly solutions in there. =)
Here's what we set out to solve:
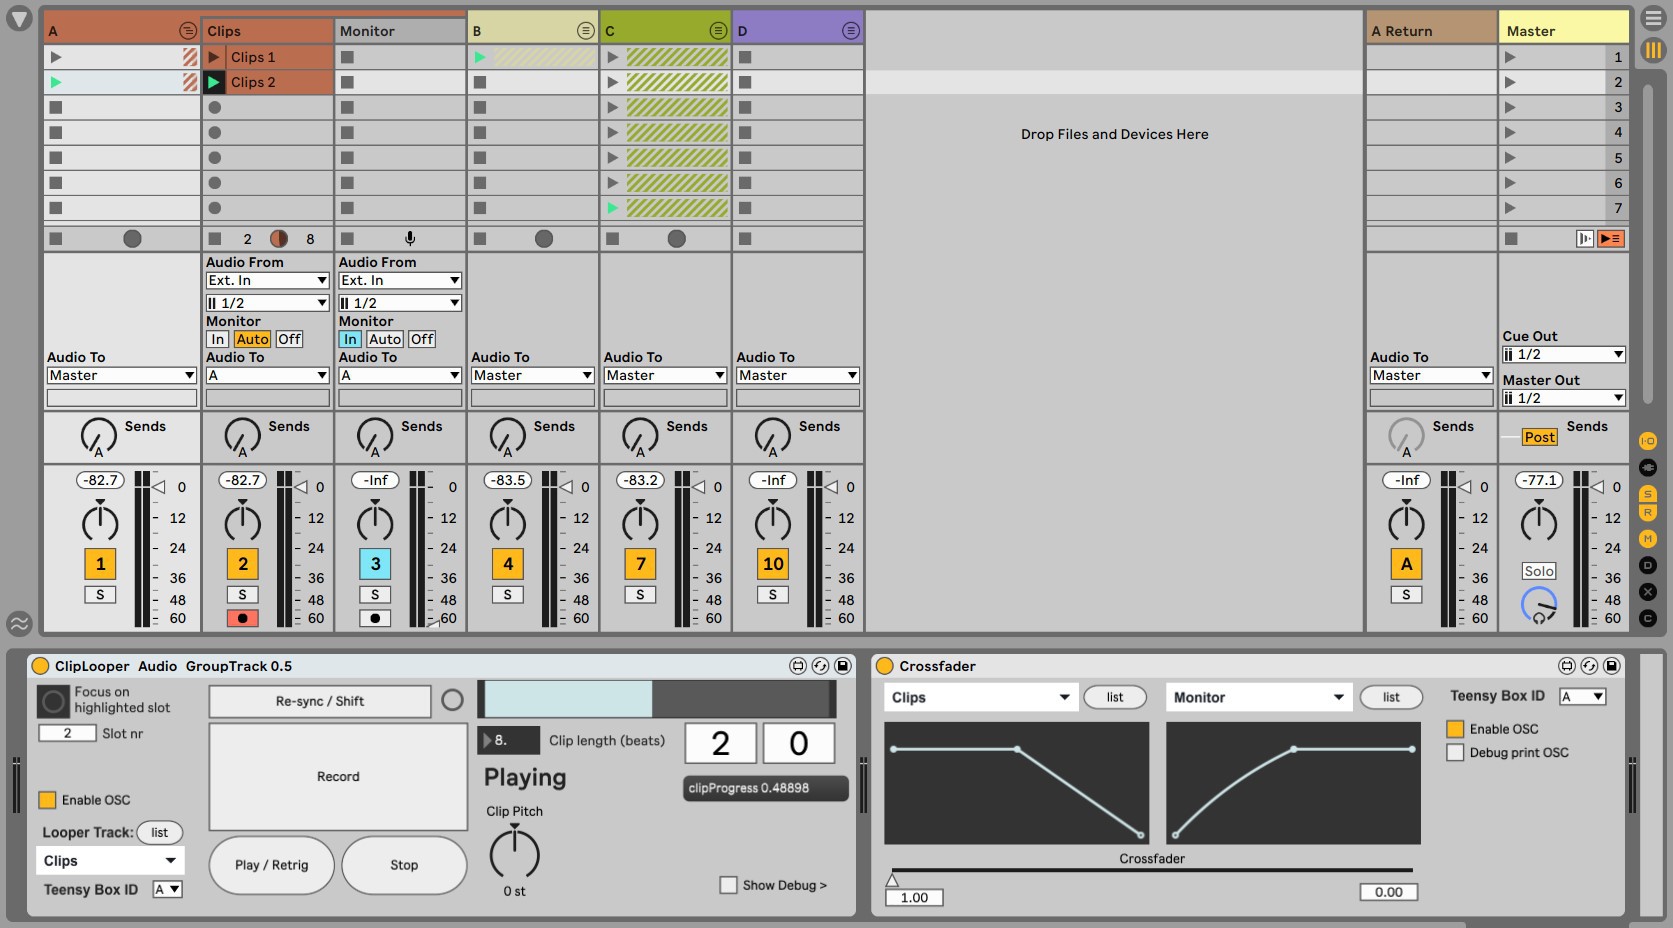
Mixing - Someone needs to own the mix, and we decided that the most logical way was to run everything through separate channels in Ableton, mixing using MIDI controllers.
Sync - Everyone has a button they can hit to get a quick Stop/Start-signal together with the MIDI clock.
Monitoring - Eeveryone needs a headphone signal, with their own sound and preferable plus the main mix in the background. We use a standard 1->4 headphone amp modded with separate inputs, cheap and dirty.
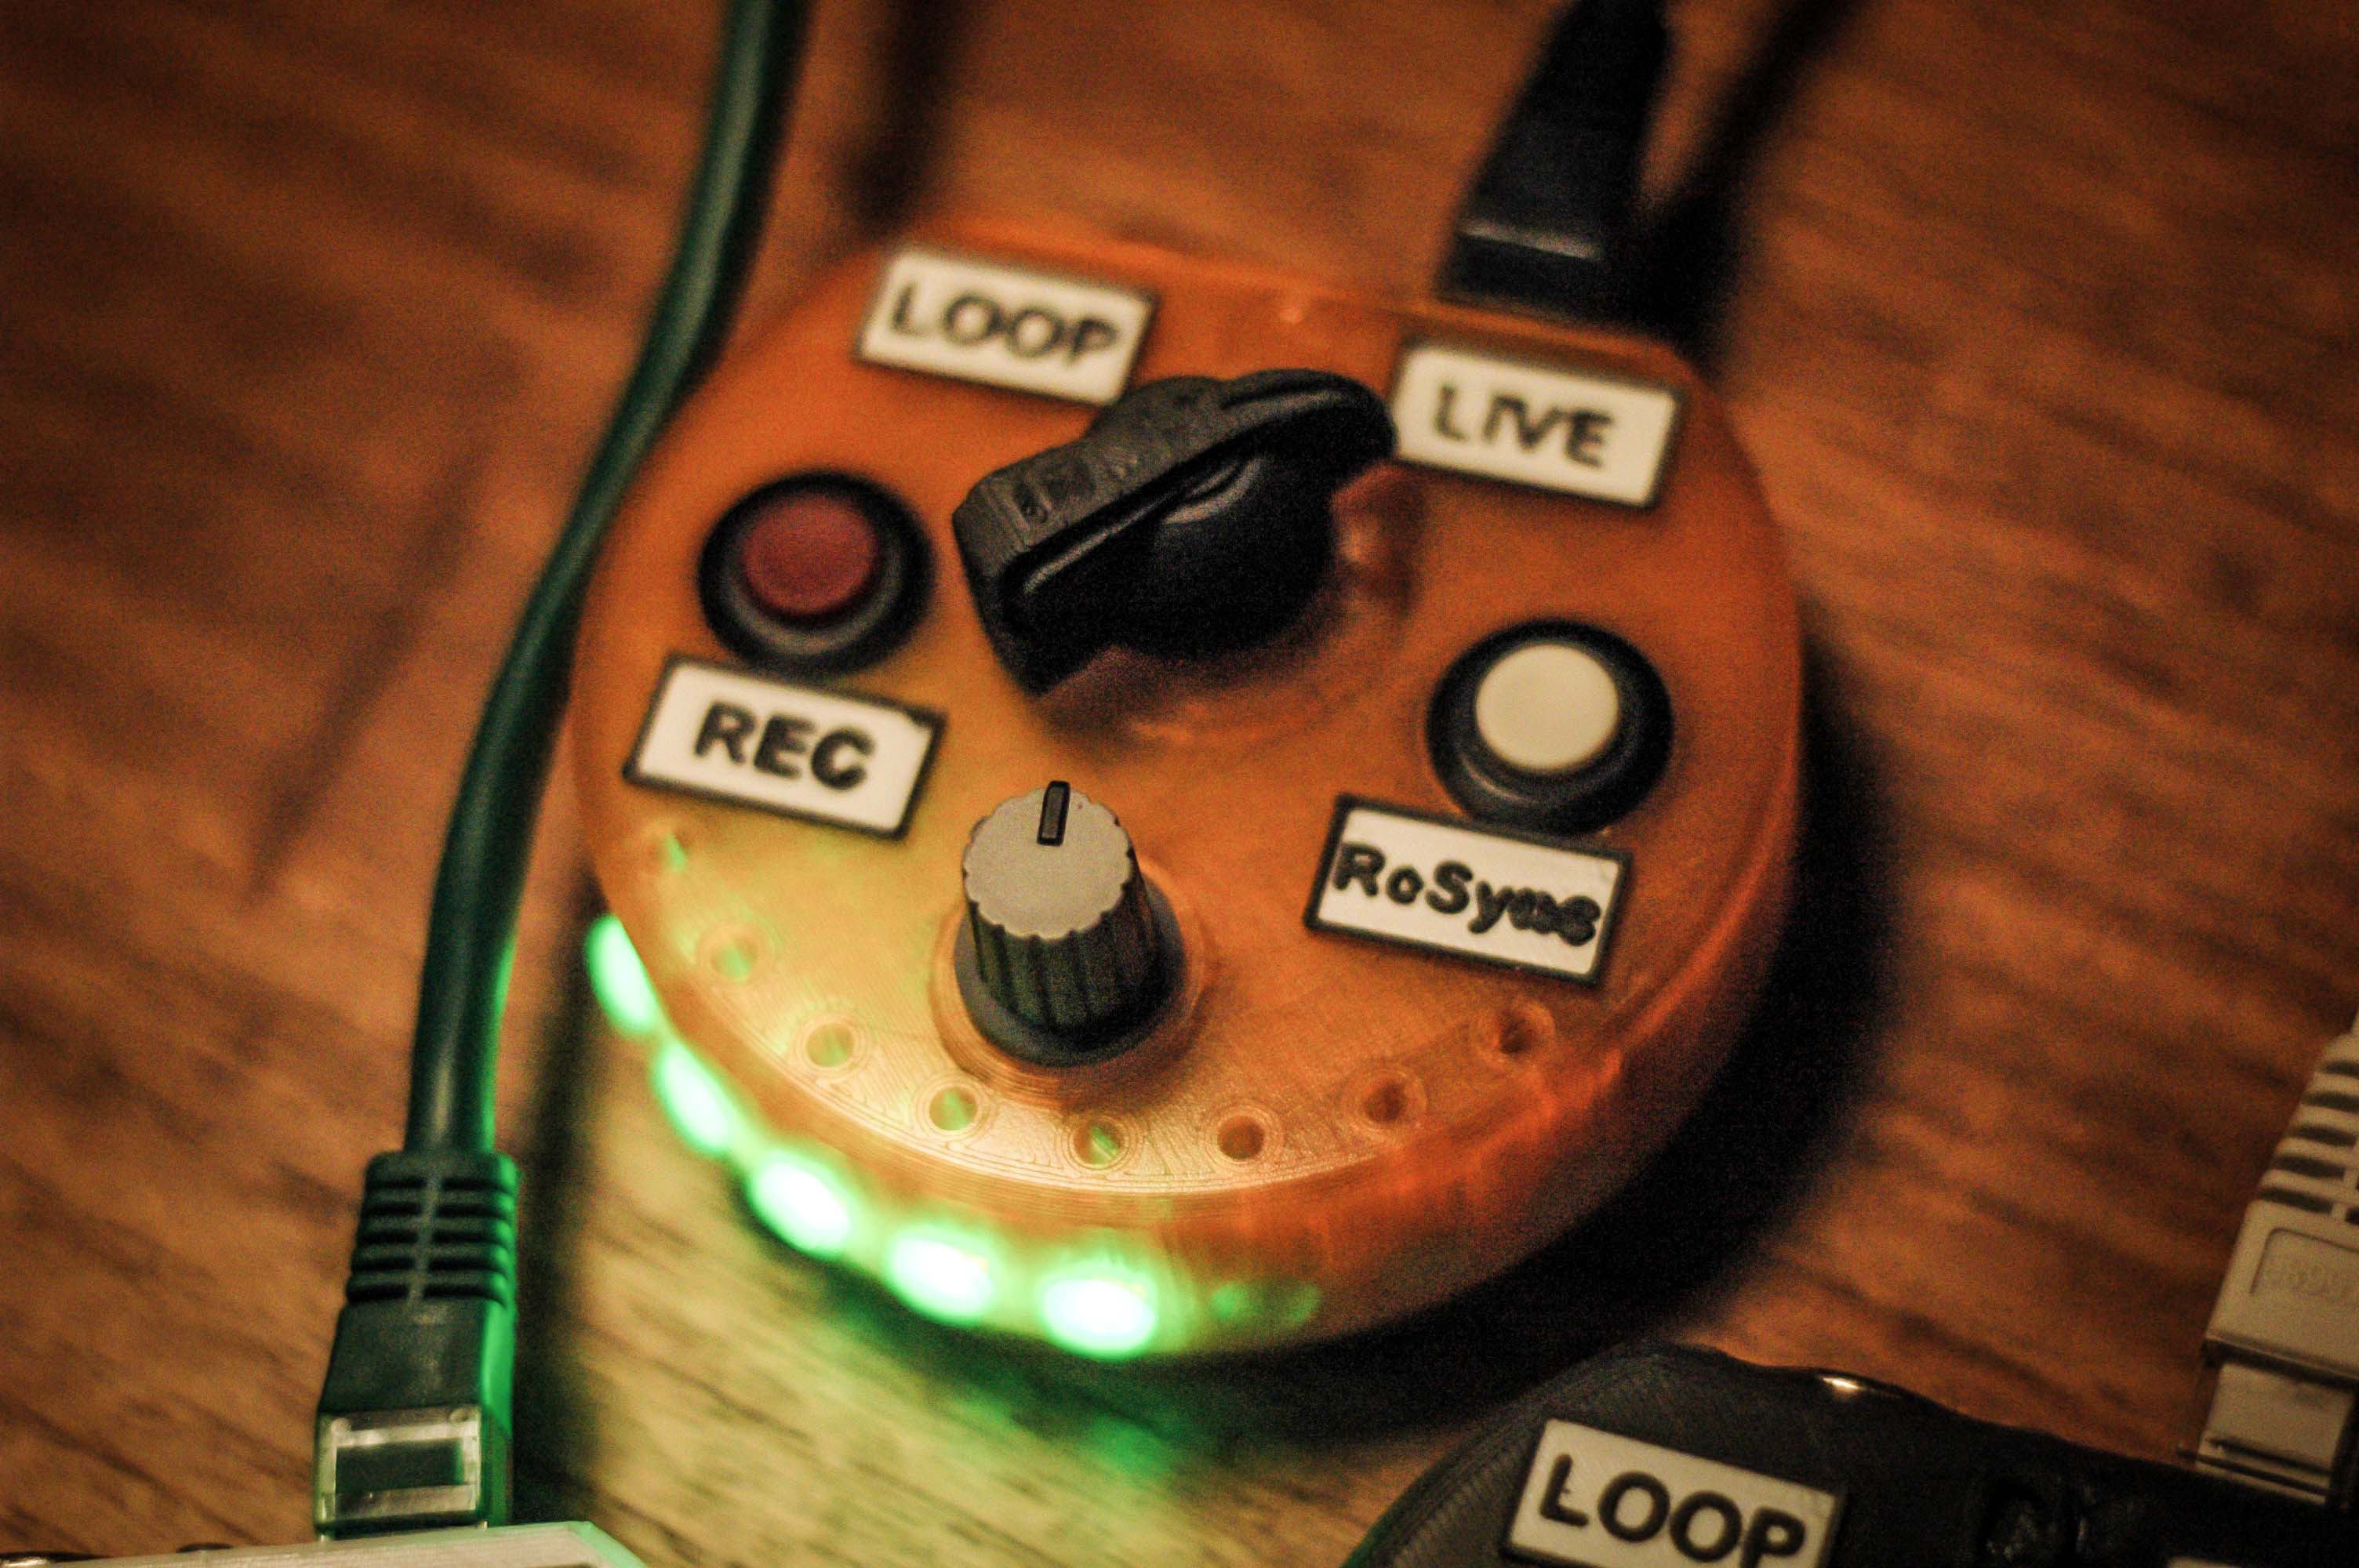
Looping - Everyone gets their own looper! Yey! Also, all loops are stored so it's also a way to collect material. Four round controllers was built for this purpose.
A number of experiments and iterations landed in this setup, it's not perfect, but it works!

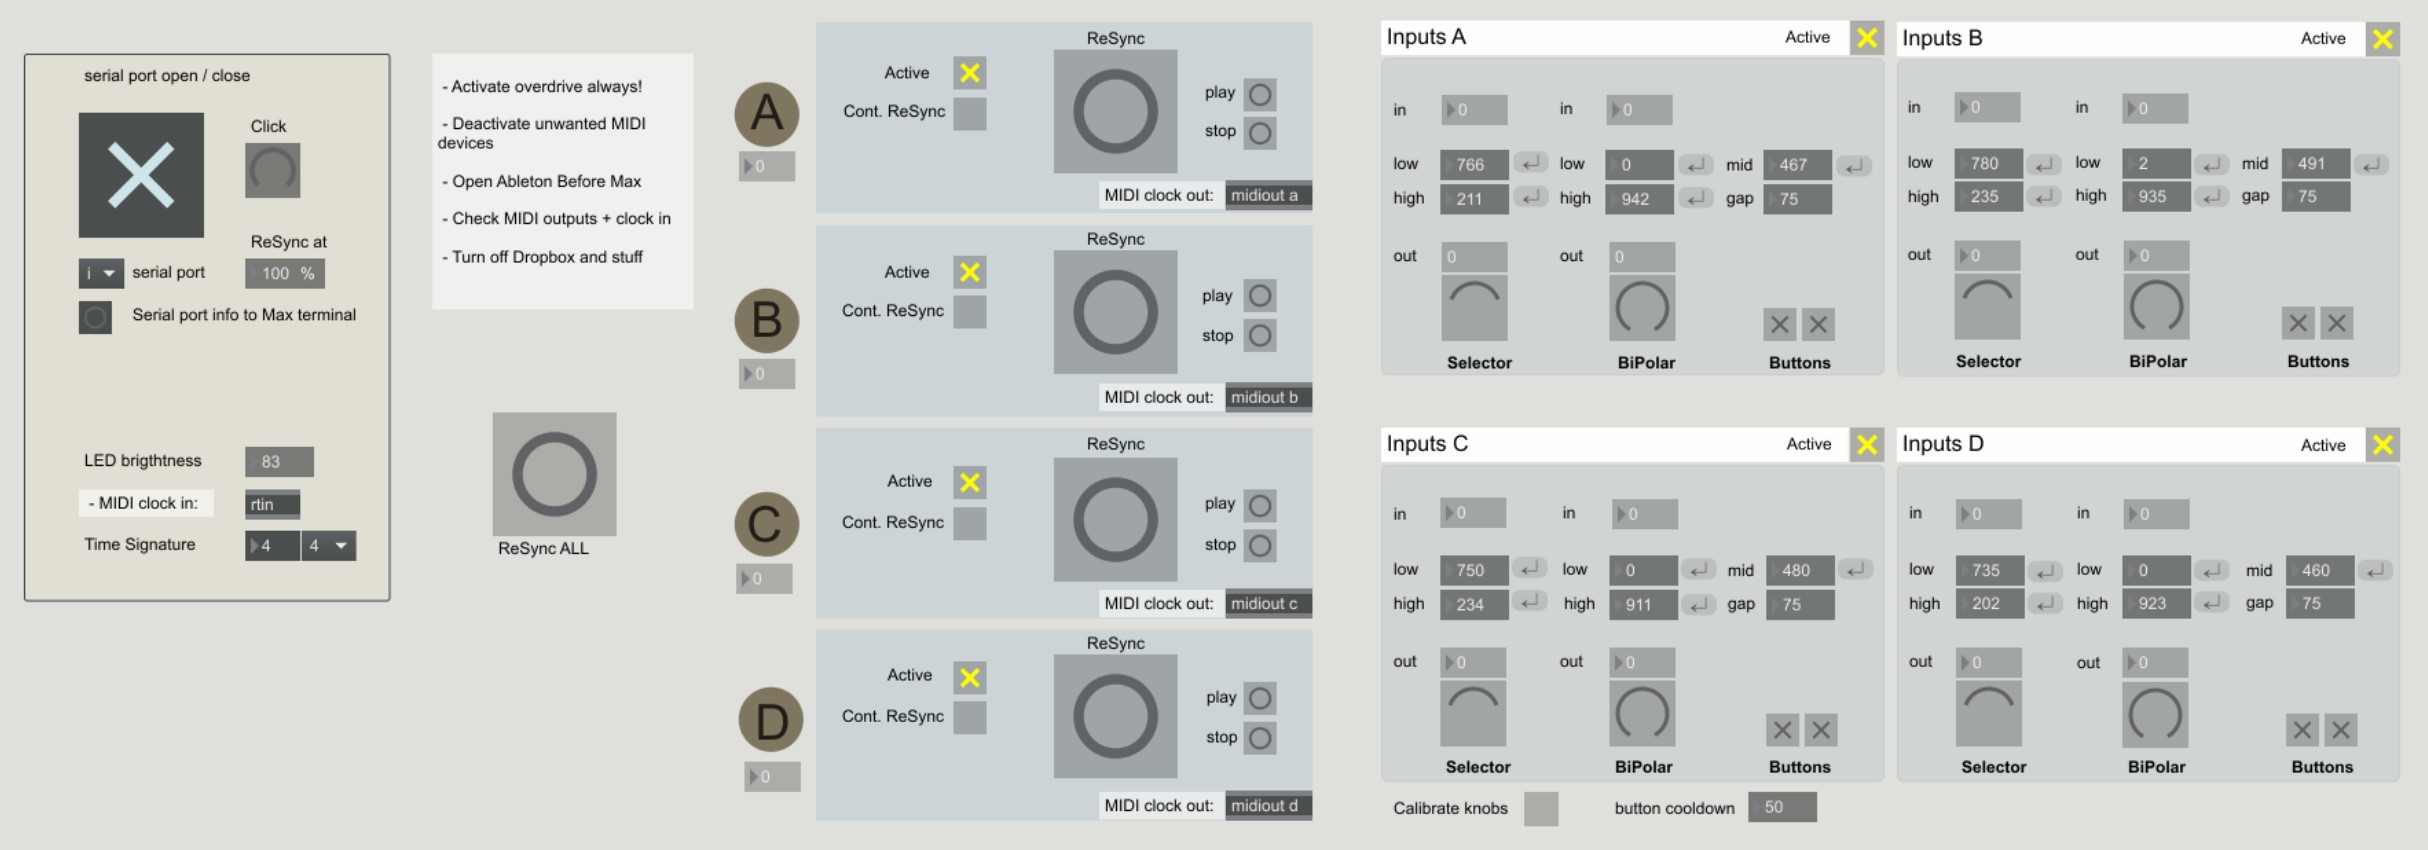
The four round controllers are hooked up to a Teensy 3.5 using standard ethernet cables. They have 8 RGB LED's (showing loop status) two buttons and two knobs, and they have a MIDI out for clock. The Teensy talks to a Max patch through USB serial, and that Max patch talks to m4l-patches in the Ableton setup though OSC. Oh and the Teensy also acts as a standard 4xMIDI interface.
All audio goes into Ableton live, when pressing the Rec button, a new clip is recorded and automatically starts playing when done. A short click makes a short loop. If the button it held down, it keeps going until released. Ableton's global quantization setting decides the minimum length of recording, and how rec start and stop is quantized.
LED's show progress in red when recording, green when playing.
The big knob in the middle controls a cross fader between Loop and Live. In Ableton, this is two channels grouped together, Loop always plays the last recorded clip, and Live is the direct monitoring of the input.
Like this - a practical example:
1 - Your mix knob says Live. Whatever you do with your MegaGrooveBox3000 goes straight through the system. When ready, hold Rec, record as long as needed and let go. A new clip is created.
2 - Flip over to Loop mode. This means that the beat goes on, but nothing you do now will mess up that loop. The only one who knows what you do now is you, through your headphones. Try out presets, program the sequencer or just practice some bold patch tweaks. If needed, press ReSync and your sequencer will be told to behave again.
2b - Take your time, notice how the person doing the mixing had time to process your and the others loops, maybe mixing between them. Dance a little.
3 - Carefully (or not) fade over to Live mode again. Rinse and repeat.
Why the max patch?
As there is just one microcontroller handling all four controller boxes, it made sense to keep all the serial USB traffic to one place. Technically I guess this could have been another m4l patch but another thing is that m4l doesn't allow for sending MIDI straight out, only filtered through Ableton where a custom MIDI clock would get lost on the way. I do recall we found some hack (external) for this but it wasn't stable.
Why not just connect headphones directly to the instrument?
We started like that, but we had some latency (about 30 ms) in Live and to hear your instrument without that got really weird when the mix in the speakers do. Of course one can trim down latency, but we wanted a bunch of effects running to get the sound right. Also all gear doesn't have...
Read more »

 AndrewMcDan
 DeckerEgo
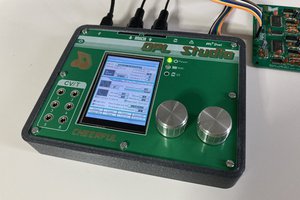
 Maarten Janssen
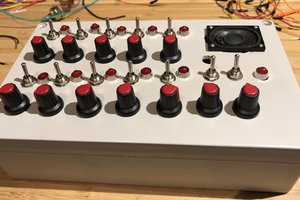
 Albert Gonzalez