Close
0%
0%

Ameba Arduino: Ameba to Communicate with Client

First connect Ameba to WiFi, then use Ameba as server to communicate with client.

Similar projects worth following
0 followers
In this project, we first connect Ameba to WiFi, then we use Ameba as server to communicate with client.

For more information: 

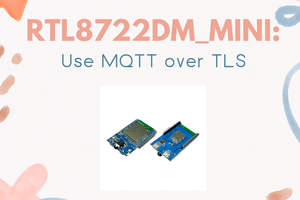
  • 1 × AmebaD RTL8722DM MINI
  • 1 × Laptop Make sure it is connected to the same network domain as Ameba, and TCP tools are installed.

  • 1
    Setup Enviornment

    First, we make sure the correct Ameba development board is set in “Tools” -> “Board”

    Then, open the Simple WiFi Server example in “File” -> “Examples” -> “AmebaWiFi” -> “SimpleServerWiFi”

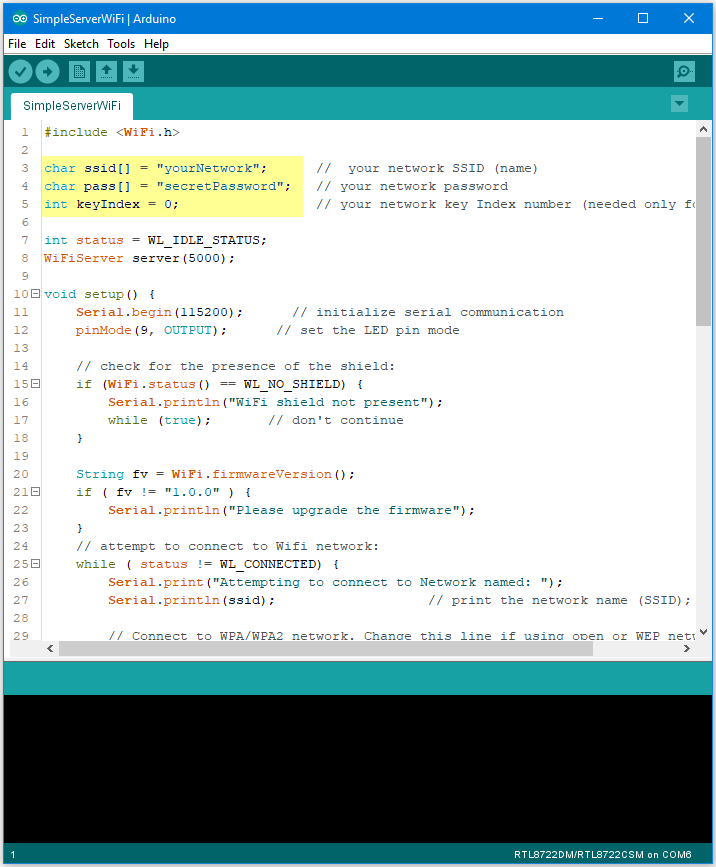
    In the sample code, modify the highlighted parameters and enter the ssid and password for your WiFi connection.

    3-1

  • 2
    Upload code

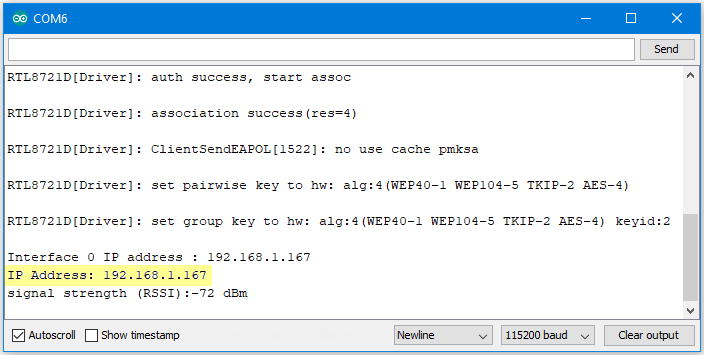
    Next, upload the code, then press the reset button on Ameba. Afterwards, you will see the connection information is displayed in the serial monitor.

    3-3

  • 3
    Setup client

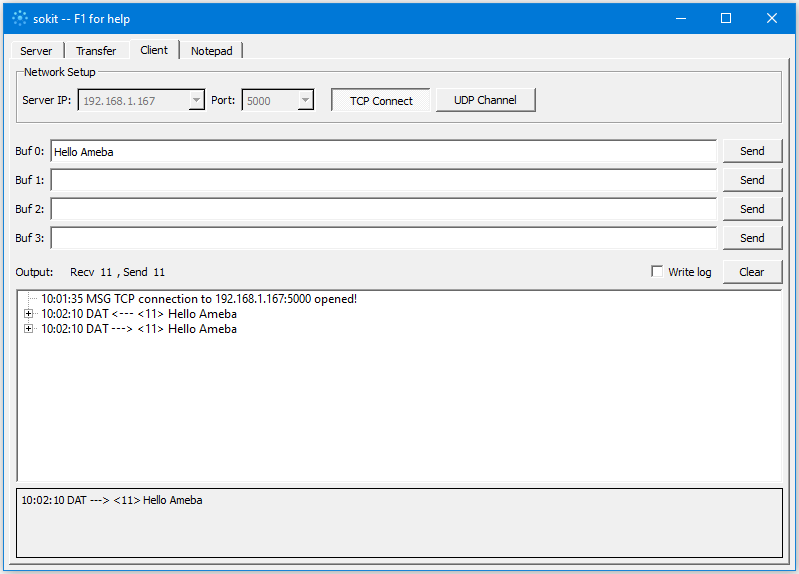
    Next, we use the socket tool in the laptop to be the client and connect to the IP address of the Ameba board shown in the connection information at port 5000. (Note: The socket tool we used in this example is “sokit”).

    3-4

    Click on the “Client” tab to choose the client mode, specify the IP and port of the server, then click “TCP Connect”.

    If the connection is established successfully, the server shows a message: “A client connected to this Server”, and the IP and port of the connected client.

View all 4 instructions

Enjoy this project?

Share

Discussions

Similar Projects

Does this project spark your interest?

Become a member to follow this project and never miss any updates