This project was developed in partnership with the company JLCPCB. When performing the reading, you get 5 free units of a printed circuit board for you to assemble your project.
The automatic fish feeder with Arduino is a great idea for anyone who wants to take care of a fish. Through this tool your fish will always be fed.
During certain intervals of time, the system will release food to all the fish in the aquarium. Do you want to understand how this system works and make your own?
If yes, then come learn all the step-by-step steps to build this project.
The 5 units of this shield were made available for free for you to receive in your home and use in any project with Arduino.
You must follow all these steps below.
- Enter on the JLCPCB website and make your account.
- Add the control board files to the website
- Add the JLC-REBE discount coupon to the payment section
- Ready, you won 5 free PCB units.
Watch the video below and learn the complete walkthrough.
https://jlcpcb.com/video/homeOrderVideo.mp4

See below for some images of our project and its parts.


Now, let's understand how the project works. Let get started!
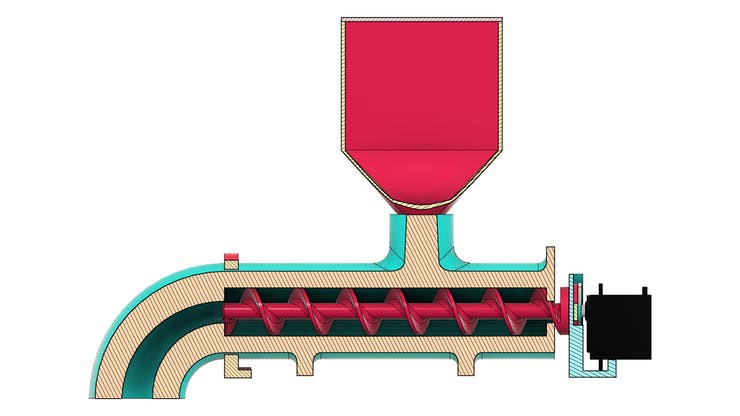
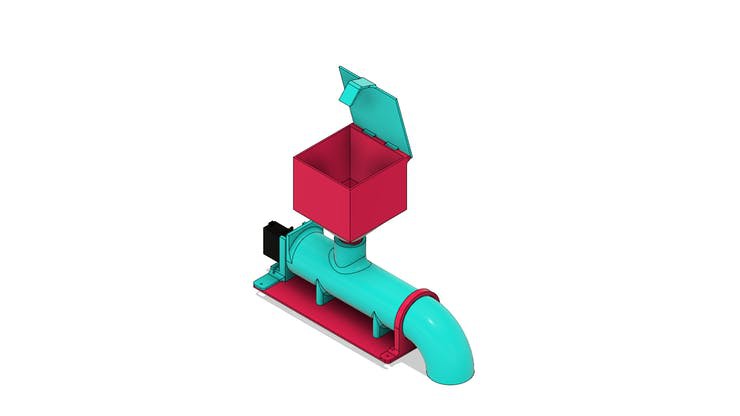
The design of the diy fish feeder with Arduino is shown in section in the figures below.

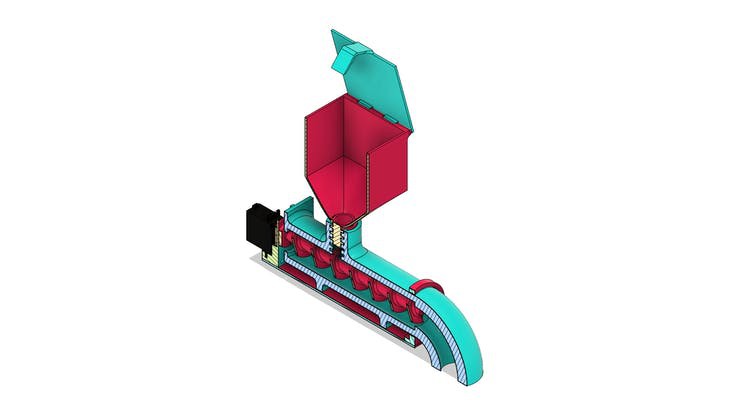
Next, we will present the pieces that make up its structure.
The base of DIY fish feeder with Arduino
The base is a piece created to facilitate the attachment of the feeder frame in any location. The base part is shown in the figure below.

In the structure of this piece, we will fix the transmission tube of the fish feed grains.
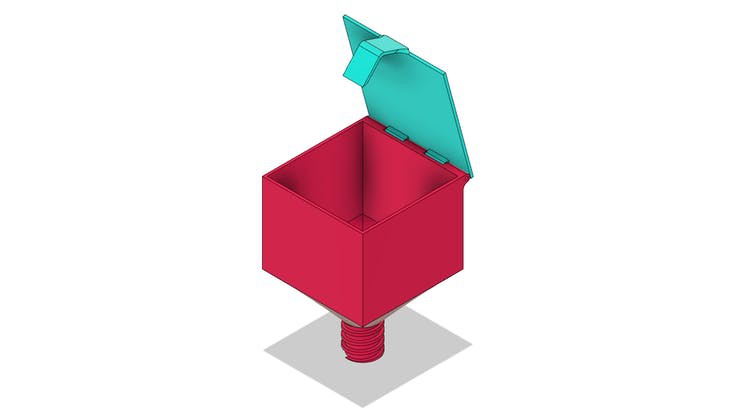
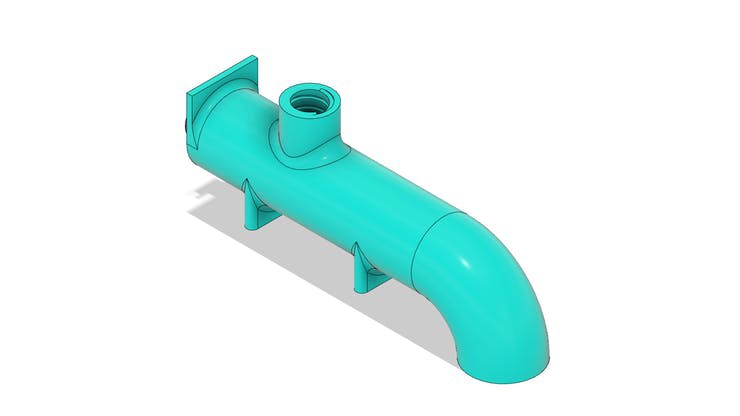
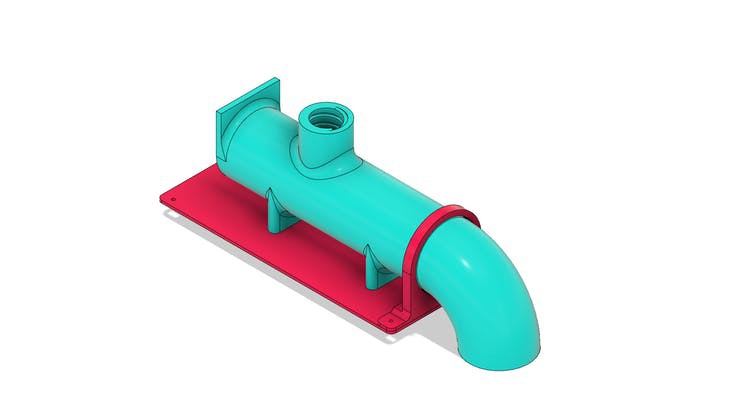
Tube for transporting fish feed grains with Arduino
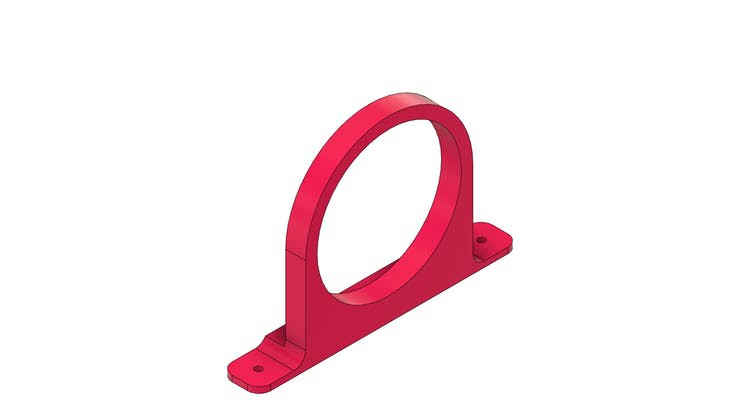
The tube is shown in the figure below. Its structure is mounted on the base piece with the aid of a collar that will be installed with M3 screws.

In the tube body there is a threaded hole. This hole is used for fixing the fish feed tank.
DIY Fish Feeder Feed Reservoir with Arduino
The feed tank has an approximate dimension of 95 x 95 x 126 mm. Its structure will be connected to the transport tube by means of a thread.
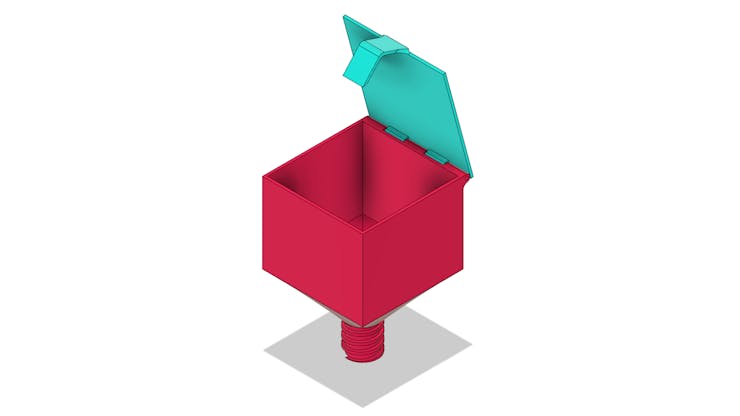
The feed will go down through the hole and will be transported to the exit through an Archimedes screw. Do you know how an Archimedes screw works?
The working mechanism of Archimedes' screw
Archimedes' screw is a very old invention and used by several civilizations to transport water in irrigation systems.
Its structure is presented below.

The video below presents the use of the mechanism by ancient civilizations
The screw was manually moved to transport water from one level to another.
Over the years, the mechanism has been improved and engines are now used to move it. In addition to transporting liquid, the system allows transport of solids.
Watch the video below and observe the transport of solids
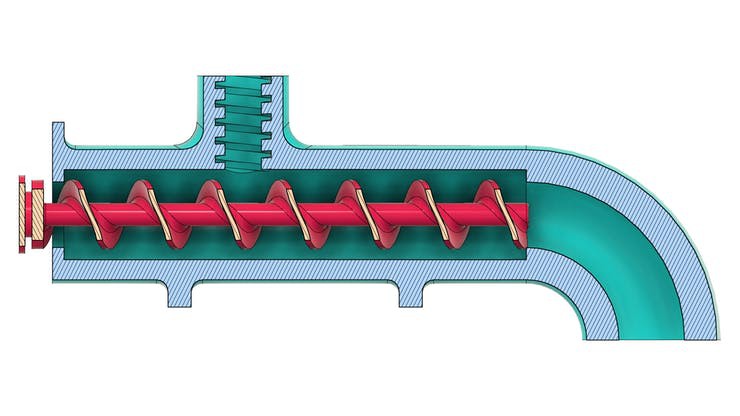
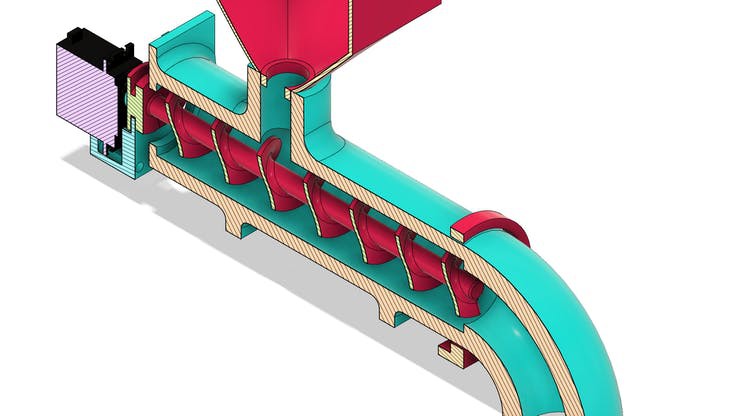
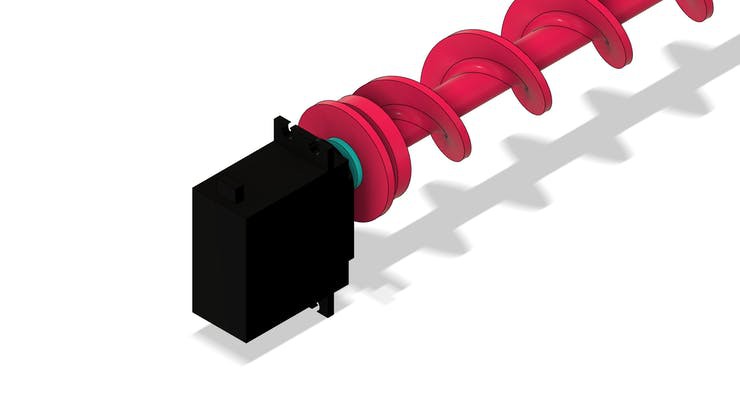
The figure below shows the tube system with the screw installed internally in its structure.
In the sectional view, it is possible to observe the threaded region for food entry and its movement through the tube to the exit location.
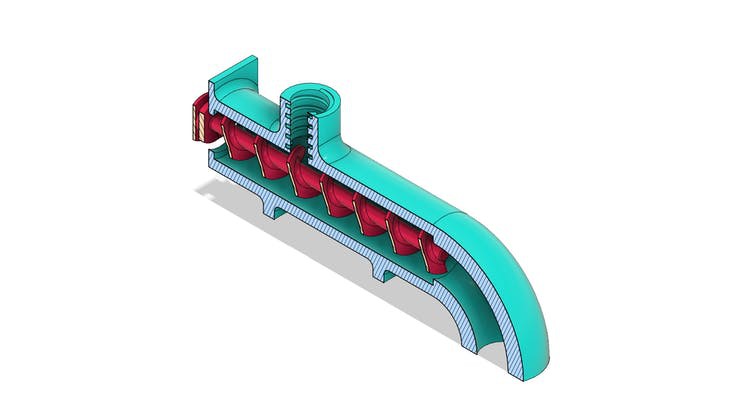

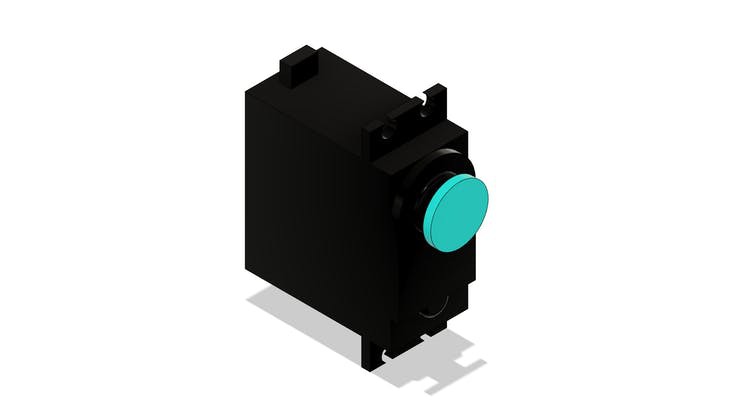
To transmit movement we use a servomotor with continuous rotation coupled to the archimede screw.
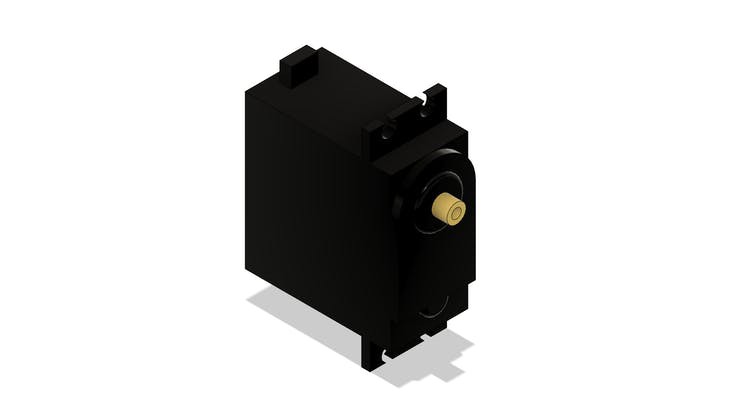
Servo motor with continuous rotation
In this project you can use a direct current motor or a servo motor.
To facilitate the construction of the project, reduce the complexity of the circuit and facilitate programming, a servomotor with continuous rotation was used.
In the figure below we have the MG996 servomotor.

The servomotor will be glued to the screw frame. See the figure below.


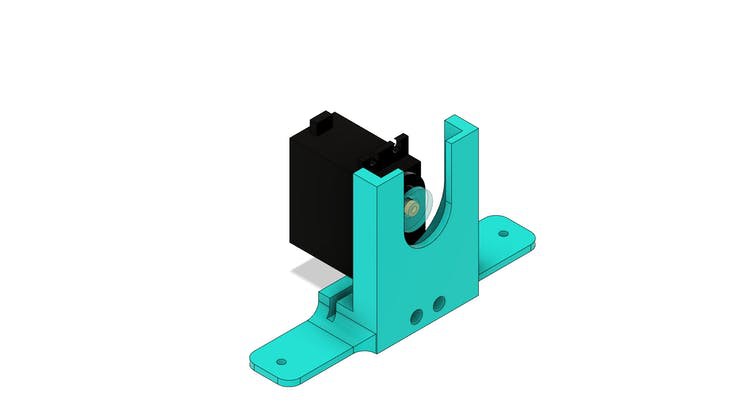
In the structure of the part there are 2 holes to mount it to the base part.
Finally, we have the support collar for installing the feed transport tube.

Did you understand how this project works? Want to have access to files to print to a 3D printer and mount it?
Follow the step by step below to receive the files in your email.
- Enter on the JLCPCB website and make your account.
- Print your screen logged in and send to email: fcodiegomoreira@gmail.com with subject: Send the DIY Fish Feeder with Arduino...

 Abid Jamal
 UTSOURCE