“Does My Breath Stink?” will make a positive impact on dental hygiene in the mask-wearing era by determining whether or not an individual’s breath smells bad. When the button is pressed, the LED will light up for 10 seconds if the pressure sensor reads below the prescribed value, determined to be 1000 hPa, 9 hPa above the average air pressure in my room. A human blowing hard can generate up to 70 hPa.
If 1000 hPa is exceeded, the LED will stay on and a random integer 1-7 will cause the positional servo motor to randomly move by a specific increment (averaged to about 22.5 degrees), stay there for 10 seconds, then the LED will turn off and the servo will move back to the starting position, displaying text stating “Go on, try me!” The servo is attached to a half-circle that rotates with the blades. A window in the front panel of cardstock will display a section of the half-circle, showing off an insult corresponding to that integer.
 SAYANTAN PAL
 Marius Taciuc
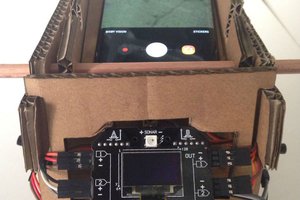
 TokyLabs