Close
0%
0%

MAE 3780 Individual Design Project

The AutoUnlocker

Similar projects worth following
My project will allow a user to unlock their door by entering a code into a keypad rather than using an actual key. The mechanical design is a 3D printed mechanism that will fit over the lock on the door, shown in the CAD below. A string will be tied to the mechanism and to a continuous servo motor. If the user enters the correct password into a 3x4 keypad sensor, a green led will blink and the servo motor will rotate clockwise until the door has been unlocked. Then, the servo will rotate the opposite direction to release the tension in the string, allowing the user to manually re-lock the door once they have entered. If the user enters an incorrect code, the red LED will turn on and the user must try again. In order to enter a password, the user must press a button once and then press the pound # key once they have finished.

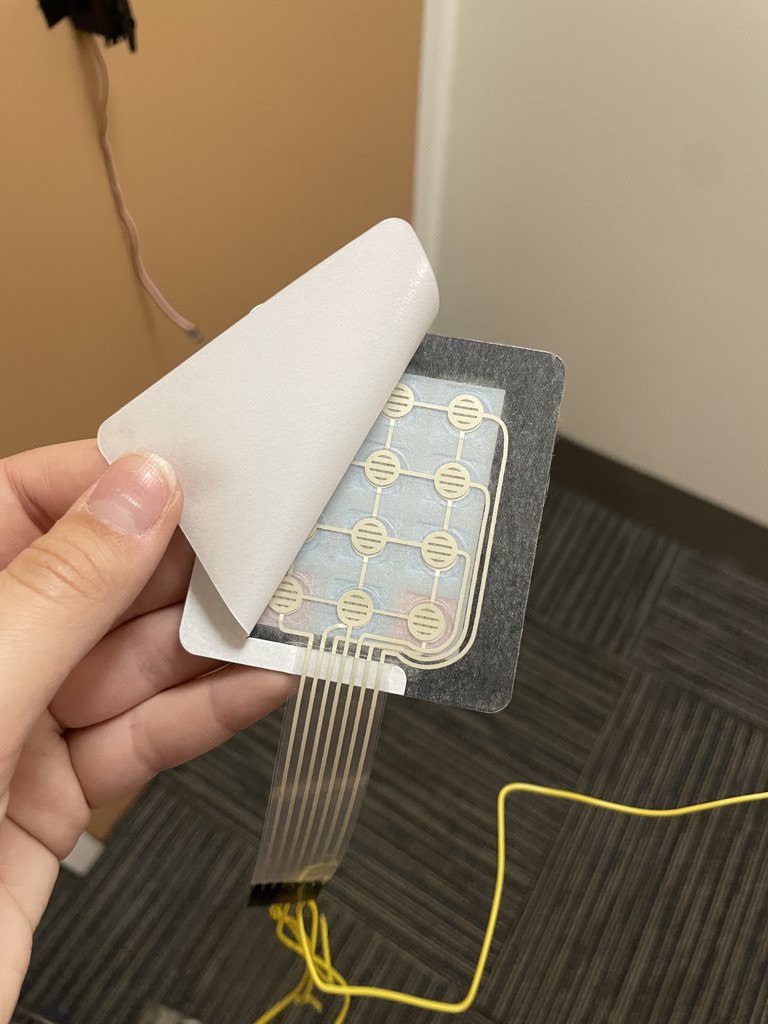
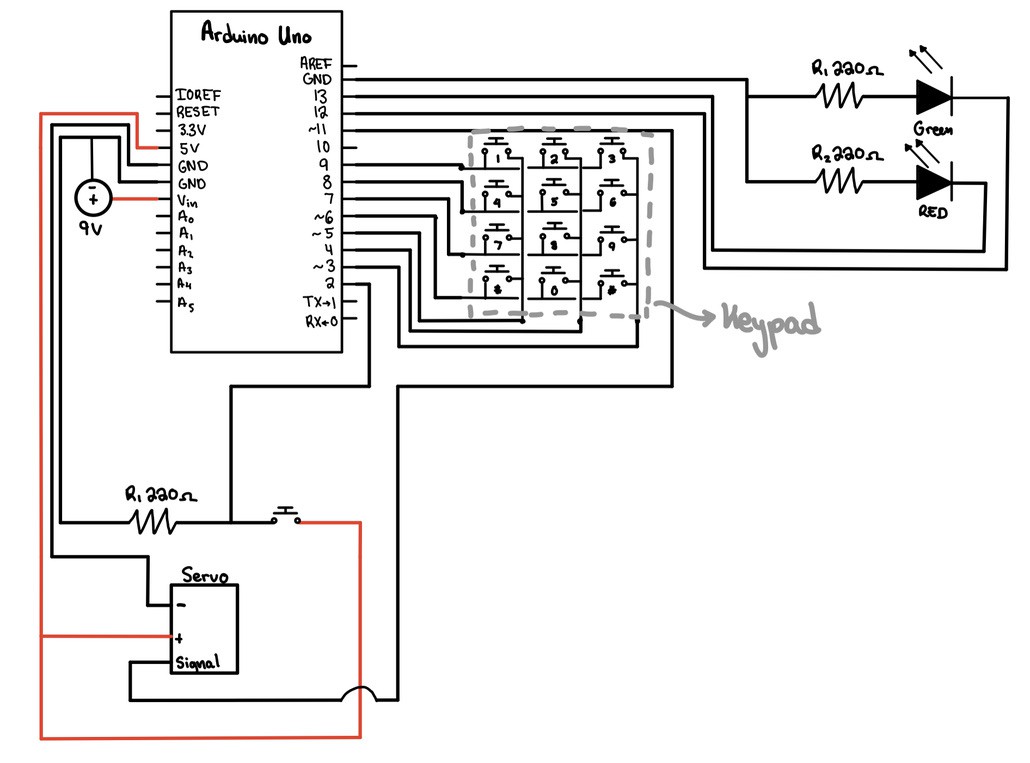
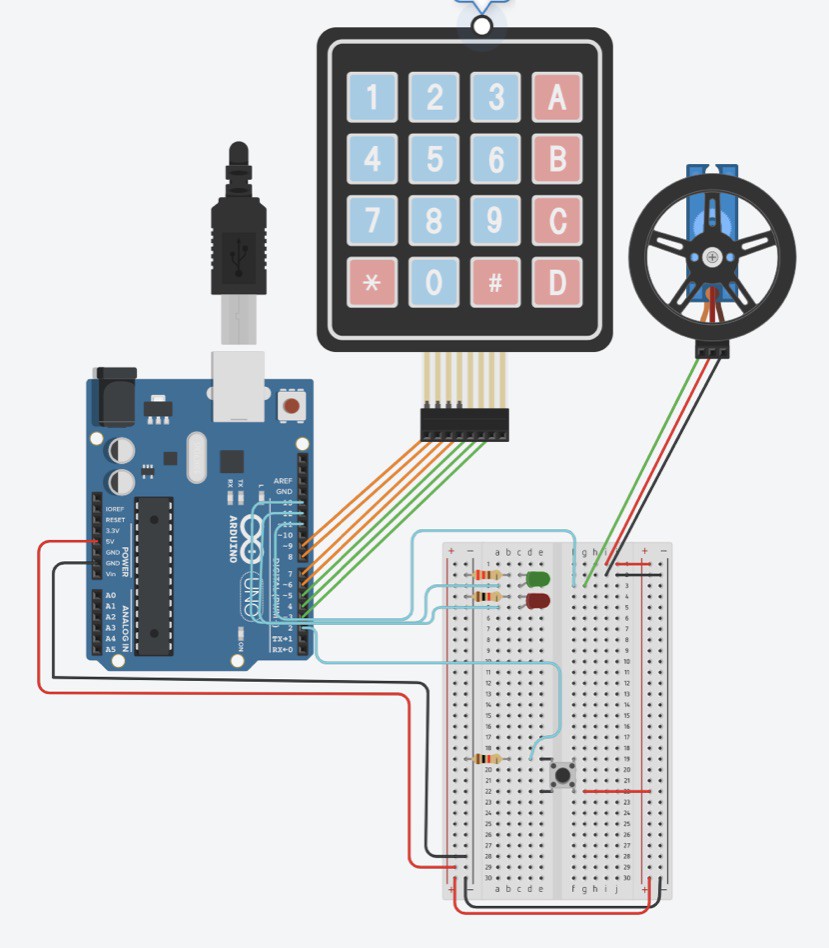
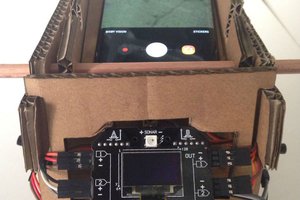
The AutoUnlocker is an automated door unlocking system. It is designed to add convenience to the everyday task of unlocking a door that is designed to only be unlocked with a key. It saves time and effort by using a continuous servo motor to pull the door lock open from the inside when the user enters a passcode. A 3D printed mechanism made out of PLA easily slides over the door lock. The mechanism features a hole near the top to allow a string to be tied from it to the micro servo. When someone wants to unlock the door all they need to do is press the button and then enter the passcode. A green LED or red LED will blink to let the user know whether they were right or wrong respectively. When the passcode entered is incorrect, the door won’t be unlocked and the user is free to try again. If the code is correct, the micro servo will pull the door lock to its unlocked position and then rotate the opposite direction to release tension in the string so that the door can be locked again. The code can be easily edited and re uploaded to change the passcode for added security and customization.

eeh86_MAE3780_Tuesday_421_DoorLockFitting v3.step

CAD file for the door lock fitting.

step - 20.97 kB - 12/03/2021 at 21:46

Download

DesignProjectCode.ino

Arduino Code

ino - 4.82 kB - 12/03/2021 at 21:41

Download

Individual Project Final Report.pdf

Detailed description of my project

Adobe Portable Document Format - 2.39 MB - 12/03/2021 at 21:40

Preview
Download

  • 1 × Kookye 2PCS Mini Servo Motor 360 Degree Continuous Rotation w/Servo Horn Set ASIN: B01HSX1IDE
  • 1 × Gorilla Tape ASIN: B001E5ZWT4
  • 1 × 3x4 Matrix Keypad Digikey: 1528-1136-ND
  • 1 × Floss
  • 1 × 22AWG Solid-core Hookup wire

View all 16 components

  • 1
    Mount keypad
    •  Peel back the paper covering the adhesive and press it on the outside of the door 6 inches above the lock.
    • Maintain light pressure for 30 seconds to ensure it remains attached
  • 2
    Build the Circuit
    • Use the circuit diagram: 

    • This diagram shows what will be on the inside and outside of the door:
  • 3
    Tape Wires
    • Tape the wires that wrap from the outside of the door to the inside of the door to make sure that the door will close easily and prevent any wires from coming undone

View all 8 instructions

Enjoy this project?

Share

Discussions

Similar Projects

Does this project spark your interest?

Become a member to follow this project and never miss any updates