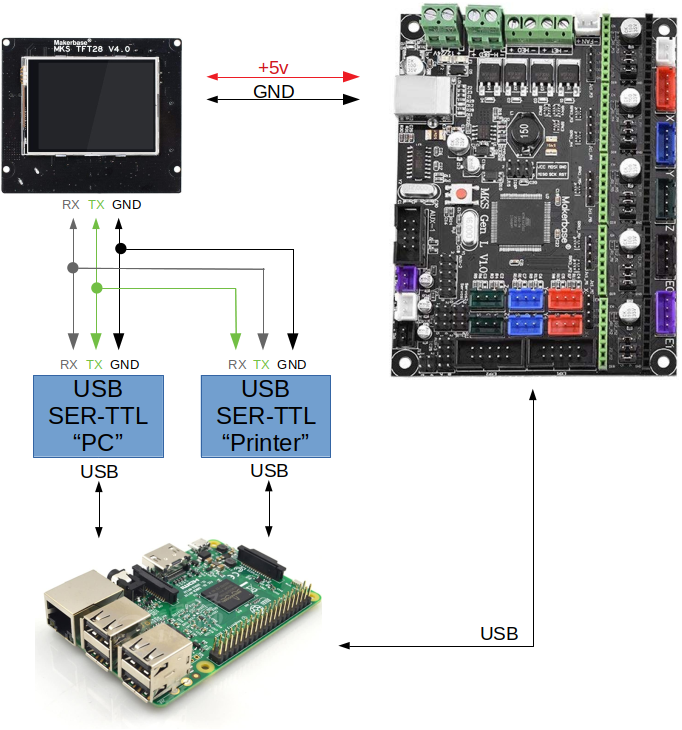
• Connecting it all together

    SetecAstronomy01/24/2022 at 01:18 0 comments

    The TFT28 clone that the Artillery Sidewinder X1 uses requires +5v to operate. The original from MKS has an optional +12v input for power, but Artillery's clone does not. Normally, it gets the +5v from the controller's AUX port, but I need to disconnect that and redirect those serial pins from the TFT28 elsewhere. The good news is that on both ends (both the MKS Gen_L AUX port, and the connector on the TFT28), there are spare +5v and GND pins we can use. I wired up a couple of 1x4 dupont connectors with positive on one end, and GND immediate next to it, leaving the remaining two pins empty. I made this cable the same length as the existing cable between the controller and the TFT, and swapped them out. Here's a couple of pictures for orientation:

    With power squared away, it was time to connect the serial cable I made earlier. I threaded it in through the hole in the back where the Y end stop enters the case, and routed it along with the rest of the cables. Once I got it to the TFT, I connected it to the other half of the connector that was previously connected to the AUX port.

    When I went to plug it in, I found that I had TX and RX reversed from what I expected and had to swap them. When I pinned it out, the only doc I could find was the pinout for the AUX port, and I had based it on that, forgetting to invert TX and RX. Oops. Thankfully the PCB is labeled to the side of the connector.

    Sadly, when I reassembled the printer and tested it all, I had no serial communication. The TFT powered up, but it wasn't updating the temperatures on the display or sending g-code to Klipper. I've got a couple guesses as to what is wrong:

    1. Baud rate - Klipper is operating at a different speed than the old Marlin firmware was, and the TFT firmware needs to be updated to match
    2. Despite all my planning, I still have TX and RX backwards. It has been my experience that you can plan all you want, it's still darned close to 50/50 that you'll get it right.

    Ideas for troubleshooting:

    • determine the default baud rate for the TFT and reconfigure Klipper to use that
    • find another serial-TTL adapter and emulate the TFT, does the system even work? If so, emulate the other end, does the TFT work with the serial-TTL adapter? Probably should have checked that before I started >_>

  • udev rules

    SetecAstronomy01/23/2022 at 22:02 0 comments

    This whole complicated system I'm about to try involved three USB serial ports. The two USB serial TTL adapters, and the one in the printer. Sure we could probably set everything up using the various /dev/ttyUSB* ports, but what happens when the printer gets turned off and back on? What happens when the RasPi restarts? This is where udev comes in handy.

    We can write some udev rules such that each port gets assigned an additional symlink of a name we chose, and we can use *those* names. So the printer is always /dev/ttySidewinder for instance.

    Unfortunately, the USB serial-TTL adapters I've got don't have unique serial numbers (I know this from previous udev experiments). This makes it rather difficult to tell them apart with a udev rule. The only way I could come up with was to specify which port they were connected to. This isn't great if everything gets disconnected and reconnected in a different order, as then it wont work right. But short of ordering more parts, this is the solution I've got.

    The first order of business is to figure out which port is which. To do this, I made sure that the printer was the only USB serial device connected, and then plugged it into the port I wanted to use for the PC serial-TTL adapter. Then it was something like this:

    $ ls /dev/ttyUSB*
    /dev/ttyUSB1
    

     So it looks like /dev/ttyUSB1 is our printer at the moment, we'll need that device name in our next command:

    $ udevadm info --name=/dev/ttyUSB1 --attribute-walk
    [lots and lots of output]

     I got several screens of output from this. The bit we're most interested in, was (in my case) the fourth device from the top. The first one that has a KERNELS== that looks something like this one, but without a colon in it:

      looking at parent device '/devices/platform/soc/3f980000.usb/usb1/1-1/1-1.5':
        KERNELS=="1-1.5"

     That's going to be the bit I use to distinguish this port from another one. I copied that whole KERNELS== line and stuck it in a document with a note as to which port it was associated with.

    Then I repeated the steps for the USB port I wanted to use for the Printer serial-TTL adapter.

    Once I had a way to distinguish the two USB ports we intend to use for the serial-TTL adapters, I needed to find out their details so I could actually write a udev rule. I moved the 3D printer's USB cable, and plugged in the two USB serial-TTL adapters, taking care to get them into the correct ports. If you saw their photo in the previous log, I had labeled them to make this step easier. I probably should have disconnected the 3D printer, but I hadn't. Thankfully it retained the same /dev/ttyUSB1 that it was using earlier.

    I reran the udevadm info command again, this time on one of my new USB serial ports: 

     $ udevadm info --name=/dev/ttyUSB2 --attribute-walk
    
    Udevadm info starts with the device specified by the devpath and then
    walks up the chain of parent devices. It prints for every device
    found, all possible attributes in the udev rules key format.
    A rule to match, can be composed by the attributes of the device
    and the attributes from one single parent device.
    
      looking at device '/devices/platform/soc/3f980000.usb/usb1/1-1/1-1.5/1-1.5:1.0/ttyUSB2/tty/ttyUSB2':
        KERNEL=="ttyUSB2"
        SUBSYSTEM=="tty"
        DRIVER==""
    
      looking at parent device '/devices/platform/soc/3f980000.usb/usb1/1-1/1-1.5/1-1.5:1.0/ttyUSB2':
        KERNELS=="ttyUSB2"
        SUBSYSTEMS=="usb-serial"
        DRIVERS=="pl2303"
        ATTRS{port_number}=="0"
    
      looking at parent device '/devices/platform/soc/3f980000.usb/usb1/1-1/1-1.5/1-1.5:1.0':
        KERNELS=="1-1.5:1.0"
        SUBSYSTEMS=="usb"
        DRIVERS=="pl2303"
        ATTRS{bNumEndpoints}=="03"
        ATTRS{bInterfaceSubClass}=="00"
        ATTRS{authorized}=="1"
        ATTRS{bInterfaceClass}=="ff"
        ATTRS{bInterfaceProtocol}=="00"
        ATTRS{bInterfaceNumber}=="00"
        ATTRS{bAlternateSetting}==" 0"
        ATTRS{supports_autosuspend}=="1"
    
      looking at parent device '/devices/platform/soc/3f980000.usb/usb1/1-1/1-1.5':
        KERNELS=="1-1.5"
        SUBSYSTEMS=="usb"
        DRIVERS=="usb"
    ...
    Read more »

  • Building the cable

    SetecAstronomy01/23/2022 at 19:47 0 comments

    I had a couple of USB serial TTL adapters with cables that had dupont connectors on the ends. These were great for using with microcontrollers or hacking around with embedded devices. They had a +5v (or +3.3v if you cracked them open and warmed up the soldering iron), which I didn't need for this, but they were what was on hand.

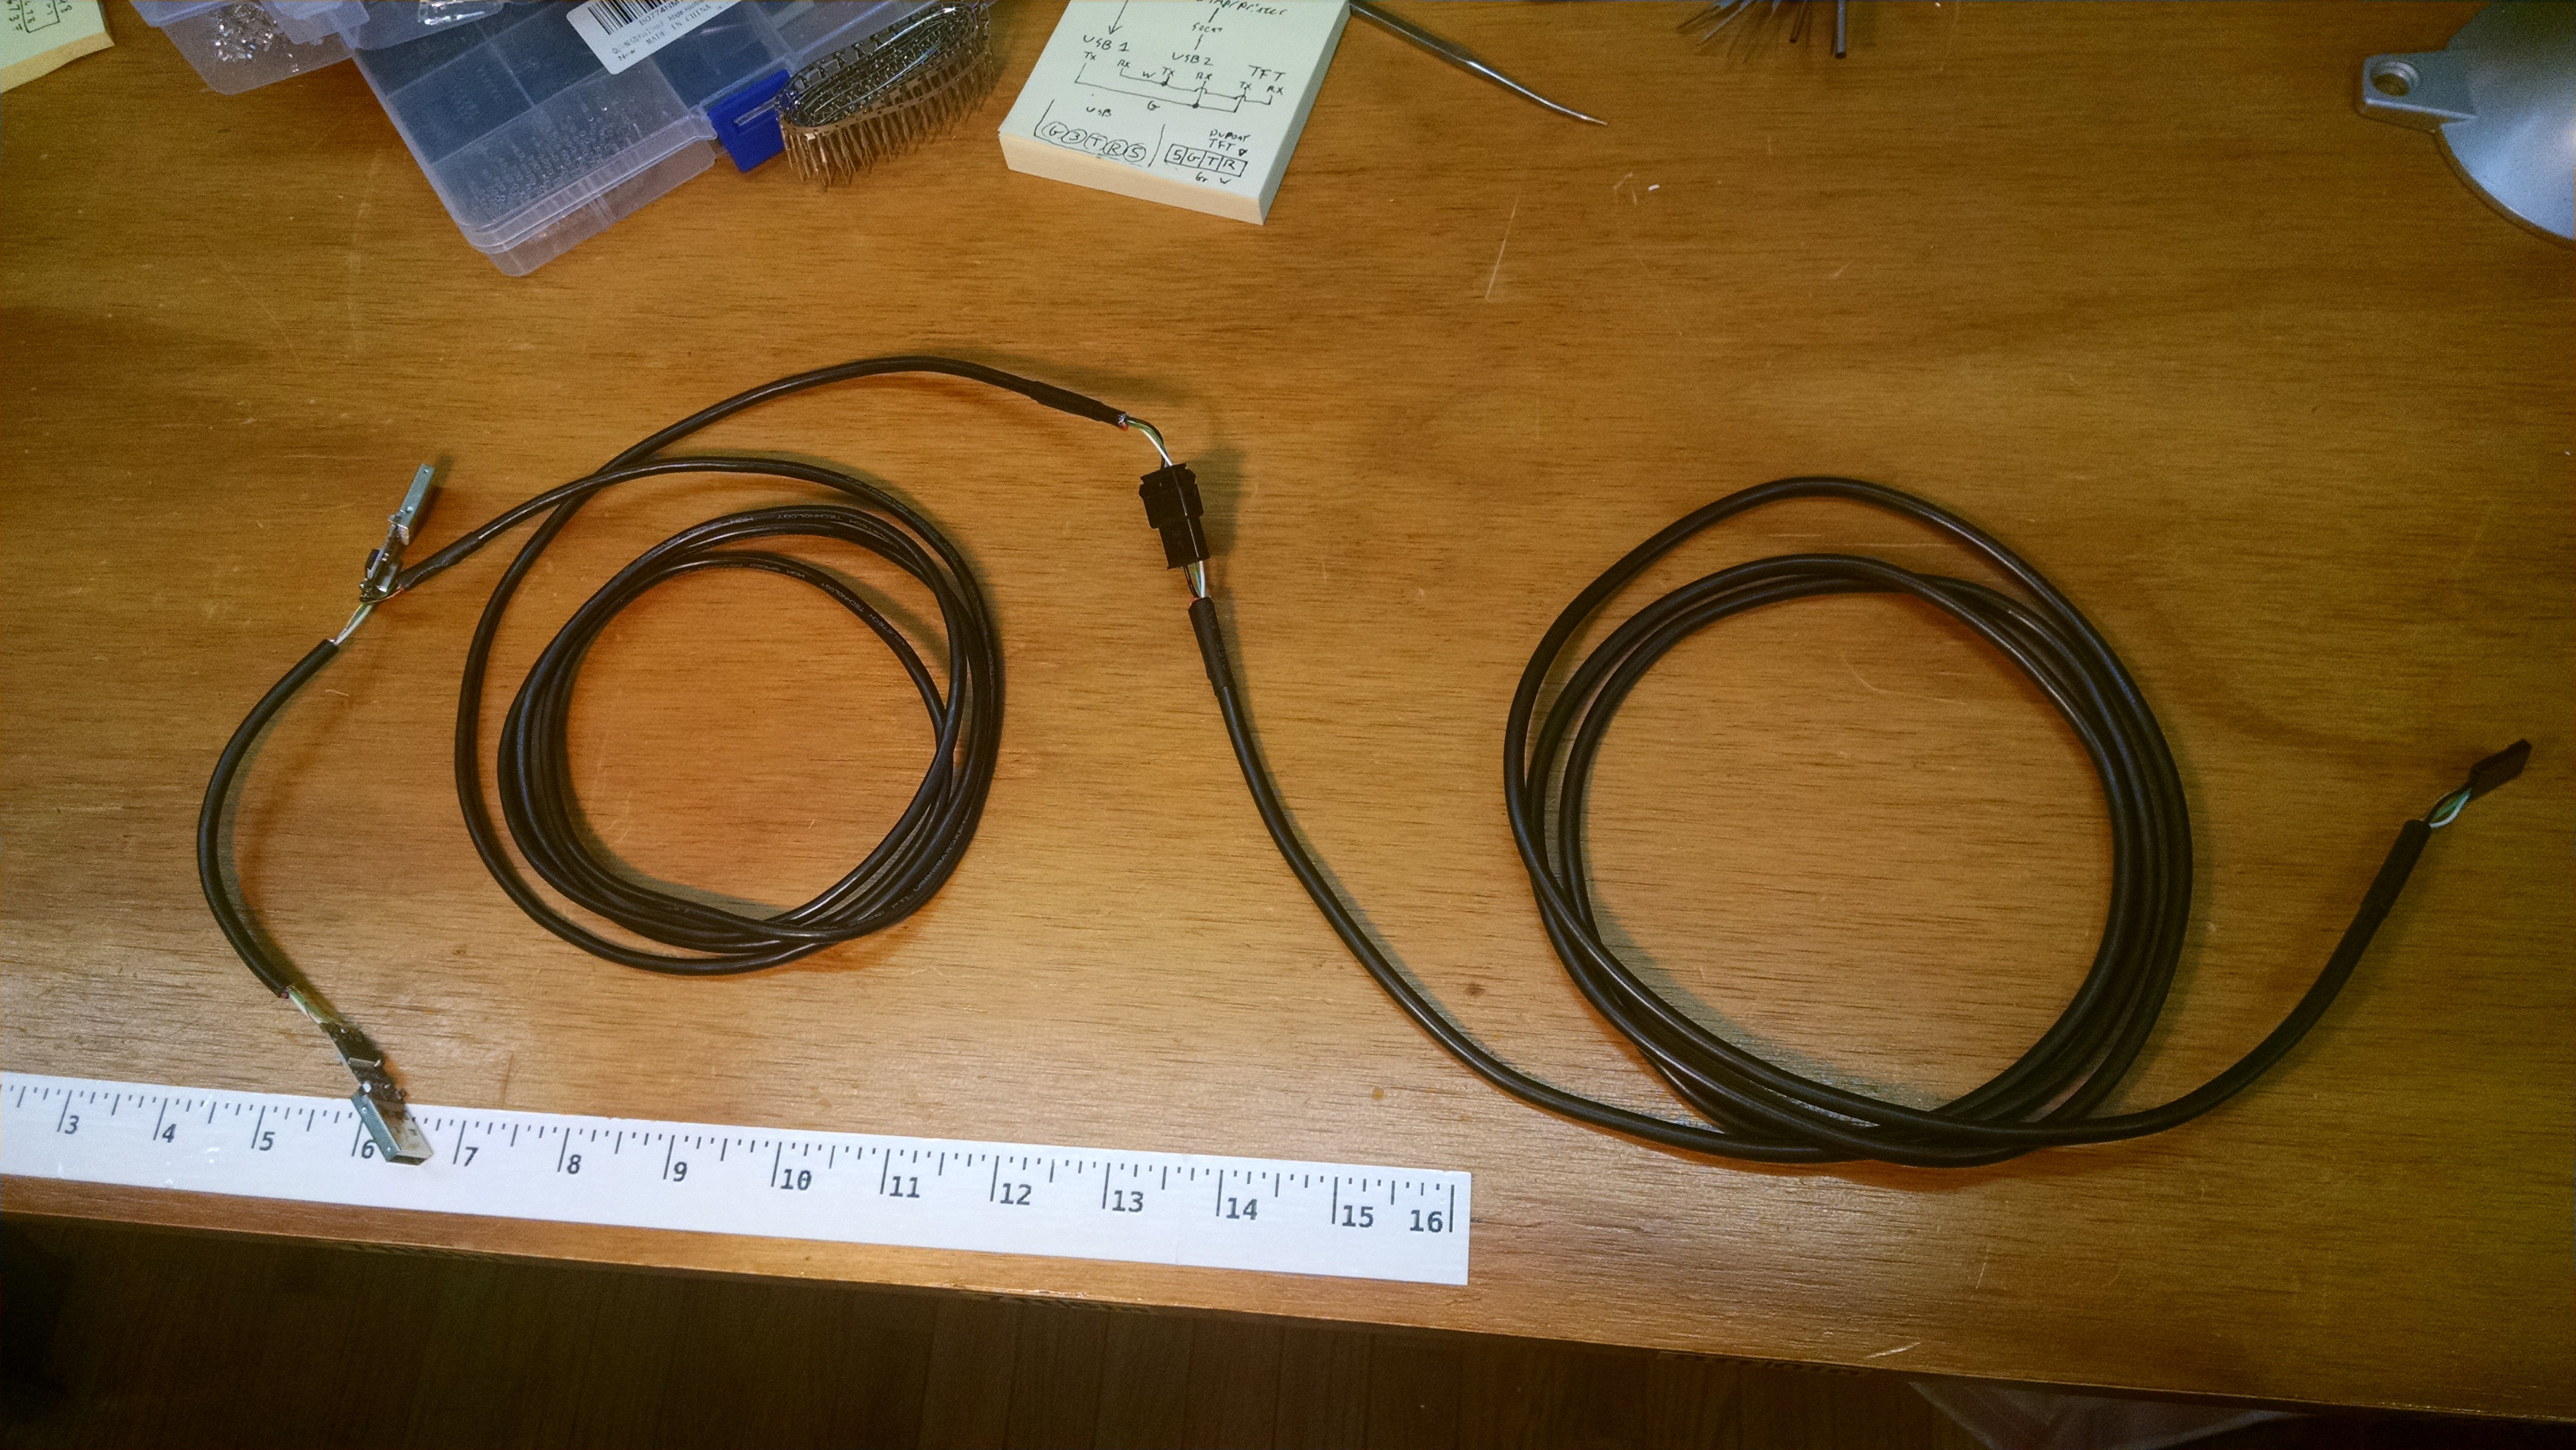
    A spudger to split the halves of the case open, and a little work with the soldering iron and I had the old cables removed and set aside for the next project. They weren't quite long enough for my setup, and I really wanted something shielded.
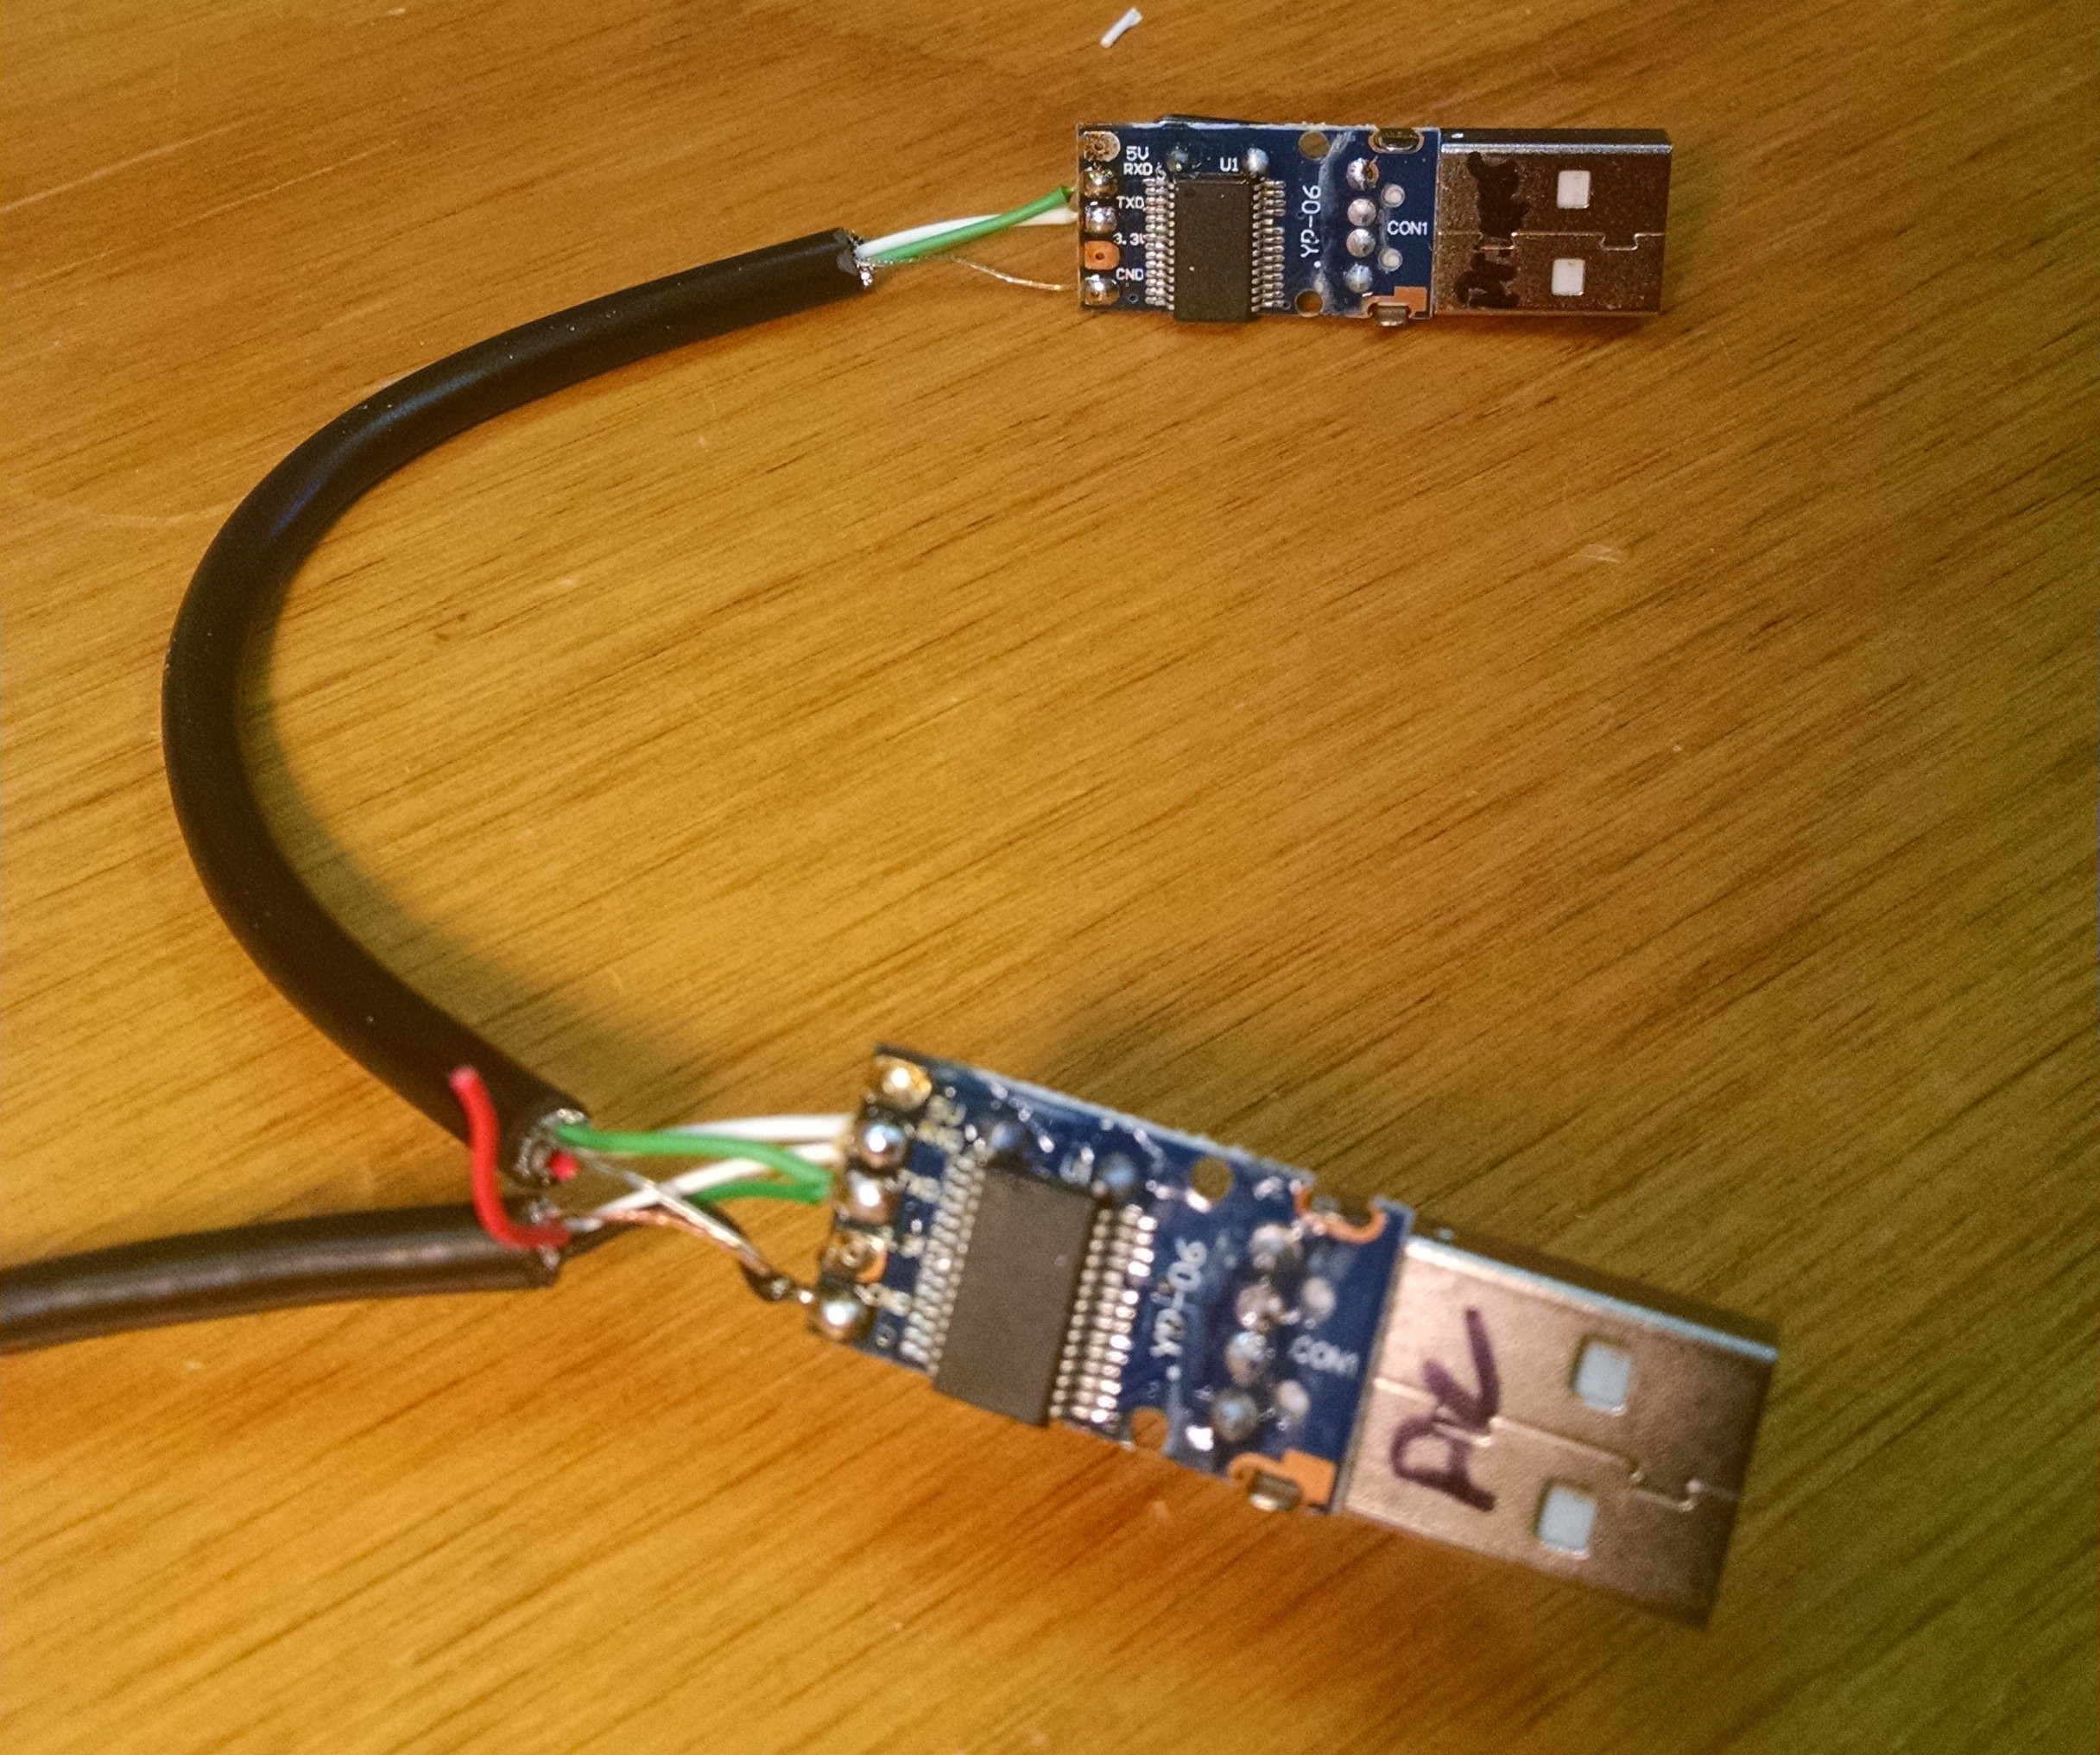
    I found a few old USB cables in the parts bin that were missing some ends that were just about perfect. The length wasn't quite right, but two of them end to end looked good, and having a connector near the back of the printer would make installation and future maintenance easier. A bit of soldering and crimping later, and this emerged:

    Everything is wired as per the diagram in the previous log. The far end has a dupont connector with the pins arranged to match the pinout of the TFT28. My best reference for that was the manual for the GEN_L, with the pinout for the AUX connector, so there's a slight chance it's mirrored, but once I get the printer open I can verify the pin markings on the actual TFT28. Thankfully they are printed right on the PCB. The connector in the middle of the cable is a JST-SM. I chose it both because I find them slightly easier to crimp than dupont, and because they lock together. The short jumper between the two USB serial-TTL adapters is just soldered.

    On the short jumper I connected the shield of the cable on both ends to GND. On the long cable from the serial-TTL adapter, the shield is connected to GND. In the middle of the two long cables the shield is not connected, as I had already cut it off. Oops. To make up for this, the dupont end of the other long cable has the shield also connected to GND. I intentionally did not want the shield connecting both GNDs together, as I had some vague memory of ground loops or something.


    The next step will be to install it, both on the RasPi and the printer, and then sort out the software side of the things.

  • /tmp/printer

    SetecAstronomy01/23/2022 at 19:17 0 comments

    Since Klipper doesn't send G-code to the physical printer's serial port, it needs to receive it on a host machine for processing before forwarding on in it's preferred format. To do this, it creates a virtual serial port, typically named /tmp/printer. OctoPrint then connects to this serial port instead of the more-typical /dev/ttyUSBx, etc.

    My plan is to use a pair of USB Serial-TTL adapters connected together, to provide a physical point I can connect the TFT28. OctoPrint will connect to one of them, and I'll use something like socat to connect the other to /tmp/printer. It should look something like this:

    I'm not 100% sure the AUX port on the GEN_L doesn't mirror both TX and RX from the main serial port (USB) to the TFT28's RX, if that's the case I'll have to come up with something different. Probably something smarter. But this is the current plan as it's easy to try with what I've got lying around.

    Note: All my experience with Klipper is from the perspective of an OctoPrint user, I understand it can be used without it, but as I've not run it that way, I've probably mistakenly attributed some things to one that belong to the other.