 Agustin Cruz
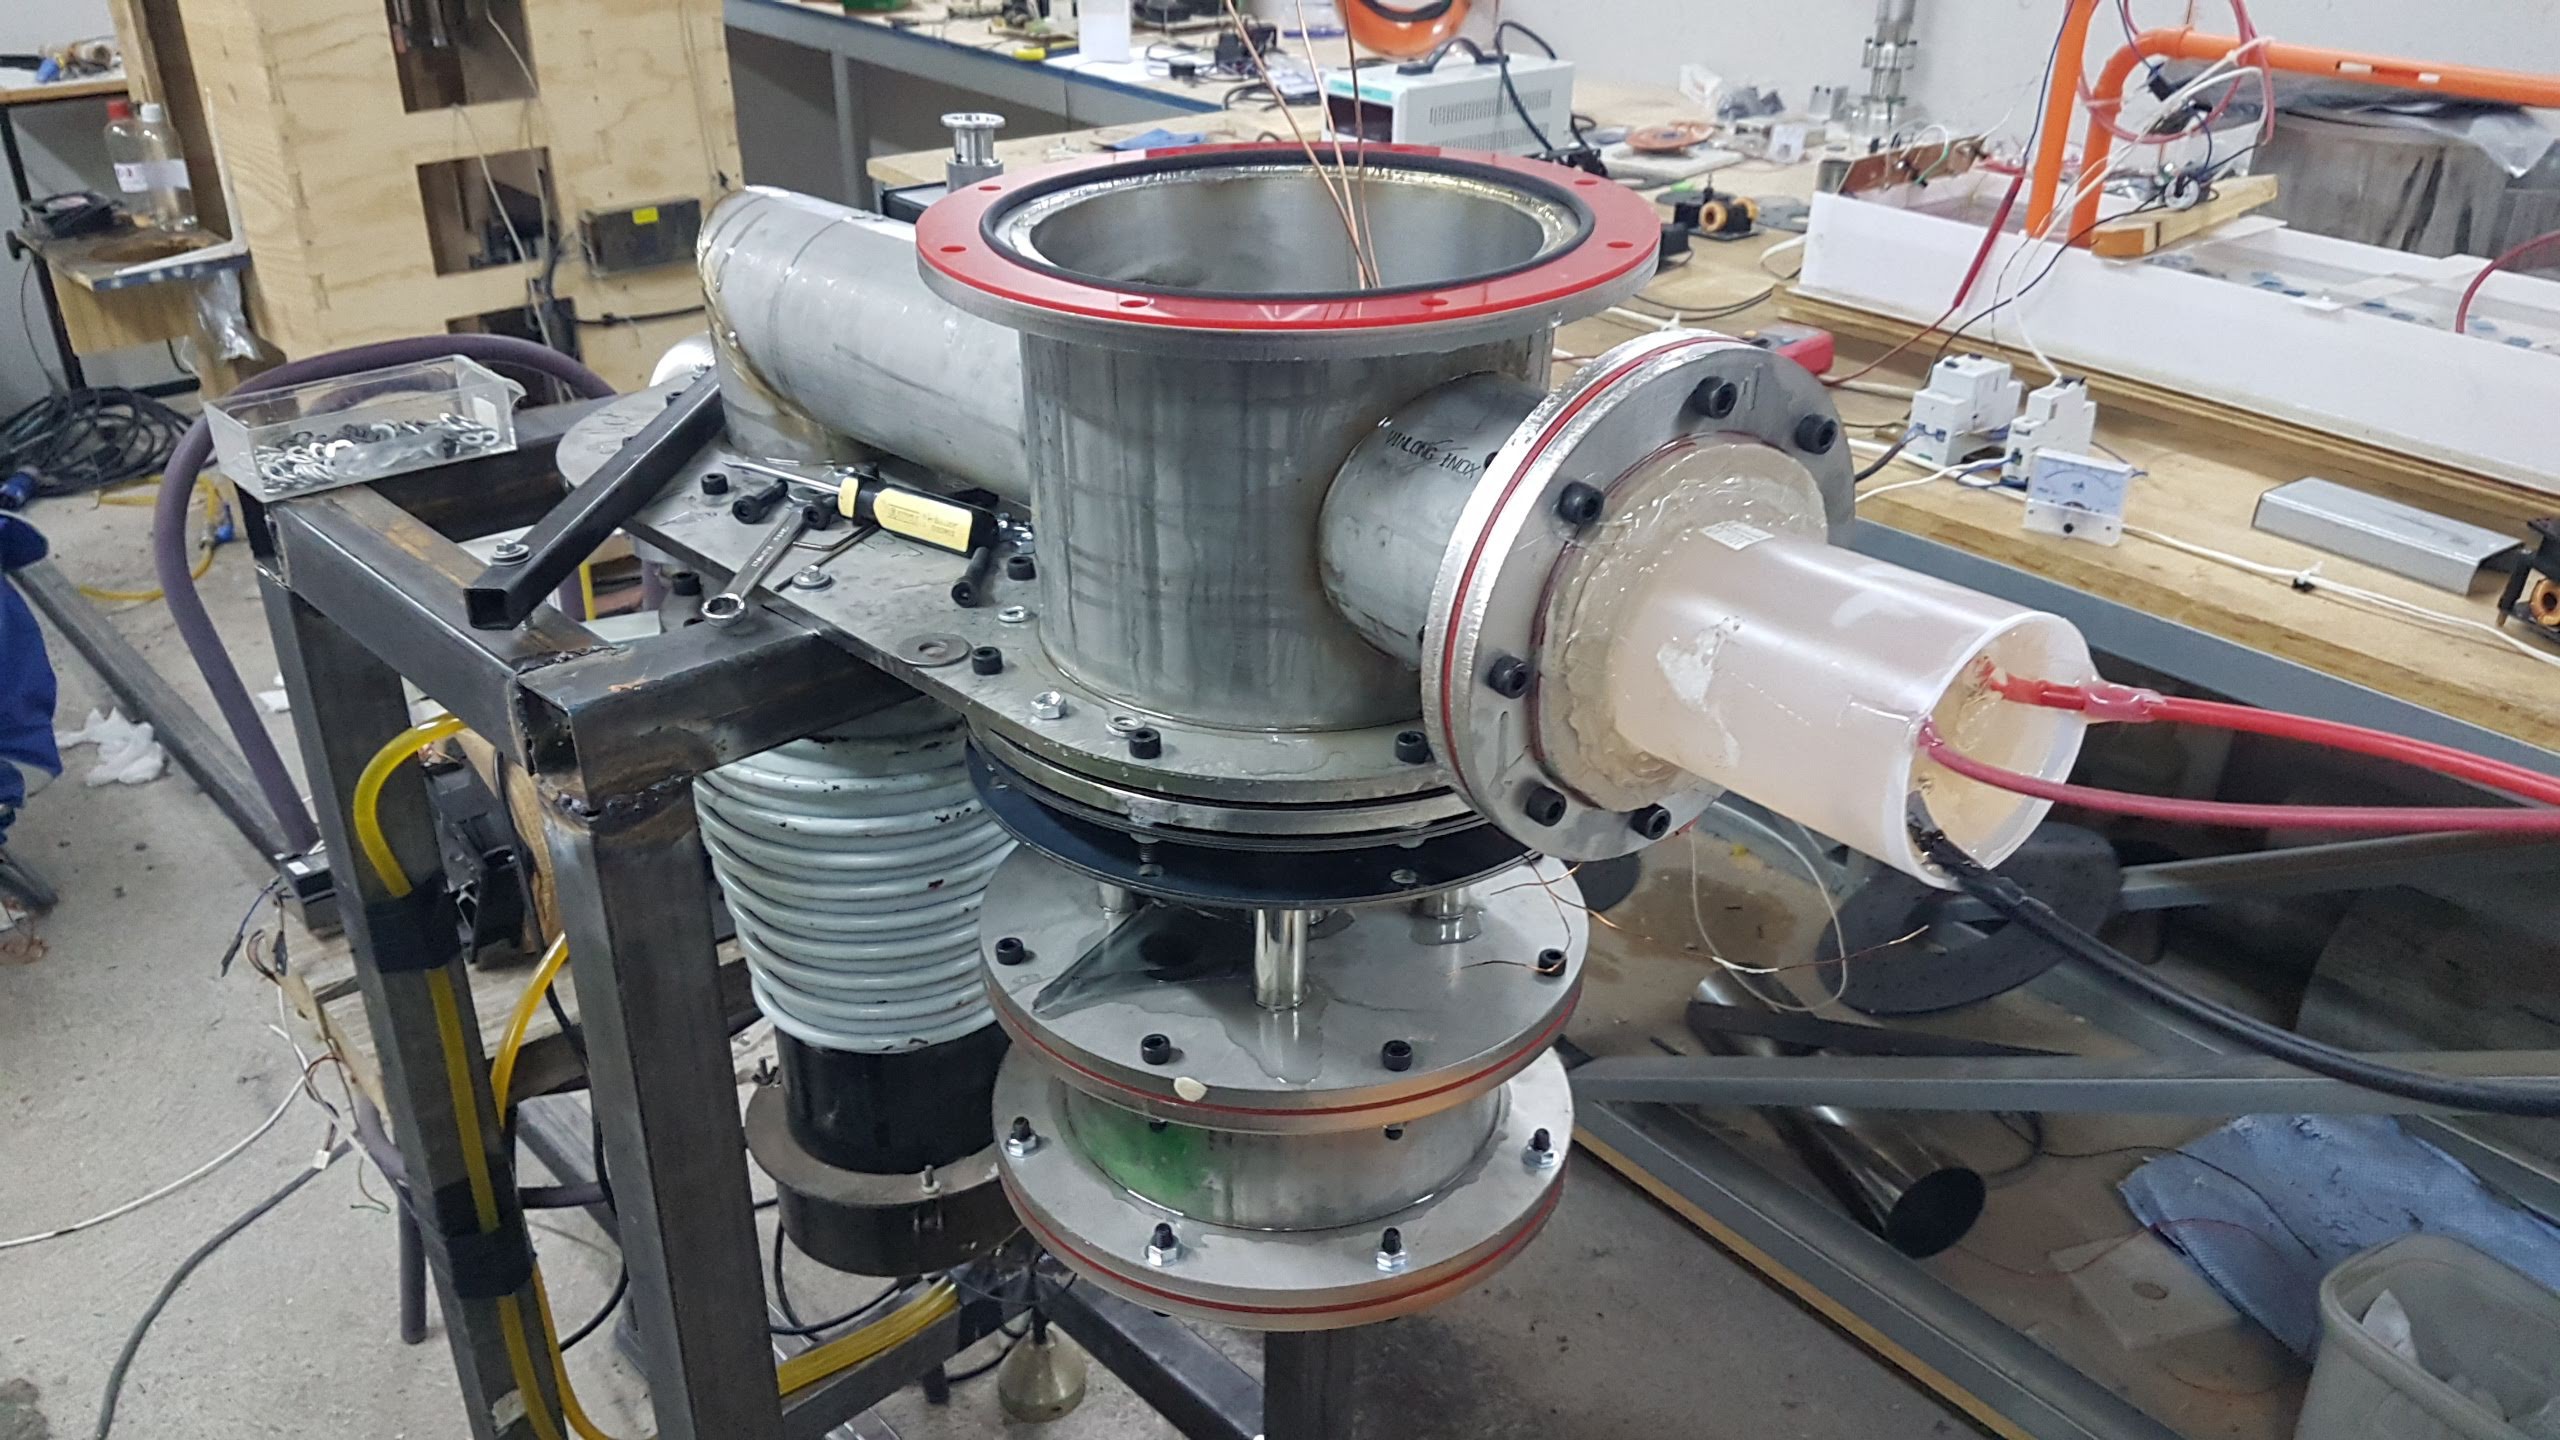
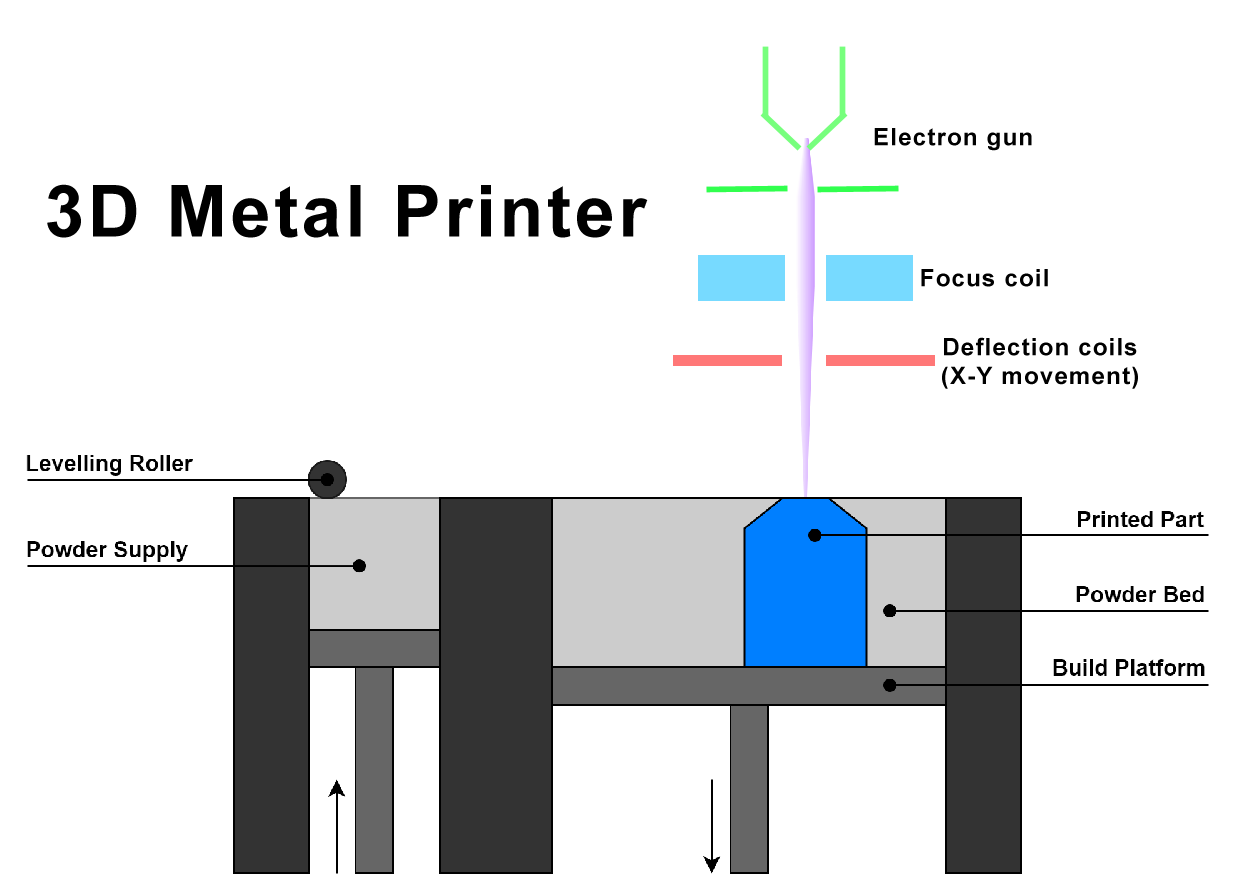
How this 3D Metal Printer works?
This printer uses an electron beam to selectively melting a layer of metal powder, causing the powder particles to fuse together. After one layer is complete, the build platform is moved down one layer in height. The re-coater comes in again with a fresh layer of powder, and the electron beam starts to induce fusion of powder particles, causing the new layer to form. This process is repeated until the entire part is finished.
The advantages of using an electron beam for 3D metal printing are:
- Higher density and strength due to a full melt of the powder
- Faster printing process
- Non-sintered powder can be recycled
- Fewer supports required compared to laser powder bed fusion
In the picture above you can see titanium 3D printed teeths, for dental implants.
FAQ:
- You're using the same basic technique as laser sintering, but with pure metal heated by a focused electron beam? That's... kinda crazy. Cool, but kinda crazy.
Yes, is the same principle. A electron beam sinters the metal powder, just like a laser beam does.
- How is compared with laser sintering?
When you print a 3D Metal part with laser is very important to take in account heat deformation and cracks when the piece cools itself. If you need a durable and strong part, you will also need a powerful oven to heat the metal part and slowly cool it to eliminate internal stress.
With electron beam printing you dont need an additional oven. The electron beam can be defocus to pre-heat the powder, so you focus again to start the sintering process according to your design.
- How much power does the system use in operation?
The total power consumption is around 1500 watts, considering vacuum pumps. The electron gun itself consume around 100W.
Disclaimer & Safety
This project is for people with experience with high voltage. The electron gun used in this project is very similar to the electron gun used in old televisions. It works with high voltage (10-20kv) and uses thick steel walls the same way old television used leaded glass to block any radiation.
Radiation Safety
When experimenting with ionizing radiation, like X-rays or Gamma-rays, diminishing your and everyone else’s exposure should be the first priority. Ionizing radiation can have serious health effects at high biologically effective doses including skin burns, an increase in cancers, radiation sickness, and even death.
There are three components that figure into the total radiation dose: time, distance, and shielding.
Time: The less time you spend exposed to radiation the lower your dose. When experimenting, make sure you know exactly what you need to get done with the radiation. If necessary, go through a dry run practicing all your motions without the radiation. Only use the radiation when you have worked out all the other potential problems with your experimental procedure.
Distance: Like most other physical phenomena, radiation decreases with distance in accordance with the inverse square law. This means that the further away you are from the source of the radiation, the less radiation you’ll be exposed to. Try to plan your experiments so that you, and anyone else around, are standing as far away from the radiation source as possible.
Shielding: As ionizing radiation passes through matter, the intensity of the radiation is diminished. Thus, to protect yourself from radiation you should erect a barrier or shield. However, the material you use matters significantly; some materials reduce the intensity of radiation more than others. Every material has a “halving thickness.” This is the thickness required to reduce the radiation intensity by half. So if the halving thickness of a material is 1 inch, then a 1 inch thick sheet will cut the radiation to 50%. Two inches will cut the radiation to 25%, 3 inches to 12.5%, and so forth. Traditionally lead is used for shielding because it has a very low halving thickness (0.4 inches). Before working with radiation, erect the shielding. When working with radiation, staying behind the shielding can be an effective way of diminishing your radiation exposure.
High Voltage Safety
Work on un-energized circuits if at all possible.
Be very careful around live 50/60 Hz electricity, since it requires very little current to injure. Your power supply can kill you!
Keep your distance from live high voltage circuits. Since high voltages can breakdown air to connect you to a circuit, keep high voltage circuits in enclosures and behind barricades when in operation.
Be sure to properly ground your experiment and your enclosure. Take special care to safely de-energize and ground a circuit before working on it. Know when and how you can end up in the ground path in a circuit and put safeguards in place to eliminate this eventuality.
Never work alone, always have a partner who knows your equipment and the risks and hazards involved. That way, you have a second set of eyes to insure safety, and someone who can shut off the power and get help if you are injured.
Disclaimer
The authors do not make any representations as to the completeness or the accuracy of the information contained herein, and disclaim any liability for damages or injuries, whether caused by or arising from the lack of completeness, inaccuracies of the information, misinterpretations of the directions, misapplication of the circuits and information or otherwise. The authors, contributors, and owners expressly disclaim any implied warranties and of fitness of use for any particular purpose, even if a particular purpose is indicated in the text.