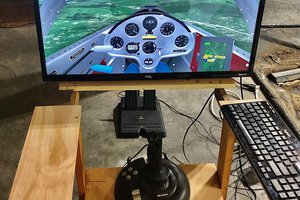
Close
0%
0%

ESP32 PoE board - sending emails from Tasmota

Used to much time searching the internet to not document this

Similar projects worth following
When dealing with tasmota compatible boards, that are not strictly standard(also has Ethernet) and on top of that you want it to be able to send emails(requires scripting) you end up in quite uncharted territory and google is little to no help.

Compiling the right software.

Settings for TasmoCompiler were:

Minimal packages required to have web console, Ethernet and email working are:

  1. ESP32 Generic
  2. Berry scripting
  3. MQTT over TLS
  4. Web Interface

- tasmota32-ethernet-wEmailDebugging.bin has this configuration and email debugging enabled, for someone that needs to debug their email script

- tasmota32-ethernet-email.bin is without debugging for email bu has several addition modules added:

Air/gas sensors, Bluetooth, Home Assistant, IR support, Light sensors, MQTT over TLS, Script, Temp/Hum sensors, Timers, Web interface, WS2812 Leds

Custom parameters were:

#define USE_ESP32MAIL
#define DEBUG_EMAIL_PORT // this is the magic bullet for all those {"Sendmail":"Wrong parameters"}

#define EMAIL_SERVER "smtp.gmail.com"
#define EMAIL_PORT 465
#define EMAIL_USER "gmail.username"
#define EMAIL_PASSWORD "16leterpassword" // generated by gmail as application specific password
#define EMAIL_FROM "senders.email@gmail.com"


#define USE_ETHERNET
// Olimex ESP32-PoE
#define ETH_TYPE          0                    // [EthType] 0 = ETH_PHY_LAN8720, 1 = ETH_PHY_TLK110, 2 = ETH_PHY_IP101
#define ETH_ADDRESS       0                    // [EthAddress] 0 = PHY0 .. 31 = PHY31
#define ETH_CLKMODE       3                    // [EthClockMode] 0 = ETH_CLOCK_GPIO0_IN, 1 = ETH_CLOCK_GPIO0_OUT, 2 = ETH_CLOCK_GPIO16_OUT, 3 = ETH_CLOCK_GPIO17_OUT

Version used was: Tasmota v11.0.0 English

tasmota32-ethernet-script.bin

Bin for general use without sendmail debugging but with additional integrations: Air/gas sensors, Bluetooth, Home Assistant, IR support, Light sensors, MQTT over TLS, Script, Temp/Hum sensors, Timers, Web interface, WS2812 Leds

octet-stream - 1.70 MB - 03/10/2022 at 23:33

Download

tasmota32-ethernet-wEmailDebugging.bin

Bin for debugging send email command for any esp32 board with or without Ethernet port.

octet-stream - 1.21 MB - 03/10/2022 at 22:47

Download

  • Scripting email actions

    Dorijan03/18/2022 at 20:00 0 comments

    By going to Consoles > Edit Script you can create your own scripts and actions, that can be persistent through reboot.

    Good sources of info regarding scripting are:

    Documentation: https://tasmota.github.io/docs/Scripting-Language/#script-sections

    Examples(for better understanding):  https://github.com/efal/Sonoff-Tasmota/blob/development/scripter.md

    Additional examples(also check some comments): https://github.com/arendst/Tasmota/issues/5689

    You must tick the box Script enable and Save to make the script valid and running

    NOTE: subject doesn't matter since gmail will replace it with device name you used to generate 16 letter password.

    This is the most basic email sending script. Every time device reboots, email is sent.

    >D
    ;define and init variables here
    >B
    ;executed on BOOT time before sensors are initialized and on save script
    >BS
    ;executed on BOOT time after sensors are initialized
    >F
    ;Executed every 100 ms
    >S
    ;Executed every second
    >R
    ;Executed on restart. p vars are saved automatically after this call
    =>sendmail [smtp.gmail.com:465:gmail.username:16leterpassword:senders.email@gmail.com:receivers.email@gmail.com:subject] Device has just restarted

    Olimex ESP32 POE has a button on GPIO34, therefore we used GPIO34 as status variable and we are setting pin[34] as input with pull-up(2).
    With some additional lines to trigger only on status changes, we can set it to send email on button change from 1 to 0.

    >D
    ;define and init variables here
    GPIO34=0
    >B
    ;executed on BOOT time before sensors are initialized and on save script
    spinm(34 2)
    >BS
    ;executed on BOOT time after sensors are initialized
    >F
    ;Executed every 100 ms
    GPIO34=pin[34]
    if chg[GPIO34]>0
    and GPIO34==0
    then
    print input status changed 
    =>sendmail [smtp.gmail.com:465:gmail.username:16leterpassword:senders.email@gmail.com:receivers.email@gmail.com:Button pressed] Button was pressed at %tstamp% .
    delay(10000)
    print 10s repeat email timeout passed
    GPIO34=0
    endif
    >S
    ;Executed every second
    >E
    Executed when a Tasmota MQTT RESULT message is received
    >R
    ;Executed on restart. p vars are saved automatically after this call
    =>sendmail [smtp.gmail.com:465:gmail.username:16leterpassword:senders.email@gmail.com:receivers.email@gmail.com:Device restart] Device has just restarted.

    Behaviour can be monitored from Tasmota console Consoles > Console

  • Flashing, testing email and configuring the device

    Dorijan03/10/2022 at 23:15 0 comments

    1. Use ESP flasher or comparable tool for flashing ESP32 devices
      https://github.com/esphome/esphome-flasher/releases
    2. Use your phone to connect to device by wifi AP set by device "tasmota ..."
    3. You will be redirected to wifi setup page (required even if you only plan to use it over Ethernet later) Use 192.168.4.1 if no auto redirection
    4. Wifi configuration page will provide you with the new IP address that it has received from the network
    5. To test sending emails just go to Consoles>Console and write + enter
      *if using this on some esp8266 or arduino script <> symbols might be required around receivers
      sendmail [smtp.gmail.com:465:gmail.username:16leterspassword:senders.email@gmail.com:receivers.email@gmail.com] test
    6. If successful you might prefer to flesh your device with a bin without extensive email debugging, since Tasmota is already installed you can use OTA update through the web interface
    7. If using Olimex ESP32 PoE Board configure the board and pinout by:
      1. Goig to Configuration > Configure Other menu
      2. Copy the template from https://templates.blakadder.com/olimex_ESP32-POE.html to the template wind
        {"NAME":"Olimex ESP32-PoE","GPIO":[1,1,1,1,1,1,0,0,5536,1,1,1,1,0,5600,0,0,0,0,5568,0,0,0,0,0,0,0,0,1,1,1,1,1,0,0,1],"FLAG":0,"BASE":1}
      3. Tick Activate and Save
      4. Restart the device
      5. Ethernet should be working
    8. If you plan on using GPIOs as input in the script make sure the pin that you are planning to use is not reserved by system
      1. Go to Configuration > Configure Template
      2. Go to the GPIO you want to use ( for example on Olimex ESP32 PoE board button is connected to GPIO34 )
      3. Select user from drop down menu

  • Setting up gmail

    Dorijan03/10/2022 at 22:53 0 comments

    For using gmail you will not be allowed to use or own gmail password due to security issues.
    Therefore you need to generate 16character(ignore spaces) app password
    more info here: https://support.google.com/accounts/answer/185833?hl=en
    requirements are that you have

    - set-up 2FA (2 factor authentication) for that email account

    - the birth date specified in the account is more than 18 years ago.

View all 3 project logs

Enjoy this project?

Share

Discussions

Similar Projects

Does this project spark your interest?

Become a member to follow this project and never miss any updates