 Stephen Chasey
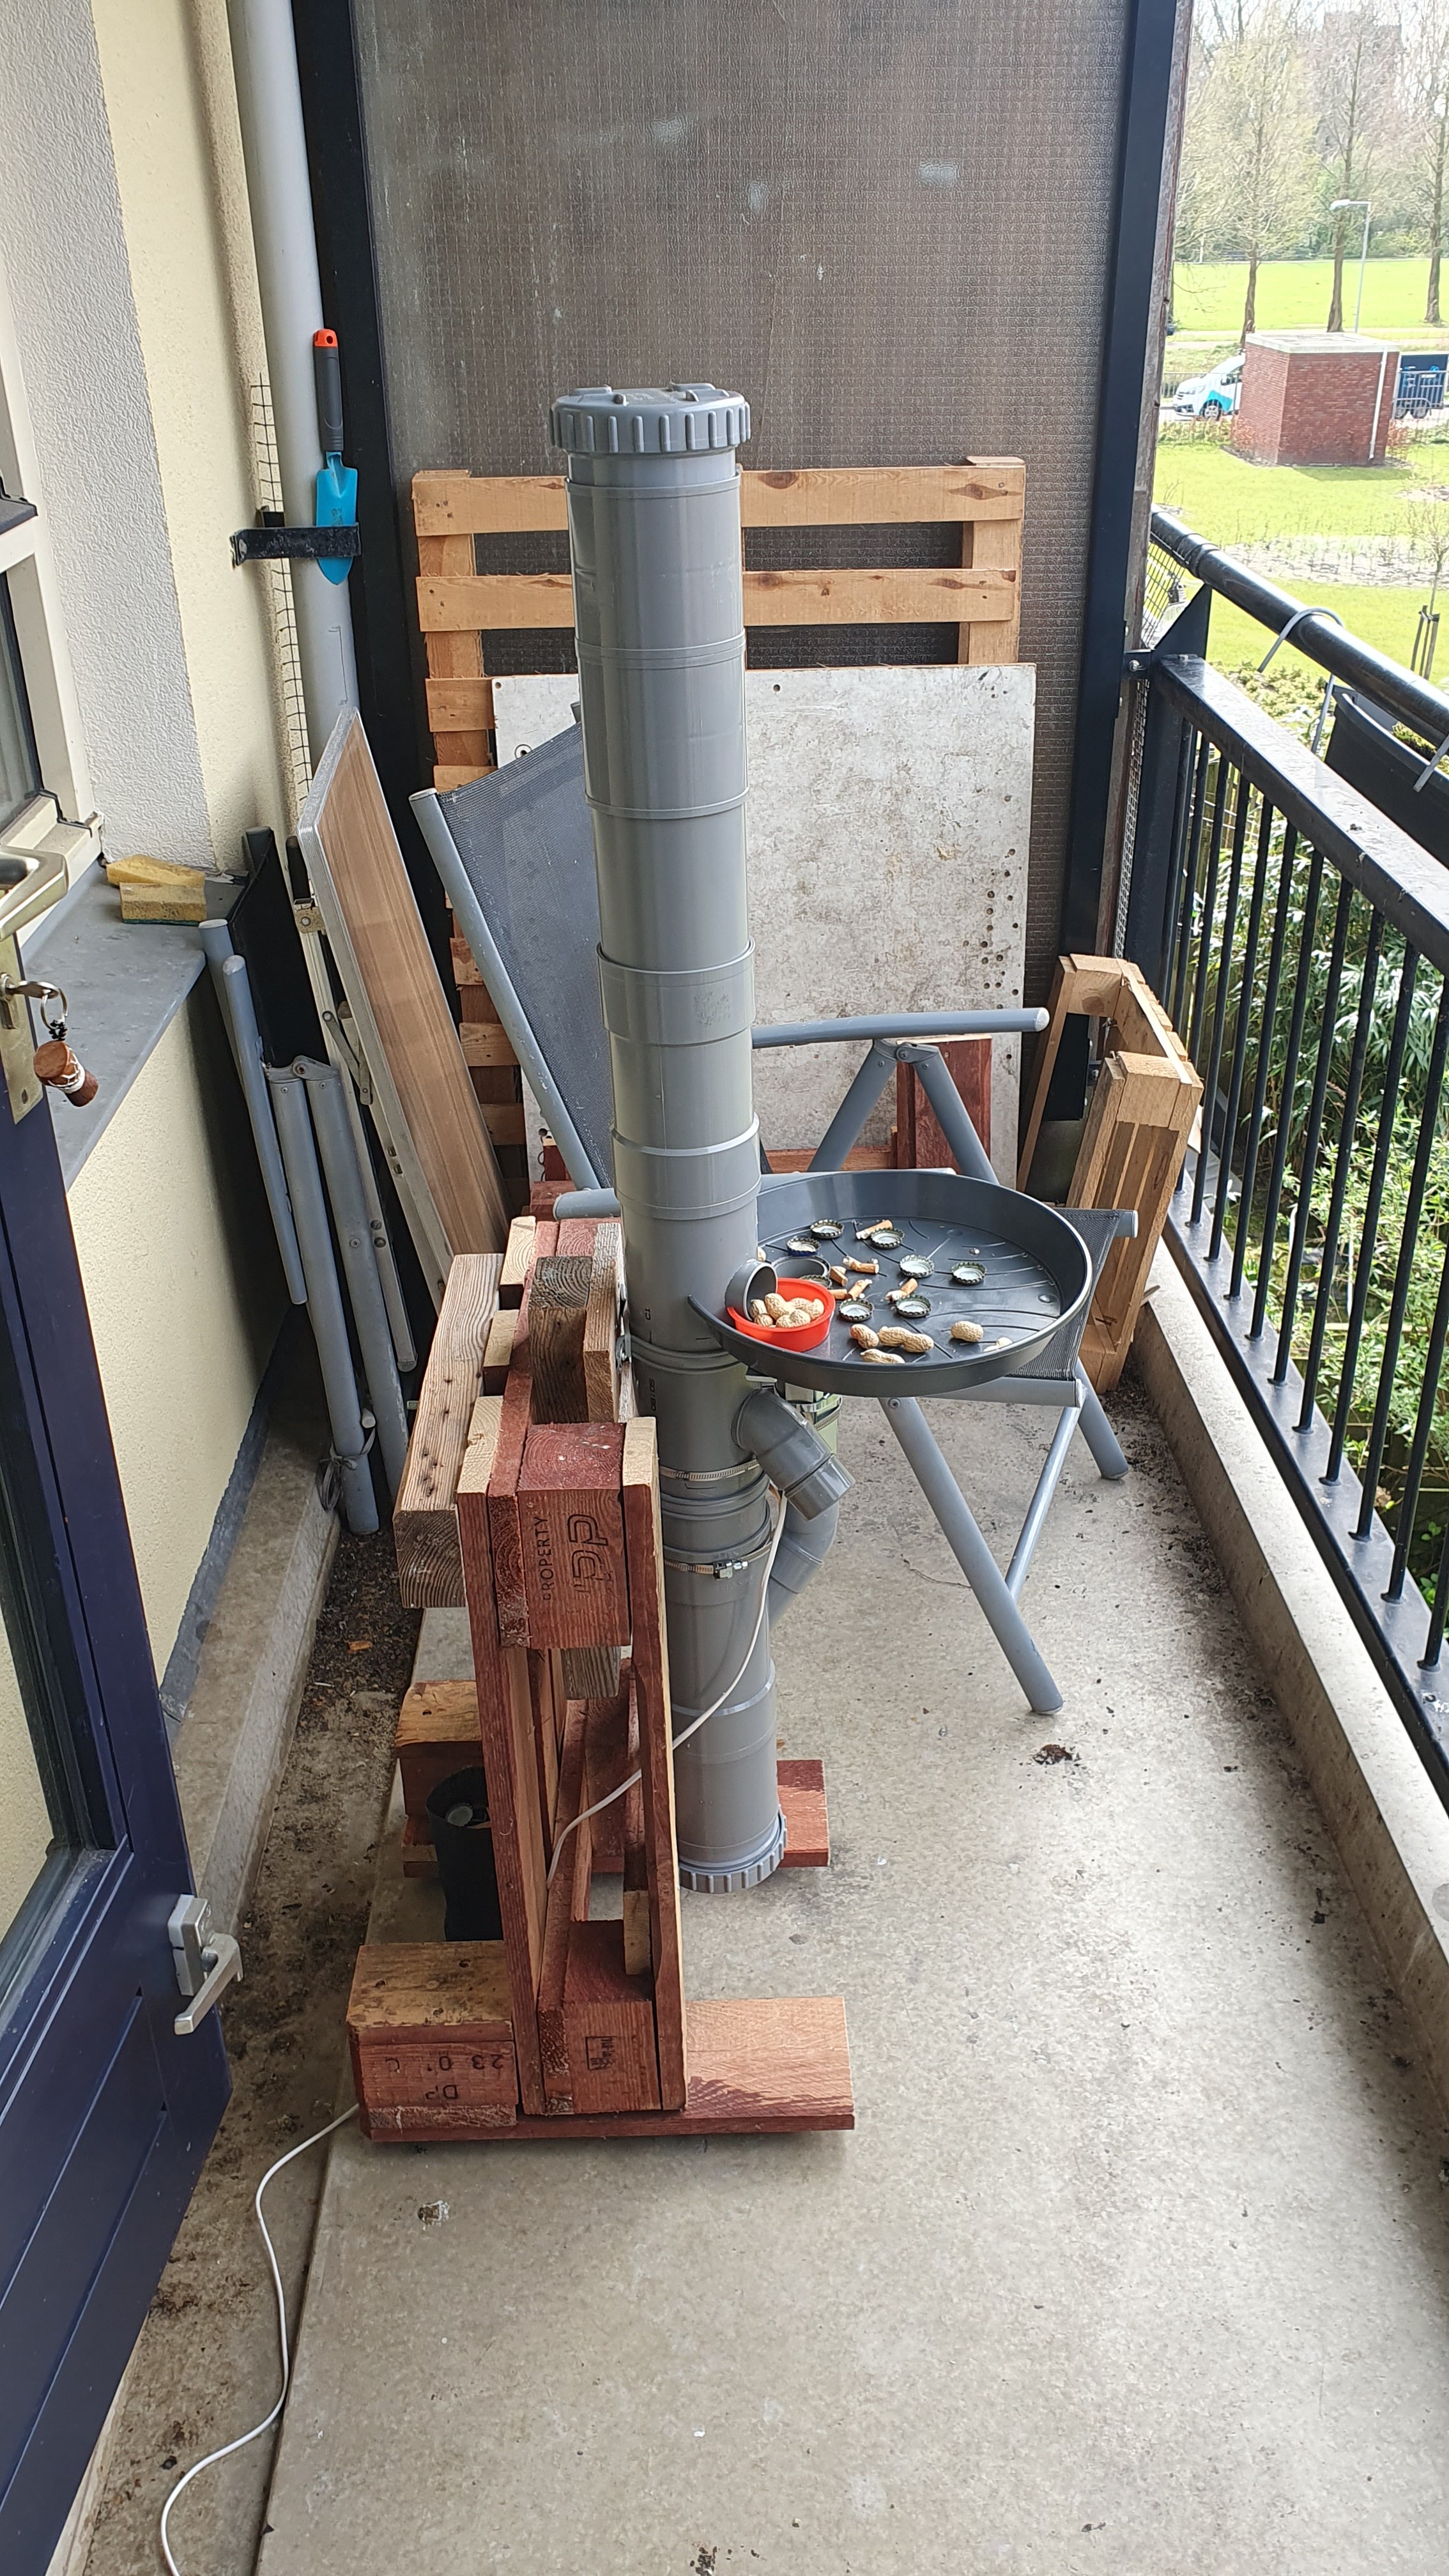
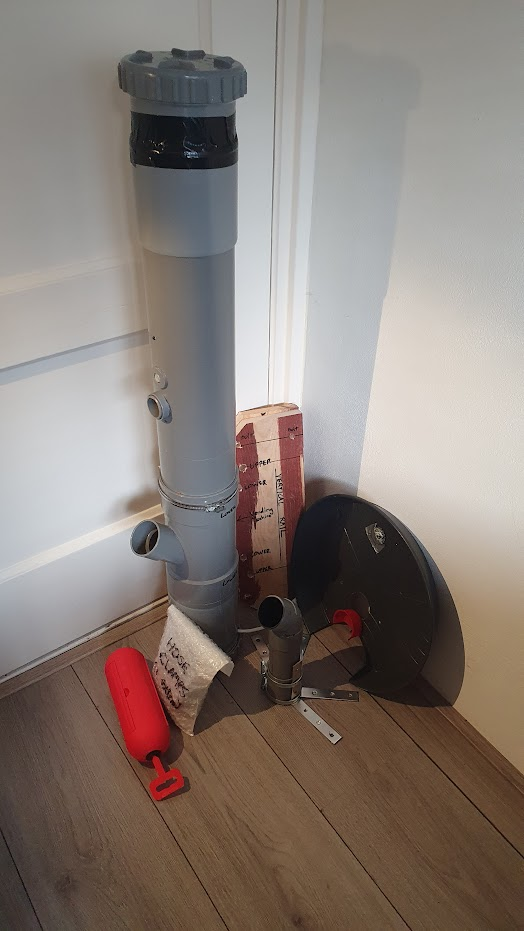
A vending machine for birds that rewards them with food when they drop something in a hole. Electronics and enclosure materials cost <100 USD/EUR. I've designed a PCB and PVC pipe enclosure and dispenser (described below). The circuit is not complex, but I think a custom PCB makes it easier for people who are not electronics hobbyists to build this. I've made a few different enclosures out of scrap for this, but will share the PVC pipe enclosure details since it's sturdy, waterproof, and the materials can all be found at the hardware store.
There were two main inspirations for me to start and document this project
- Hans Forsberg - designed his own machine and was the first person I learned of that had birds (magpies) bringing items to deposit on thier own
- Josh Klein - makes his Crowbox designs freely available and supports people who want to build it
I would like to thank PCBWay for helping me get the PCB made.
MAIN FEATURES
- portable
- saves power until a warm body is present
- battery or mains powered
- one moving part
- accessible components and materials
- rodents can't break in and get the food
- cheap to build
- customizable
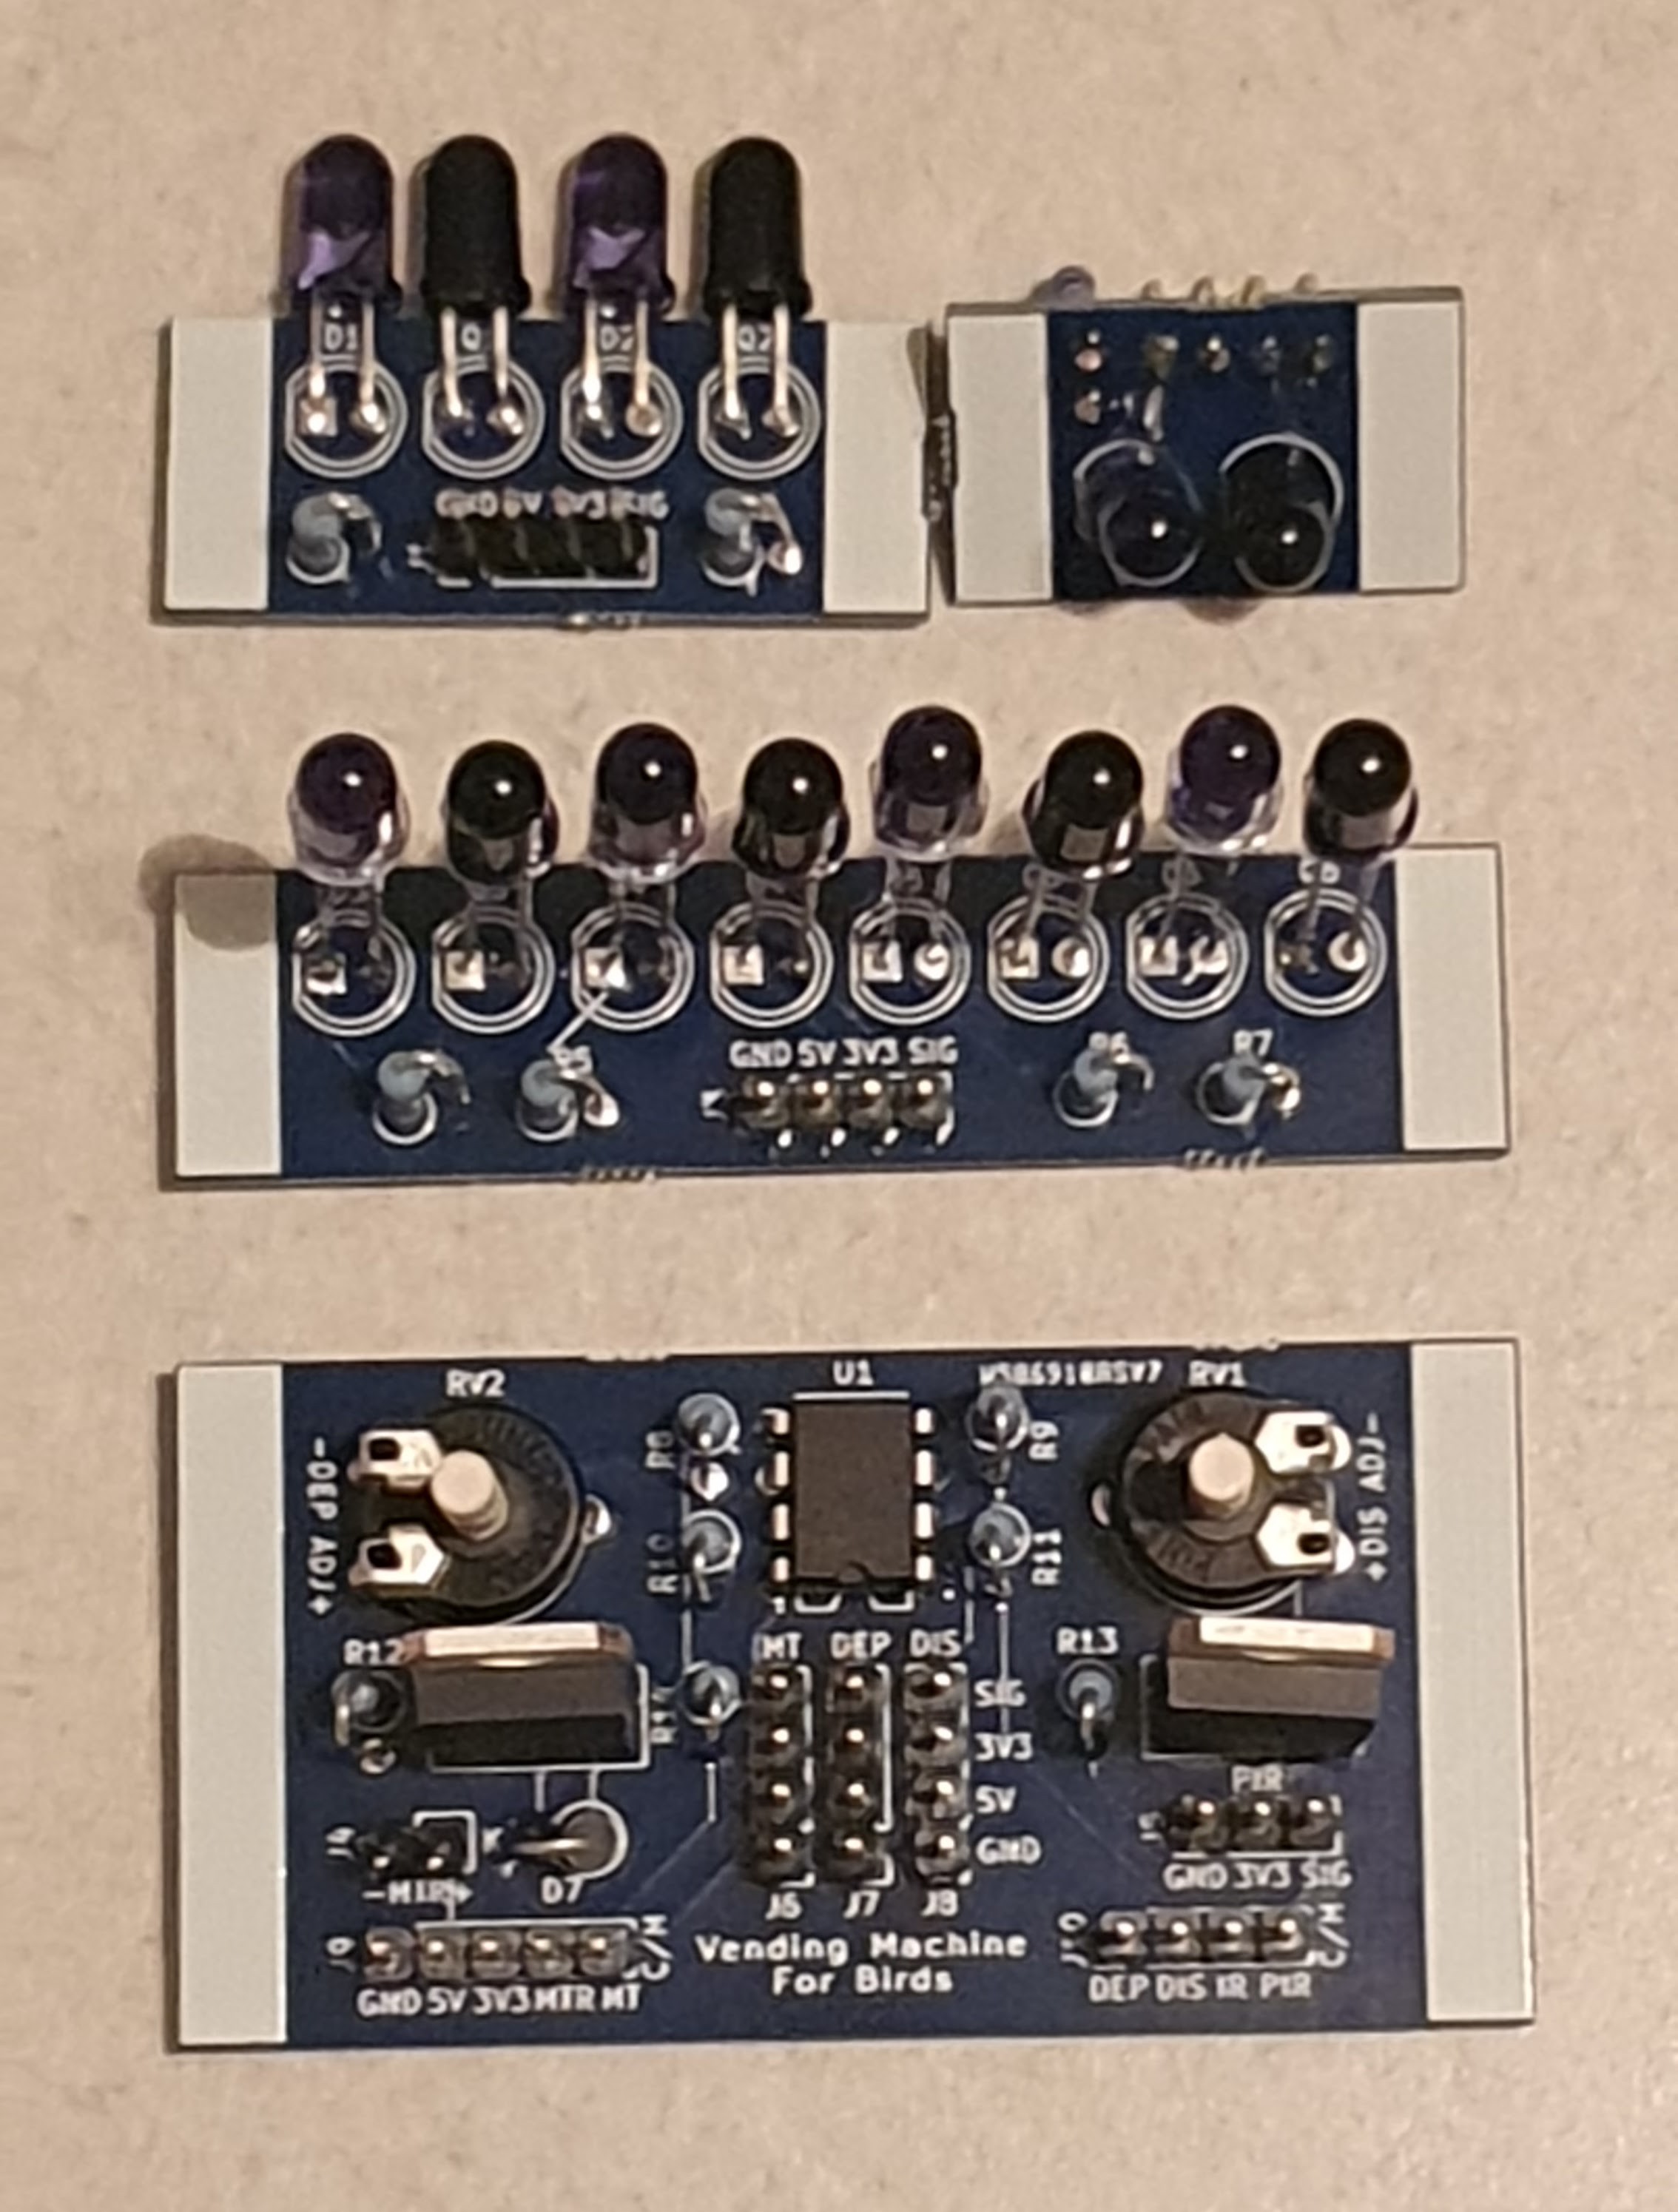
ELECTRONICS, SENSORS, AND POWER
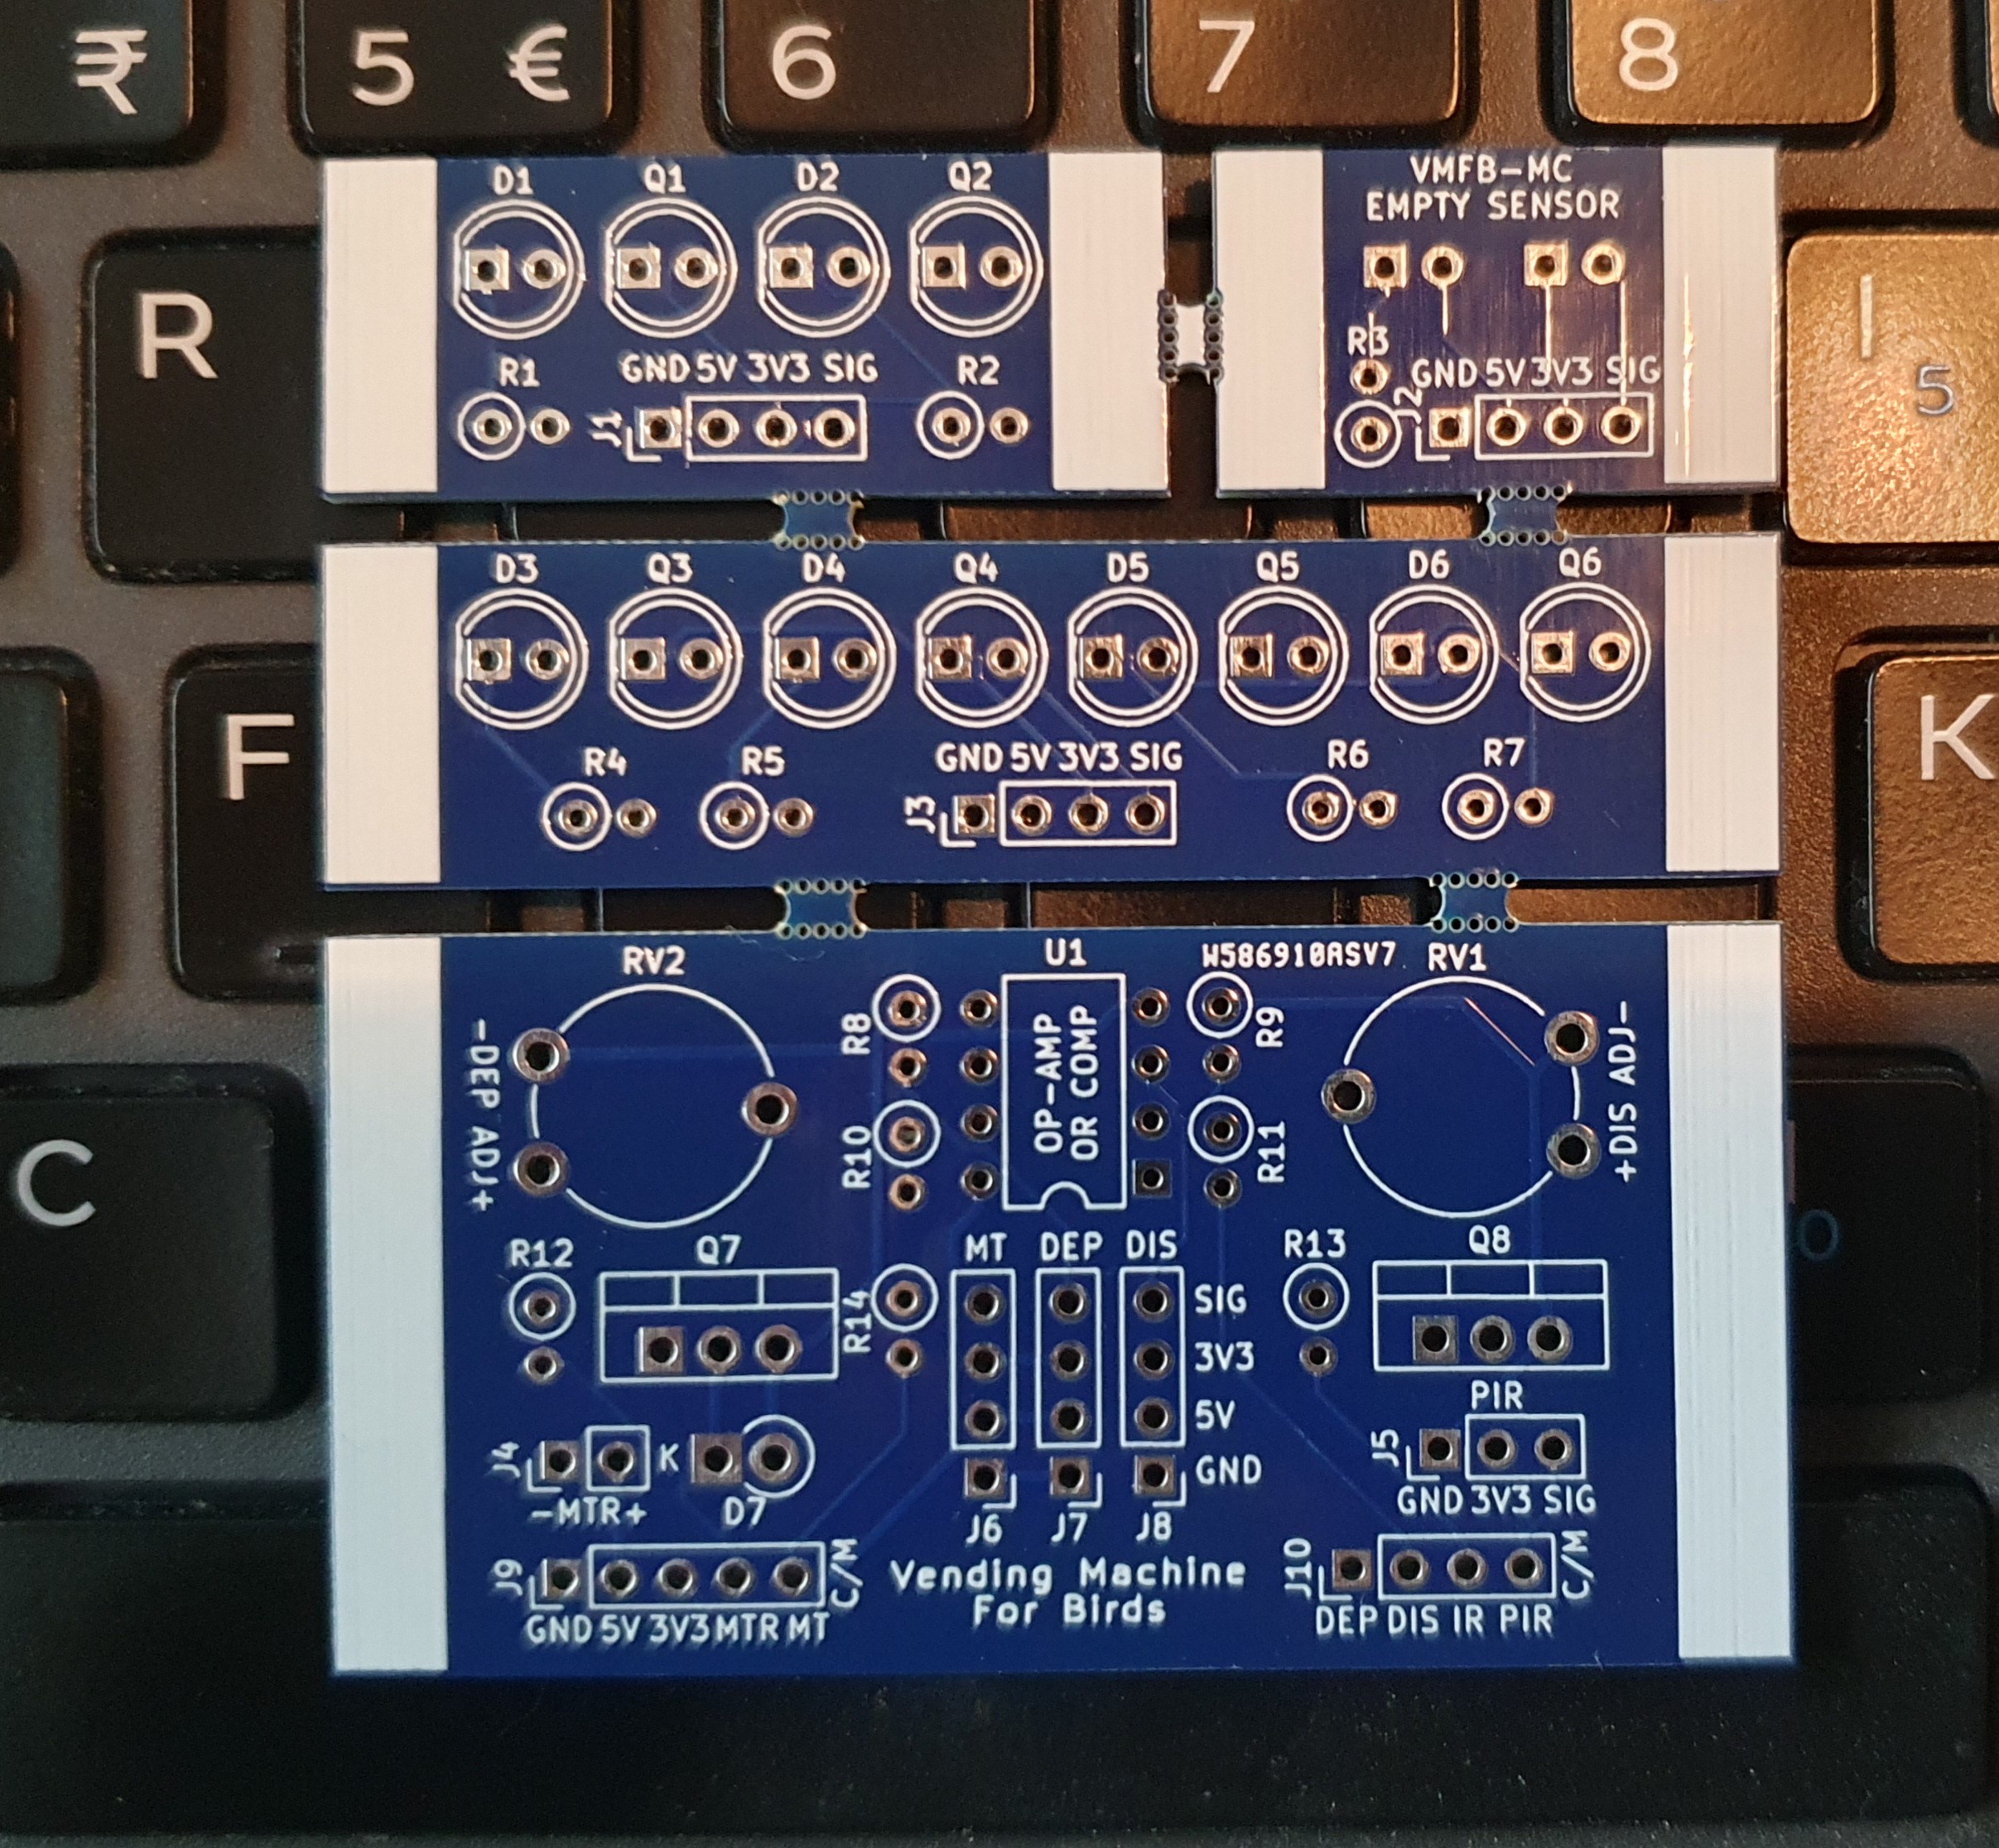
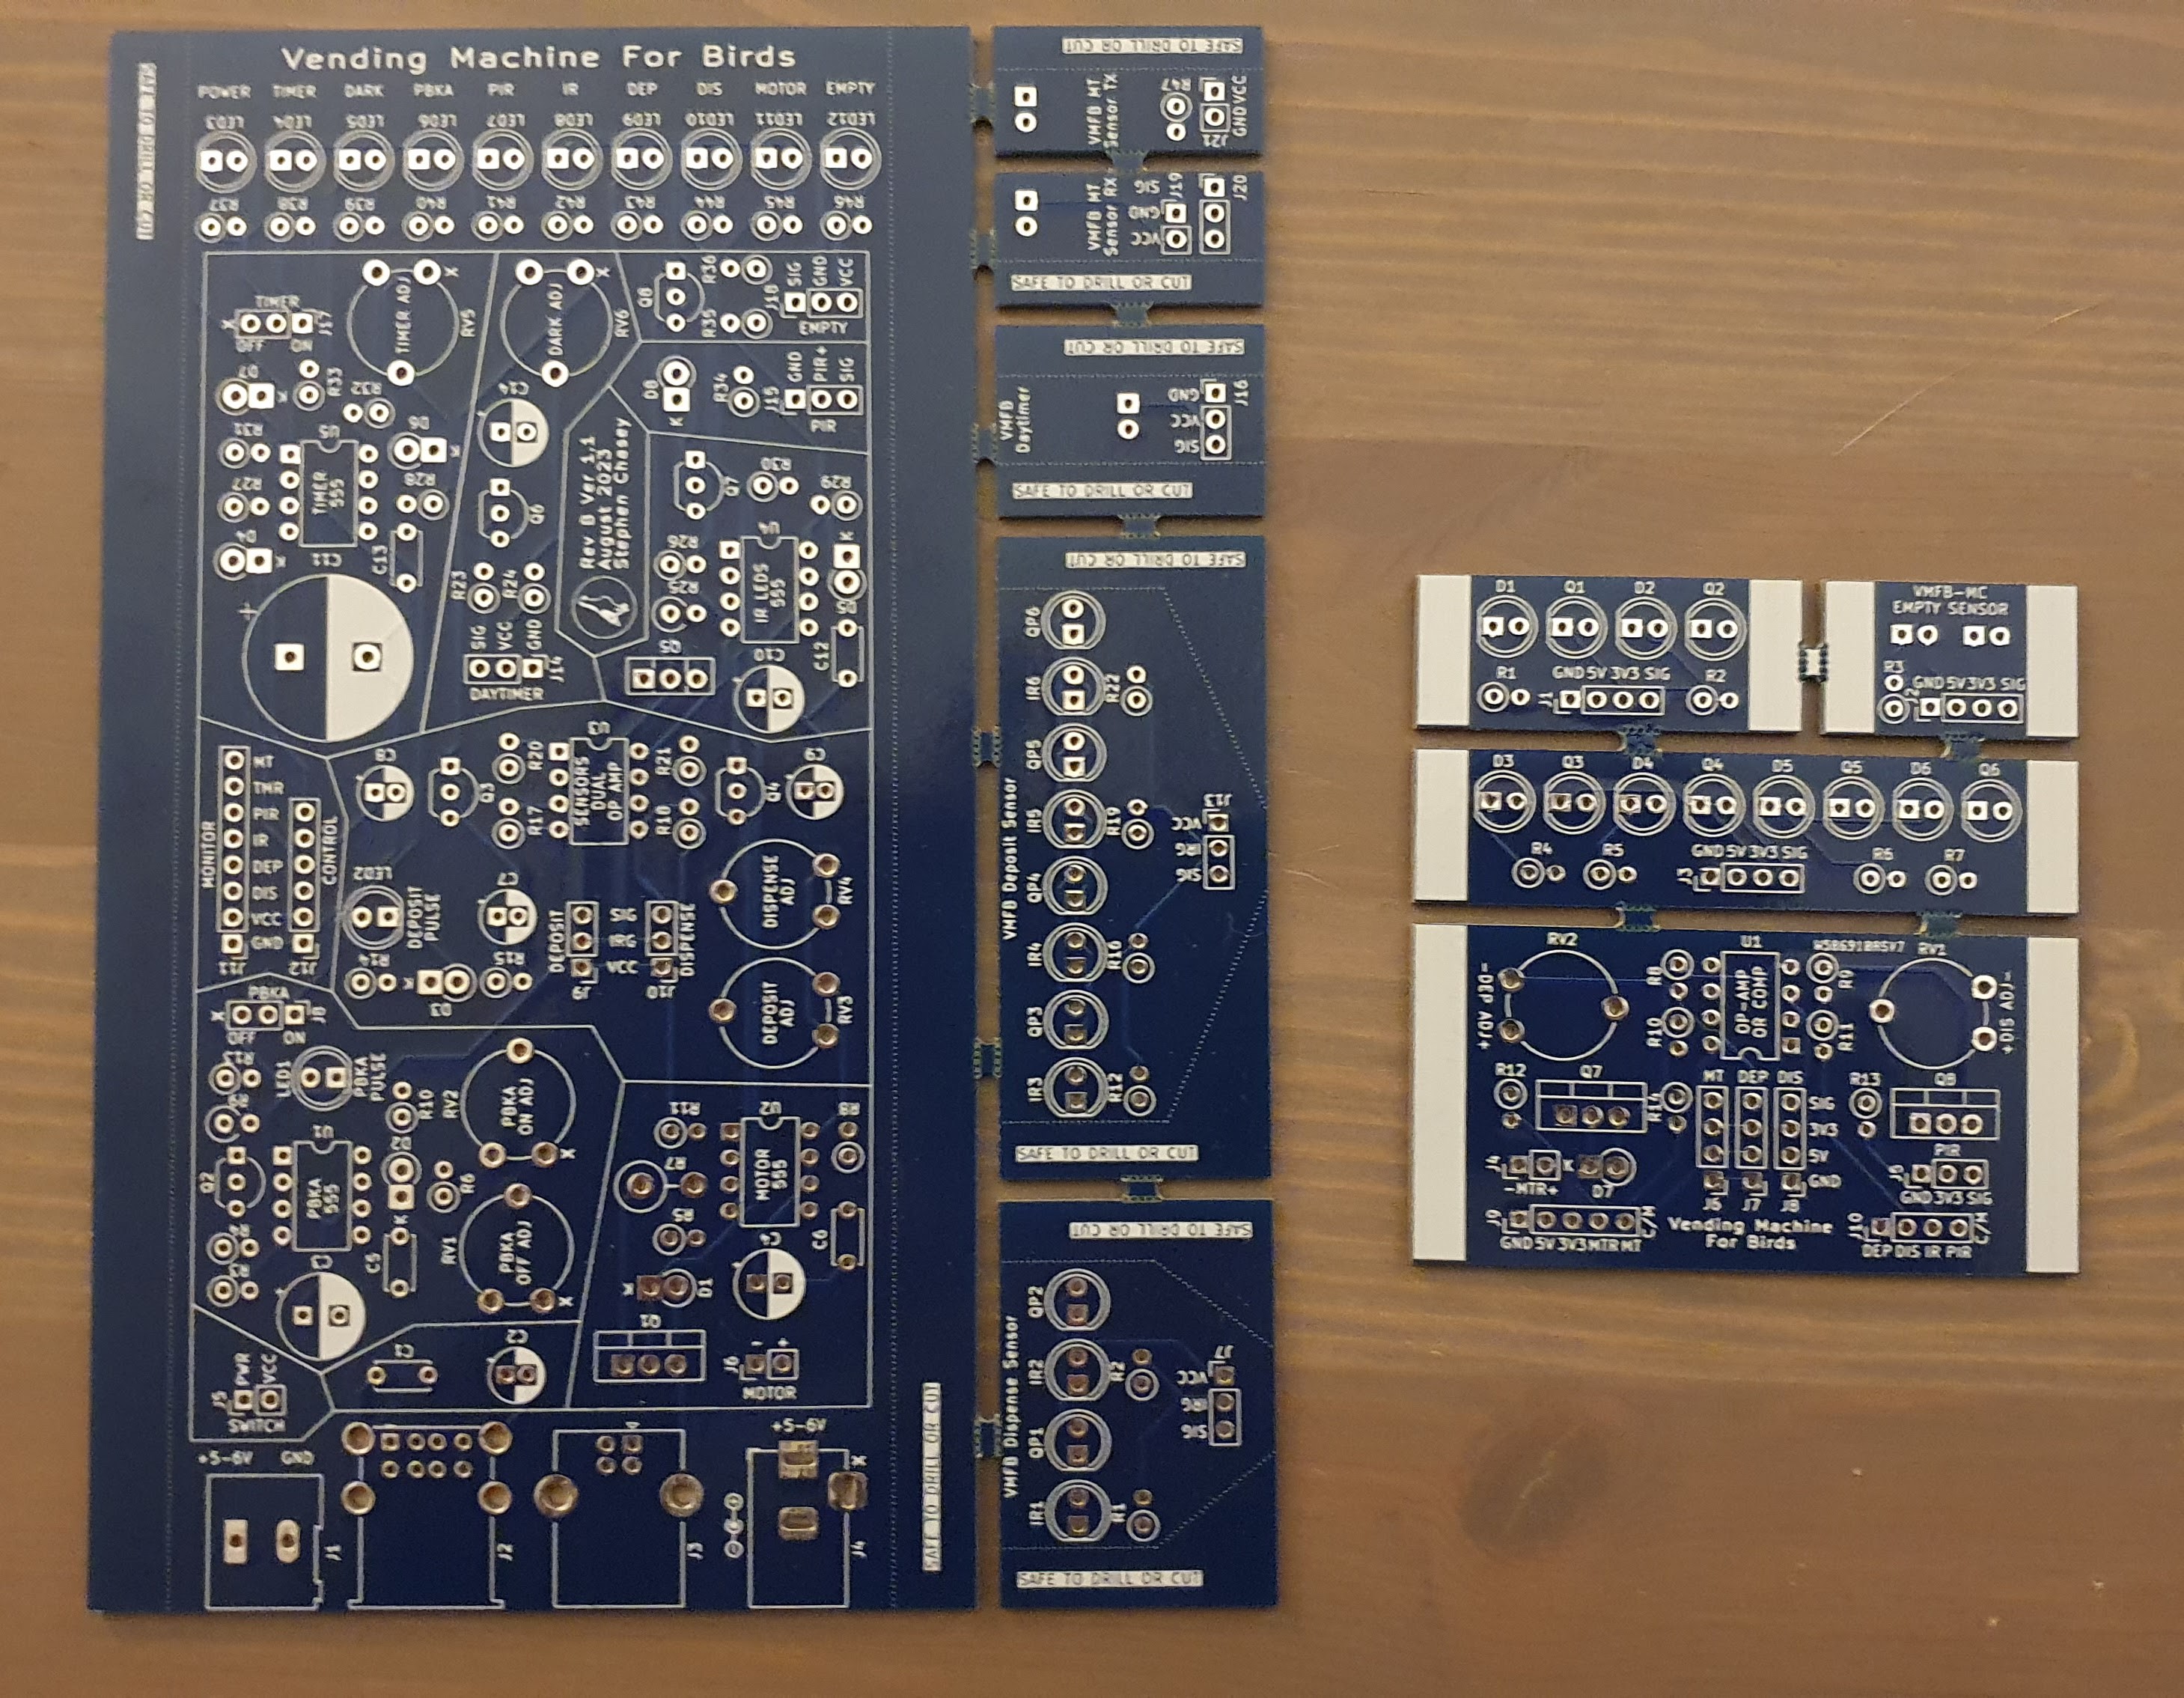
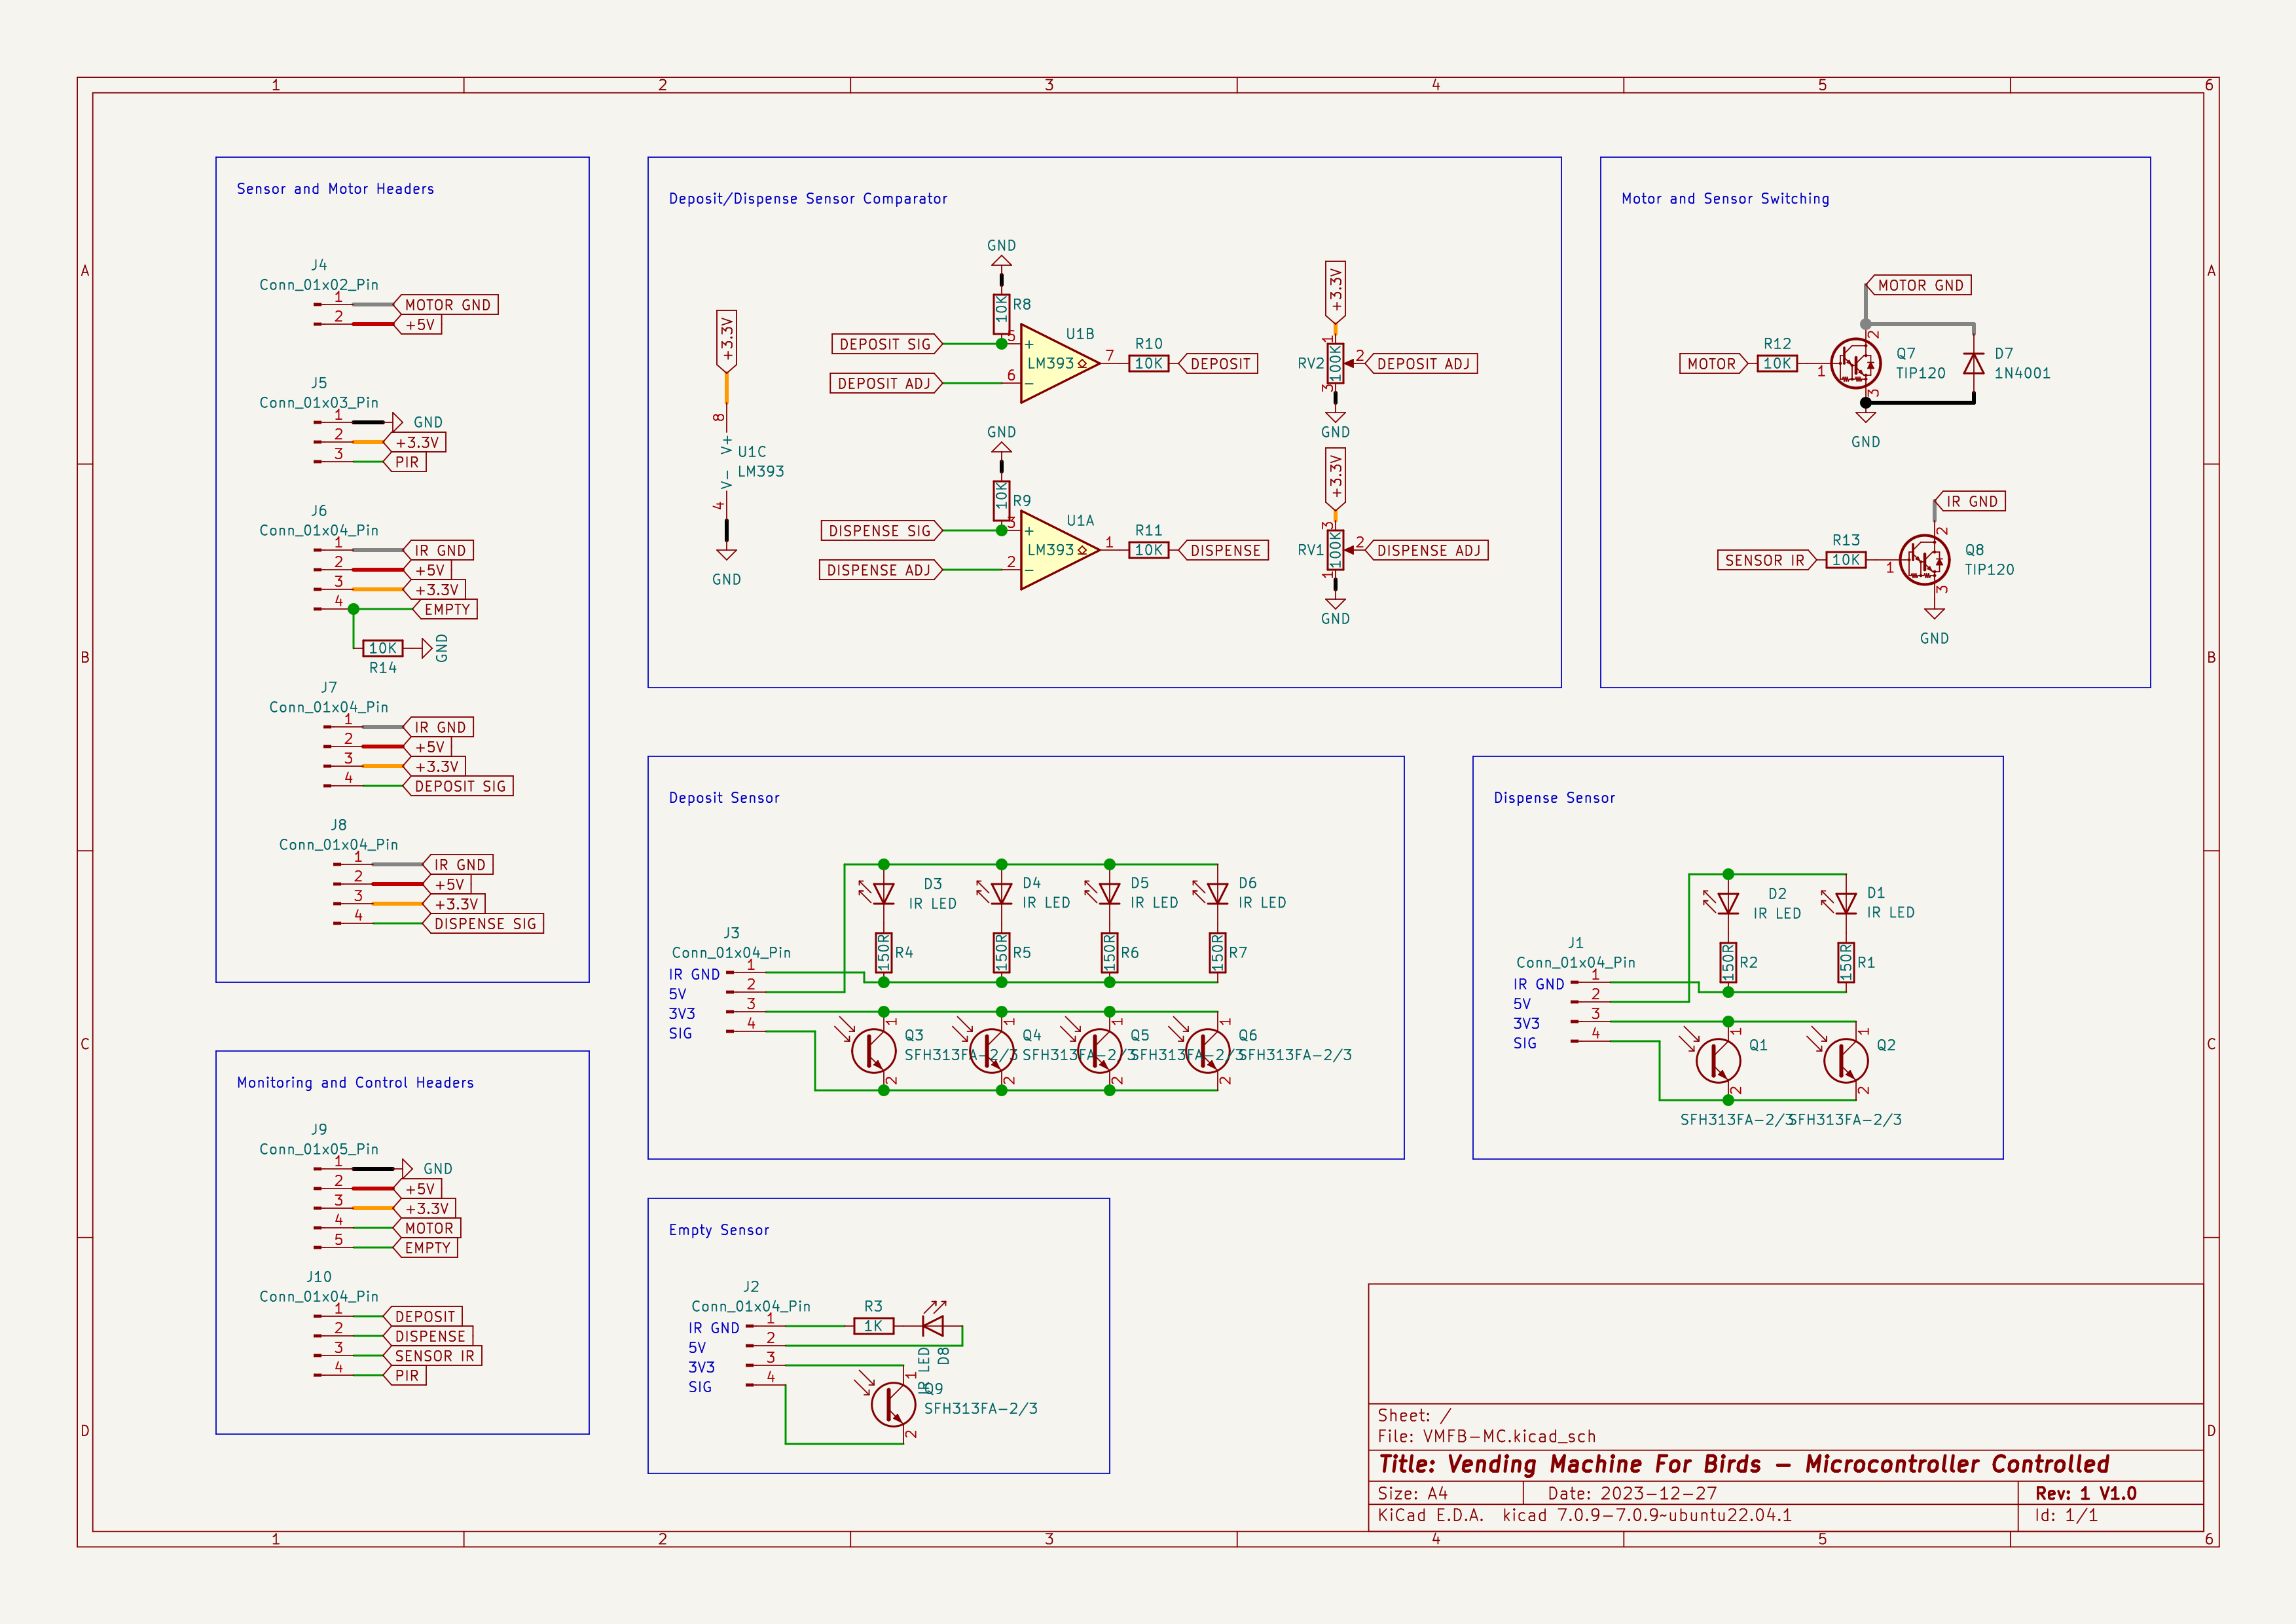
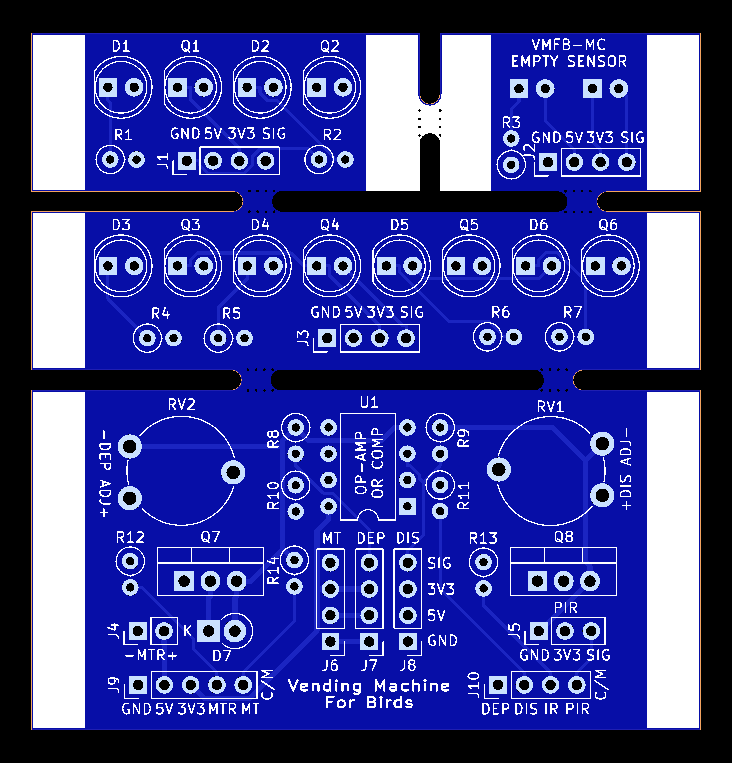
The circuit is all analog, using four NE555 timers and one LM358 dual op amp. The sensors are all made using IR phototransistors and IR LEDs. The PCB has headers broken out so you can monitor and control it with a microcontroller or SBC. It runs on 5-6VDC, but be sure to use 5V if you are planning to power a USB device (like a camera) with the vending machine's USB ports. If you use a USB cable to power the vending machine, be sure it can deliver enough current. I found that some 10-year-old 2-meter USB 2.0 cables were resulting in a voltage drop from 5 to 4.5-4.8 volts on the vending machine power rail. Cables that didn't work so well had a resistance >1Ω. Ones that did had a resistance of <0.5Ω. NE555's should get at least 4.5 and Raspberry Pis need at least 4.7V. If things are not working as expected, use a multimeter to check the rail voltage - it should be around 4.9V. Shorter cables are less lossy and take up less space inside the enclosure.
Power consumption at 5V is as follows:
Without RPi Zero W
- Idle with Powerbank Keep-Alive and TImer enabled: 18mA
- Timer uses 8mA
- Powerbank Keep-Alive uses 4mA
- ^With both of these disabed it uses 6 mA
- IR LEDs on: 320mA
- IR LEDs and motor on: 510mA
With RPi Zero W and wide-angle camera module
- Idle with Powerbank Keep-Alive and TImer enabled: 220mA
- IR LEDs on: 520mA
- IR LEDs and motor on: 820mA
So with the Rpi and camera you could get about 2 days out of a 20,000 mAh power bank. With just the vending machine you could get about 10 days.
Modules
- Powerbank Keep-Alive: 555 sinks current every 7-22 seconds for 0.7-2.2 seconds to keep USB power banks on while sensors are in standby - the powerbank keep-alive can be disabled.
- IR LED ON/OFF: 555 keeps the IR LEDs used by the sensors on for 22 seconds after the last PIR trigger
- Op Amps: LM358 used as comparators to adjust the threshold of the sensors and send signals when they are triggered
- Motor Controller: 555 turns on the dispenser vibration motor when the deposit sensors are triggered, tuns it off when the dispense sensor is triggered
- Timed Dispense: 555 dispenses food every 10-100min - timed dispense can be disabled
- Daytimer: Phototransistor that puts the timer in reset while it's dark outside - brightness threshold can be adjusted or disabled (Rev. B)
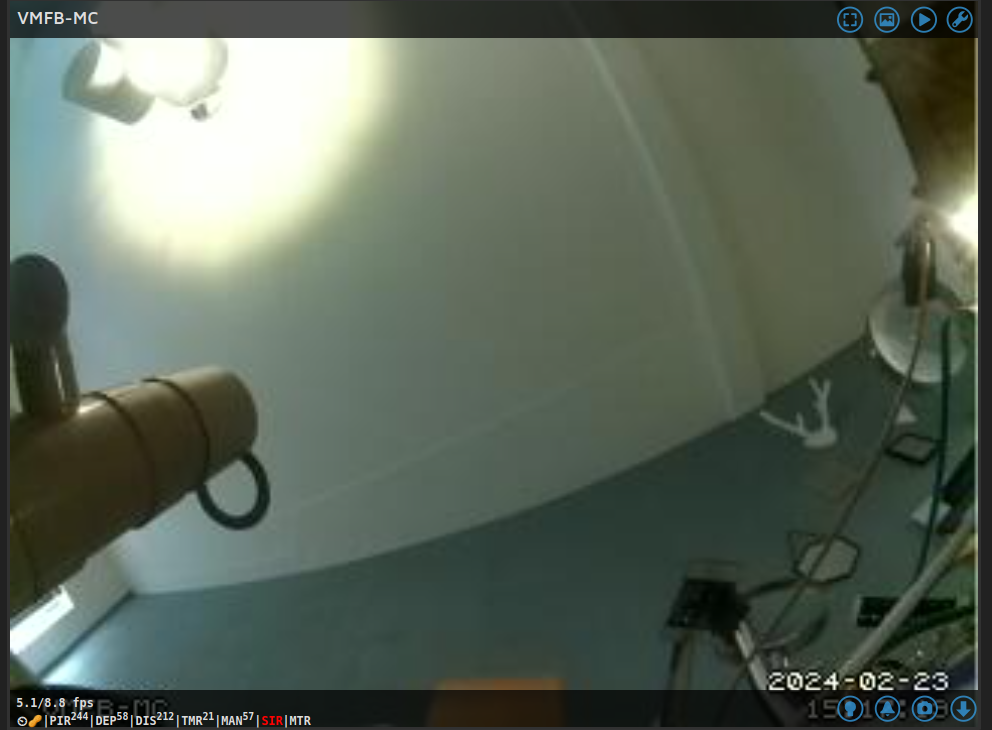
- PIR Sensor: Sends a signal to turn on the sensor IR LEDs
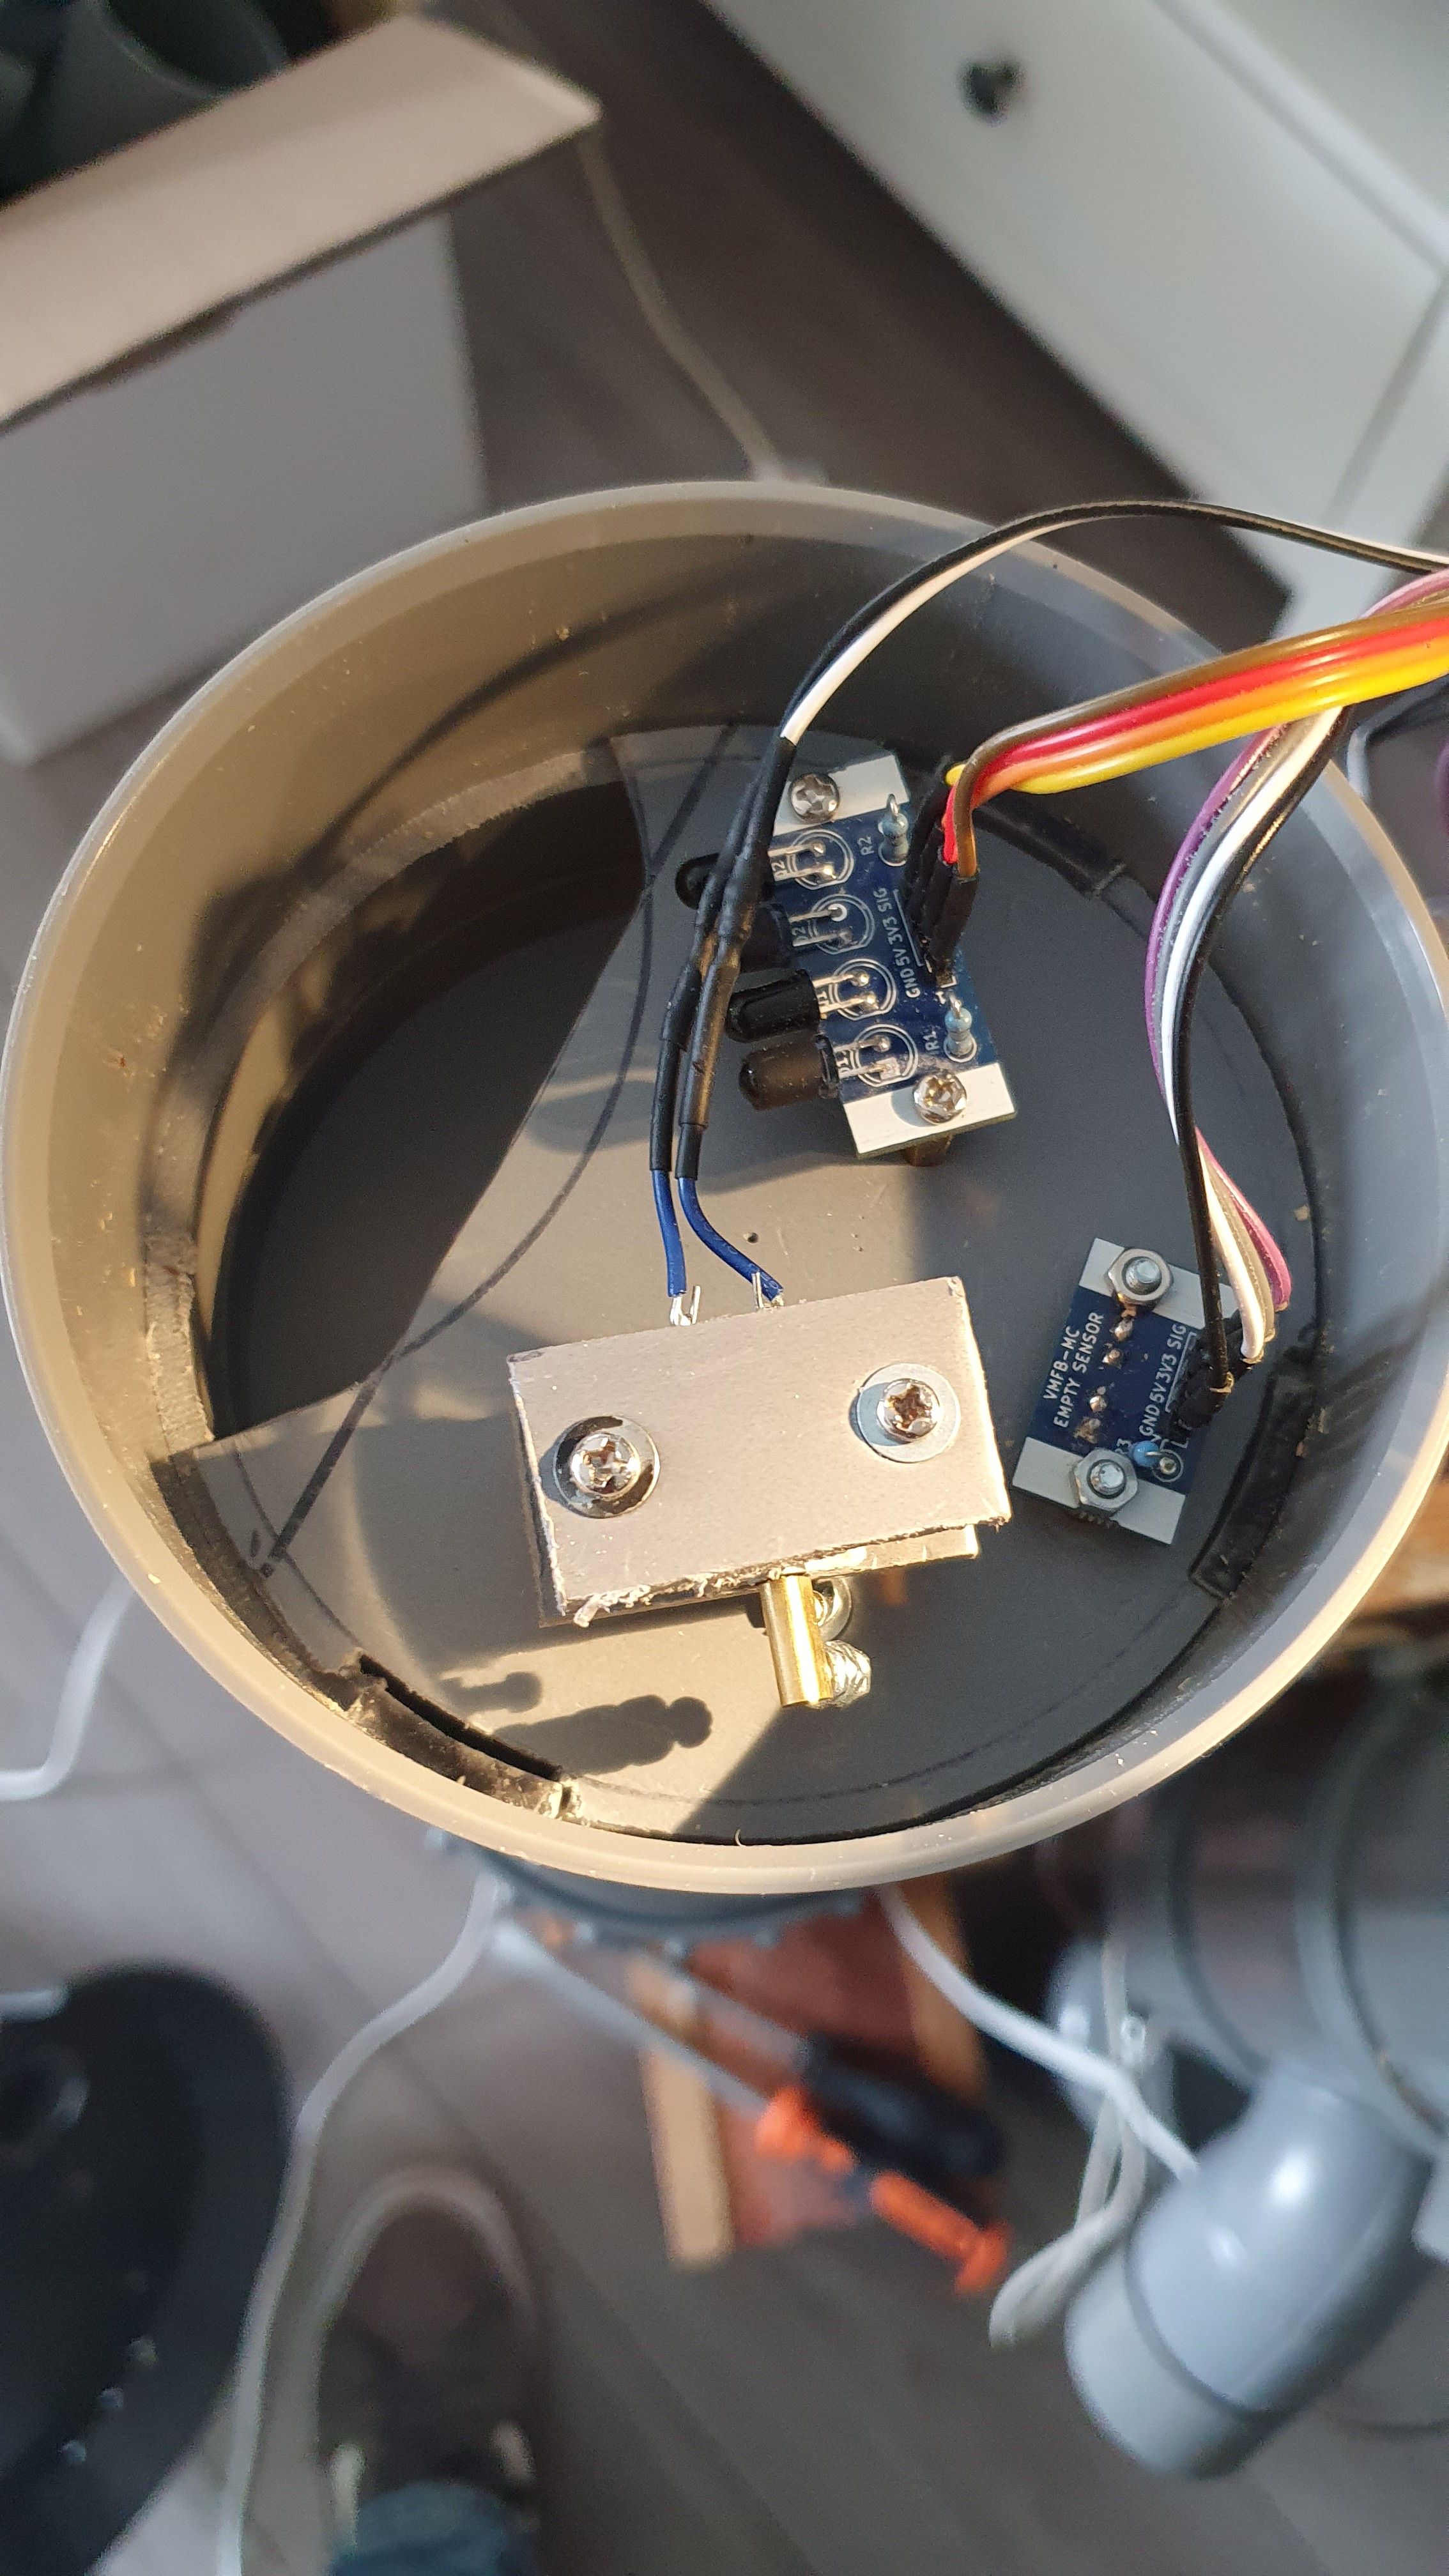
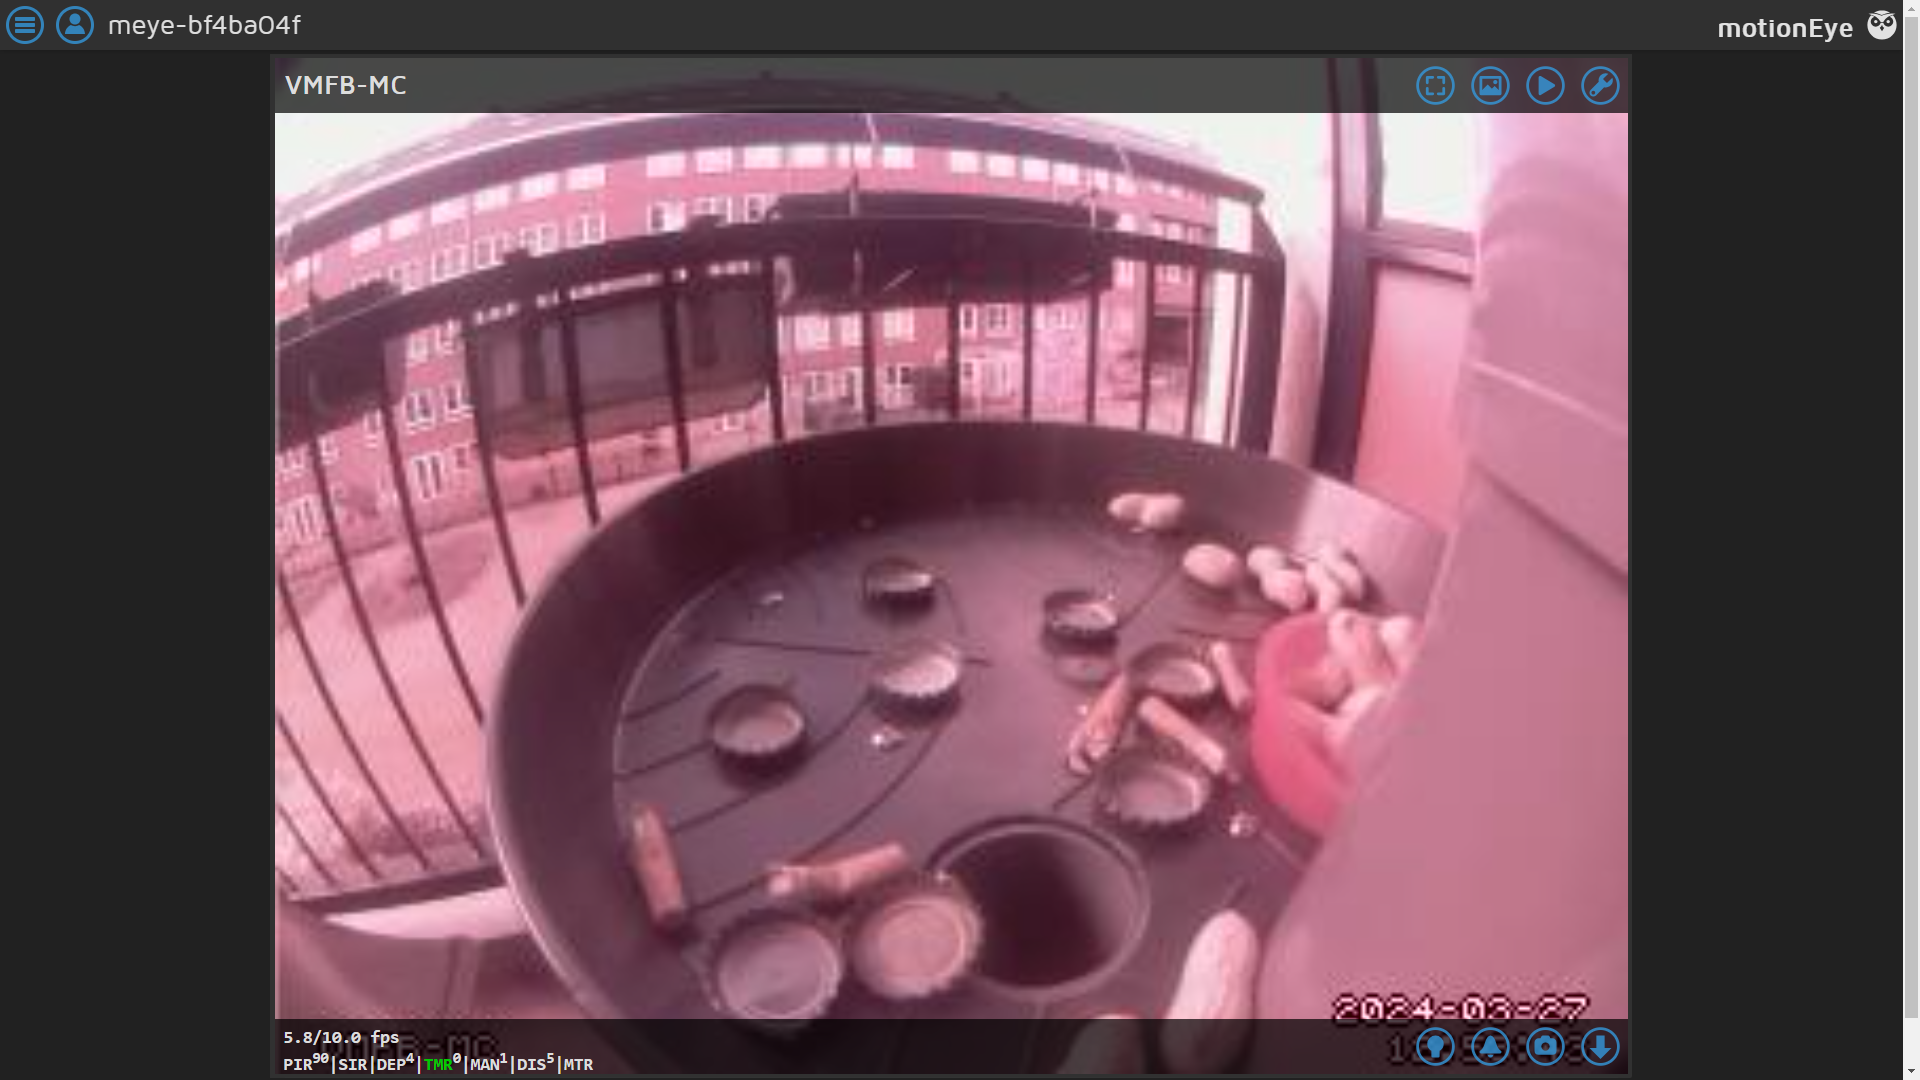
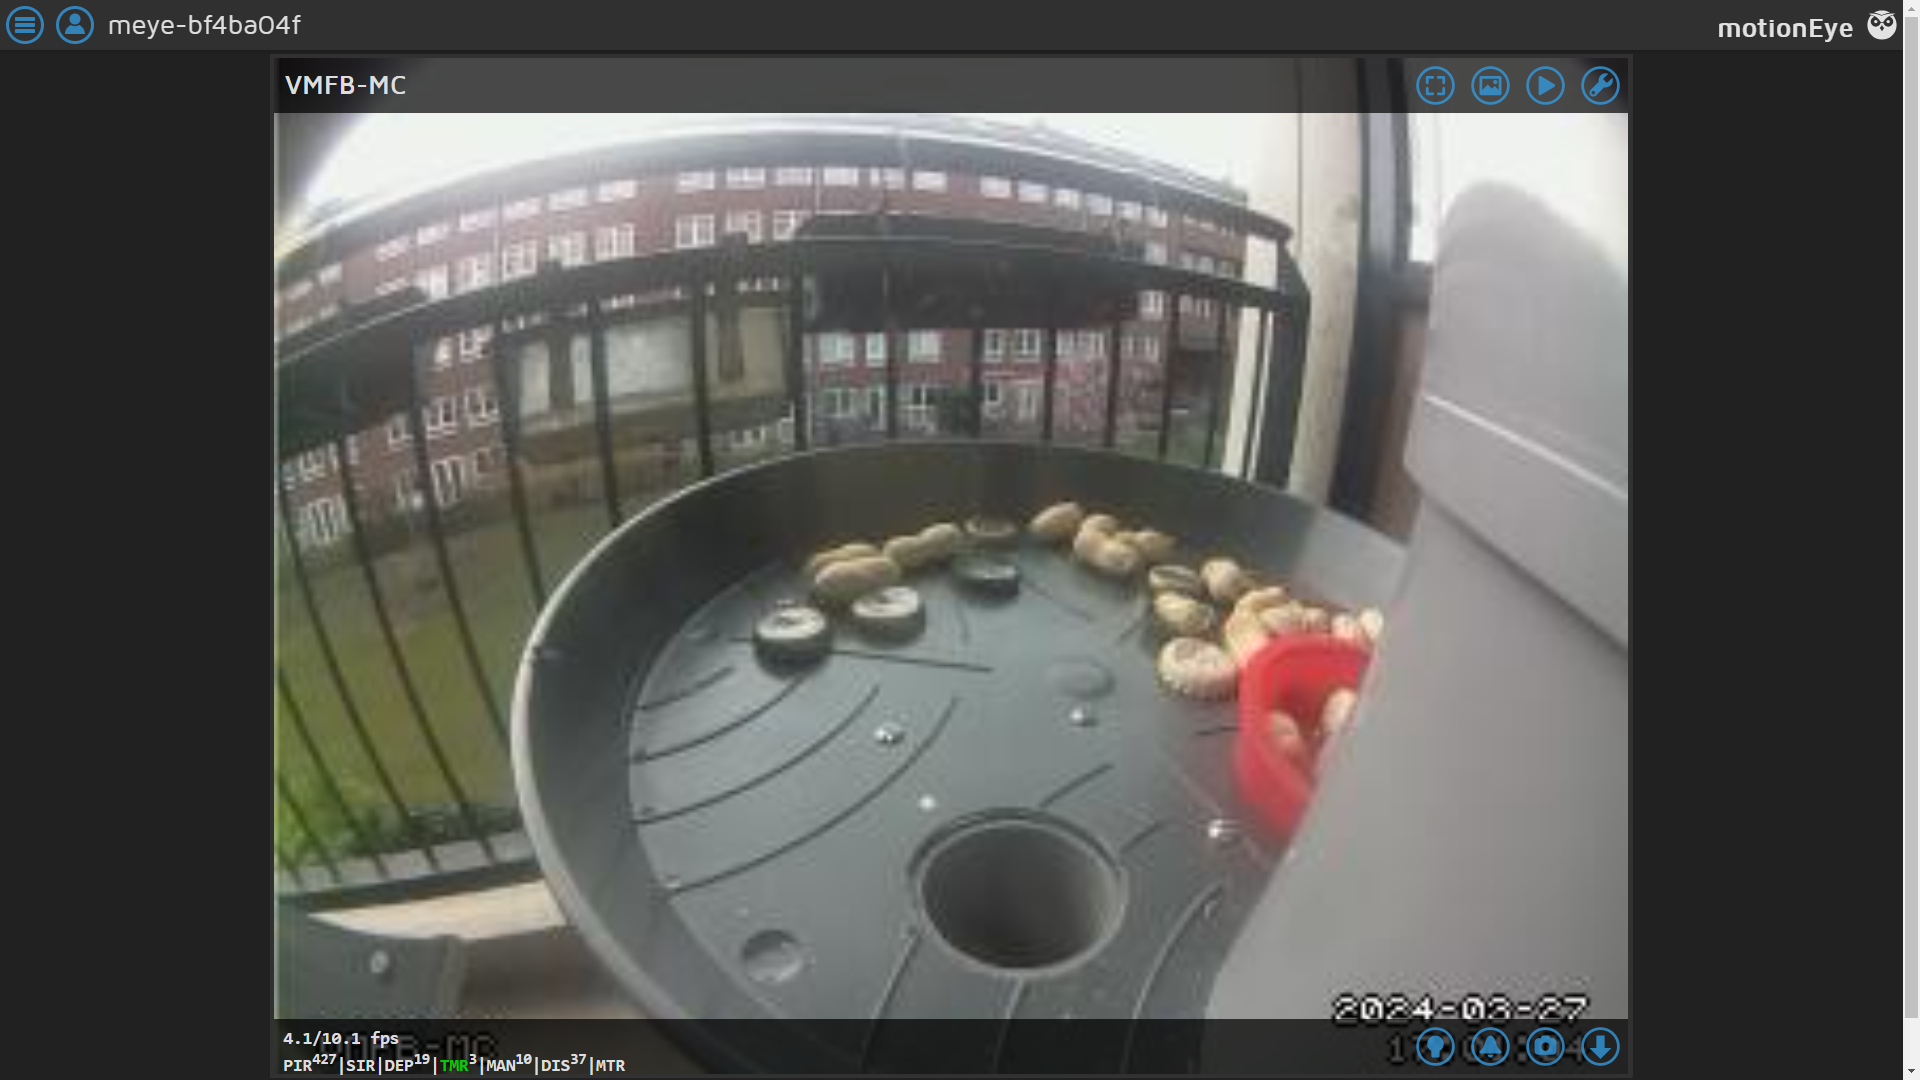
- Deposit/Dispense Sensors: IR phototransistors and IR LEDs used as proximity sensors to monitor the deposit and dispense chutes
- Hopper Level Sensor: IR phototransistor and IR LED to detect when the food level gets low (Rev. B)
- Monitoring/Control: lines for monitoring and triggering events with an external controller (Rev. B)
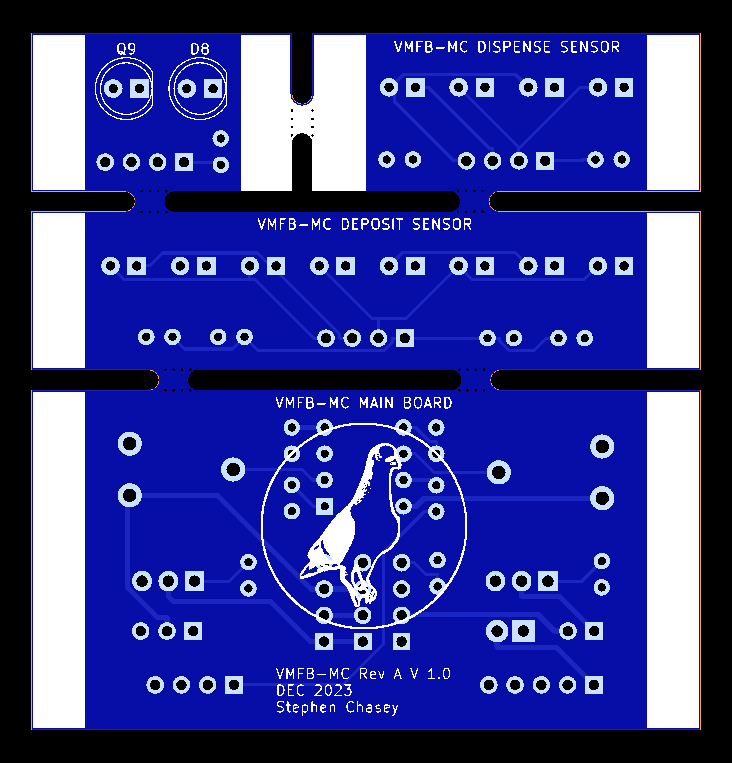
PCB, BOM AND GERBERS
Kicad Files (Github): https://github.com/src1138/VMFB
Gerbers, PCB and BOM (PCBWay): https://www.pcbway.com/project/shareproject/Vending_Machine_for_Birds_11f2a4da.html...


 CriptasticHacker
 Paul Crouch
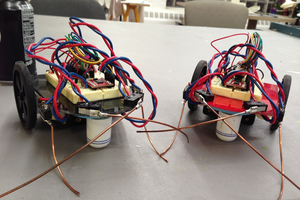
 Bob Baddeley
That project is best for birds.
https://www.pfmlogin.org/