 Walt Perko
A small 3" x 3" x 3" robot toy that can sense with an UltraSonic (PING) sensor, then tell a joke and do a little dance. Designed to be so easy a very young child can build these themselves!
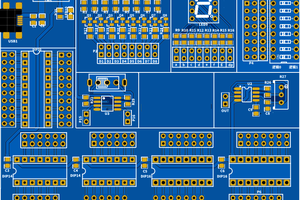
Starting with a RoboGuts™ circuit board I chose to use my favorite MCU module, the PICAXE 28X2 module, although I could use almost any other chip or module if I wanted (BS2, ATMEGA 328P, PIC chips, ARM BASIC chip etc...) I then add three jumpers for the Red, Green and Blue RGB 3-color LED. Then I add a 220Ω resistor to +V (+5V) for the LED power. Then I add a jumper from PIN 11 of the PICAXE 28X2 module to PIN 10 (C.6) of the on board SpeakJet chip for speech and singing (any language). The after 3D printing the six plastic parts for the miniFloppybot I add two 1mm dia x 8mm long screws to each servomotor servohorn to attach them to the 3D printed wheels so they can be assembled onto the miniFloppyBot ... the servomotors simply plug onto the 3-pin hobby pin connectors at PICAXE PINs 17 and 18 (B.0 and B.1)
Powering the board can be done a dozen different ways, usually when I'm tweaking the software I use a 6V ac/dc adapter for power, but the PICAXE 28X2 module can run on anything from 4.5V to 12V dc
The idea is to make learning how to make robot toys and animatronics systems as easy as possible ... so easy even a 5-year old can do it with only a few minutes of introduction ... yet with the power of the super intelligent bread board (the RoboGuts™ circuit board) it can be used for many advanced systems. The user is only limited by their own dreams.
Use an chip or module that will fit into a 7mm wide or 15mm wide DIP socket up to 28-Pins. The on board 1W audio amplifier is sufficient for most projects or you can simply tap that output as an AUX output or direct from the SpeakJet chip to a much larger audio amplifier for some real loud stuff. .5W to 1W speakers work best, but in this little bot he's running a 2W speaker ... hence he doesn't get as loud as the other RoboToons Robot Theater characters. http://www.r2pv1.com/


 DIY GUY Chris
 Sergey Mironov
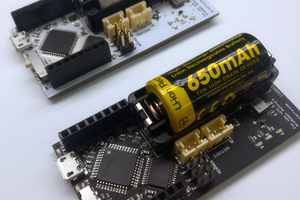
 Jaap
Jaap
Built-IN firmware is not part of the contest as I understand the rules. There is no firmware on the RoboGuts™ itself, just in the PICAXE 28X2. The entire program resides in the PICAXE 28X2.