 Fabian
In the last few days I have worked out some of the planned details.
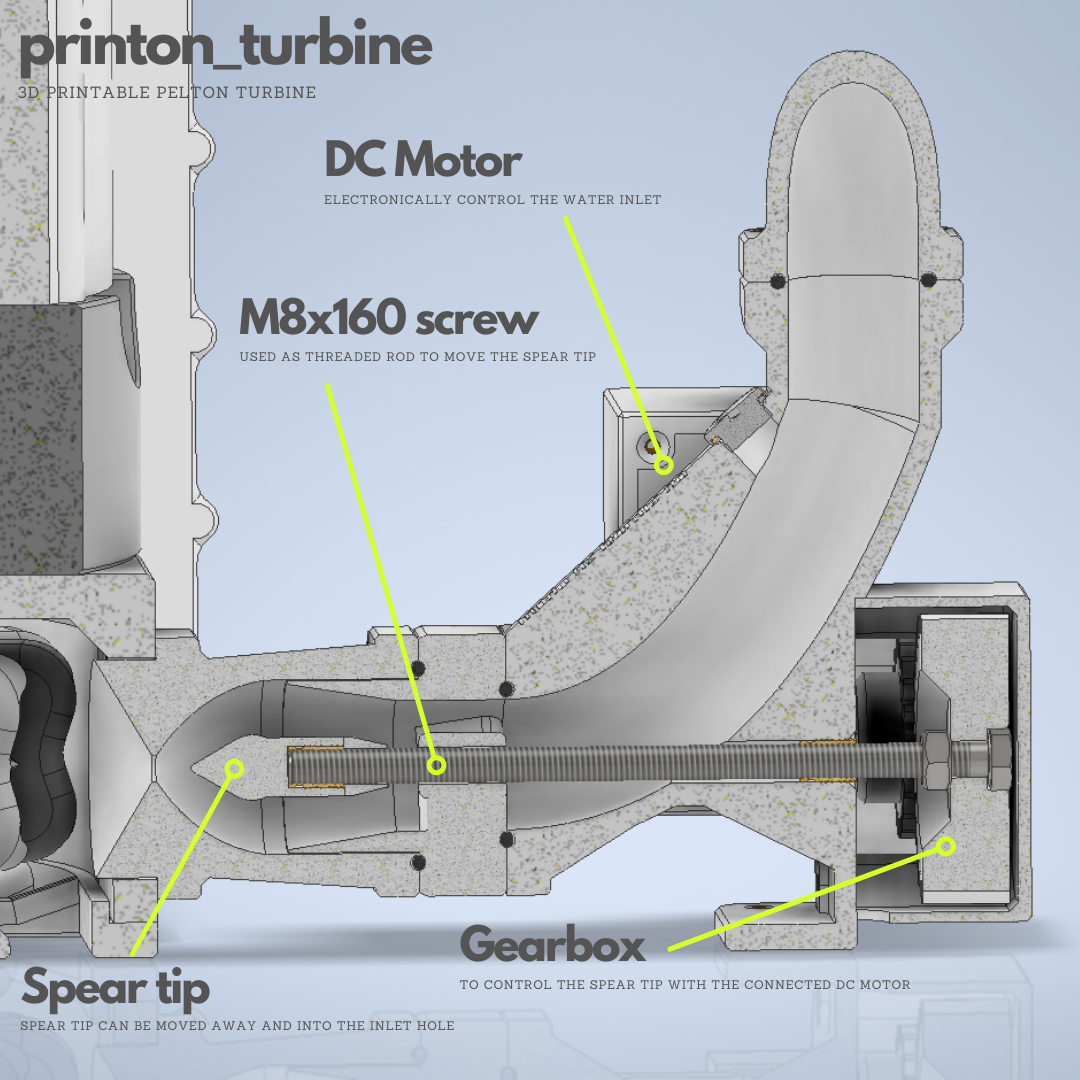
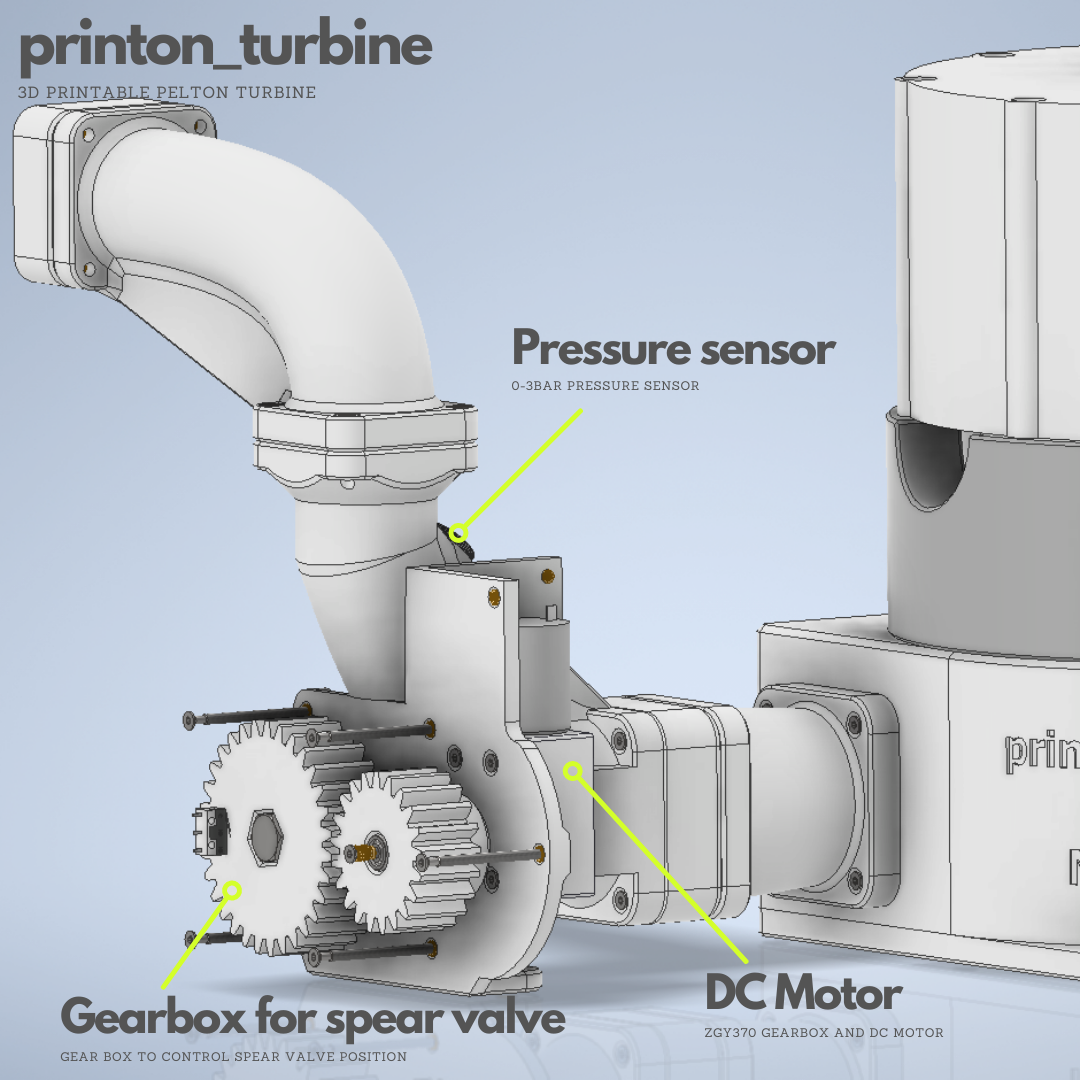
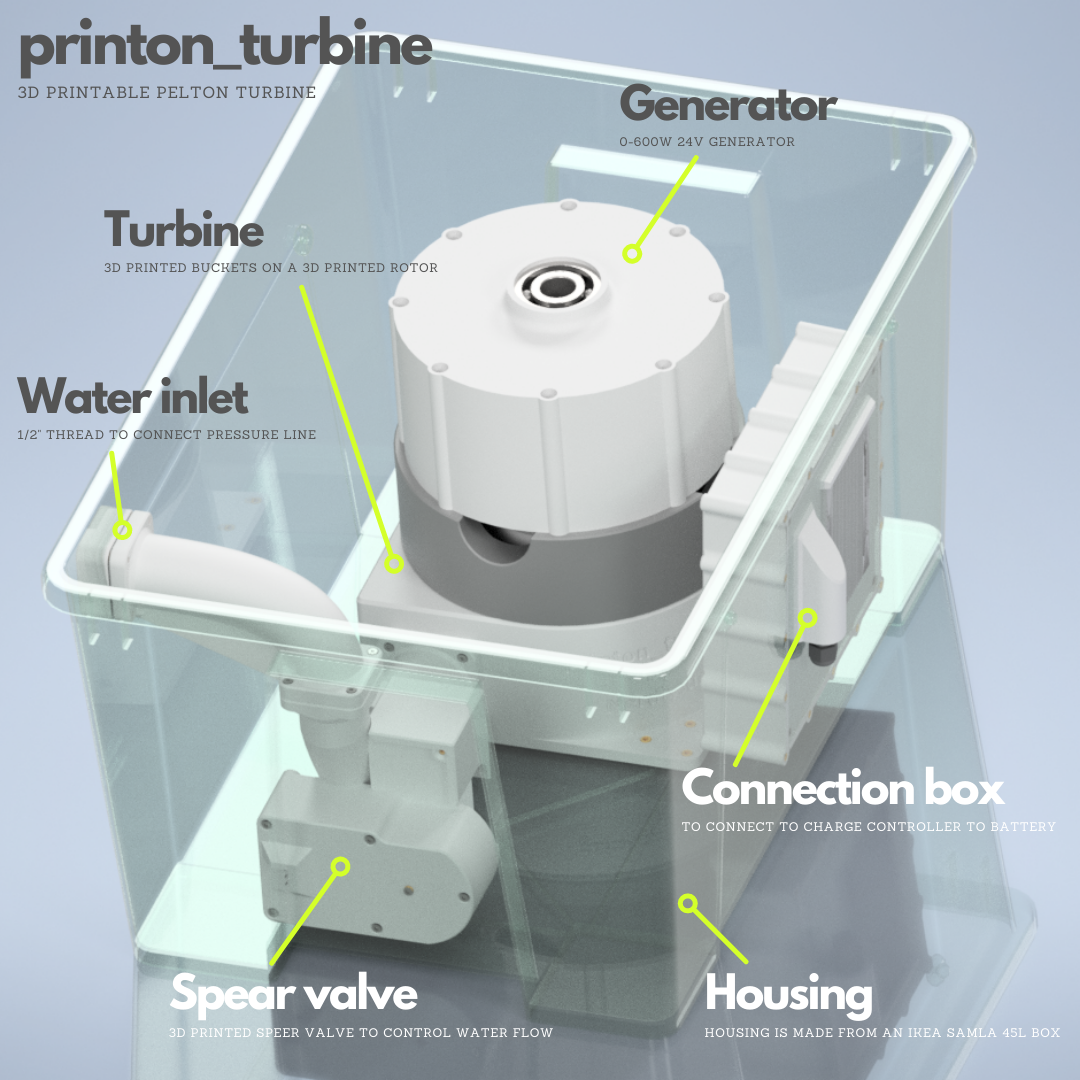
Spear valve:
The spear valve is now equipped with suitable seals/recesses for it. I have currently planned with existing standard sealing rings. Later I would like to try to replace these with 3D printed TPU filament seals.
I have attached a cover for the gear and the DC motor so that they are at least splash-proof.
The cover of the gearbox also got a drain, because I'm still unsure how much water loss occurs through the M8 thread of the push rod. Any escaping water should then flow down out of the gear box.
Additionally I installed two end switches for the maximum positions of the spear valve. This way it should be possible to recognize both positions. The intermediate positions can then be approached over the running time of the DC motor. Actually, I would like to have more precise feedback on the valve position here, but for now I have only noted this point on my nice-to-have-to-do list. :)
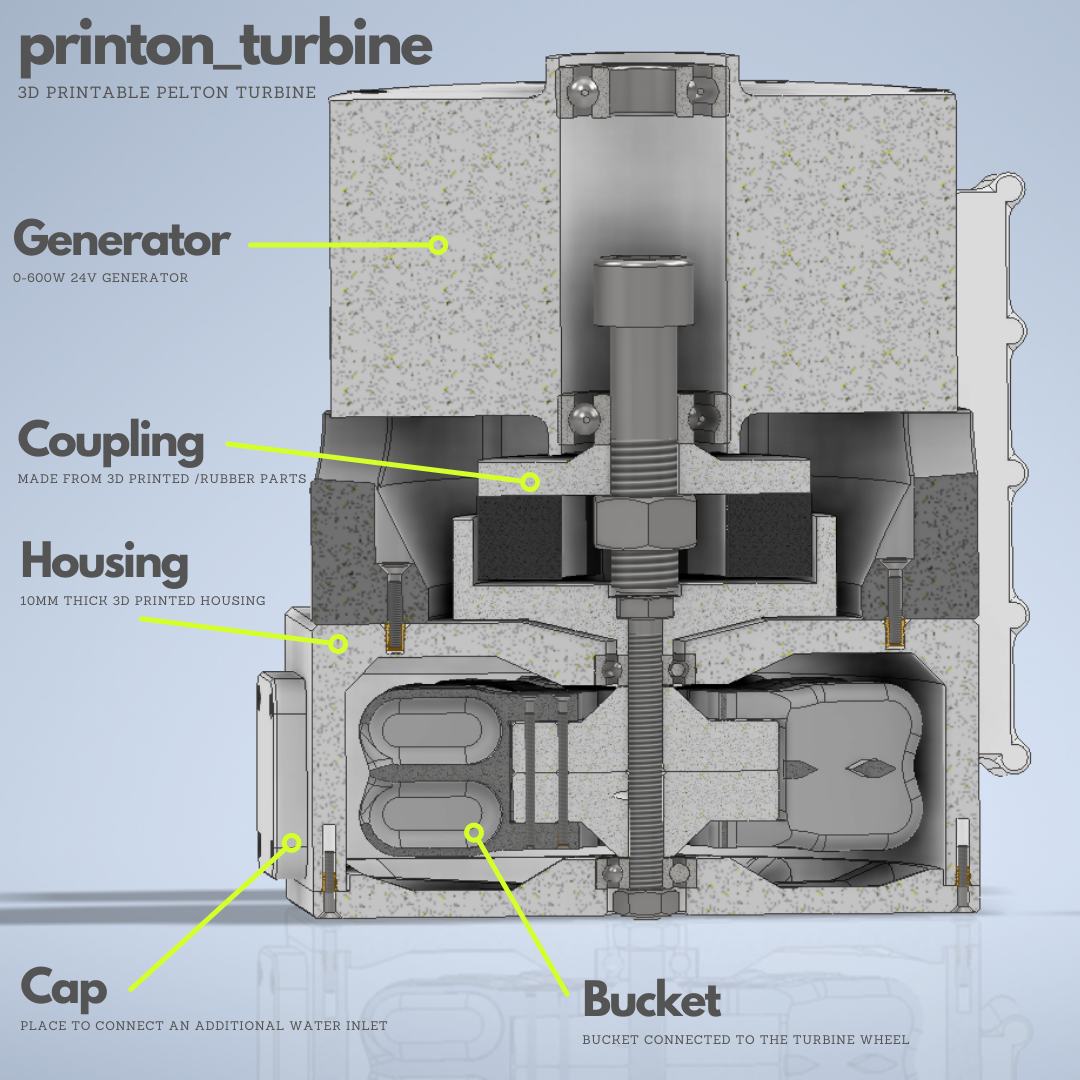
Generator:
I created a CAD dummy for the ordered 24V generator in order to be able to plan at least roughly (unfortunately the data sheets for this generator are a bit sparse when it comes to exact dimensions).
So I was also able to create a first draft for a coupling from the generator to the turbine axis. For this I have created two clutch discs that interlock with rubber buffers. (I'll make a separate log to explain it better. :))
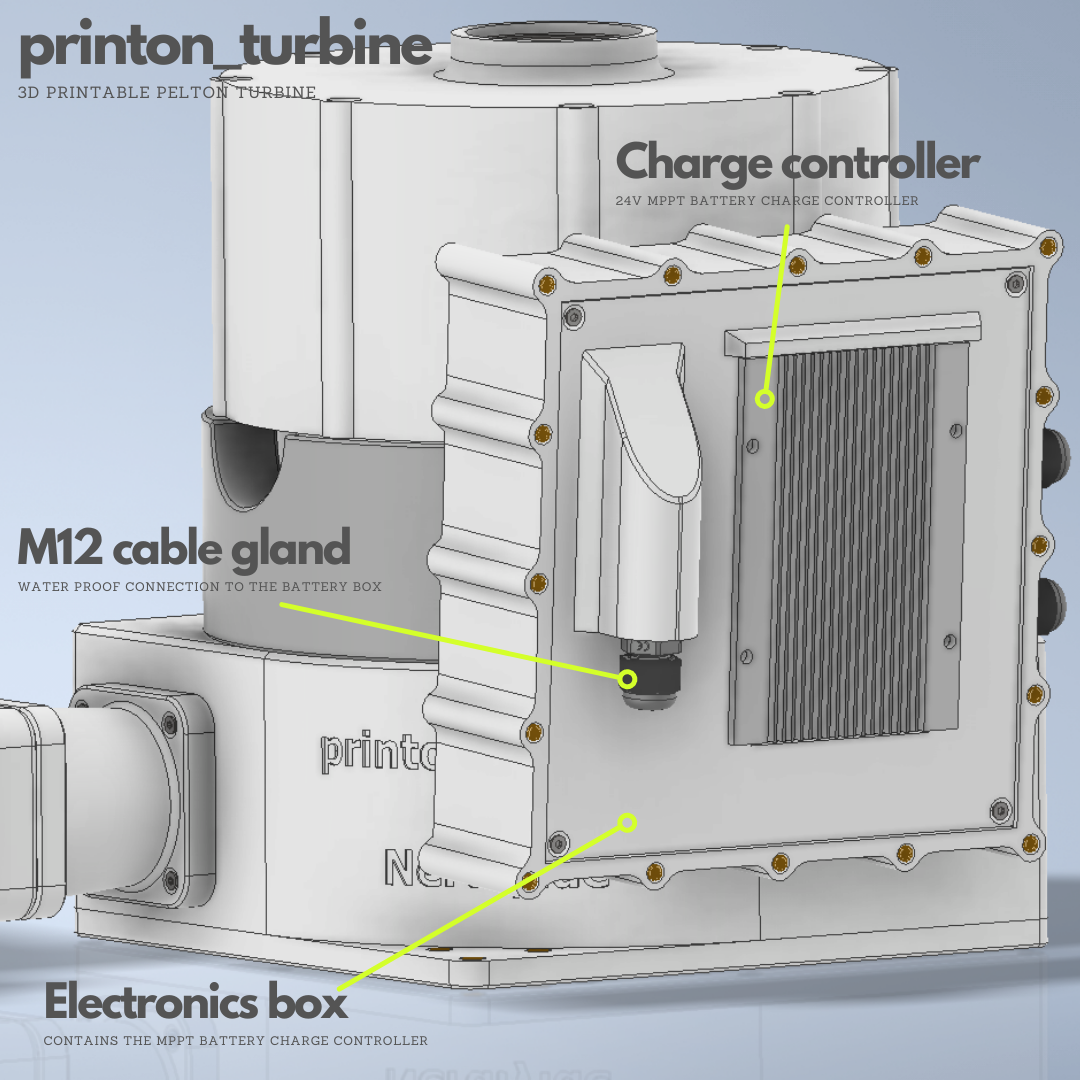
Charge controller and electronics box:
In addition to the generator CAD dummy, I also created a suitable dummy for the charge controller. This is housed in a separate waterproof housing. The controller is mounted in the housing in such a way that any heat generated is dissipated to the outside.
An M12 cable gland is also integrated into the cover of this housing. The connection cable to the battery box can be fed through here.
ToDo:
My next todo is mostly about the other planned boxes. I plan to have one additional box for the water inlet incl. filter system. From this box the pressure line will be connected to the turbine box.
Additionally I plan to create another box for a small buffer battery. I'm still undecided on how exactly this should look like.
In principle I would like to have a complete system accommodated in two to three 45L Ikea Samla boxes. The system can then be assembled and commissioned on site. At least thats the plan. :)
Discussions
Become a Hackaday.io Member
Create an account to leave a comment. Already have an account? Log In.
Housing is the foundation, the blank canvas upon which we build our lives. But it's the magic of interior design that transforms it into a sanctuary, a reflection of our unique personalities and desires. From choosing the right layout to weaving stories with carefully curated decor, each element becomes a brushstroke, painting a picture of comfort, functionality, and personal expression. It's the interplay between the structure and the soul, creating a space that not only houses us, but truly embraces us. Get more from https://roomtodo.com/fr/4709/room_planner/ here.
Are you sure? yes | no