 SimonXi
Function generator is a very common testing tool in a electronic lab and they may be used as a signal source to test analog circuit or to introduce an error signal into a control loop to verify circuit's performance.
To DIY a function generator, there are 3 challenges,
1. Creating a repetitive signal
2. Configurable frequency of the signal
3. Configurable Waveforms
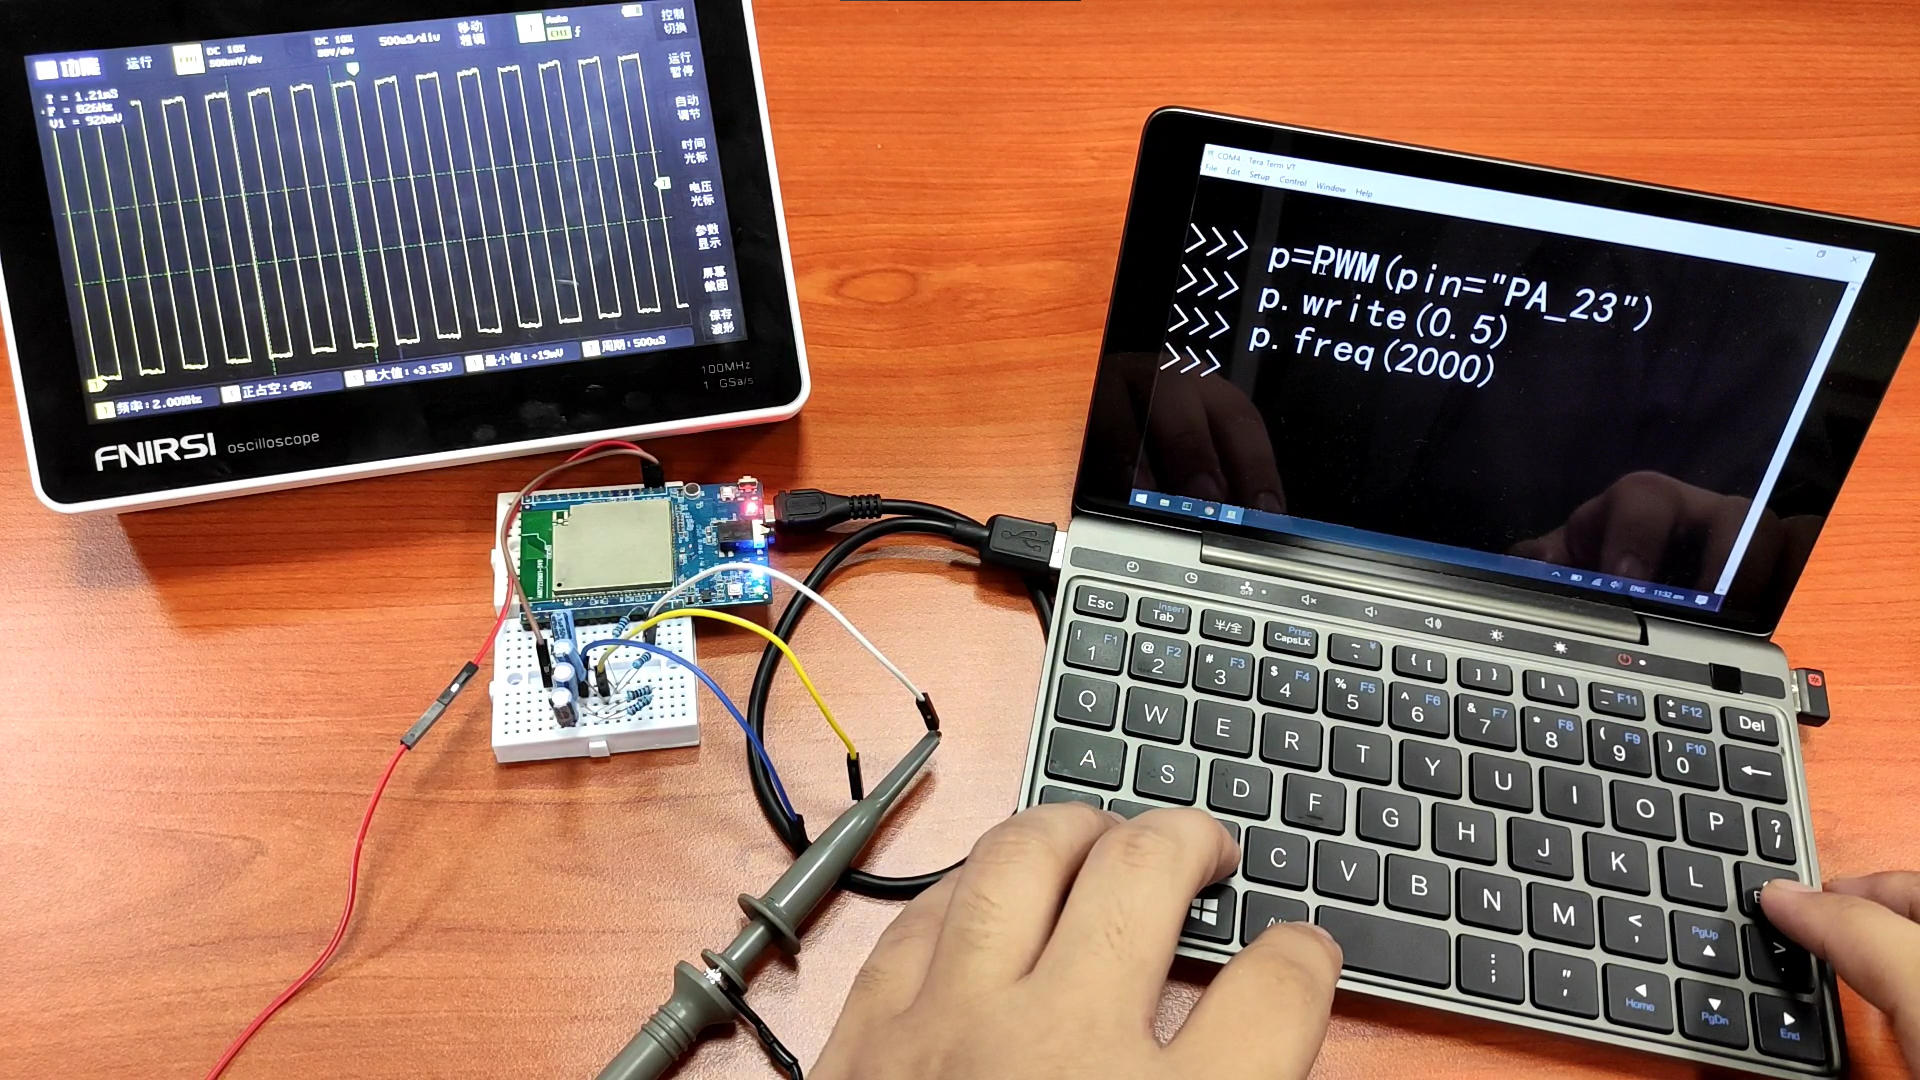
To overcome challenge 1 and 2, we can use a microcontroller with a PWM signal which is a repetitive square wave with controllable frequency. However, to do it in 3 lines of code, we must rely on the very convenient and powerful MicroPython project. It allows a microcontroller to interpret Python code and change its behaviors on the fly, which is ideal for our case. Here we are using Ameba AMB23 (RTL8722DM) with MicroPython to generate the PWM signal.
Moreover, to overcome challenge 3, we need a little help from a simple circuit, and a bit of math. As demonstrated from below, a square signal actually consist of many high frequncy components.
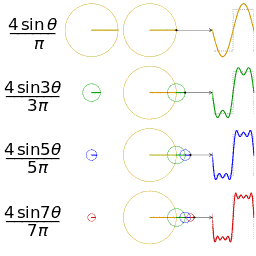
If we are able to remove those high frequency components, we will be able to create triangualr, sawtooth or even sine waves. Therefore, we need to design some simple Low Pass Filters to pass only the Low frequency components of a signal, here is the design,
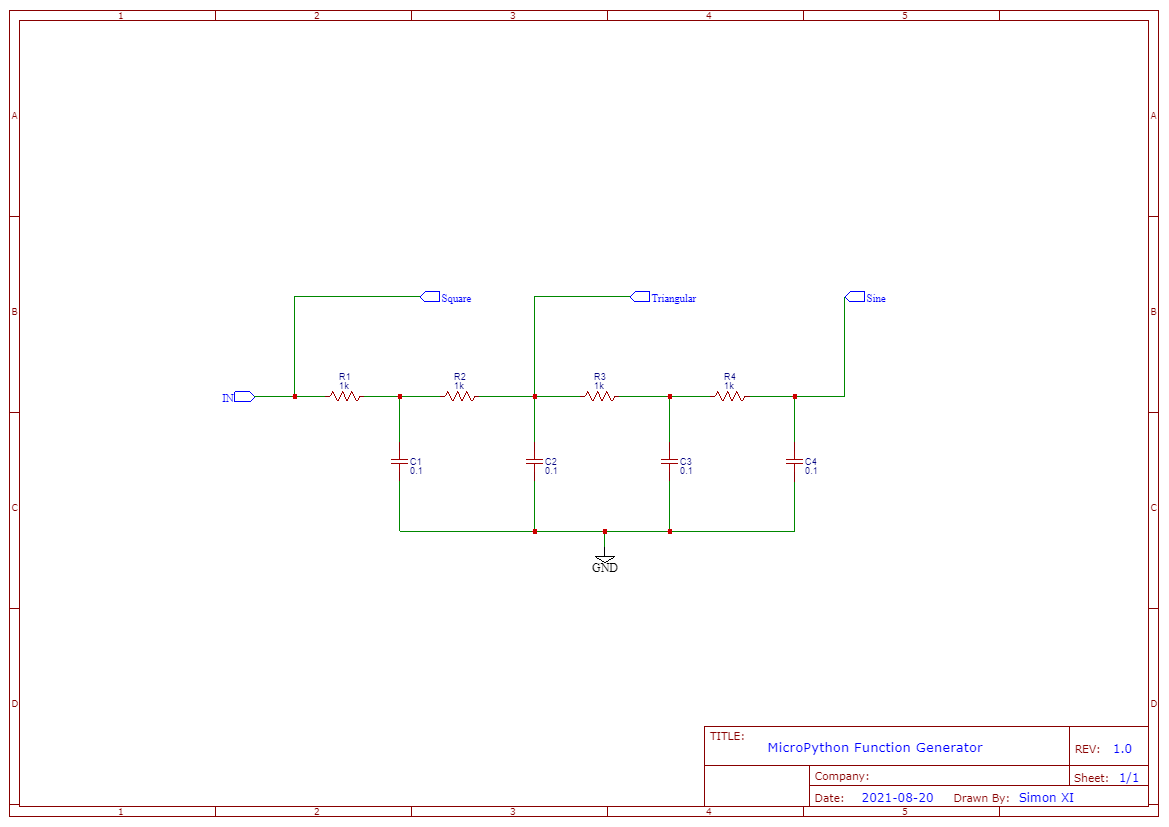
As you can see in the picture, there are 4 sets of low pass filter, each consists of a 1K resistor and a 0.1 capacitor, and we can easily draw different waveforms from their output.
The 3 lines of code is shown in video above and in the picture down below,
 agp.cooper
 benedekkupper
 Jacques
 Ted Yapo