Subhajit
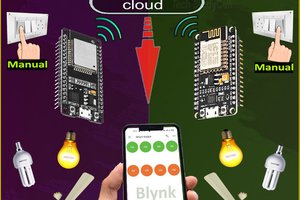
In this IoT project, I have shown how to make IoT-based Smart Home Automation using ESP32 Google Assistant Blynk with the timer, sensor, and IR remote control relay with real-time feedback.

So, you can easily make this home automation project at home just by using an ESP32 and relay module. Or you can also use a custom-designed PCB for this project.
Tutorial Video on IoT Project using ESP32 & Blynk
In the tutorial video, I have shown all the steps to make this Blynk home automation system.

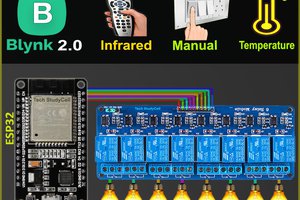
This Blynk ESP32 control smart relay has the following features:
- Control home appliances with WiFi (Blynk IoT App).
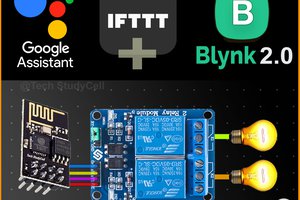
- Control home appliances with Google Assistant.
- Control home appliances with DHT11 Sensor and Timer.
- Control home appliances with IR remote.
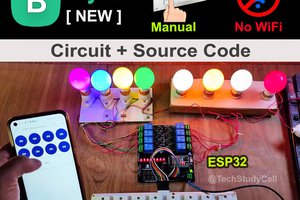
- Control home appliances with manual switches or push buttons.
- Monitor real-time room temperature in the Blynk IoT App
- Monitor real-time feedback in the Blynk IoT App.
- Control appliances without WiFi.
Required components for the ESP32 Project
So, you can easily make this home automation project at home just by using an ESP32 and relay module. Or you can also use a custom-designed PCB for this project.

- ESP32 DevKIT V1
- 4-channel 5V SPDT Relay Module
- DHT11 Sensor
- TSOP1838 IR Receiver (with metallic case)
- Switches or Pushbuttons
- Any IR Remote
Circuit Diagram of the ESP32 IoT Project

The circuit is very simple, I have used the GPIO pins D23, D22, D21 & D19 to control the 4 relays.
And the GPIO pins D13, D12, D14 & D27 are connected with switches to control the 4 relays manually.
I used the INPUT_PULLUP function in Arduino IDE instead of the pull-up resistors.
IR remote receiver (TSOP1838) connected with D35. And the DHT11 sensor is connected with RX2.
I have used a 5V mobile charger to supply the smart relay module.
Please take proper safety precautions while working with high voltage.
Blynk & Google Assistant Control Relay Using ESP32

In this IoT project, you can also control the relays with sensors and Timer using Blynk Automation.
Here, I have controlled the 3rd relay with temperature and the 4th relay with the predefined time schedule.
IR Remote & Manual Switch Control Relay Using ESP32

You can always control the relays from the IR remote or switches. For this project, you can use any IR remote.
You can monitor the real-time feedback in the Blynk IoT App.
I have explained how to get the IR codes (HEX codes) from any remote in the following steps.
Please refer to the circuit diagram to connect the pushbuttons or switches.
Design the PCB for This Smart Home System
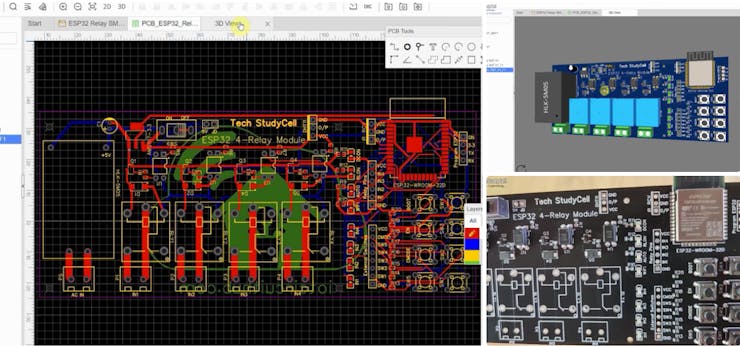
To make the circuit compact and give a professional look, I designed the PCB after testing all the features of the smart relay module.
You can download the PCB Gerber, BOM, and "pick and place" files of this ESP32 control relay PCB from the following link:
GitHub link to Download PCB Gerber File
For this project, I have the JLC SMT Service while ordering the PCB.
Why you should use JLC SMT Service?
On JLCPCB's one-stop online platform, customers enjoy low-cost & high-quality & fast SMT service at an $8.00 setup fee($0.0017 per joint).
$27 New User coupon & $24 SMT coupons every month.
Visit https://jlcpcb.com
JLCPCB SMT Parts Library 200k+ in-stock components (689 Basic components and 200k+ Extended components)
Parts Pre-Order service https://support.jlcpcb.com/article/164-what-is-jlcpcb-parts-pre-order-service
Build a Personal library Inventory, save parts for now or the future
Assembly will support 10M+ parts from Digikey, mouser.
Steps to Order the PCB Assembly from JLCPCB

1. Visit https://jlcpcb.com and Sign in / Sign up.

2. Click on the QUOTE NOW button.

3. Click on the "Add your Gerber file" button. Then browse and select the Gerber file...
Read more »