 Mrinnovative
DIY-thread-winding-machine

Hello friends here I have made a thread winding machine.
This machine wind thread from larger spool to smaller spool. this machine is very much usefull for the onw who daily deals with thread winding like the operator in loom factory. small scale textile owner etc.
Component Used
775 DC Motor liner rails timing belt 6mm timing pulley 6mm 20 x 20 profile Nextion HMI Optical Encoder 5mm ID bearings Custom PCB
Here I have used 12mm wooden sheet for the base of the machine. I roughly cut it with the help of jigsaw machine. then after I used table saw to finally cut according to reuired size.


Then I made the frame of 20 x 20 Alu. extrusion profile and place it on the top of wooden base
all the electromechanical components are going to be place on this frame.

Then I used my CNC router machine to cut this 6mm acrylic sheet this will hold the main shaft of spool one end of the shaft is connected with DC motor with the help of timming pulley.

now I installed the acrylic part to the 20x20 alu Profile facing to each other, and I have installed a 775DC on on acrylic sheet .

Here I have used 9mm linear rail for left and right motion of thread, also I have printed two 3d parts to support the linear rail and T8 lead screw.
I place two 8mm id bearing for the smooth operation of lead screw

Then I connect the nema 17 stepper motor with 3D printed part and attached it to the alu. profile this stepper motor used to move the thread direction left and right.
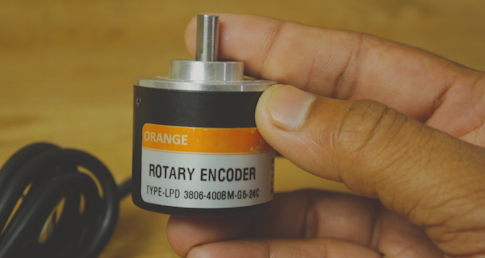
If you want to build a project where the machine can control the speed of the conveyer belt as well as the direction of movement, a rotary encoder is a must-have component. Keeping this in mind, Robu.in is introducing the brand new orange 400 PPR 2-Phase Incremental Optical Rotary Encoder at a competitive price.
This is a 400 PPR resolution optical rotary encoder with quadrature outputs for increment counting. It will give 1600 transitions per rotation between outputs A and B. A quadrature decoder is required to convert the pulses to an up count. The Encoder is built to Industrial grade.
The Encoder comes with a Standard 1.5 m cable length which can be extended with extra cable if needed.
Adding a pull-up resistor to both the A and B phases of the encoder output will help to avoid the effect of interference in output and get the precise logical output value from the encoder at the same time. Also adding a pull-up resistor to all phase output lines protects the open collector output-triode from damage due to direct Vcc supply short circuit.
Terminal Name Wire Color Description Phase A White Quadrature encoded output A Phase B Green Quadrature encoded output B VCC Red VCC should be connected to +ve 5V of supply GND Black The ground should be connected to the negative of the supply Shield Golden The shield should be connected to GND
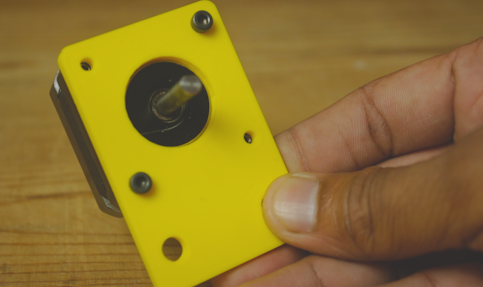
Custom PCB
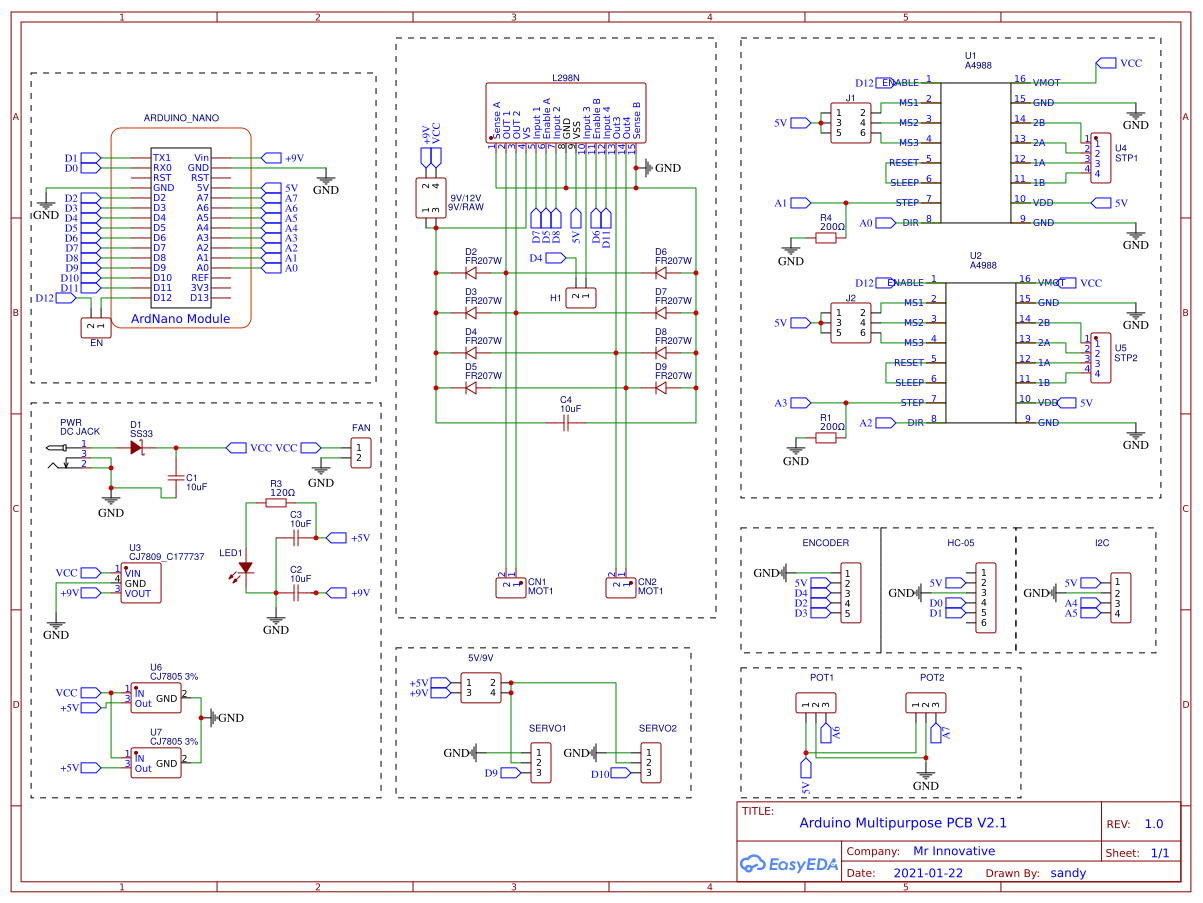


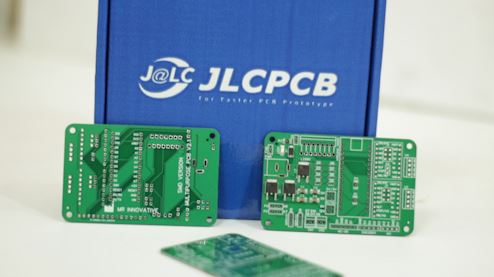
I have design circuit and PCB ineasy EDA and ordered PCB from JLCPCB.com
JLCPCB.com are the world leader in PCB manufacturing there PCB production rates are very much affordable and they have world class PCB production unit results fast PCB production.
I have provided the link of circuit desgin so that you can modify it as per your need if you need to change any thing.
https://oshwlab.com/sharmaz747/multipurpose-pcb_copy_copy_copy

SMT Assembly service of JLCPCB.com is cherry on top now get your PCB fully assembled and save your time and money Select components for your PCB from there Parts Library of 200k+ in-stock components they are offering $30 valued New User coupons & $24 SMT coupons every month $8.00 setup fee, and $0.0017 per joint
Now no need to order components separately for you PCB and get free from stress of soldering them on PCB just try PCB SMT assembly service and get you PCB with components pre assembled and ready for the project
👉 Try PCBA service of JLCPCB.com and save your time and money, get PCB ready for project, 200K+...
Read more »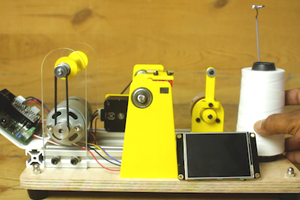
 sandy
sandy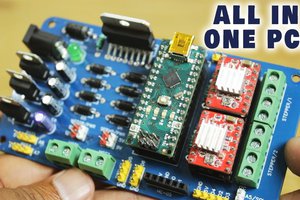

 paulusjacobus