LesWright
A note of caution!
This project involves the repair of a 15W CO2 Laser!
Appropriate certified Laser safety glasses and safe working practices are a requirement if you intend to duplicate any of the work described here!
Additionally I have heard remarks on the internet that wavelengths of 2 microns and above (Ho:YAG and CO2 Lasers etc) are 'eyesafe', this is simply not the case. 'Eyesafe' is a term that describes a specific Laser application, Laser rangefinders. These have pulse energies are millijoules or microjoules, and in those cases the light would not be able to penetrate the eye and damage the retina.
For high average power Lasers the term 'Eyesafe' does not exist. Any CO2 Laser although incapable of damaging the retina, will certainly irreversibly damage your cornea. So, Safety glasses!
Note on hardware
This has been tested with a D100+ Laser Marker/Coder. It should work with others from the Domino Series (from the datasheets). It may work with Linx or VideoJet printers as well, but this has not been tested or researched!
Introduction
I bought a Domino D100+ Laser coder from eBay as scrap for parts. These are showing up as scrap quite regularly now as they are end of life and/or failed units.
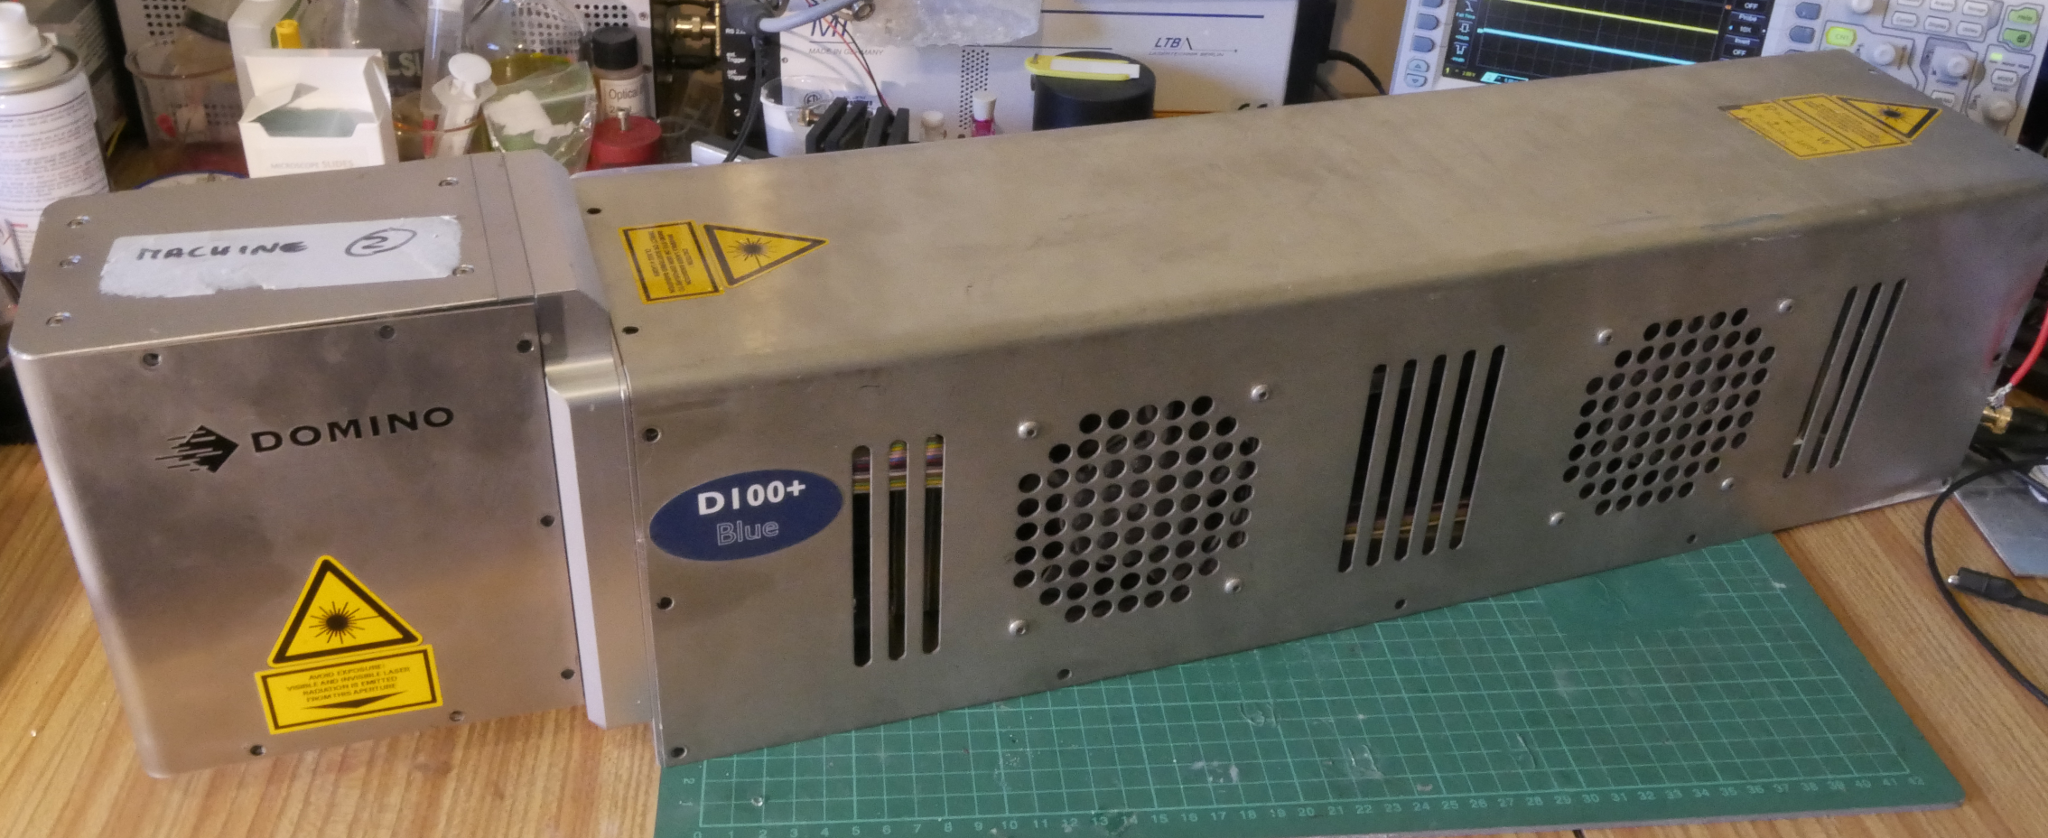
Inside is a high speed galvo scanner assembly, and F-Theta Lens, a collimating Lens and a Synrad CO2 Laser
There is a tear-down video of the Laser coder here:
However the parts in this are too useful to tear down completely, hence this project.
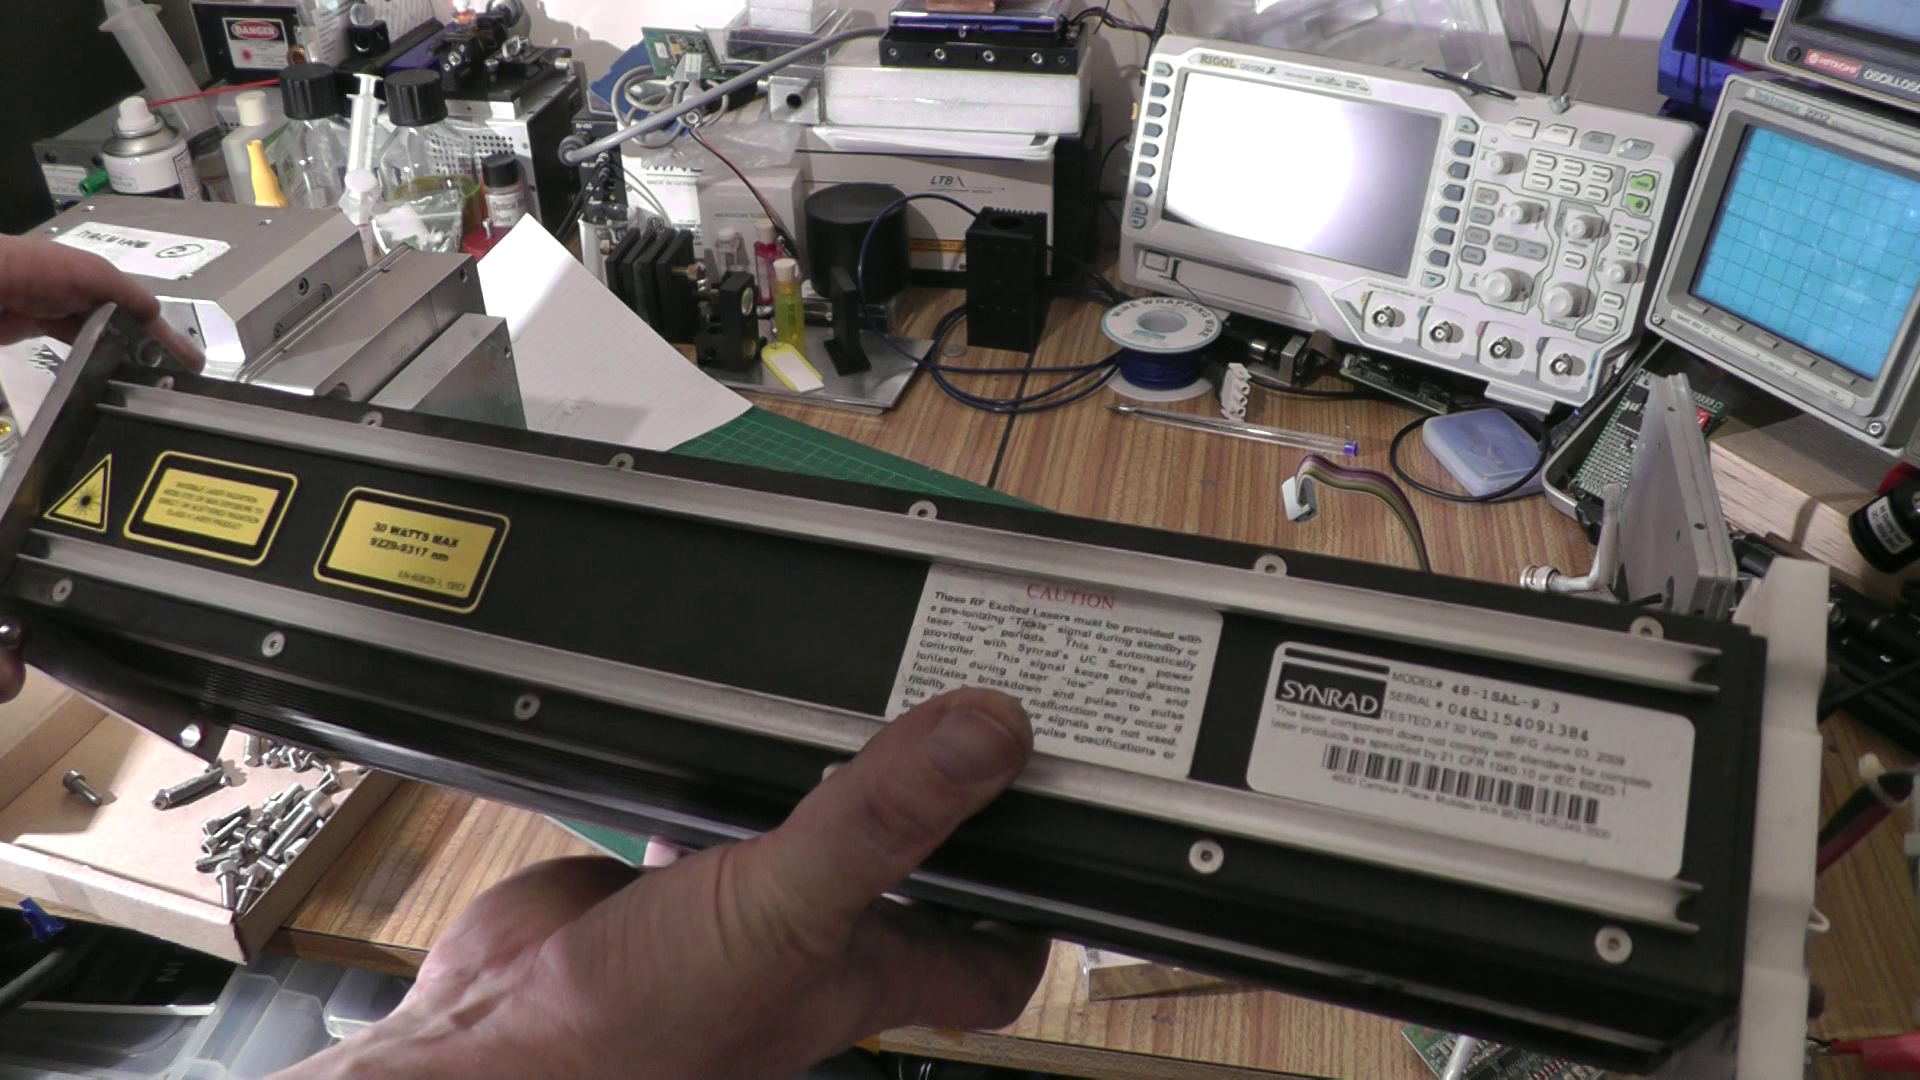
Synrad CO2 Laser repair.
Inside the Coder is a 15W Synrad 48 CO2 Laser with an unusual wavelength of 9.3 microns (This wavelength is used to better etch soda bottles)
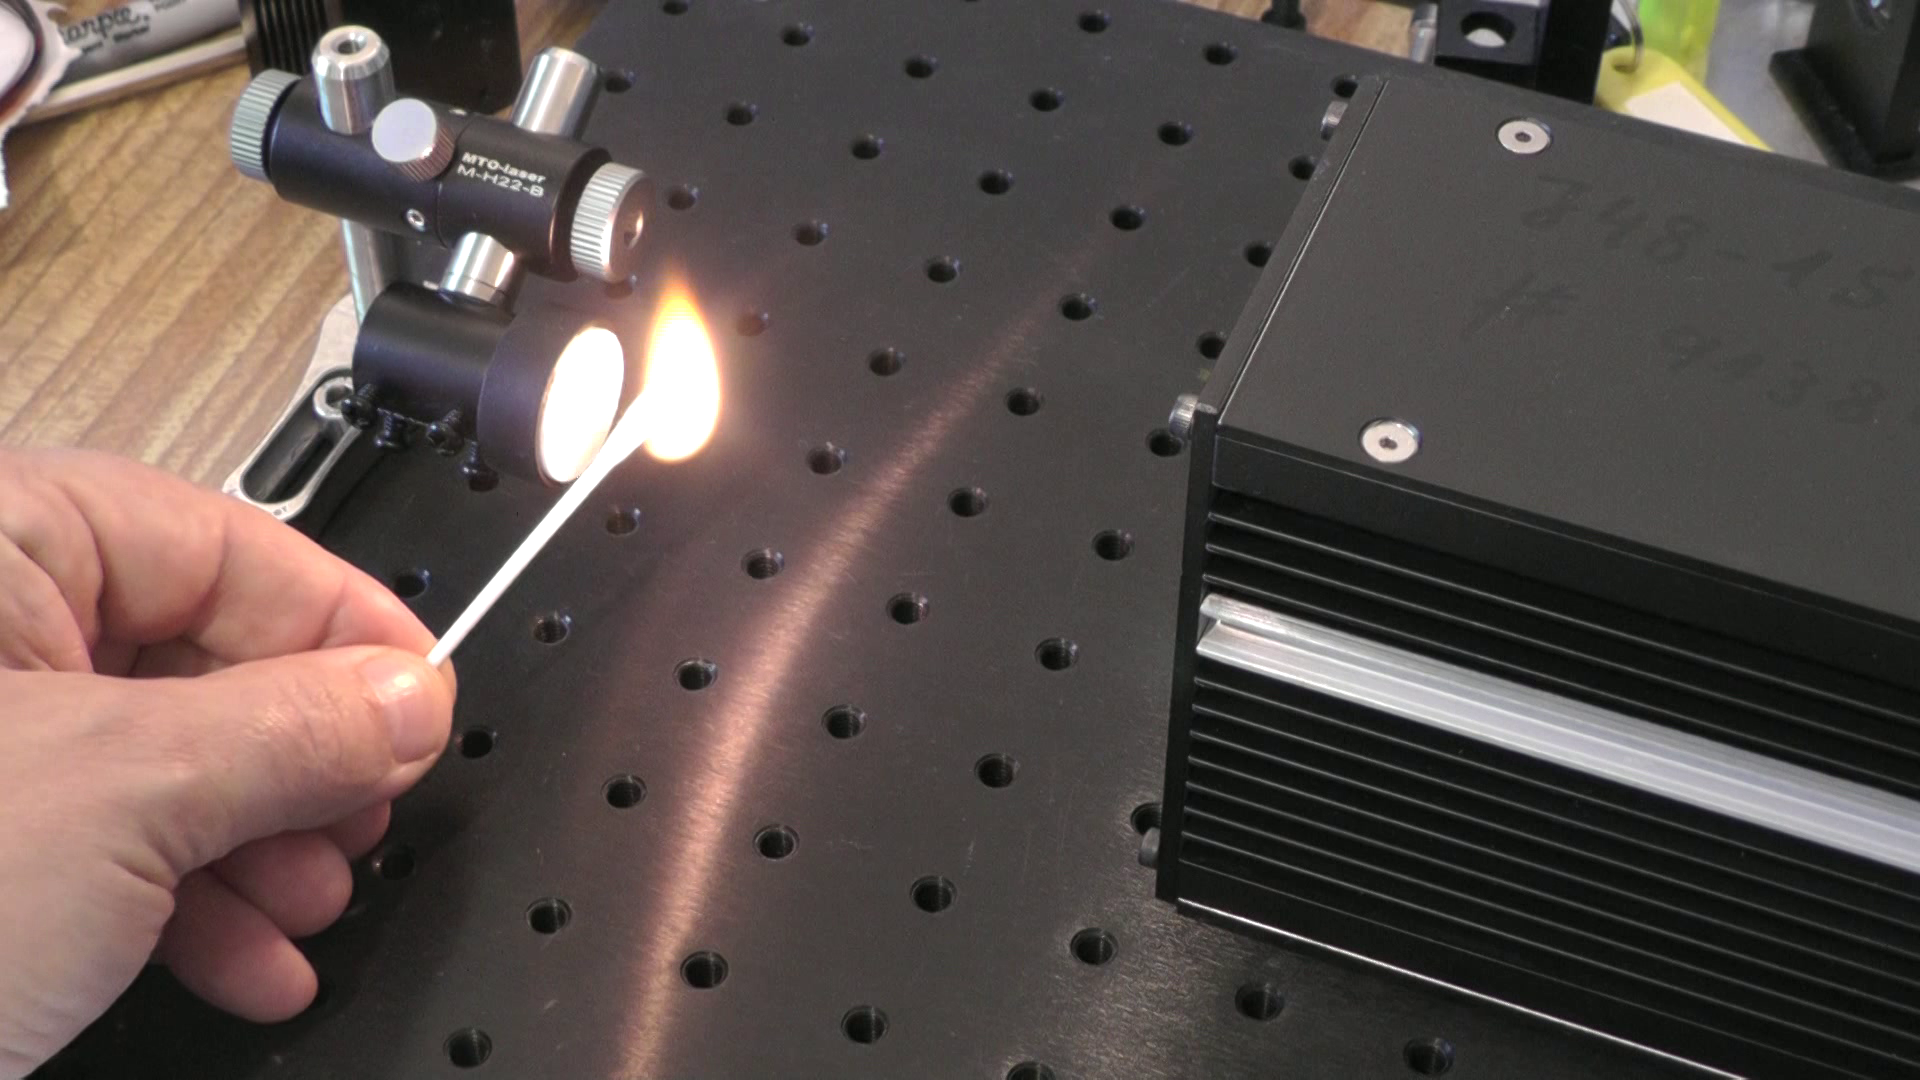
The CO2 Laser requires a 30V PSU at 6A, and the application of a PWM signal to its BNC connector.
The PWM signal must provide a 'tickle pulse' to pre-ionize the tube initially. This is a 5kHz PWM signal with a pulse with of 1μS +/- 20%
To run the Laser, the duty cycle is increased. At about 3uS pulse width Lasing will begin. The laser can be run up-to 100% duty cycle however 95% is the recommended maximum in the manual.
When testing this, it became apparent that the reason it was scrapped, was that the CO2 Laser was no longer functioning.
I extracted the tube and attempted a Helium soak on it.
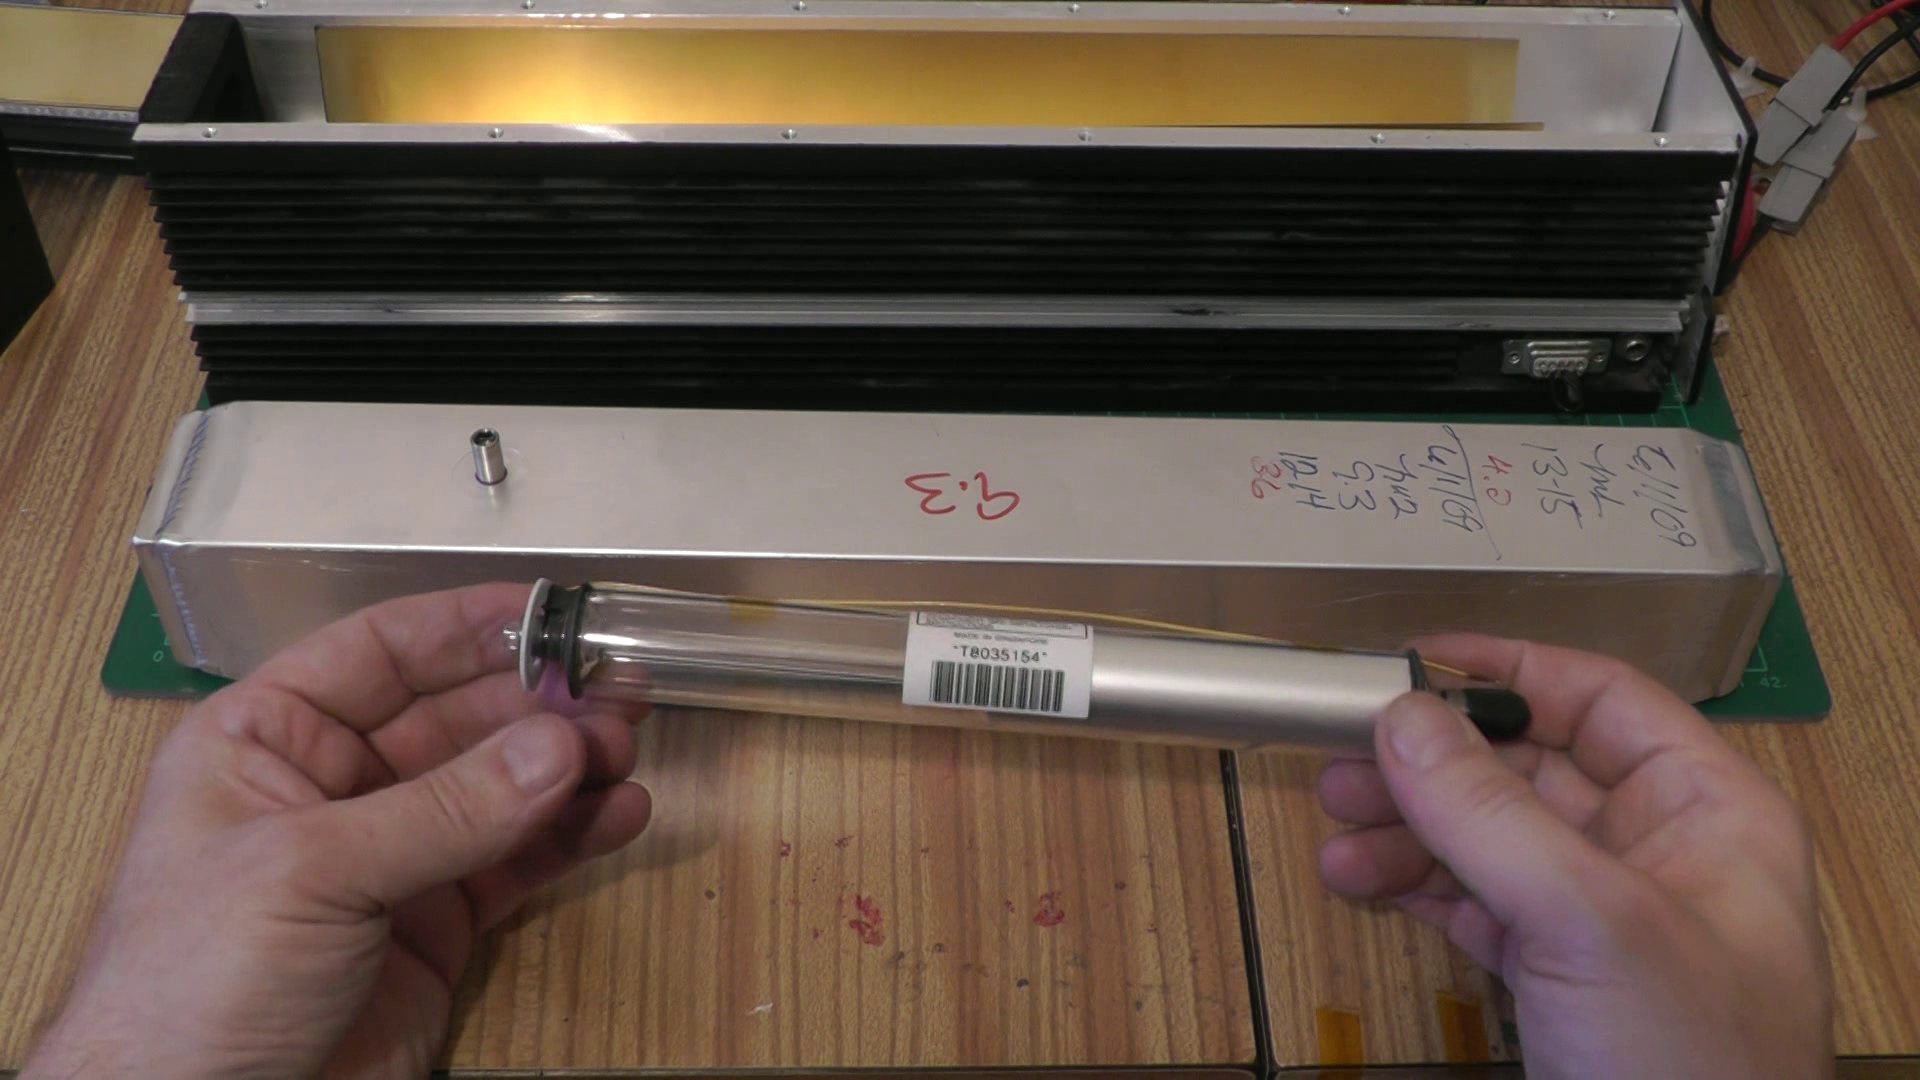
This is an all-metal tube (compared with the Helium-Neon tube in the foreground here. The Idea behind a Helium soak is that as a Laser tube, where a large proportion of the fill gas is Helium ages, Helium diffuses through the seals. Since this tube is soft-sealed (Viton seals) it did not seem unreasonable. (https://www.repairfaq.org/sam/laserhtr.htm#htrtrr1a)
When the Laser was re-assembled, it started working. However this was nothing to do with the Helium soak. Seemingly disturbing the tube and the RF Oscillator caused it to burst in to life.
The Tube quickly stopped working again, and I surmised it may well be an oscillator fault. Someone kindly sent me the Synrad RF tuning guide, and after following it, this laser has given no issues since!
This requires adjusting the tuning capacitor, (C5) and the bias resistor (R3) and inductor (L2) in the RF section of the Laser:
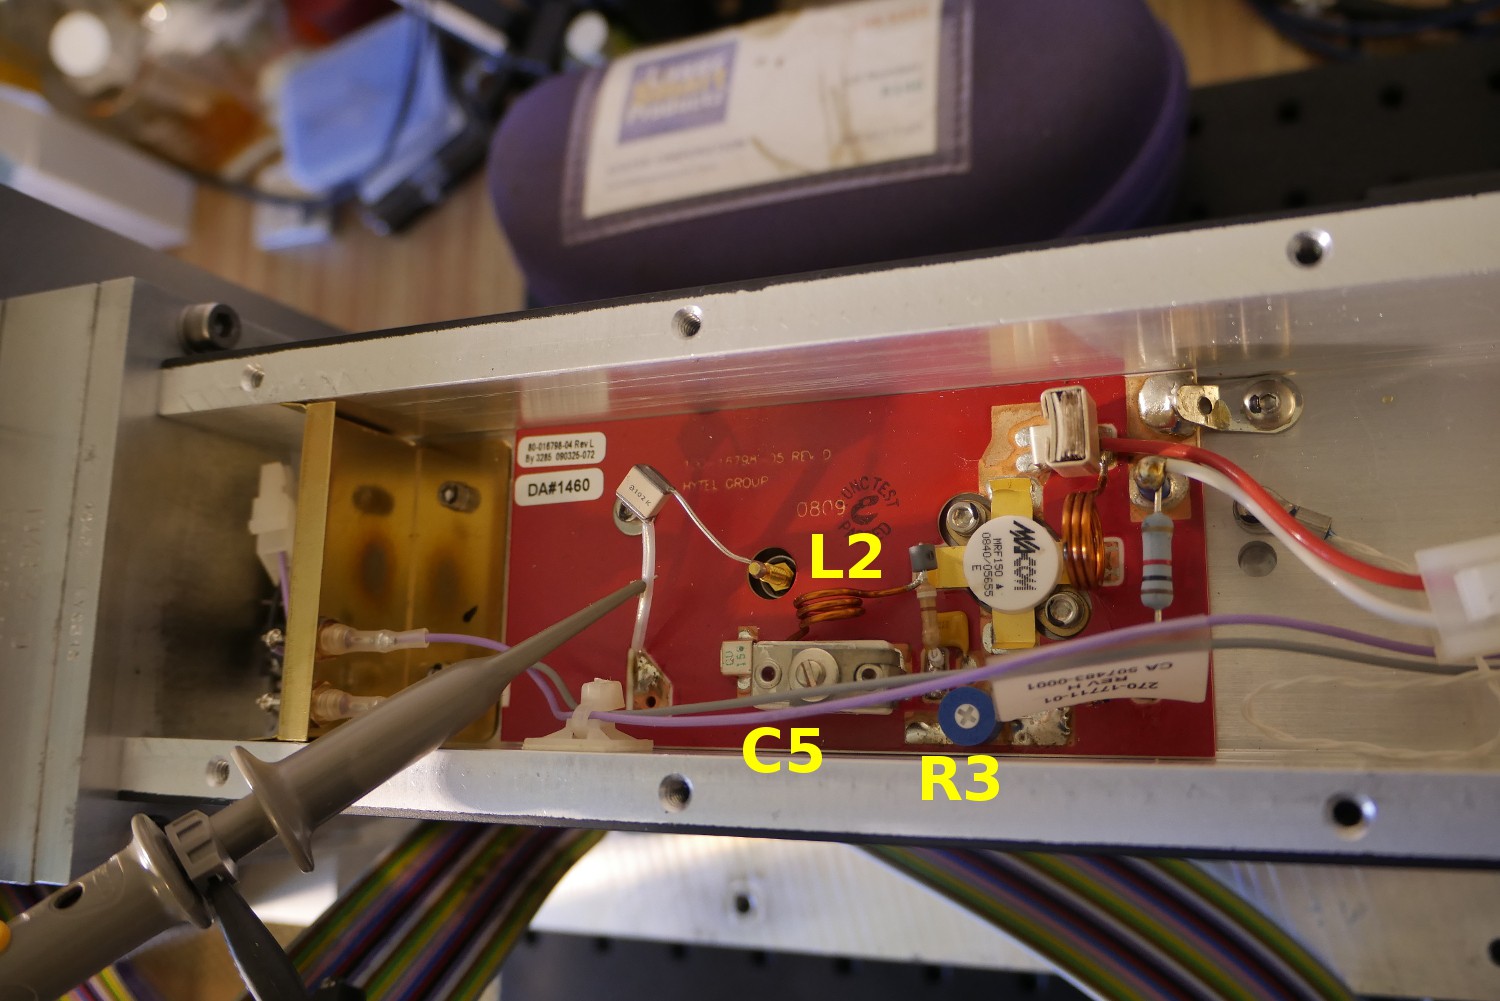
The scope probe must be hooked over the Teflon shield leading to the output capacitor as shown (capacitive coupling). The output 'rings' at about 500v during proper operation, and would damge the scope, and load down the RF driver. The Signal should appear exactly as shown below on the scope:
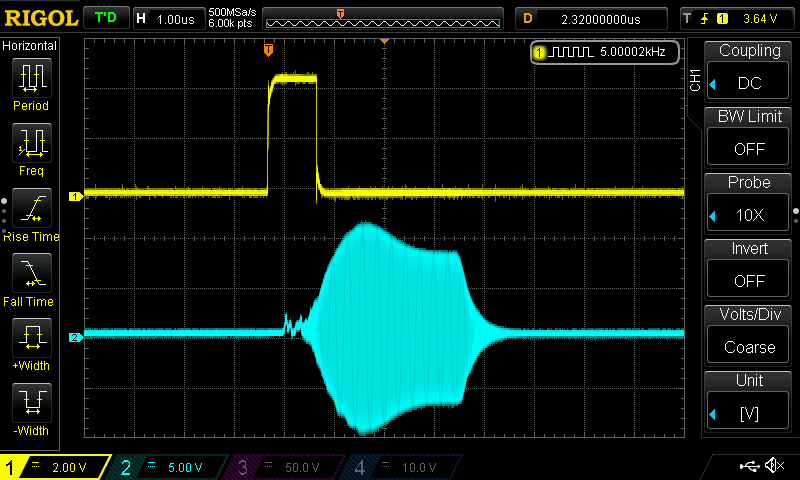
Ch1 is the 1uS Tickle pulse required to ionize the tube. Ch2 is the RF output. If the RF output looks like anything other than what is shown here, the CO2 Laser is out of tune and has not 'struck'.
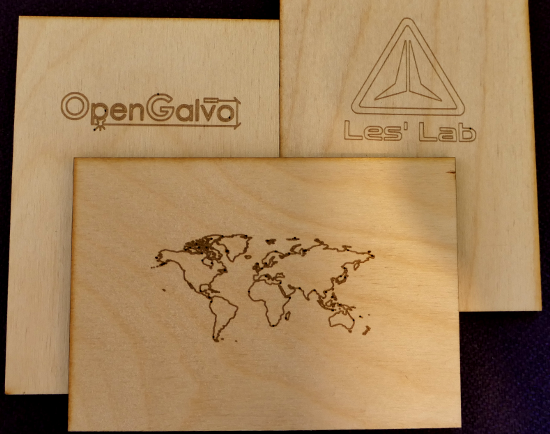
Galvo Scanner
The Galvo is the reason I bought the Laser Coder in the first place.
I determined the interface to run XY2-100 protocol, with additional connections ofr +15v -15v and ground. This is a common pinout, and is the same as the Sino-Galvo Scanners: https://www.galvo-scanner.com/galvo-scanner/industrial-galvo-scanner/double-axis-laser-galvo-scanner.html
This was demonstrated working in the above video using the XY2-100 protocol using a Teensy 3.2 running the XY2_100 library available here: https://github.com/Tuet/XY2_100
XY2-100 Firmware
Although the XY2_100 library above was good for a test, hard coding Galvo movements is required.
Fortunately, Daniel Ollson released this fantastic project: https://github.com/opengalvo/OPAL This translates standard GCode into XY2-100!
This piece of software makes extensive use of the Teensy Timer libraries in order to generate the necessary timing signals for the XY2-100 protocol.
The firmware is minimalist in that is supports only linear GCode commands, however this is not a problem as curves can be generated by means of a series of short lines!
Supported codes include:
- G0 Linear Move (GOTO).
- G1, Linear Move.
- S for PWM for Synrad CO2 Laser, E.g S200.
- F for feedrate fro example F400.
- M17 and M18 to turn Galvos on and off.
- M80 and M81 to turn the Laser on and off.
XY2-100 PCB
The OPAL project was missing a PCB and schematic, though it is possible to build one by using the readme and picking over code in the original repo. Since the breadboard version worked well, I spun up a PCB and schematic for this project!
The Gerbers are available at: https://github.com/leswright1977/OPAL_PCB
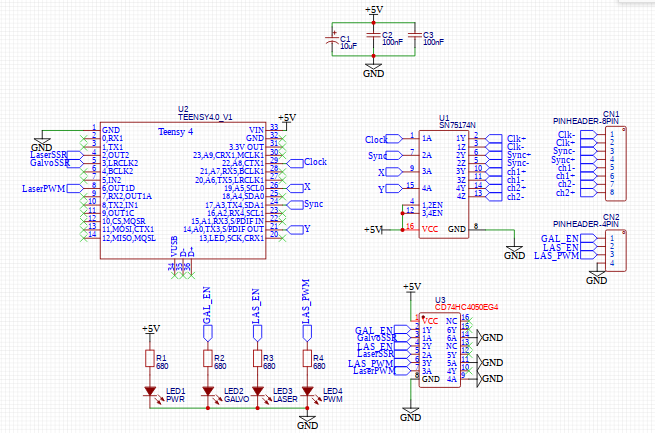
Schematic. This uses just two IC's and a Teensy 4.0. The SN75174N is a differential line driver used to provide the differential drive signals required by the Galvo head. The 74HC4050 buffers and level shifts the 3V3 teensy signals to 5V.
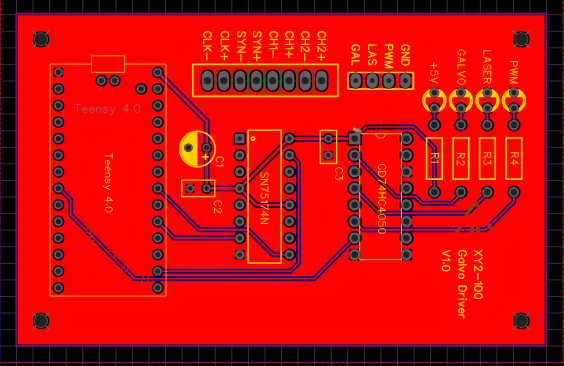
PCB top side
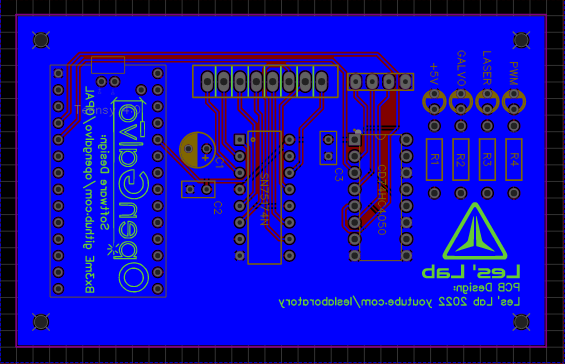
Bottom Silk Layer.
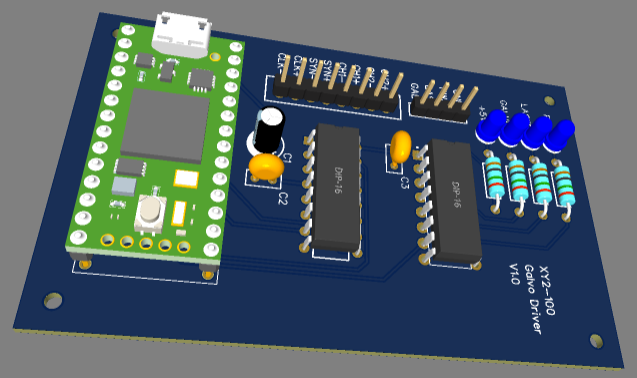
3D render
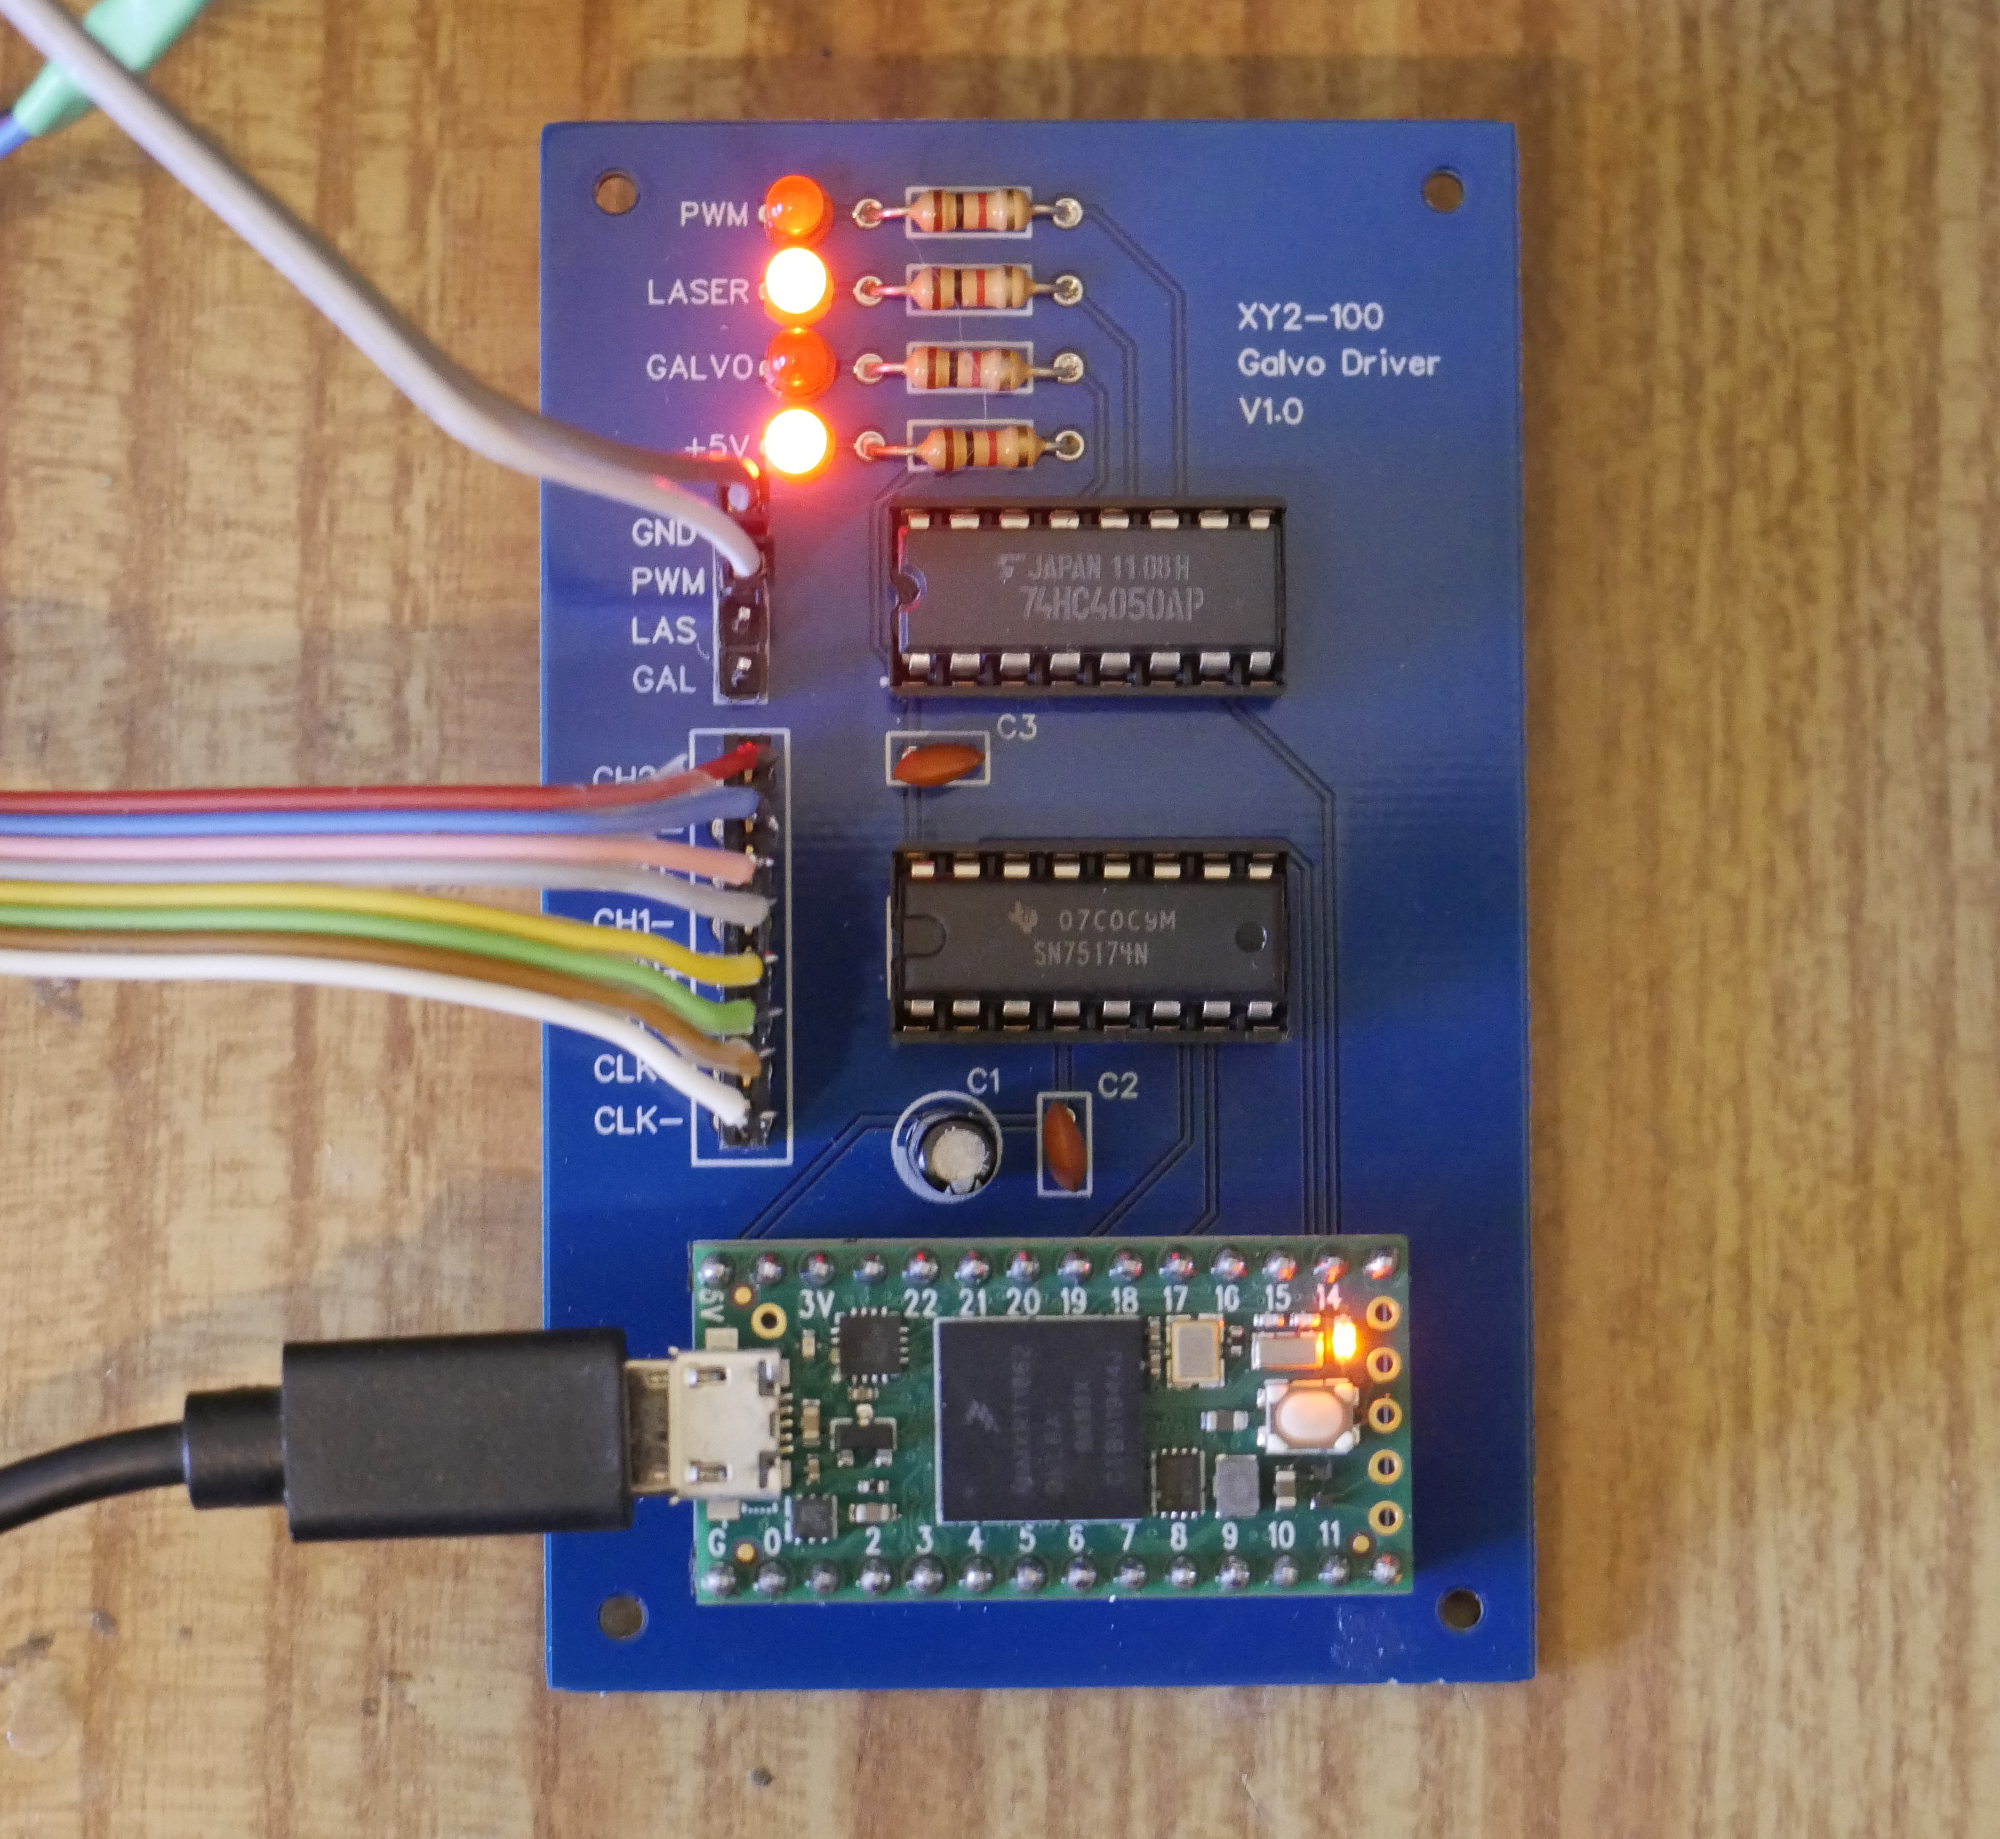
Finished PCB!
It Lives!
Results!