 Jerry Isdale
The Adafruit NeoTrellis RGB Driver PCB for 4x4 Keypad is a board with i2c connections and an array of 4x4 button pads, each with a NeoPixel (RGB). Adafruit also sells number of accessories and kits around the board. The Silicone Elastomer 4x4 Button Keypad, acrylic case, and Feather M4 can also be purchased as a bundled kit. You can drive the board with any i2c device, such as arduino, raspberryPi, etc. There is a kit that pairs 4 of the keypad boards with a single Feather M4 for a large 8x8 keypad. I chose to start with a single board, the Adafruit Feather M4 and CircuitPython, mostly to explore the chip and the Circuit Python system.
Adafruit has a nice Learn project for building the kit and basic programming (arduino or Circuit Python).
Note there is a similar but very different PCB kit the Adafruit NeoTrellis M4. This board has a 4x8 button/neopixel array, but these are directly connected to the M4, not via i2c, which as we will see makes the NeoTrellis 4x4 a very different beast.
Basic Kit Build and Initial Coding
It was pretty easy getting the board wired up to the Feather. The 4x4 board has a JST-PH 4pin socket, so we solder a matching plug with wires to the Feather. The 4x4 also provides solder holes for the i2c, so I could have gone with simple soldered connections on both ends. However, a DesignPattern I prefer is to use connectors between boards and peripherals. This way parts can be separated and re-arranged easily
It was annoying to note that the connector is NOT the same as the 4 wire connection used by other i2c standards like Qwiic and Stemma QT. Those use smaller JST SH connectors. I had purchased a number of those for previous projects, So I had to buy a set of -PH connectors. Standards Aren't.
The Case
Building the case was also pretty easy, following the Learn project. I did have to do it at least twice, as one of the solder connections broke. I found it wasnt too hard to pick up the outer acrylic in one piece if you squeeze a bit. Once assembled it looks good.
Python Code
Programming the basic example from the Learn also went pretty well. On a previous project, I found the MU Editor is very nice for these boards, but the 'autoreload' feature gets triggered every second or so by something on my PC. (someday i need to track that down). There is a simple fix for this. Insert the following code snippet at the beginning of the code.py program:
import supervisor

supervisor.disable_autoreload()
modify the Adafruit Learn example
I pulled the code bundle from the Learn pages and THEN went back and read the bits before it. The example code uses the common code for initializing the i2c connection:
import board
# create the i2c object for the trellis
i2c_bus = board.I2C()
However, this does NOT work on a Feather M4, because the I2C() function is not implemented in the board module for Feather M4 boards. So you MUST use the alternative i2c setup:
from board import SCL, SDA
import busio

#create the i2c object for the trellis
i2c_bus = busio.I2C(SCL, SDA)
I had a similar issue with the raspberryPi Pico. Not sure why but guess the rather impressive team at Adafruit/CircuitPython are a bit busy. This may have changed by the time you read this, so check.
Note that while SCL and SDA are defined in board, these are only the primary i2c pins. Many boards support alternative pins and you can easily use those.
Once those two hiccups were fixed, the example worked just fine. It blinks the corresponding neoPixel when a button is pressed. Not super impressive but a decent starting example.
Code for project at this state is in github repository at examples/code_neotrellis_example_m4.py
Communications
simple blinking its Boring. and doesnt communicate.
Communication is pretty easy as a...
Read more »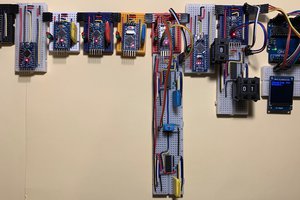
 Amos
Amos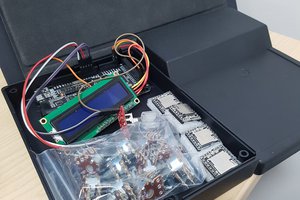
 Craig Hissett
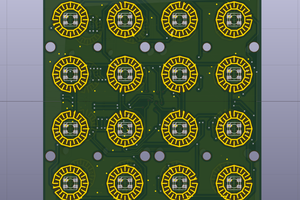
 Pierre-Loup M.
 Dimitar