 Ben Brooks
I actually ‘started’ this project several years ago using my microcontroller of choice at the time, a Particle Photon. I got the basics working easily enough, but I got hung-up on the weather data portion at the time. I have my own weather station which reports to Weather Underground and I REALLY wanted to use the forecast for my specific station. They offer a free API for folks that have a weather station, but my complete lack of actual coding skills meant that I was never able to get it to work properly. I ultimately shelved the project for quite some time but picked it up again after setting up a Home Assistant instance; this made things a lot easier for my none-coder-self to get everything to play nice together, albeit without using the forecast for my specific weather station.
Once I started utilizing Home Assistant, I knew that I would be using ESPHome with all of the ‘smarts’ being done by logic on my local HA server. The ‘code’ for the microcontroller is simple enough that it doesn’t really count as programming; it’s a short YAML file that I flashed onto my ESP device. From there, I just monitor (and ultimately automate) everything within Home Assistant.
I started off by attempting to monitor a houseplant and initially used an ESP8266 but ultimately switched to an ESP32 to give me an extra analog input (didn’t think I’d need it for my initial use-case, but I planned to make a PCB and I wanted it more multi-purpose for situations where I might want multiple soil sensors). Yes, I could have used an ADC to get way more inputs, but I had an ESP32 on-hand and I didn’t foresee a situation where’d I’d monitor more than 2 sensors anyways. Throw in an analog soil moisture sensor, a 12V solenoid valve, resistor, diode, capacitor, 12V to 5V regulator and a transistor for controlling the solenoid and I had a finished prototype. Once I went through a couple dry/watered cycles with the Aloe plant in my office window, I was satisfied that the sensor would give me reliable and useful readings so I designed a simple PCB. I opted to use phone plugs (RJ11) for the inputs/outputs to make it more user-friendly instead of screw terminal blocks that I normally use. This didn’t end up being QUITE as user-friendly of an improvement as I envisioned, as I ultimately designed the case to still require opening it up to make the connections (felt like the best way to make it more water-resistant).
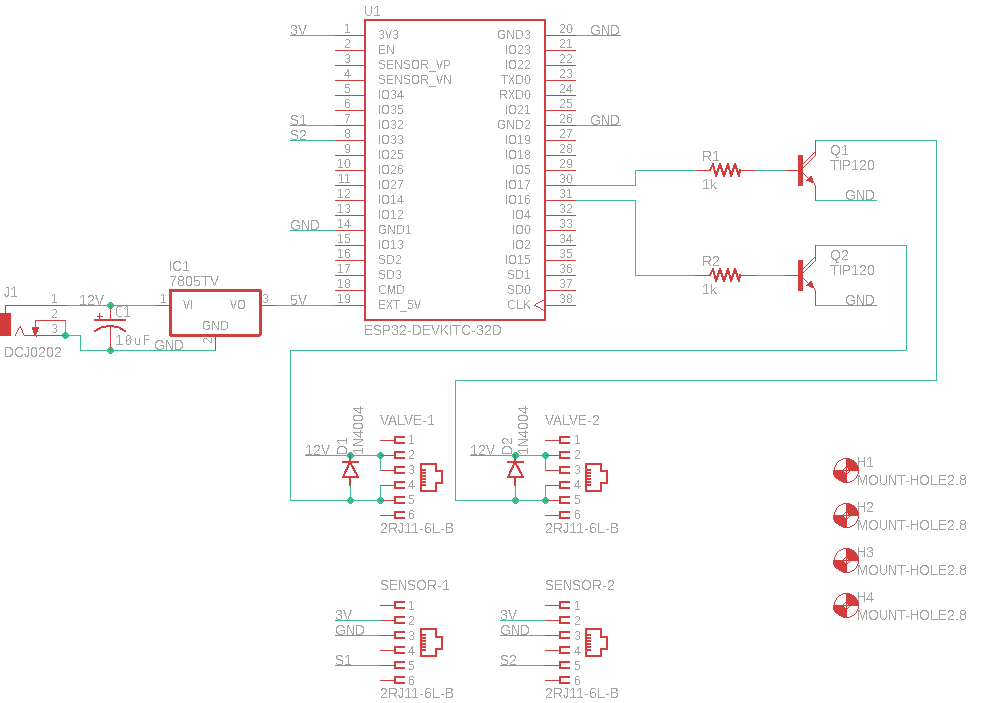
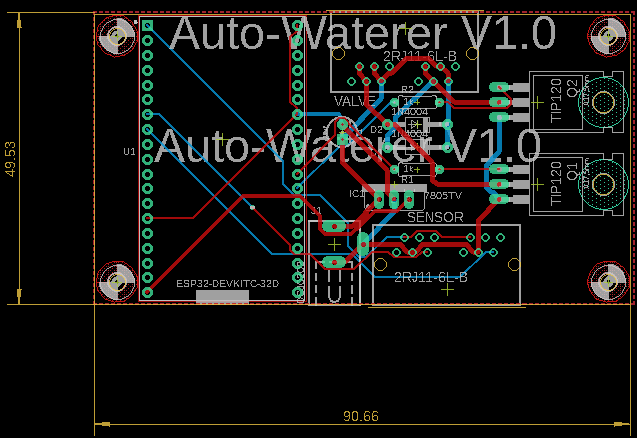
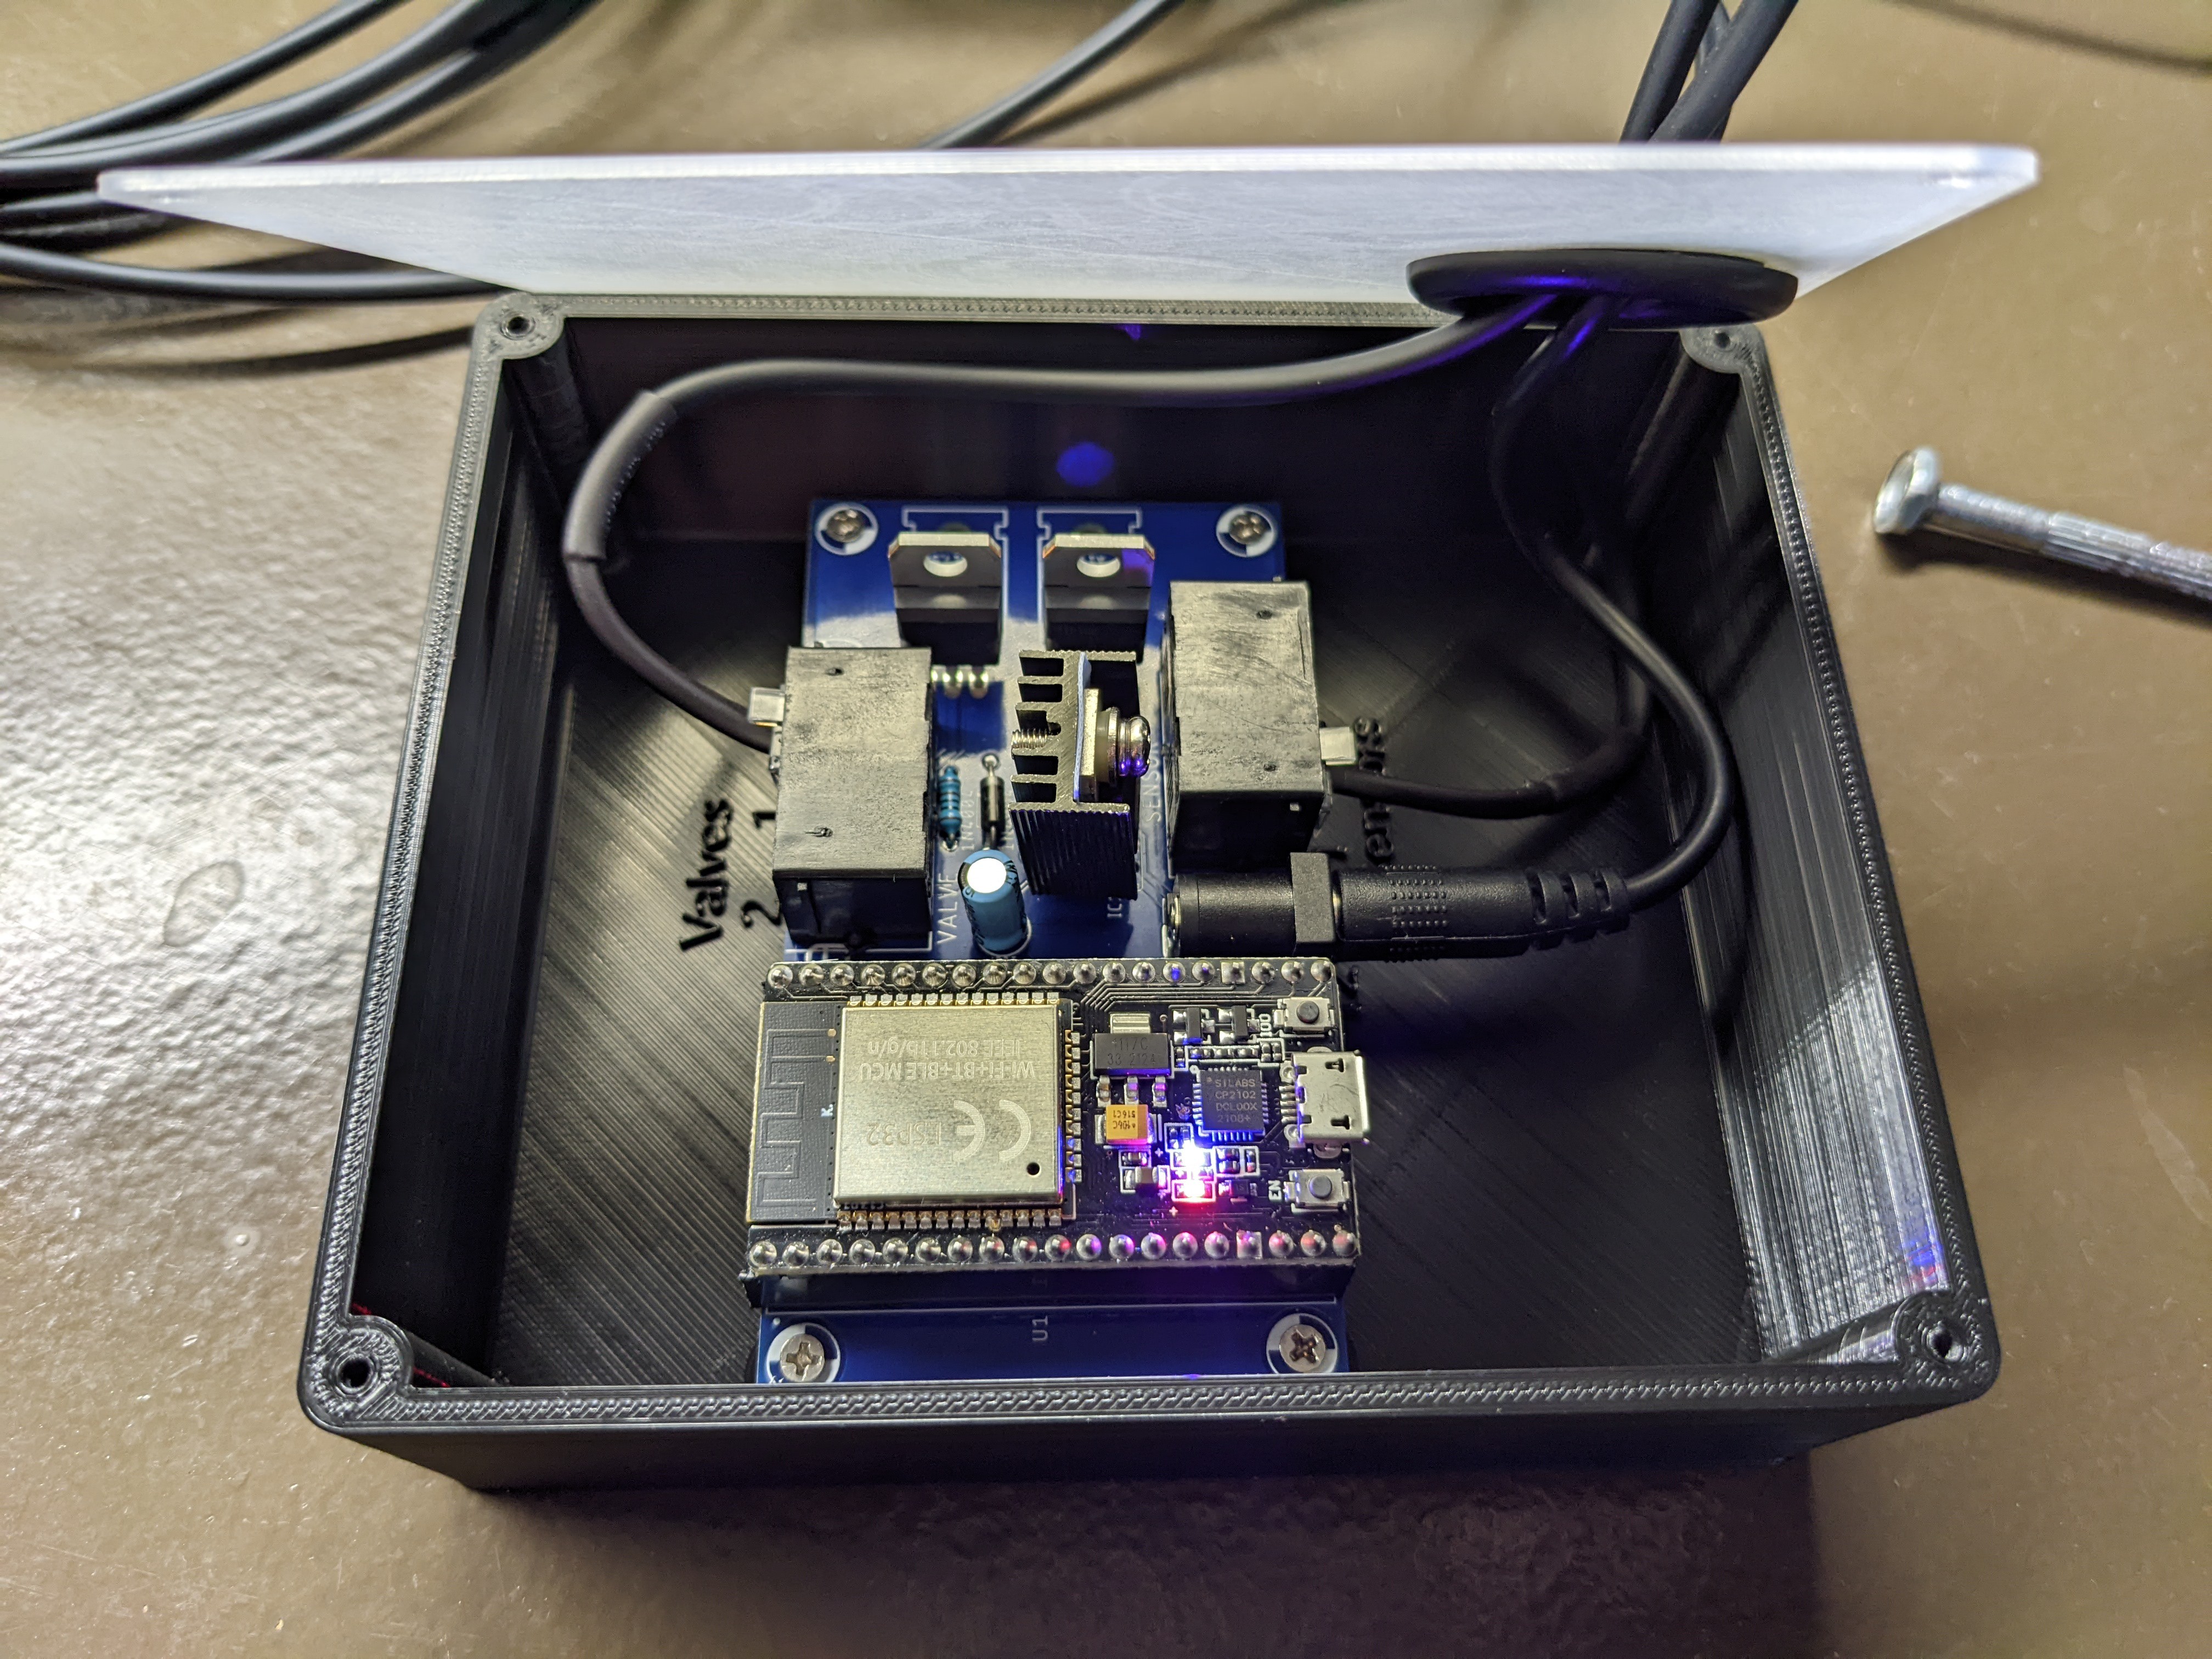
After receiving the finished PCB and assembling it, testing confirmed I didn’t mess anything up in my ELECTRICAL design; I did however realize that I failed to check the width of the pins for the ESP32. Luckily it was a small enough difference, that by adding header pins I was able to make it work. I then made up some simple enclosures for both the PCB as well as the top of the solenoid valve and got some fittings to allow me to use the valve with standard garden hose threads. With the physical design ‘done’, it was time to install it outside and take it for a spin.
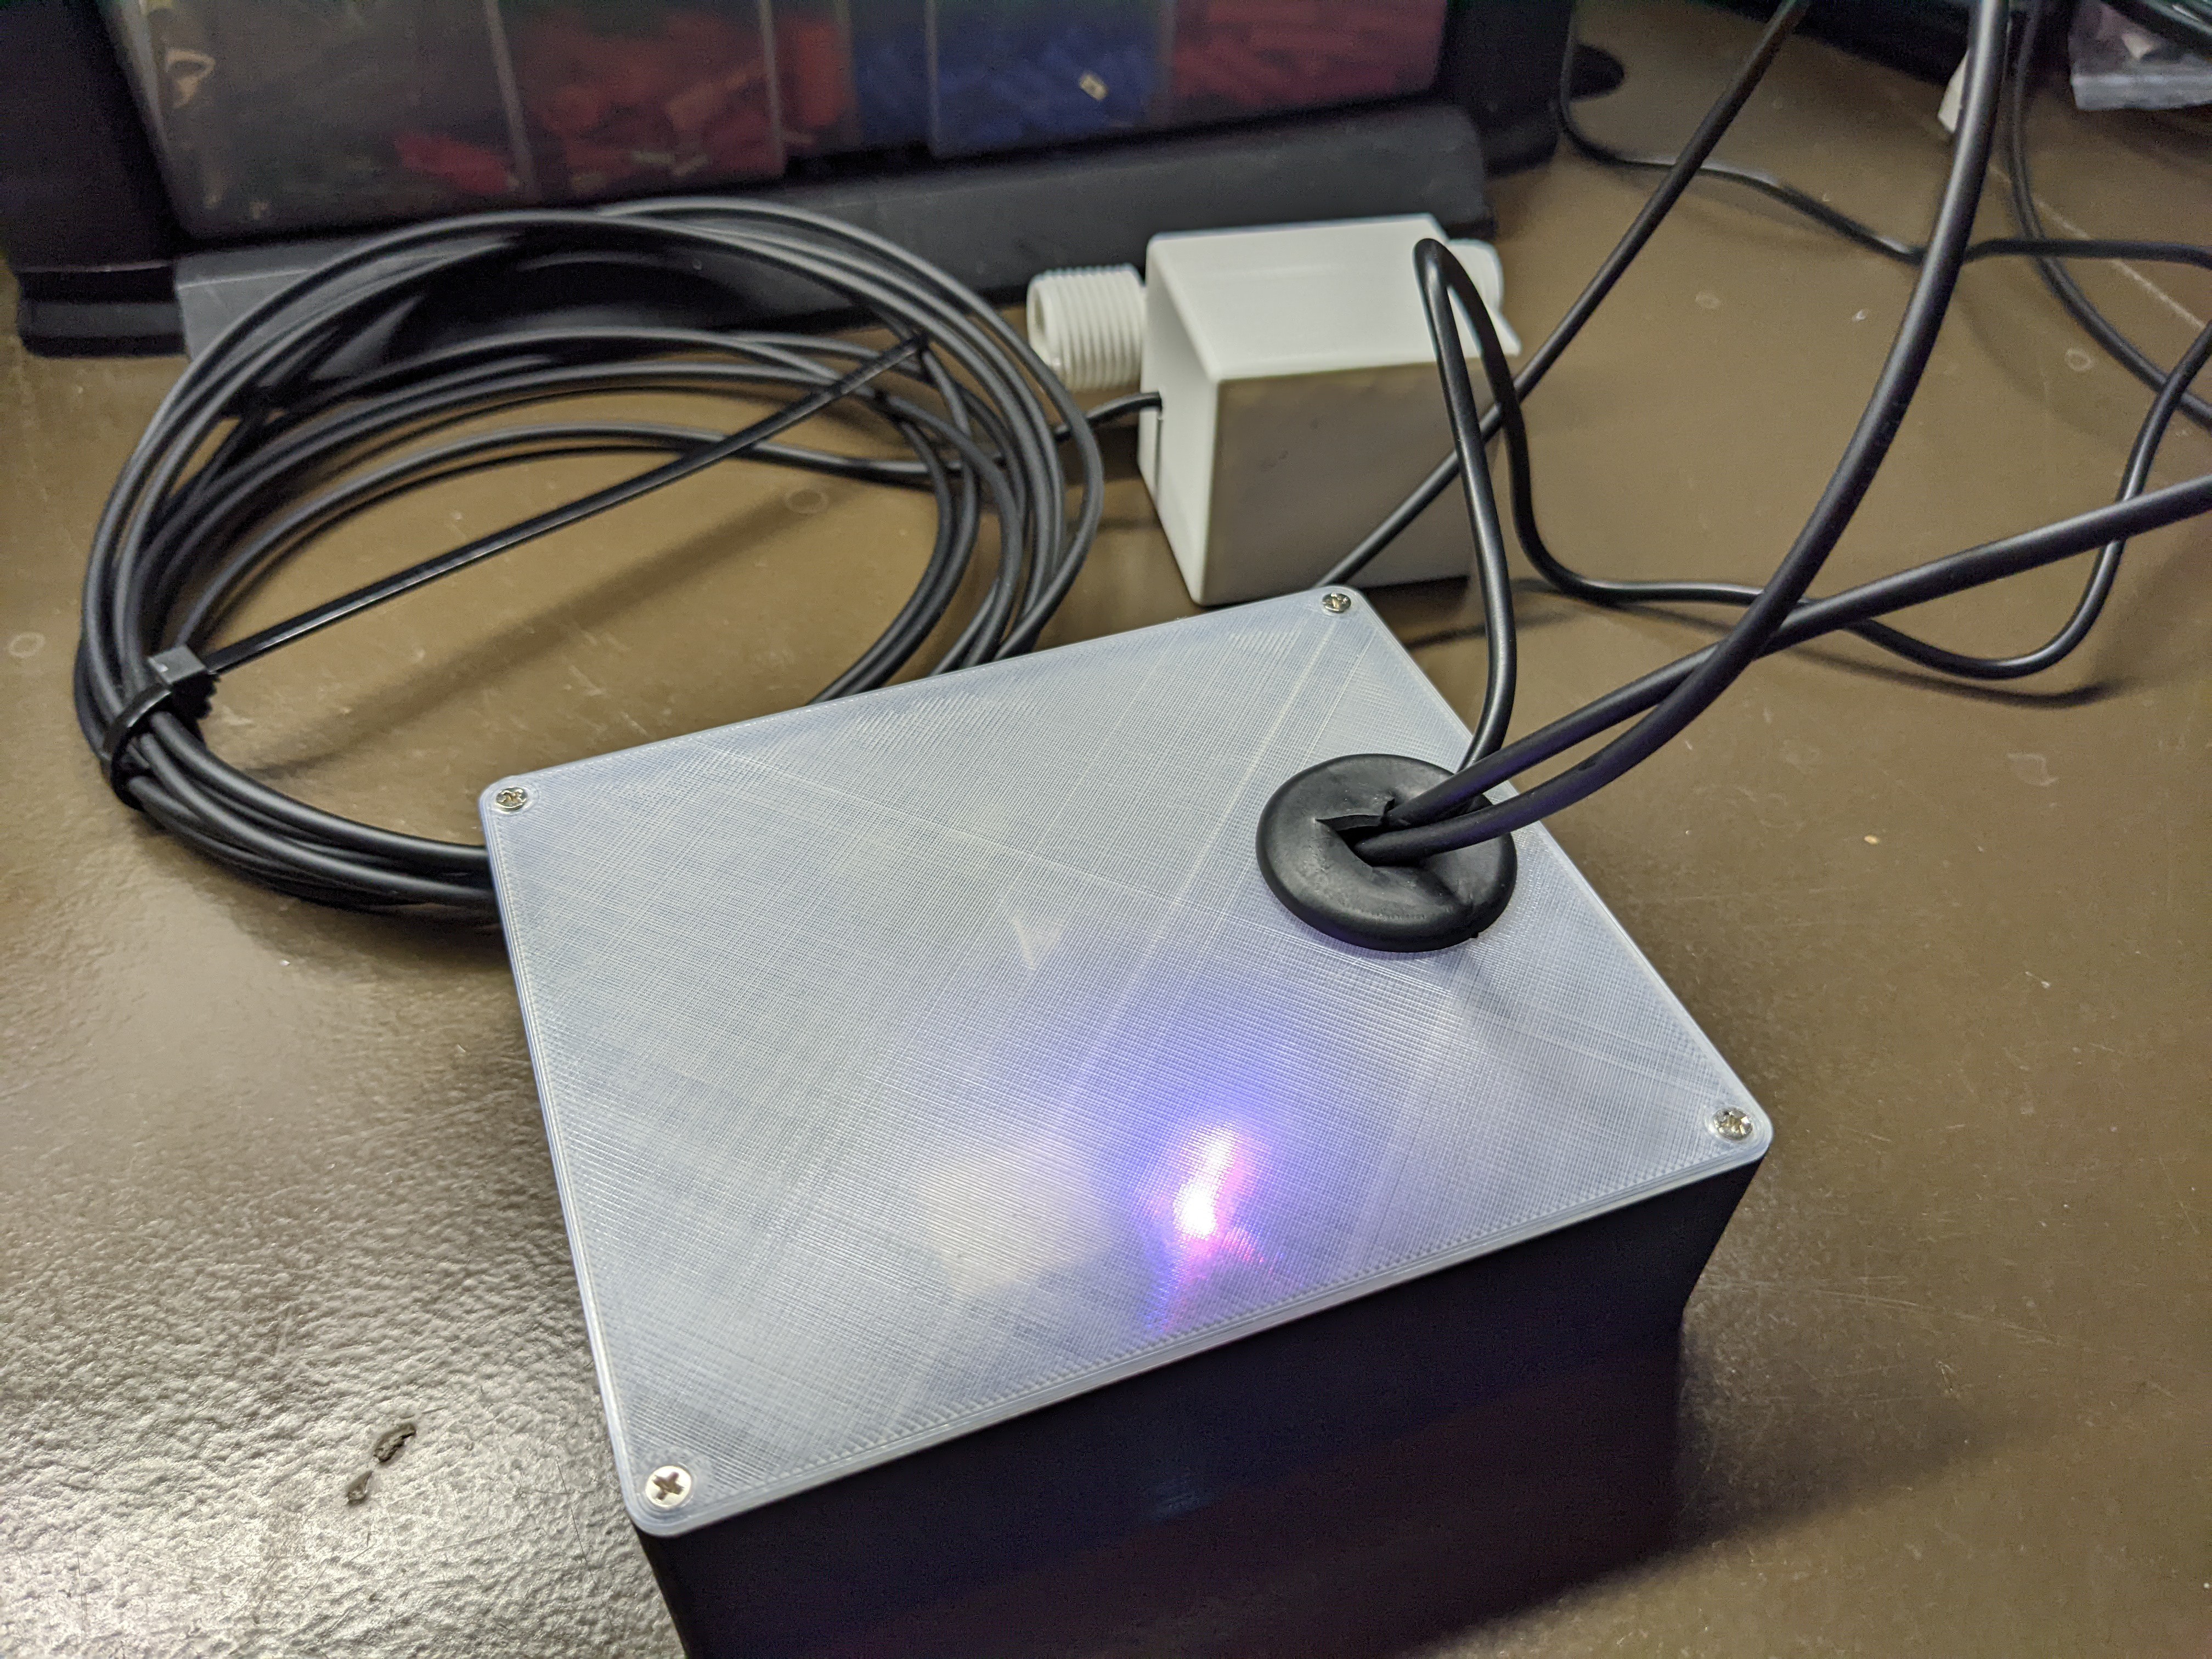
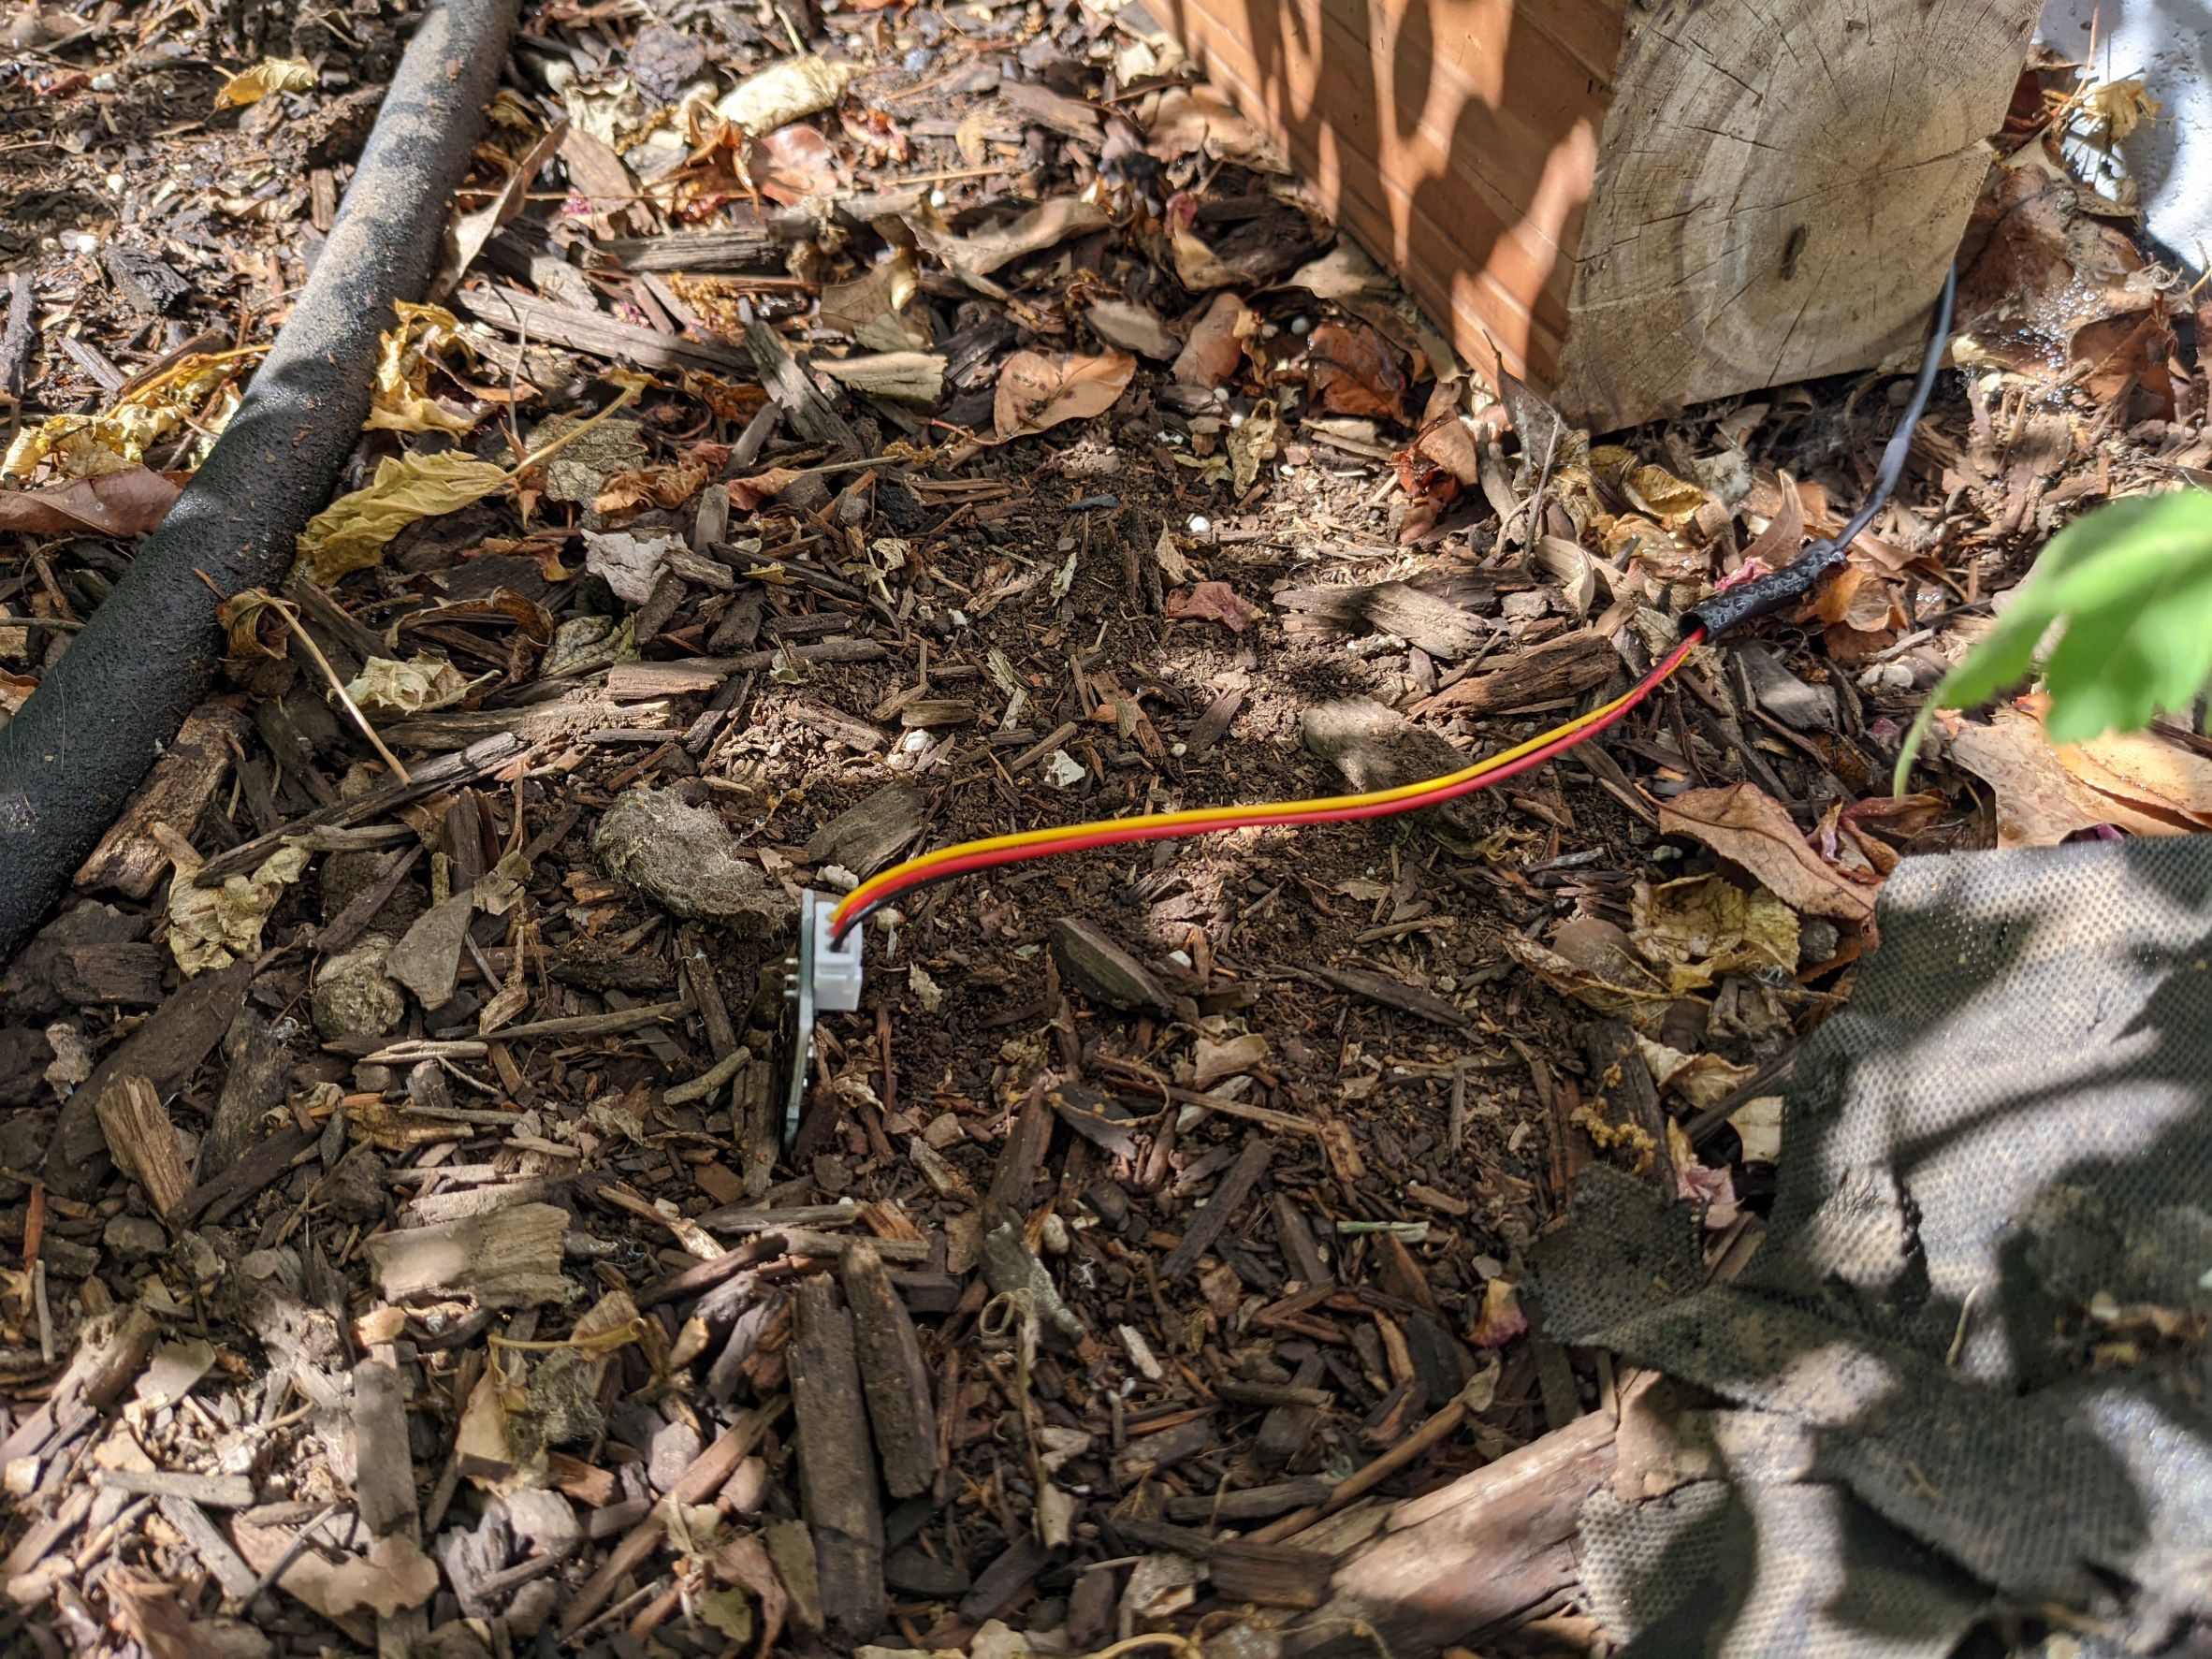
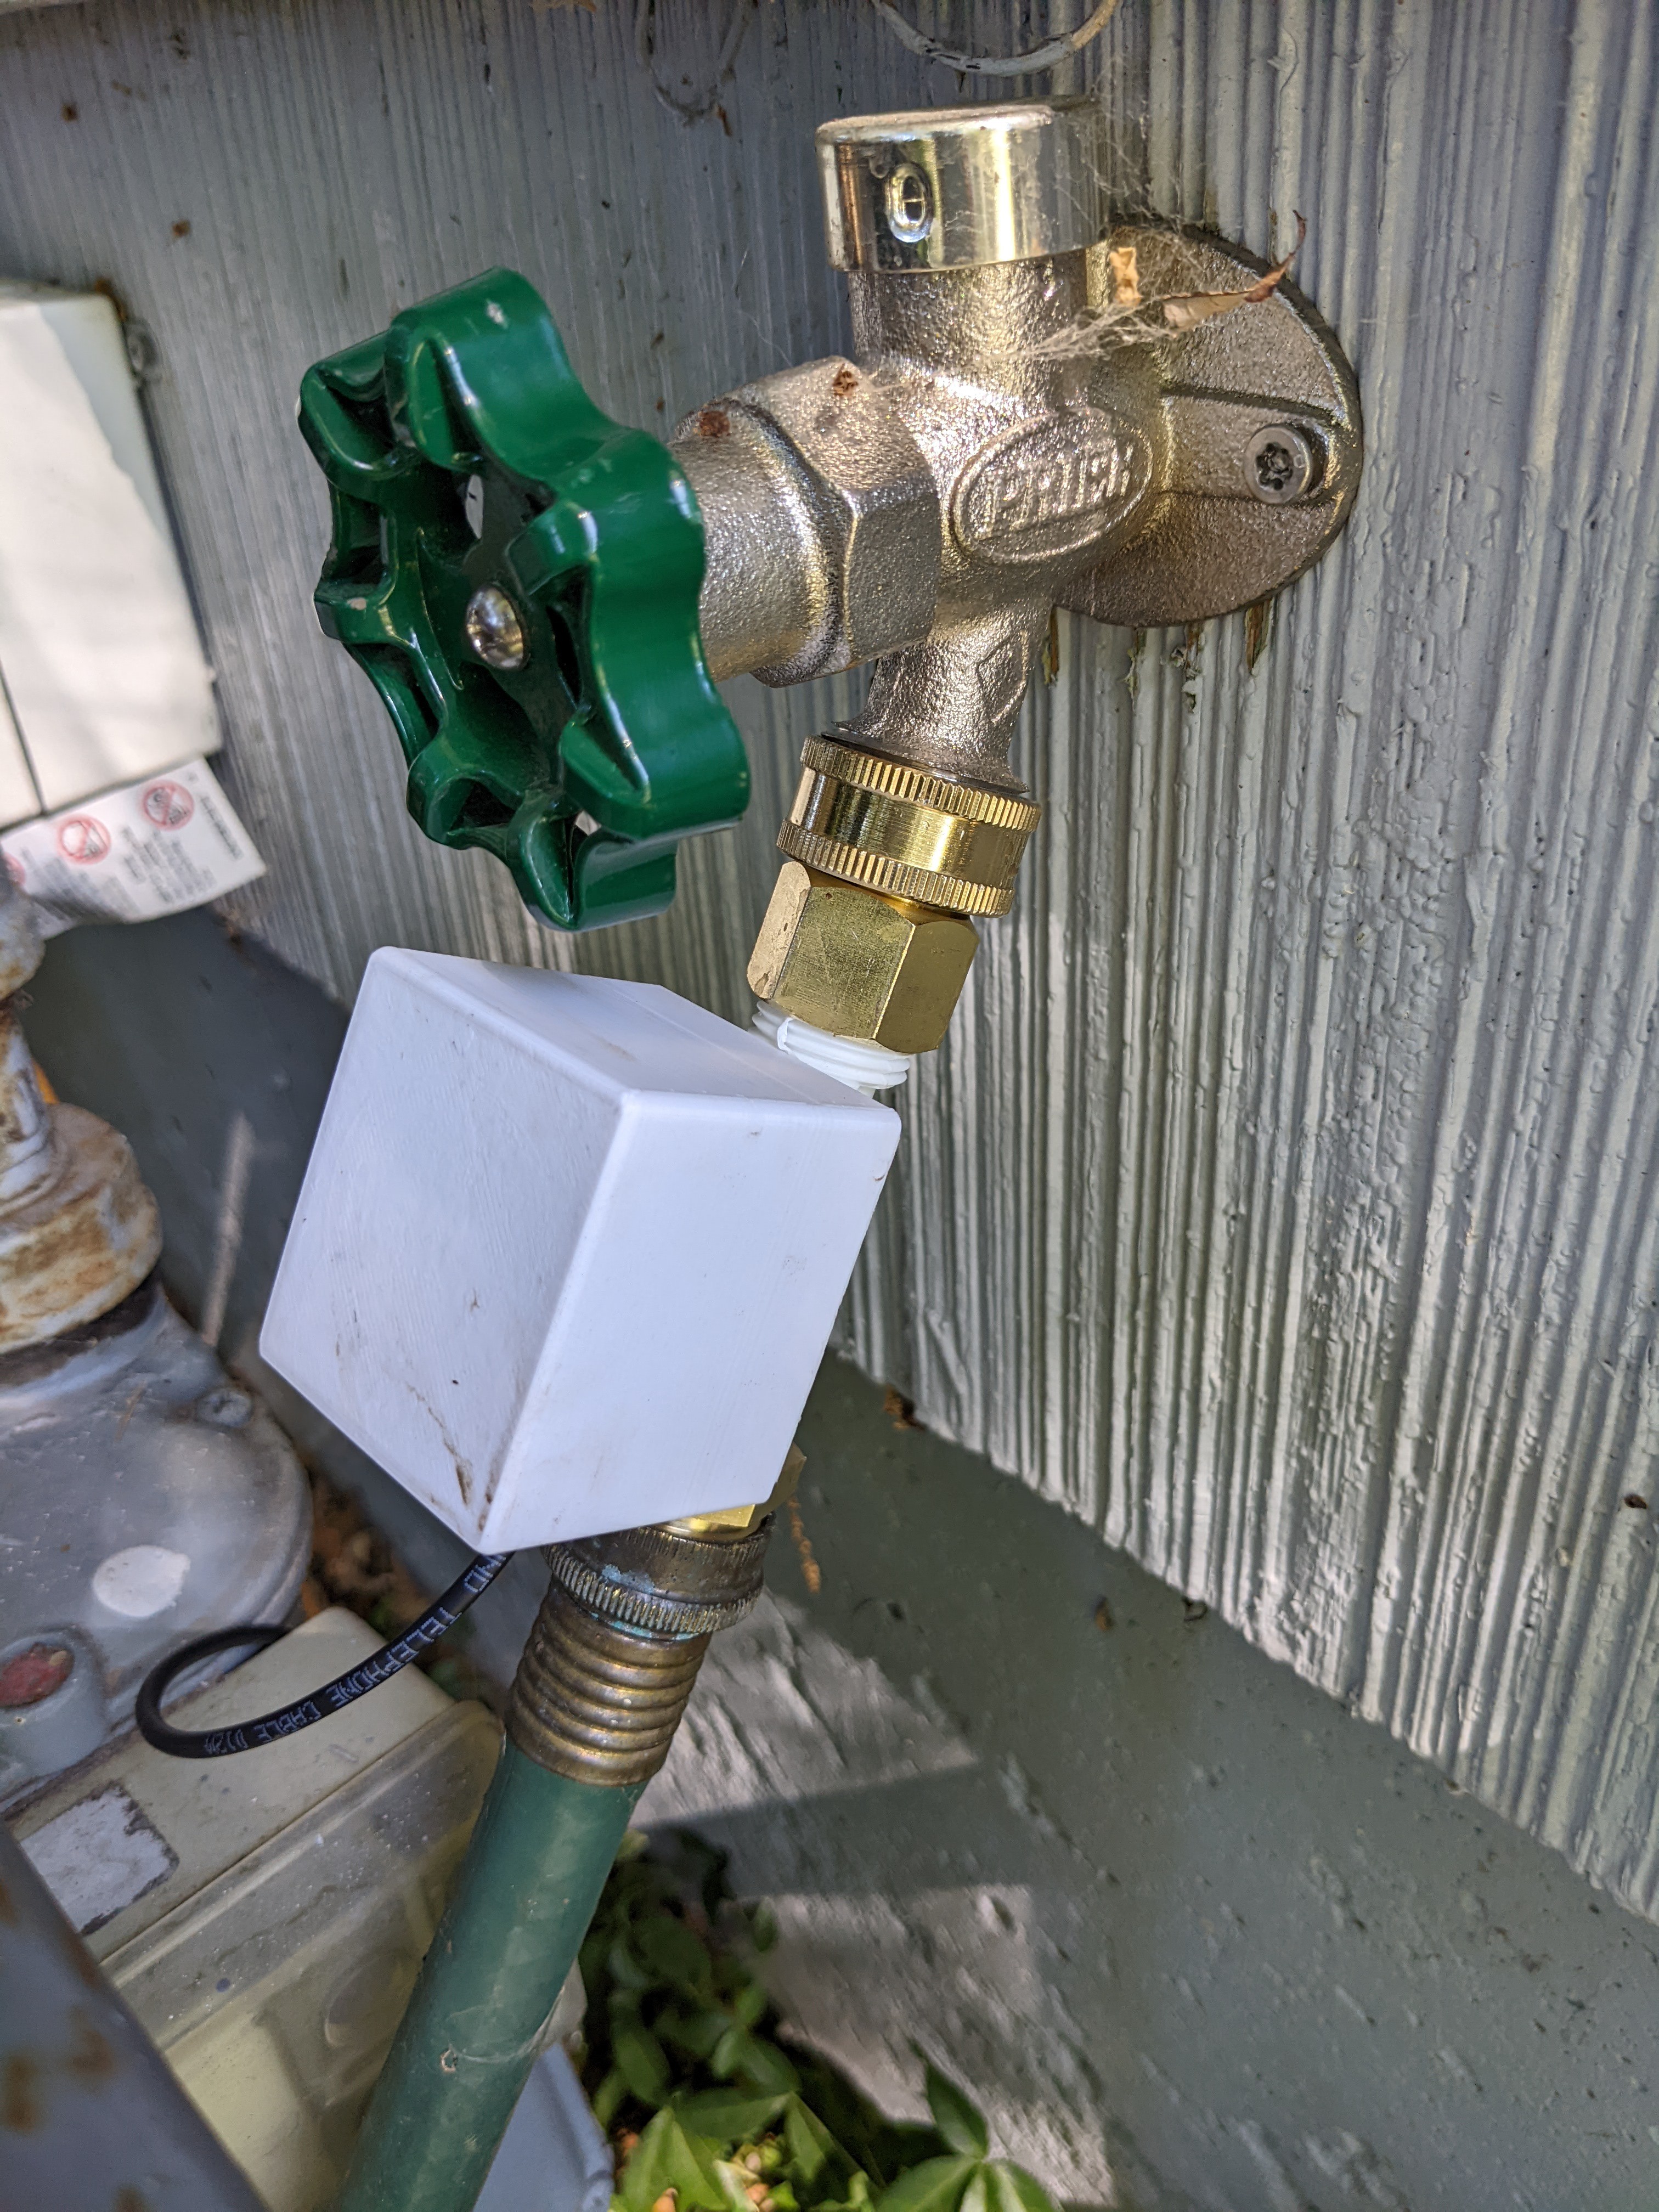
Install was pretty simple and straight-forward. I had originally planned to use some heat-shrink on the top of the soil sensor, but ultimately chose not to. Partly this was because I didn’t have any large enough on-hand, but I also was curious how long it would last completely exposed to the elements. It’s a cheap part, I already assume that it will fail in short-order anyways and I wanted to see the quickest that it would need to be replaced as a baseline before I start trying to protect it (that way I know if anything I do actually makes a difference). With it all installed, I did some quick testing of the valve to ensure it operated properly and didn’t leak (mainly on the inlet side). I also wanted to get a rough idea of how long it would need to ‘run’ to start affecting the soil moisture readings. While I didn’t time things, I ran it for a few minutes and subsequently noticed the soil moisture readings start increasing from ~20% to ~75% for the next ~30 minutes, before dropping some and then plateauing. I decided to start my automation with 30 second watering times, followed by 30 minutes of waiting before checking readings again. For the time being, I have the control box rudimentarily ‘mounted’ under some stuff on top of my deck. Once I’m confident no changes are needed, I plan to mount it with some 3M adhesive strips UNDER my deck, UNDER the eave of my house, with the opening facing down. I feel pretty confident this should keep any water from getting where it shouldn’t be.
For the weather data portion of things, as I mentioned previously, Weather Underground was my preferred source but I couldn’t get it to work. Home Assistant works with a couple of different sources quite easily. I’ve tried both the National Weather Service (presumably US only) and OpenWeatherMap, which was new to me. I ended up using OpenWeatherMap, partly just to try it out and also because in addition to daily precipitation probability it also provides daily precipitation amount (which I felt like an important data point for my purposes). It actually allows for contributing your own weather station, but there isn’t an ‘easy’ way to do so (at least with my specific weather station). Adding a few ‘sensors’ to pull the specific weather data I cared about and I was all set to put together a simple automation to control it.
Ultimately, this led me to my current stage of the project; the basics are all setup and work and I’m simply ‘commissioning’ it. I have a simple automation that checks the soil moisture readings and the forecast for the next few days to make decisions whether to water or not. It’s just a series of checks based on the soil moisture reading, with progressively less stringent rain forecast requirements based on how dry the soil is (as well as making sure it’s not actually raining right then). Now I just wait, and tweak parameters (and replace soil sensors presumably). I’m also considering utilizing the additional I/Os I built into the board to either monitor and water another section of our garden or possibly fill a fountain when the water is low (I already have this on a smart plug with power readings, and can tell when the water runs out based on the reduced power consumption of the pump). For such a simple project, I found this extra-satisfying to ‘complete’; I think primarily because it’s been sitting on my bench unfinished for a couple years and it always feels good to wrap something up.