Close
0%
0%

JAR Clock

A seven segment LED display clock, immersed in mineral oil.

Similar projects worth following
You remember those mineral oil immersed desktop computers some people were building? Yah, those fish tanks, you might say. I thought “what about an immersed microcontroller instead of a CPU”! And so I came up with this idea of building an LED clock inside of a jar.

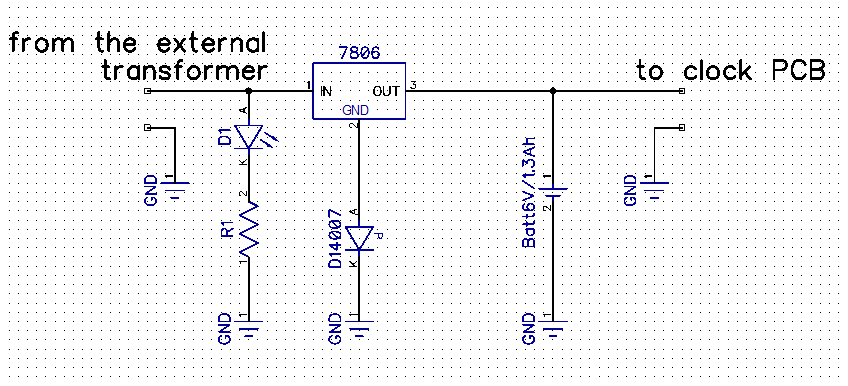
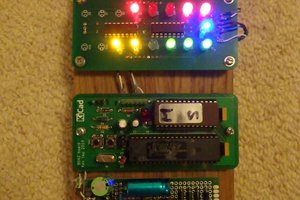
I didn’t wanted to struggle very much with a RTC and since I had a previous MCU project that was generating a 1s pulse, I thought I use that as a master circuit for my clock. I could have used the tmr modules of the same MCU, but then I realized I had to use another external CLC chip just to increase the number of pins because I wanted to build the binary LED display for the seconds. Since I found that these China MCUs are cheaper than many other 74’s, I decided that I was going to use this configuration of two microcontrollers. So I came up with this twisted-head schematic eventually. The master circuit also controls the seconds display and after it finishes displaying all the LEDs and measuring exactly one second, it outputs a single pulse from the pin D7 of the PortB. This pulse is the increment signal for the slave chip and the chip knows exactly what to do with it.

The code on the master MCU is really minimalist and with some small exceptions regarding the order of the instructions and without the conversion procedures, it could be described like this:

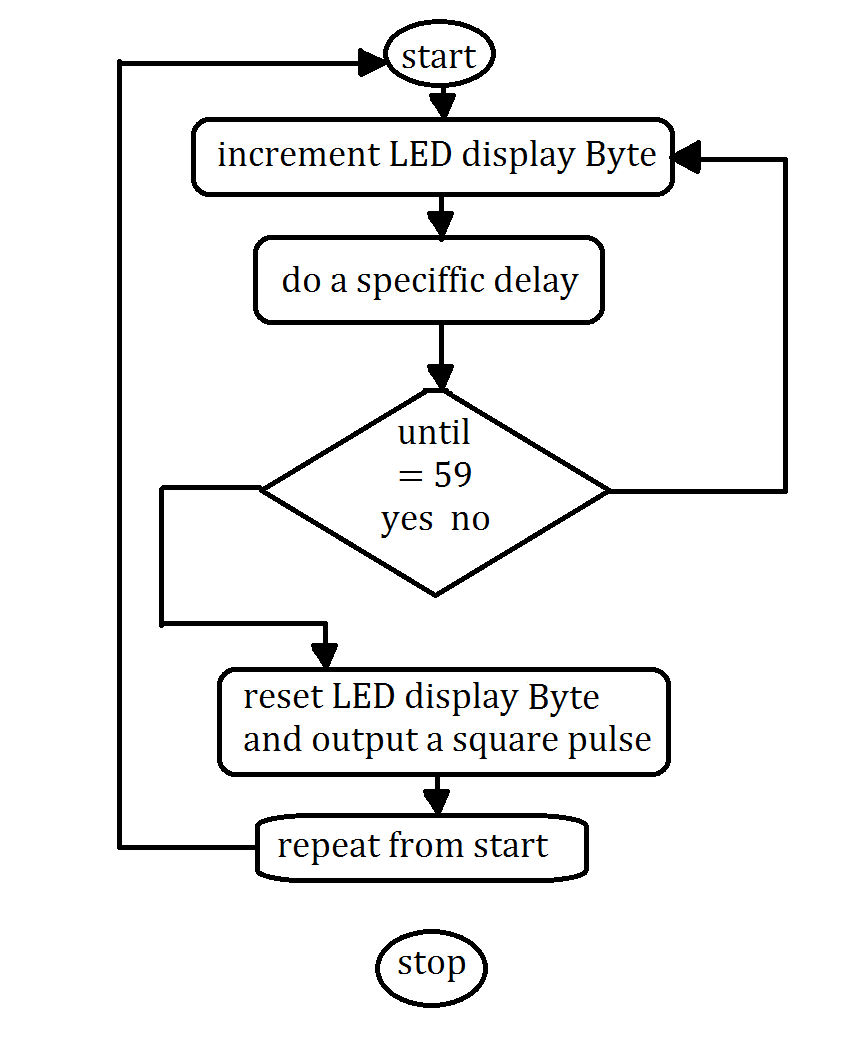
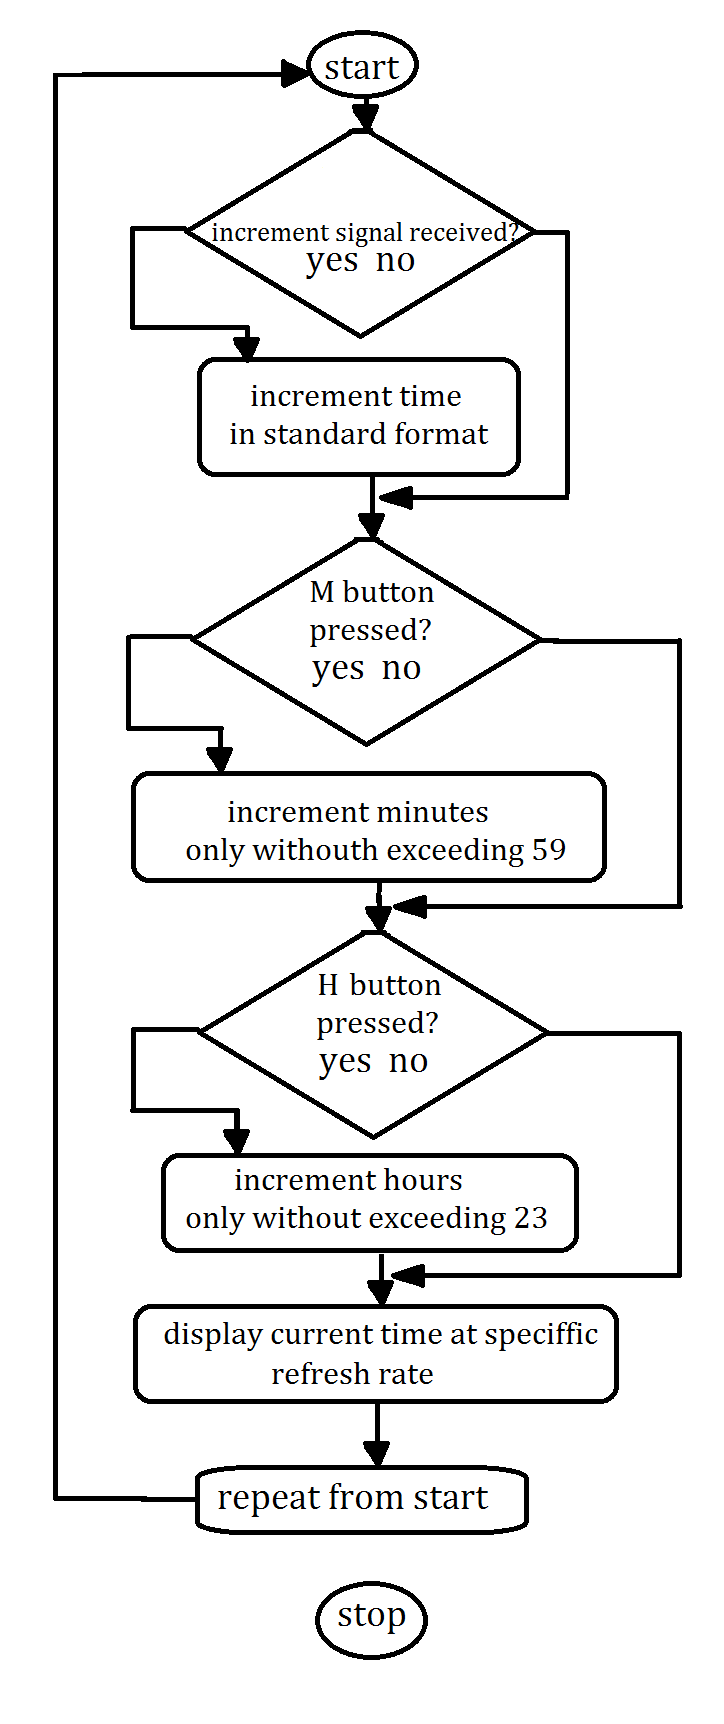
The slave MCU then picks up the square wave from the master and increments the rest of the clock... and without trying to be too boring, I will place a simplified flowchart of that too:
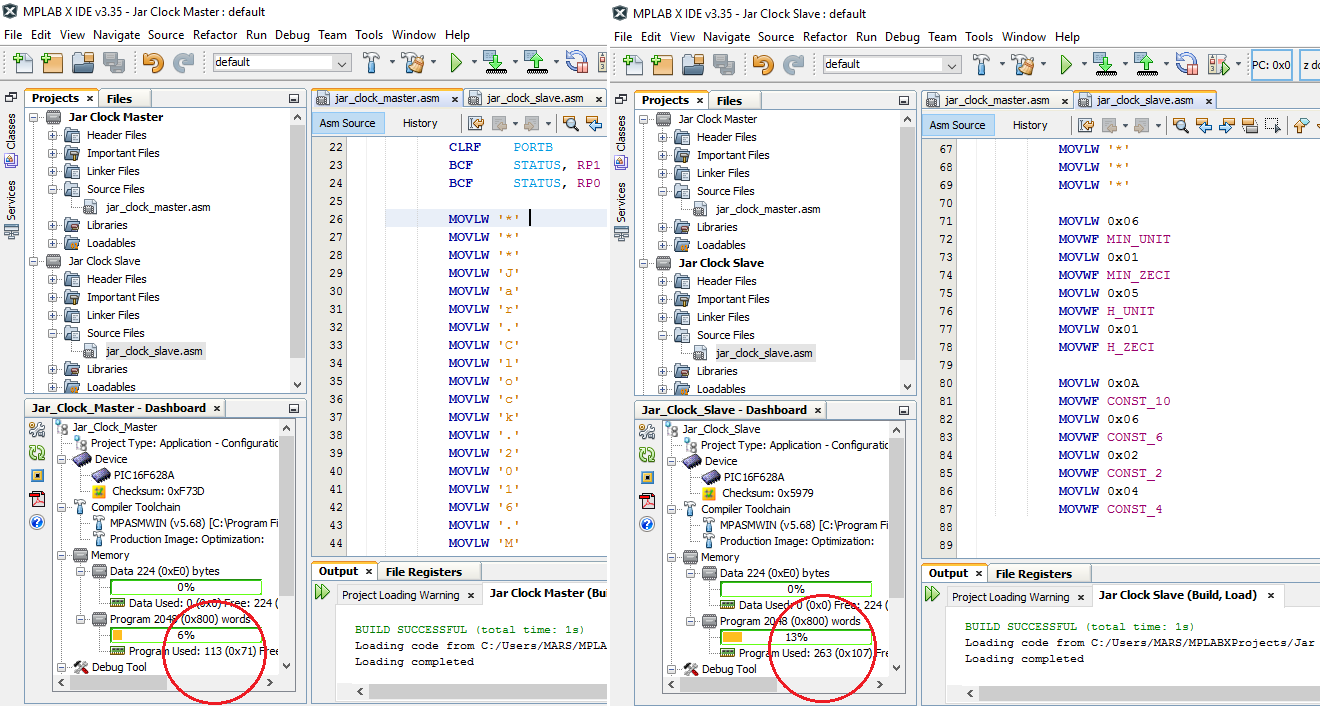
Code size

The Master MCU code is only 113 words and the Slave MCu code is 263 so the entire code is 376 x 14 bits.

Jar_Clock_Slave.X.production.hex

Hex file for the Slave MCU

hex - 1.49 kB - 12/23/2016 at 21:34

Download

Jar_Clock_Master.X.production.hex

Hex file for the Master MCU

hex - 690.00 bytes - 12/23/2016 at 21:33

Download

Extension button board.dip

The Layout for the small extension PCB for the buttons. This allows setting the time without touching the oil if you choose to fill the jar way up top with oil and it connects in the indicated place on the slave board pads

dip - 10.52 kB - 12/13/2016 at 18:39

Download

battery schematic.dch

schematic file of the sealed accumulator connection inside the jar (DipTrace)

dch - 22.49 kB - 11/30/2016 at 20:21

Download

jar_clock_slave.asm

ASM code for the slave MCU

asm - 5.28 kB - 11/30/2016 at 14:28

Download

View all 7 files

  • 1
    Step 1

    I figured I could use uncolored mineral oil or red colored (these are the most common available on the market). I choose red with red LEDs because I found a cheap mixing mineral oil used for 2 strokes engines and I was content with this solution.

    I managed to drill a hole in the jar using a glass drill bit, but I have to admit I also managed to break my first jar at a first attempt. So, I’m advising you to use thick gloves and goggles if you want to try it. I sealed the hole using glue gun first, but it started leaking after a while so I took it off and replaced the whole sealing with transparent silicone which seemed to have a better adhesion to glass.

    Inside the jar I also placed a 6V sealed lead accumulator of 1.3Ah so this provides functionality for almost 12 hours in case the power goes down.

    The custom letter LEDs are manually build also. I placed two overlapped pieces of transparent laser printed foil over the LEDs and then I covered the entire LED in contractible tube as the image shows.

    The LEDs from the second are showing the word Jesus when they all light up at 31 seconds (or 0001 1111). I thought that, since the Christmas is coming, a religious message would be most appropriate. But you can choose whatever you like, if you want to re create this clock.

    I think there is also room for improvement. For instance, I’m thinking of adding a constant temperature regulator to the oil (keeping the temperature higher than the room temperature, of course, but stabile). In this way, I could keep the master’s resonator at a constant temperature and obtain a very precise clock period (in theory).

View all instructions

Enjoy this project?

Share

Discussions

Similar Projects

Does this project spark your interest?

Become a member to follow this project and never miss any updates