Close
0%
0%

Halloween Mirror

Scare the bejesus out of friends and family with this innocent looking mirror

Similar projects worth following
Halloween is coming so it is the perfect time to get your tricks in order. This mirror conceals a scary image when there is light. Once the light goes out the image is revealed with a scream or any audio you like.

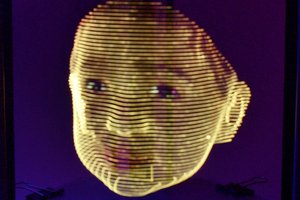
If you have ever seen a smart mirror it uses the backlight from an LCD screen to project an image that magically appears through what appears to be a mirror,  When the screen is turned off the appearance returns to a regular mirror.

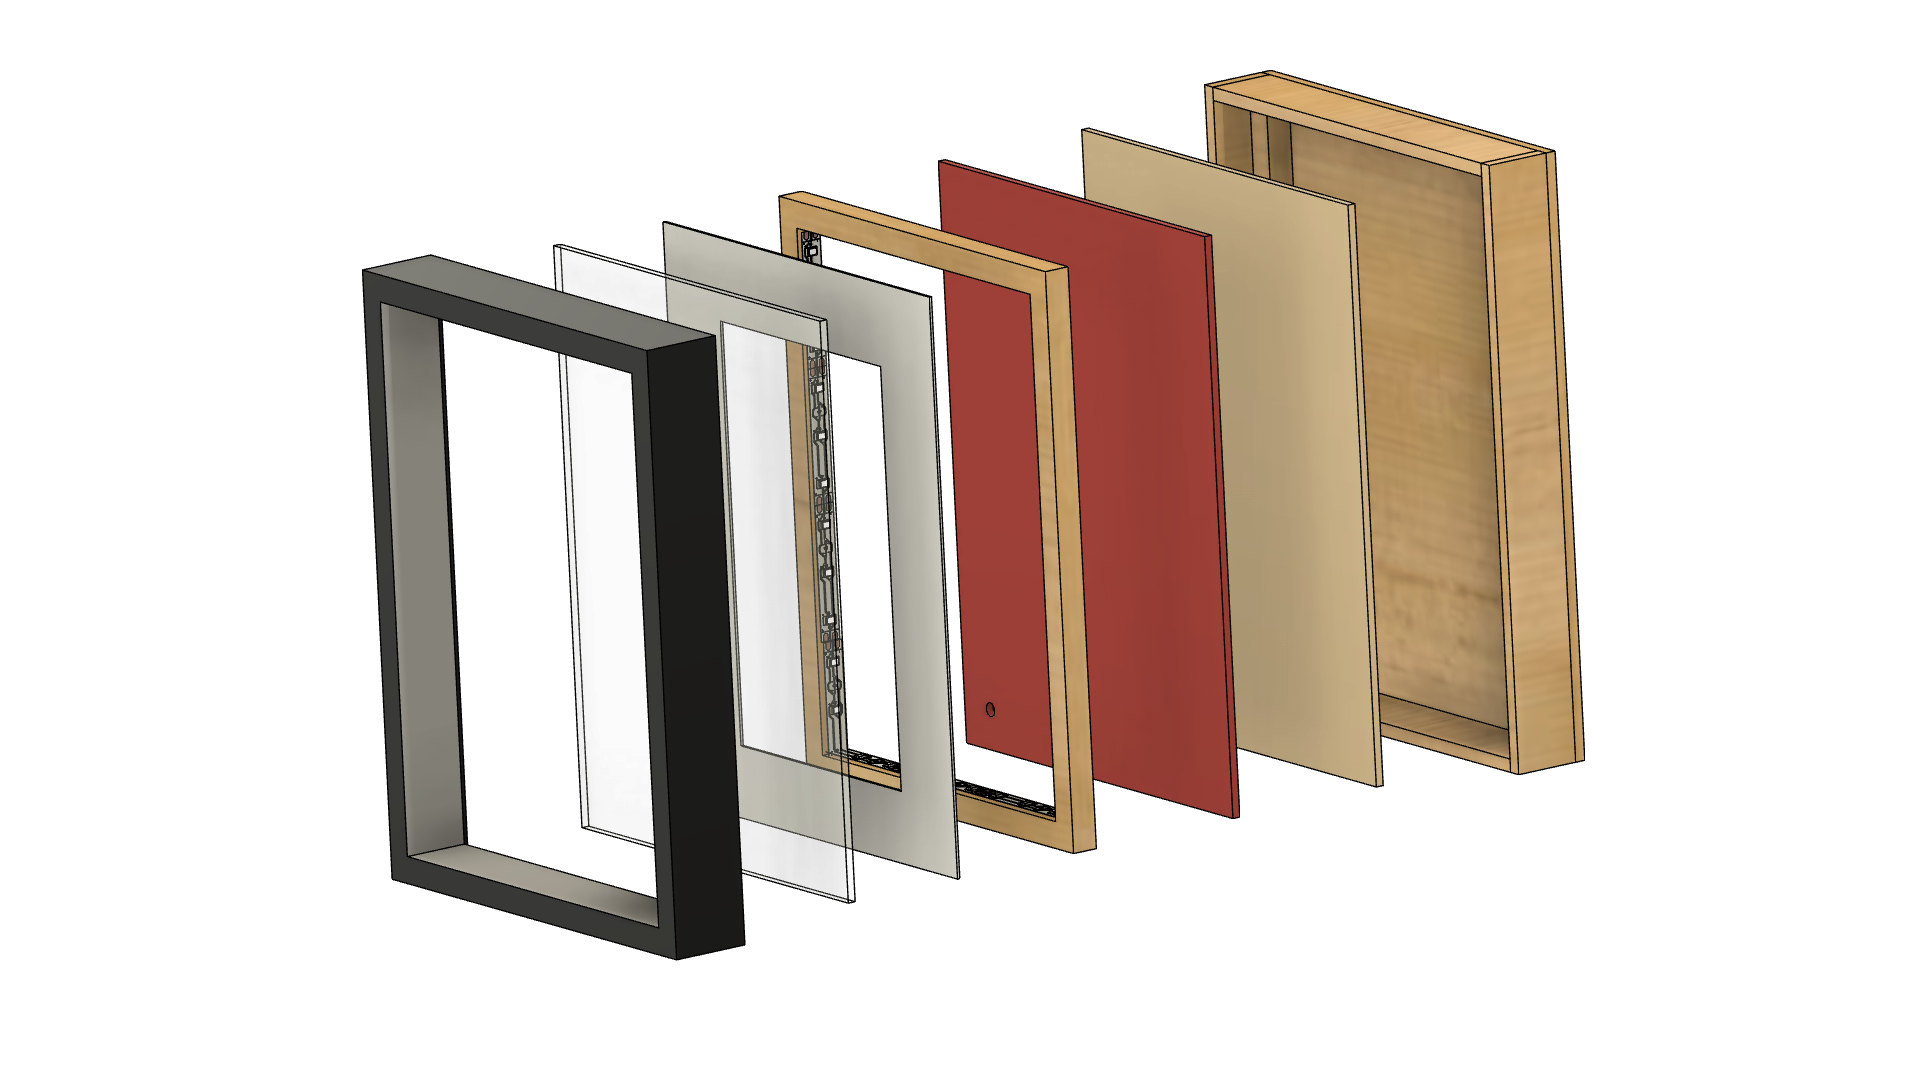
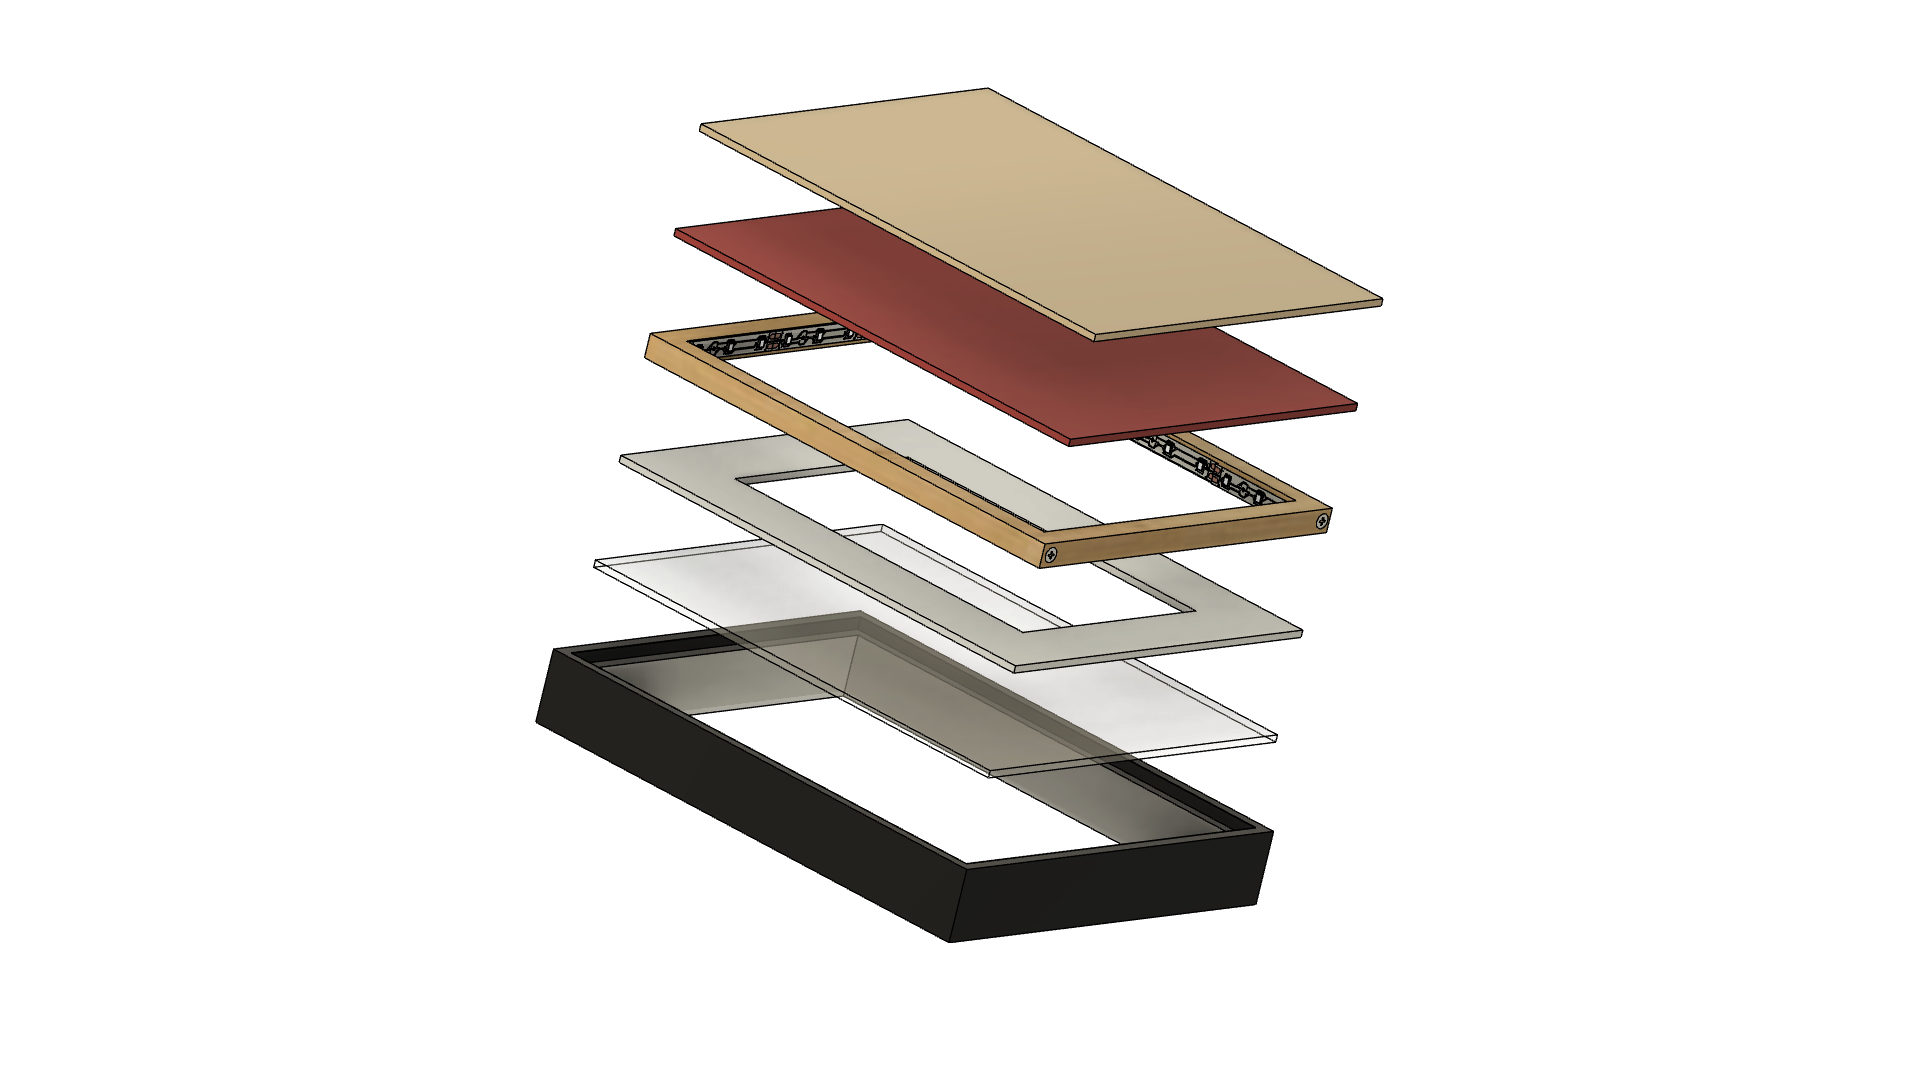
In this project, we take this concept and place an image or 3D print behind the mirror. Using a Light Dependant Resistor the amount of light in the room is detected, once the light level drops an LED strip lights up to show our scary image. To take it to another level we use a MP3 module to scream at the same time!

Just get your friend or family member to check themselves in the unassuming mirror switch off the lights and BOOM, Hilarious. 

The project uses Arduino IDE to program a digispark but any Arduino board will do, I just used this board due its size. It also uses the well-documented DFplayer MP3 module. A standard 5V white LED strip is used but a bit of tweaking of the sketch and additional hardware you could use a Neopixel to bring up the color of your choice. 

  • 1 × DFplayer MP3 player
  • 1 × Digispark MCU (Or any Arduino)
  • 1 × 5V White LED strip (not neopixel)
  • 1 × Light dependant resistor
  • 1 × Hookup wire

View all 14 components

  • 1
    Pick a frame

    The mirror will sit in a picture frame. The added bonus of a picture frame is it will come with glass that you can adhere the window (mirror) tint to. The size of the frame is really dictated by the size of the image you want to put in it and the length of your LED strip. For my example, I had a skull bas-relief image and it made more sense to just light it up from the bottom to give it a more menacing look. 

  • 2
    Construct the frame

    There is a million ways to construct a frame, here is just my angle on it. All you really need to consider is the space for the LED strip, the MP3 player, and the controller. The materials log is based on this 6x8 frame. 

    Boxing for LED lamps

    LED strips are usually 10mm wide, here I will make a frame from 10x10 pine trim that fits inside the area the area where the picture usually fits. Measure the inside of the frame (where the glass sits).

    Mark out the pine trim and cut the long sides 20mm shorter as we are making a butt joint. Cut 2 pieces for the short side and 4 for the long side. 

    Drill a hole in each long end of pine trim into the end of the short pine trim, and use glue and a self-tapping screw to hold the frame together. Drilling stops the wood from splitting. 

    Put the surplus long pieces to one side to be used later. 

    Once the glue has set apply the LED strips to the inside making sure there is a connection all of the way around. In one corner you will need to run wire to the back of the frame. More on this later. 

    Assemble the boxing

    With the LED frame assembled compile all the parts of the frame together in order. 

    1. Picture frame
    2. Glass
    3. Mat
    4. LED frame
    5. Picture (shown in red below)
    6. The backing that came with the frame

    With this compiled add the extra two long pine trims and measure the height from the frame to the top of the pine trim. 

    Measure out this distance on some flat particle board or pine (4-5mm thick) the length of each side. 

    Create a box around the frame, screw, and glue the box together. Measure the width and height and cut one more piece to cover the entire back.

    Assemble the back section of the frame. 

    The gap between the back of the frame and the picture will house your electronics. 

    Drill a hole in the picture and picture back for the wires from the LED lamps to feed through. 

    Most picture frames have metal clips to hold the picture in place. 

    Mark these positions into the side of the LED frame, then drill holes halfway in for the tabs to hold the frame, matt, and glass in place. The rear frame can slide on and off making it easy to change the picture or service the electronics. 

  • 3
    Tint the glass

    This is best demonstrated in a video. 

View all 6 instructions

Enjoy this project?

Share

Discussions

Similar Projects

Does this project spark your interest?

Become a member to follow this project and never miss any updates