 Julien OUDIN
- SOFTWARE
The program was made in C++, using the Arduino IDE, thanks [gdsport] for its joystick library adapted to SAMD.
For a speed of implementation, we chose to carry out two separate programs (they could, in the future be joined together in only one to switch from mouse to stick function easily)
Joytostick : To use the power wheelchair controller as a joystick (right or left stick) with a video game console via a dedicated interface (work with XBox Adaptive Controller from Microsoft)
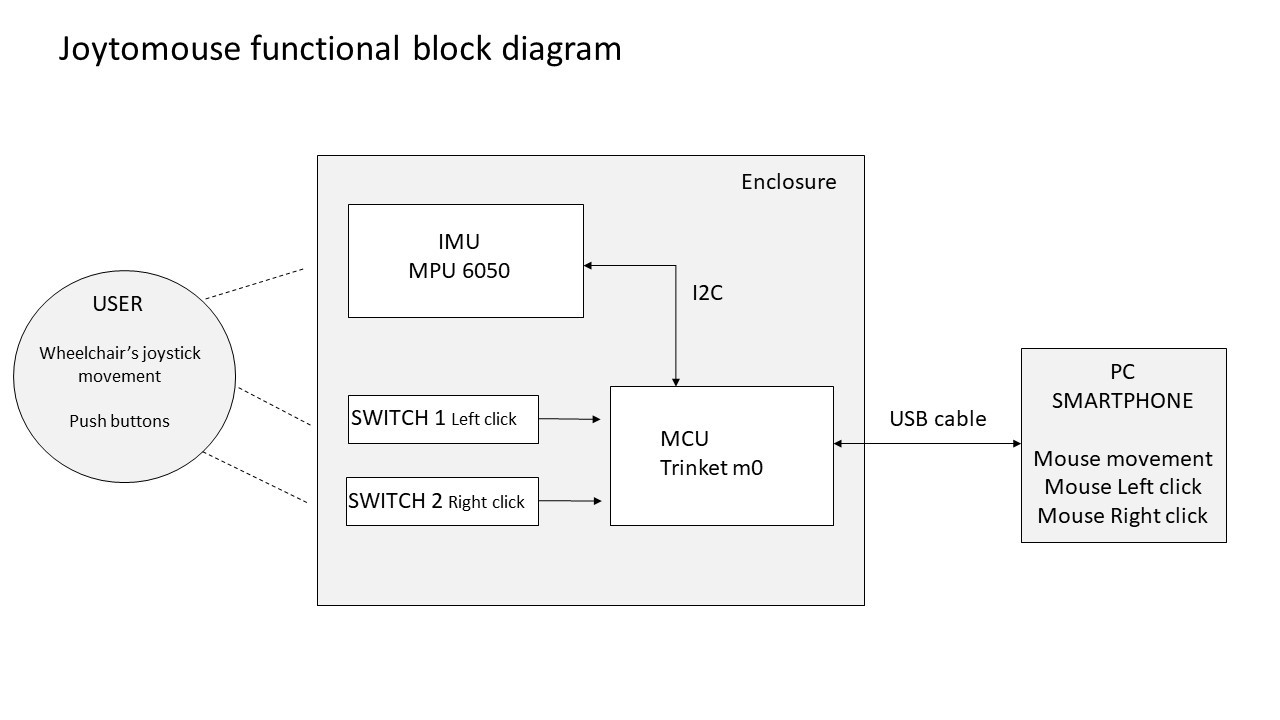
Joytomouse : To use the power wheelchair controller as a mouse for PC, smartphone...
Theses are avaible in the compressed folder : Joytojoy_prototype_v1.zip
The code is not necessarily clean and optimized (it will be one of the things to improve), but it works!
- HARDWARE
If the programming was facilitated by the use of effective libraries, the electronic and mechanical side required several iterations to design a functional prototype that could be easily exploited by users. The challenge was to respect the initial specifications, by integrating electronics in a box easily adaptable for all.
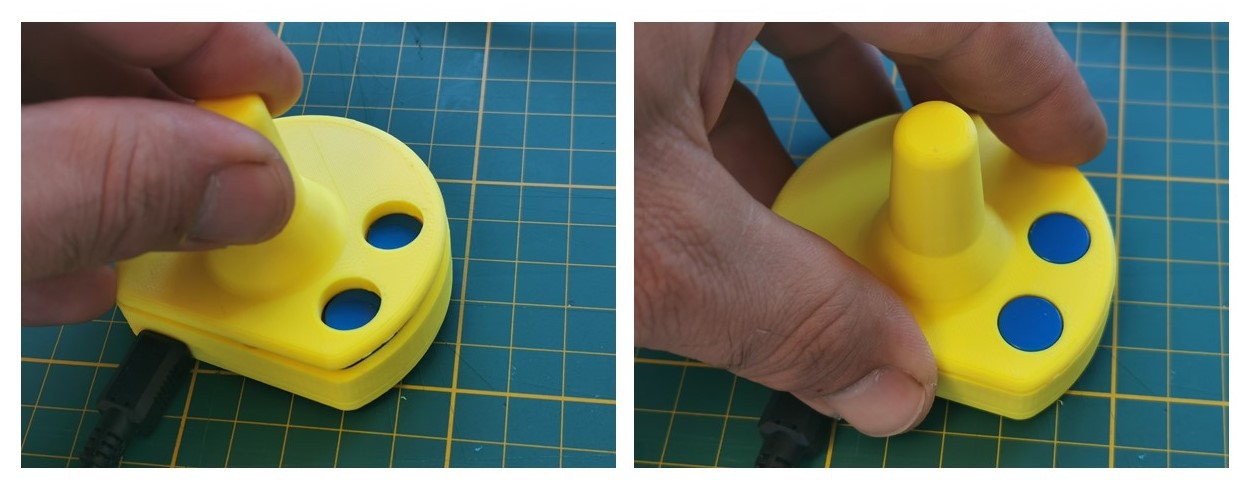
Enclosure
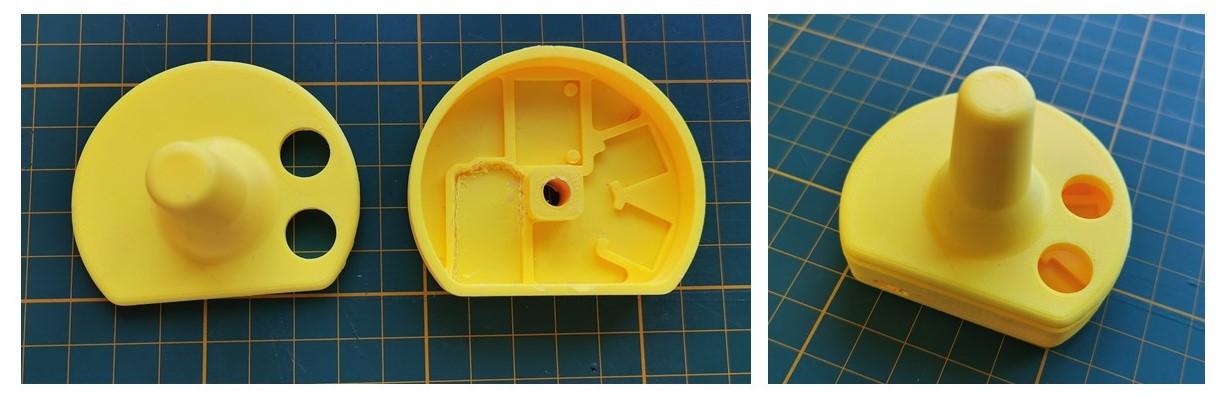
The enclosure is made of two 3d printed parts wich will clip together (Top and Base)
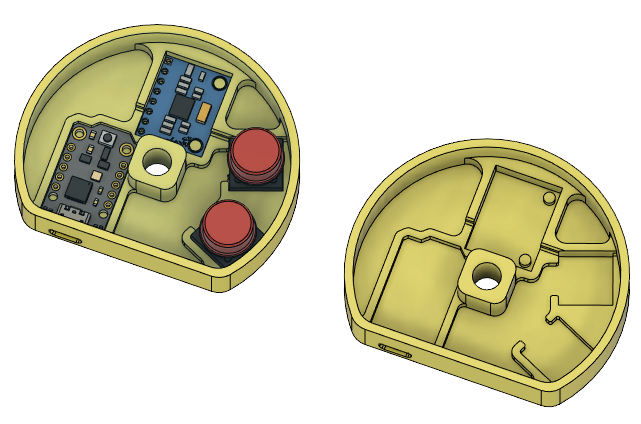
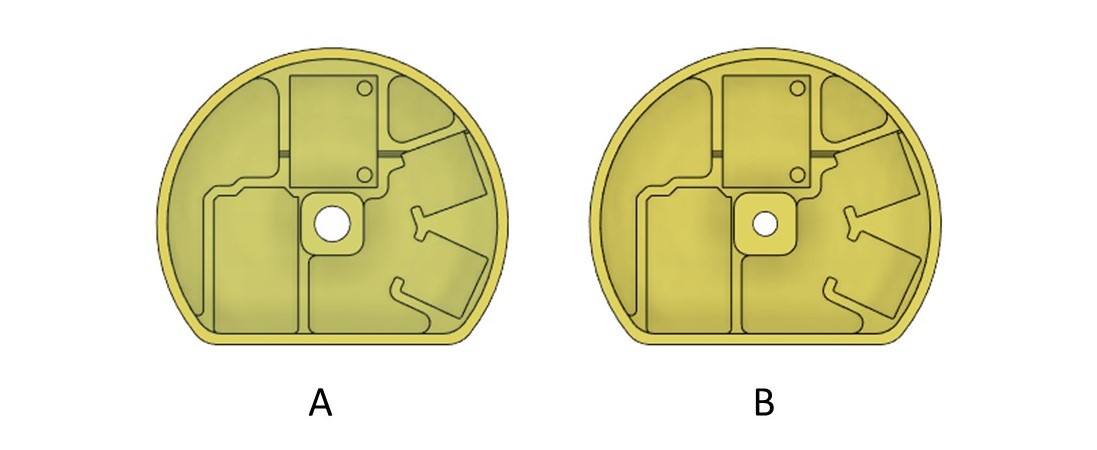
- Base :
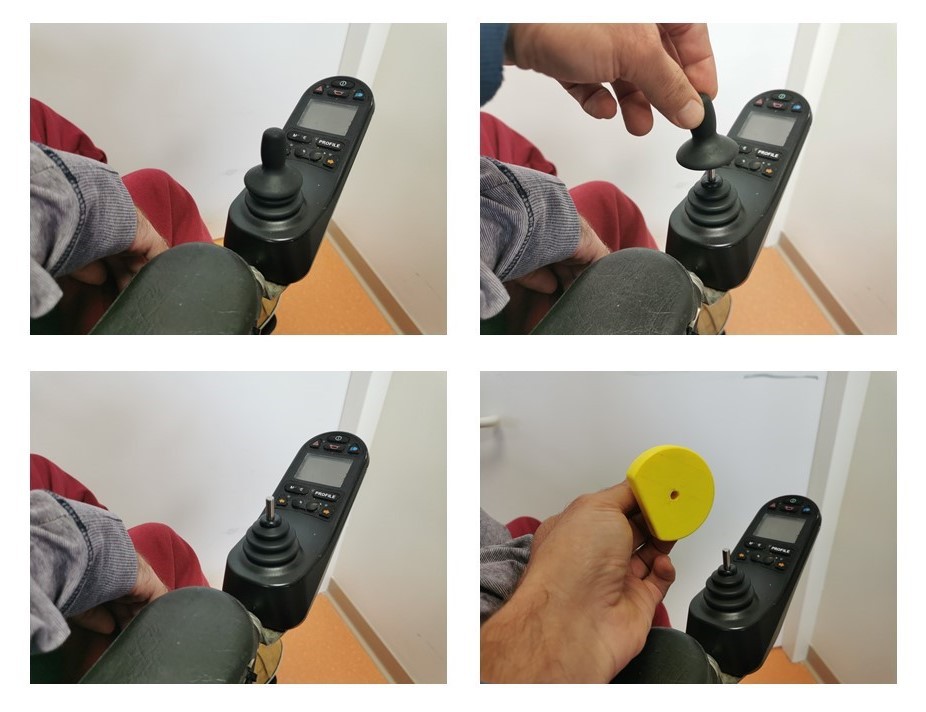
Host the electronic stuff, present a hole to fit in place of the standard wheelchair's joystick knob
Two holes diameters to suit to different controller avaible on the market :
A (diameter = 6.4 mm) = Power wheelchair with Rnet or PRIDE, Permobil, Ottobock, Sunrise, Levo.
B (diameter = 5 mm) = Power wheelchair with Linx electronic (Invacare)
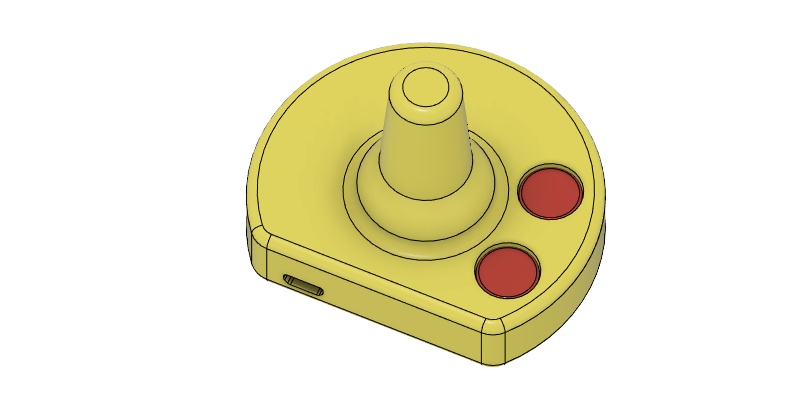
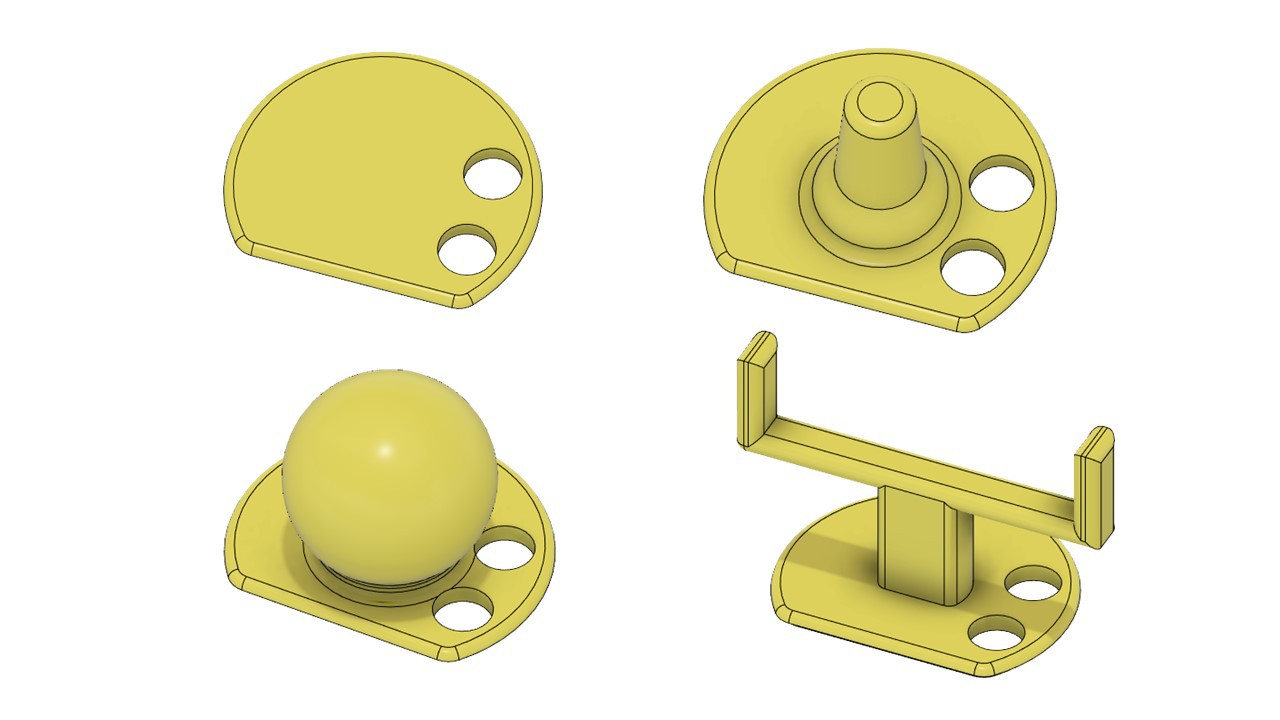
- Top :
Features the joystick handle and two holes for the buttons.
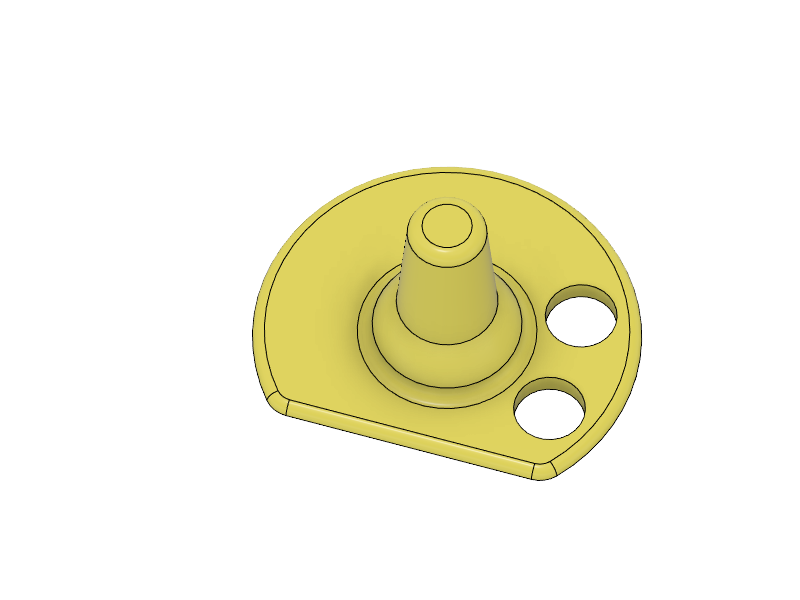
A version with a standard joystick shape is available for common needs,
For other needs, we make an adaptation from the flat shape of the top by adding a specific handle adapted to the user needs
Electronic
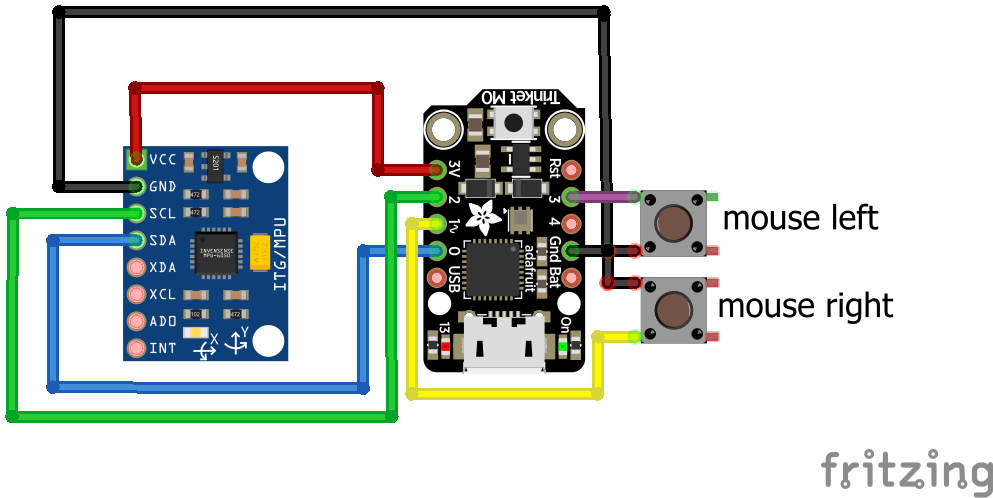
We made the choice of a cable connection between the different elements.
Trinket M0 pin 0 - - - SDA MPU 6050
Trinket M0 pin 1 - - - Button 2
Trinket M0 pin 2 - - - SCL MPU 6050
Trinket M0 pin 3v - - - VCC SDA MPU 6050
Trinket M0 pin 3 - - - Button 1
Trinket M0 Gnd - - - Gnd MPU 6050 - - - Button 1- - - Button 2
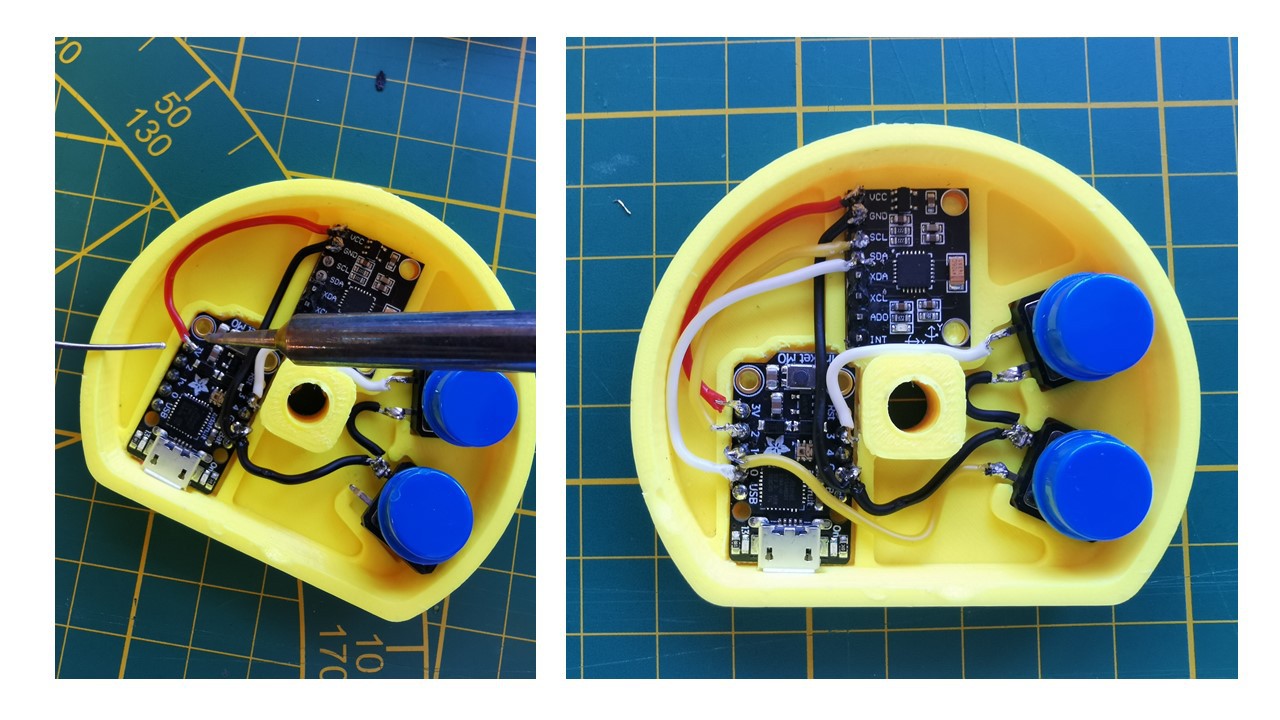
This requires 1 hour of work, to cut the wires to the right length, cut the MPU pins, play with the soldering iron, put heat-shrink tubing, and a glue gun to fix everything.
After that, we've clipped the two parts together
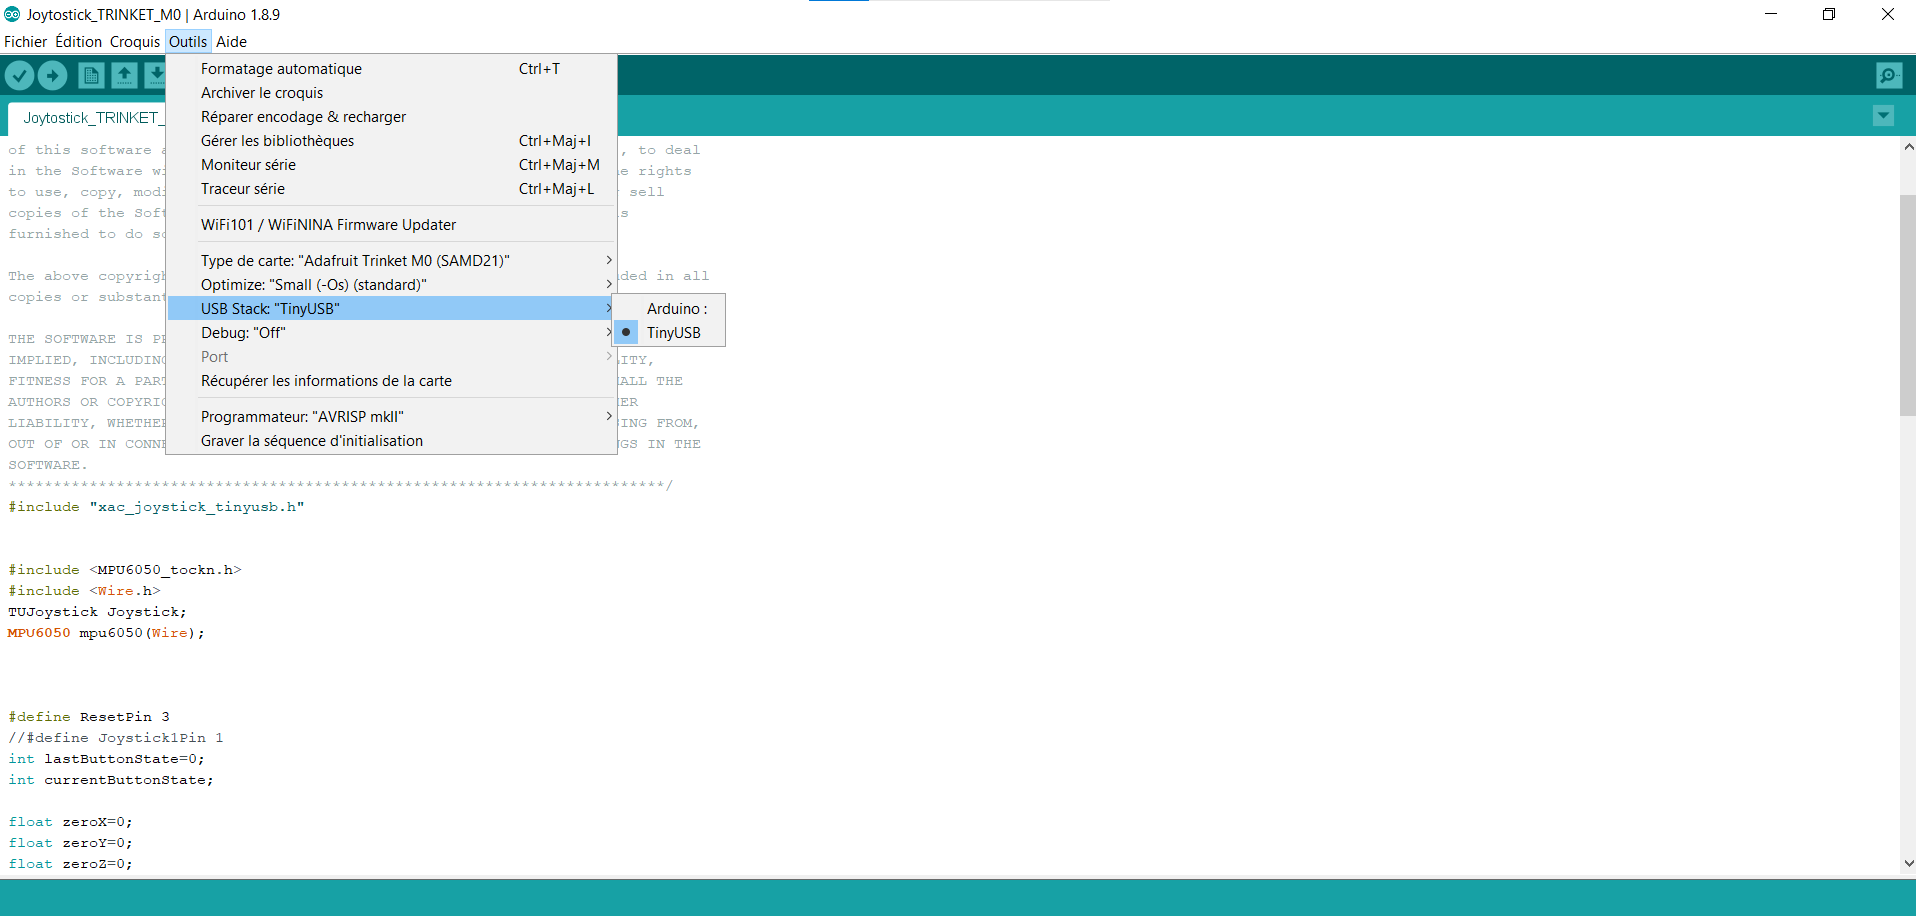
- PROGRAMMING
Now we will upload the program on the microcontroller with an usb cable and the arduino’s IDE
For a game stick :
Select the arduino sketchJoytostick_TRINKET_M0_v1.ino in Joytojoy_prototype_v1
Download and install theses libraries to the arduino IDE:
MPU6050_tockn by tockn
Joystick Library for Adafruit TinyUSB by gdsports
Be sure to set the USB Stack to TinyUSB
Then, Upload to the Trinket Joytostick_TRINKET_M0_ONE_BUTTON.ino
For a mouse :
Select the arduino sketch : Joytomouse_TRINKET_M0_v1.ino in Joytojoy_prototype_v1
Download the MPU6050_light library in the library manager of the arduino software.
Upload the program to the Trinket
Checking :
- Joystostick :
We can check its proper functioning by connect the joystick to a PC with an usb cable
The OS emits a sound to indicate that the device is recognized as peripheral.
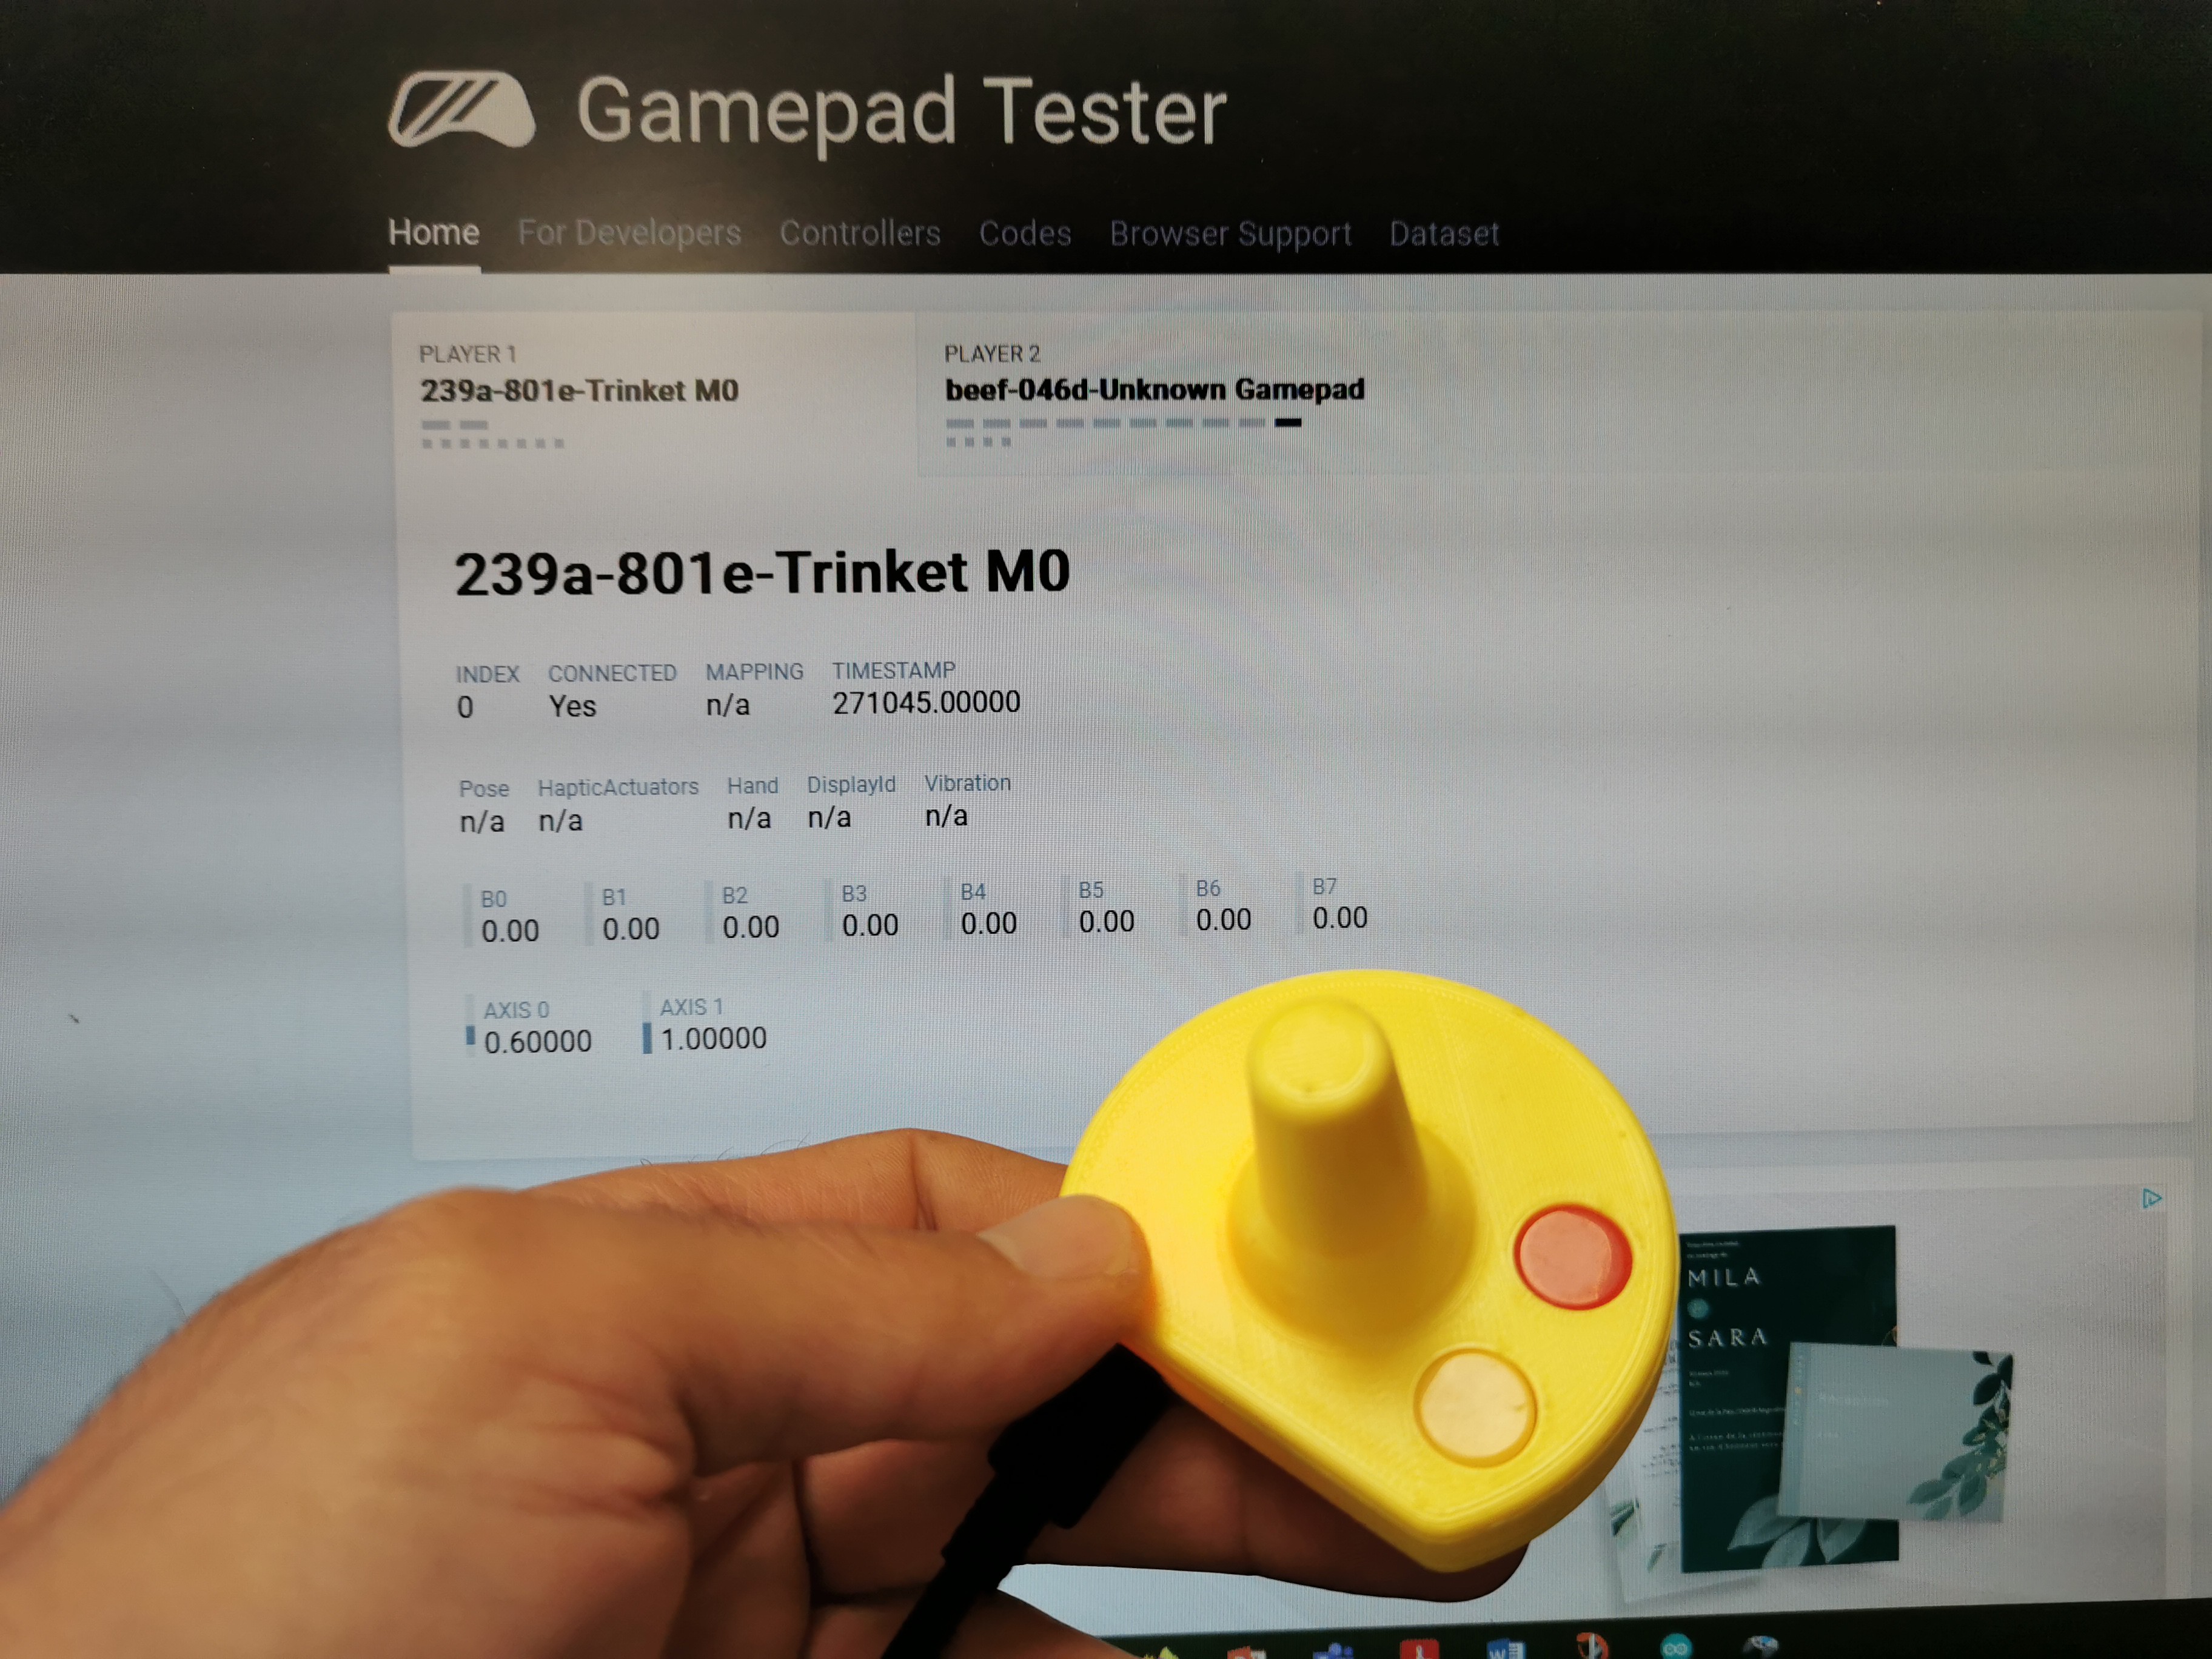
We can get visual feedback and check how it works by usingto the Gamepad tester website.
The values corresponding to AXIS 0 and AXIS 1 will vary according to the movements of the device, it means it works.
- Joytomouse :
We can check its proper functioning by connecting the joystick to a PC (windows, linux, MACOS, or a smartphone)
The device is recognized as a mouse device and works without further manipulation. The movements of the box move the cursor on the screen and the buttons correspond to left and right clicks

All that remains is to install the box on a wheelchair controller and play or control a mouse
Discussions
Become a Hackaday.io Member
Create an account to leave a comment. Already have an account? Log In.