 Steve Anderson
An explanation as to what's going on here.
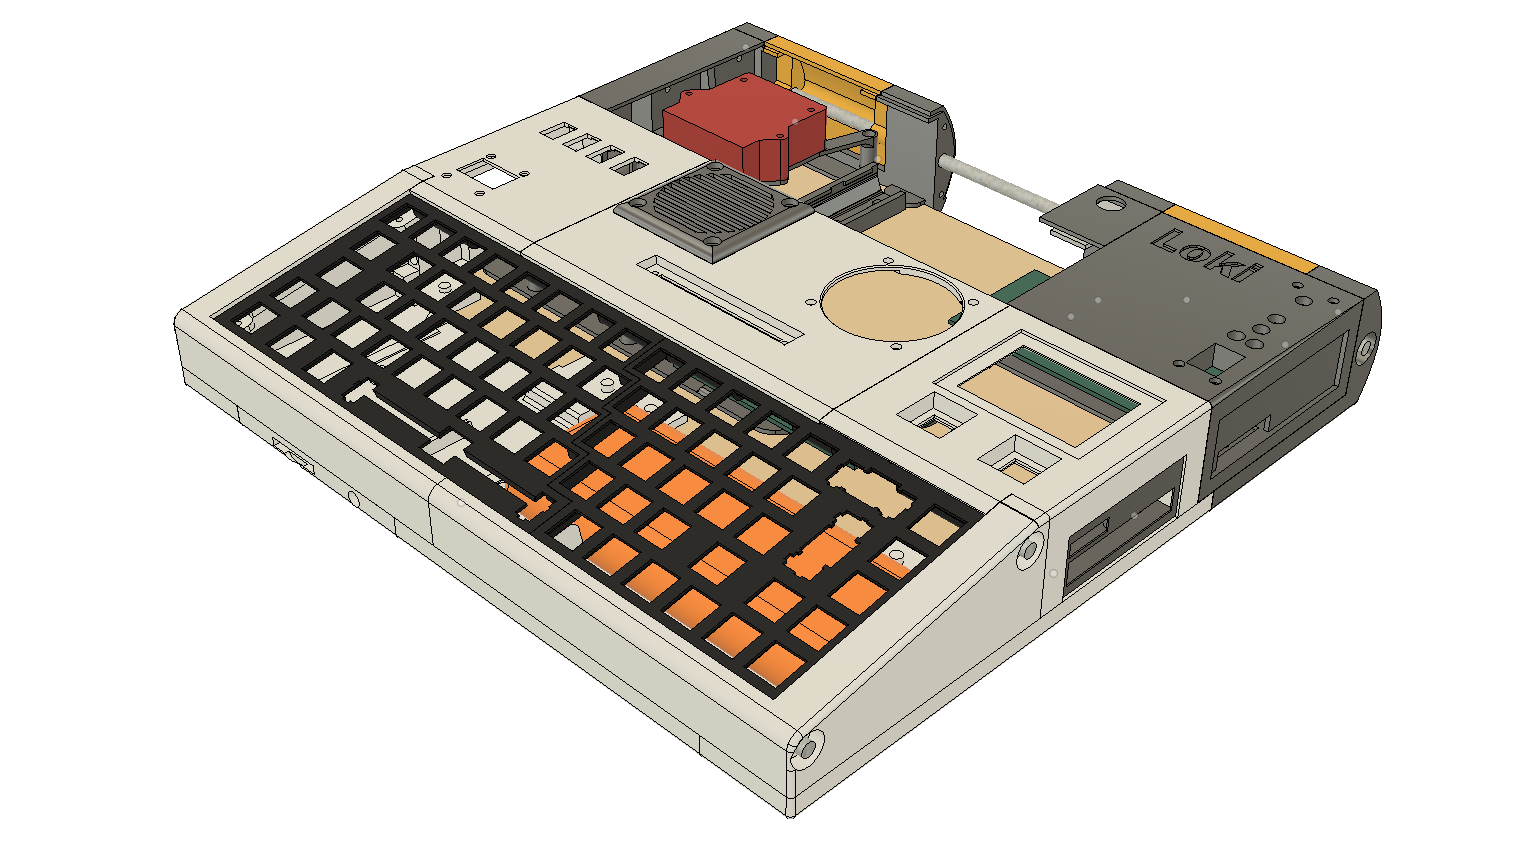
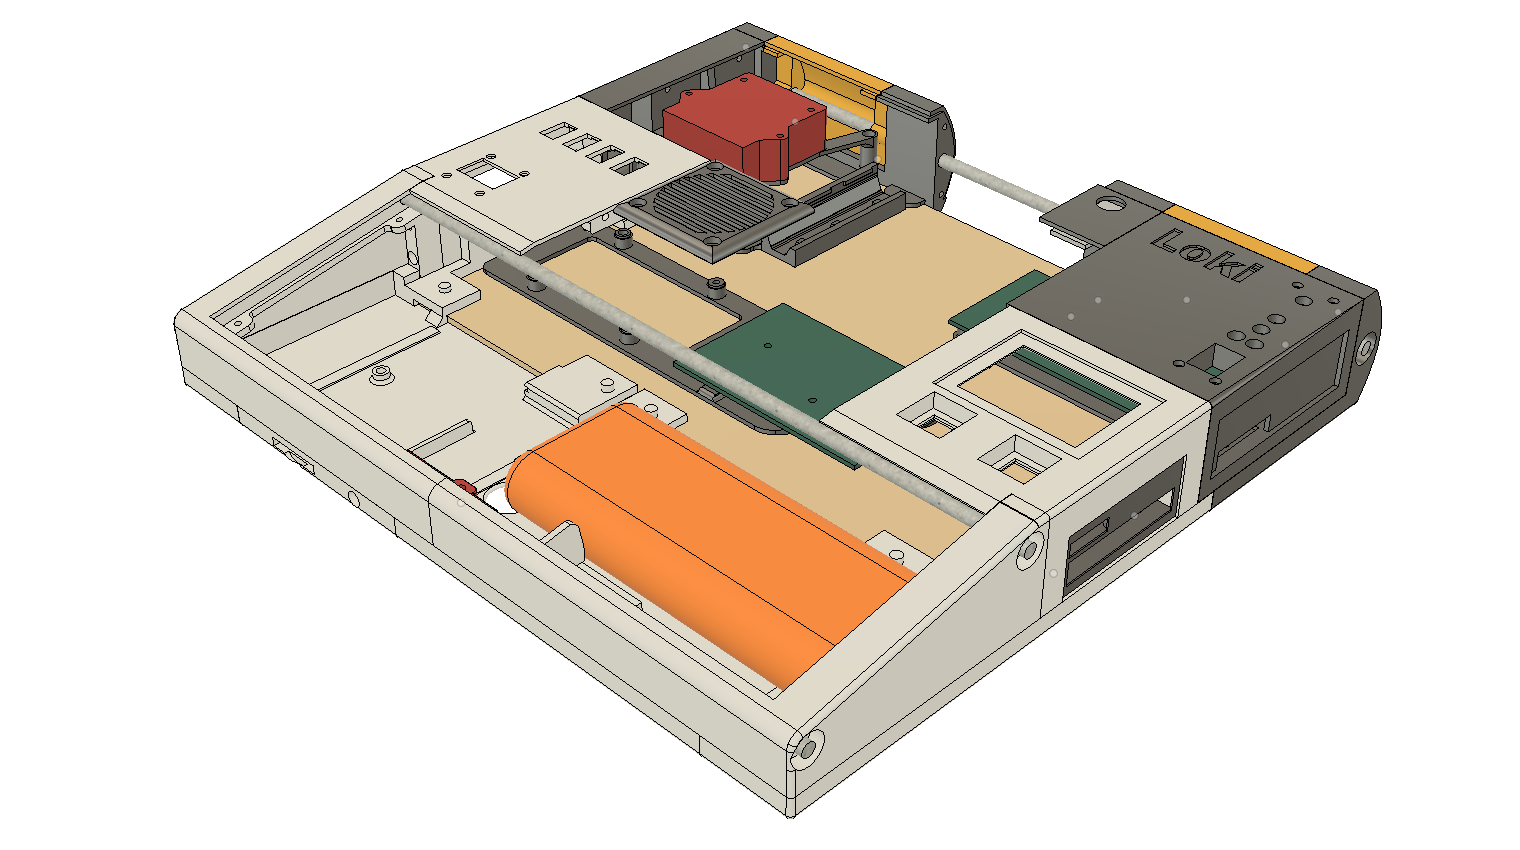
💾 Loki is sort of a cyberdeck, although I don't like to call it that because it's not set out to be hyper-portable. It does however have a battery pack, as well as taking a 12V PSU input.
🎰 Loki has both a Raspberry Pi 4 and a ZX Uno inside (that's an FPGA recreation of the 1980s Sinclair ZX Spectrum hardware). The display is connected to both, as is the keyboard, using different technology for each system. The Pi also has a trackpad liberated from an OG Pi-top case.
📺Loki's display is a 2K screen from an iPad. The driver board has both HDMI and VGA inputs, so they can be switched from one to the other. The HDMI input passes through a KVM switch so that external boards can use the keyboard, trackpad and screen as well. The KVM requires physical switching, so that's been extended to a little soft tact switch alongside the display controls, but for the LEDs that show which input is active I've decided to go mad and use 3D printed clips to hold flexible light pipes. Why? If you have to ask, you wouldn't understand.
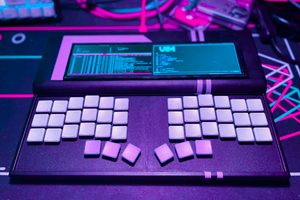
⌨ Loki's keyboard is a hand-wired mechanical keyboard, powered by a Raspberry Pi Pico. I'm writing the firmware myself because I need to be able to switch between USB and PS/2, so I'm taking the opportunity to replace the status LEDs with an OLED screen and will add macros for things like key mapping information (the Spectrum has multiple commands per key, whereas my keycaps don't). All the key switches are blue Cherry clones, pulled from an absurdly cheap gaming keyboard I got on eBay, and the keycaps are a mixture of heritage - mostly from my old Corsair K65, but with some spares from other places and one key has been 3D printed, just to see if I liked it.
🛠 Loki has been in progress for some time and is getting gradually put together as I get bits designed and printed, and there's four different PLAs in play depending on what I have to hand. The case, therefore, is currently a mess (and the base of it is mostly 3mm plywood). There's various seams that need filling, but that will come at the end of the build. On the screen case I've used primer and black truck bed paint which did a great job of hiding the joins and wood filler on the front - less so on the back because I rushed it, so there's going to be some liberal application of stickers at some point. To deal with the fact Loki is made from so many slapped-together case pieces there's threaded rods running across the top and bottom of the keyboard and across the back of the base. They provide a noticeable strength and rigidity, and the locknuts at the ends look interesting!
📃 Loki isn't named after the Marvel antihero (although I loved the show), nor (directly) to the Norse god, but after a mocked-up "Super Spectrum" that Sinclair User magazine made a big deal about, and that young me wanted desperately to own, but didn't actually exist. Given that was a dream computer to me then, and this is whatever I want it to be, this is my Loki.
There's lots (and lots) more over on my website. It rarely gets visited, but I don't mind; it's more a chance for me to write words for my own satisfaction than it is for broadcasting those words into peoples' faces. (I used to write for money! About Spectrums!! 30 years ago!!!) I'll keep updating here as well, but that's where there's going to be the fuller details of what's happening. (I get a bit overwhelmed by the amount of options and things here as well, and imposter syndrome is less of an issue on a platform of one.)

 0x17
0x17
 Taylor Hay
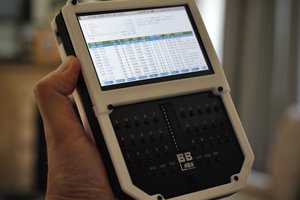
 Richard
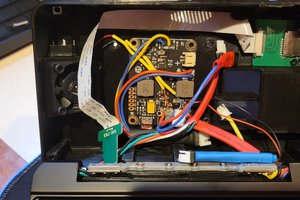
I get you. Actually one of the reasons I started making this was specifically to use the ZX Uno - I'd backed it in 2015/16 and it had been sitting unused for a while. Sinclair computers have been part of my life for nearly 40 years and while emulation has often been enough for me, the Uno is a hardware clone - perfect Z80 and reverse engineered custom chips. It's actually more compatible than later Spectrum models were!
So the important bit to me was always about getting the ZX Uno doing things. Not "be able to play Spectrum games", but "be the best Spectrum I can make".