Close
0%
0%

Polaron

100 TB Portable NAS that can survive the end of all things

Public Chat
Similar projects worth following
Greetings and thank you for visiting my project. I hope that you find my work interesting.

This is my solution for a combination portable backup and end of the world archive that mates a powerful network attached storage with Raspberry PI's for an all in one solution. This is a work in progress and will hopefully be done by the time the 2022 Cyberdeck contest ends. The main hallmark for this project is "Over-built" as much as i could integrate with a old style Pelican 1600 case that i have tried to EM Harden to the best of my abilities based on NASA Standard for EM and Radiation Hardening.

Do i think that this project is ever going to go to space or be struck by a atomic bomb? No not at all, but its the challenge that makes it worth it and if you are not going to go overboard ....why go at all?


Submission for the Hack-A-Day 2022 Cyber-deck contest

Overview

This is something that i have been working on for the last 6 months. As a consummate data hoarder, i wanted to find a way to protect my hoard and be able to take it with me if i travel without worrying about internet connection. I love pelican cases so i took the largest one that i had (old style pelican 1600) and started to plan all the things that i could cram into the box.


I had made several other pelican case based projects in the past after being inspired by Back7Co and all the awesome stuff that he does. So this was going to be my magnum opus!

Sitting down i tried to think of all the things that i could do to be able to protect the precious data so i tried to take everything into consideration when building the base and to consider everything that could damage it.

Foundation

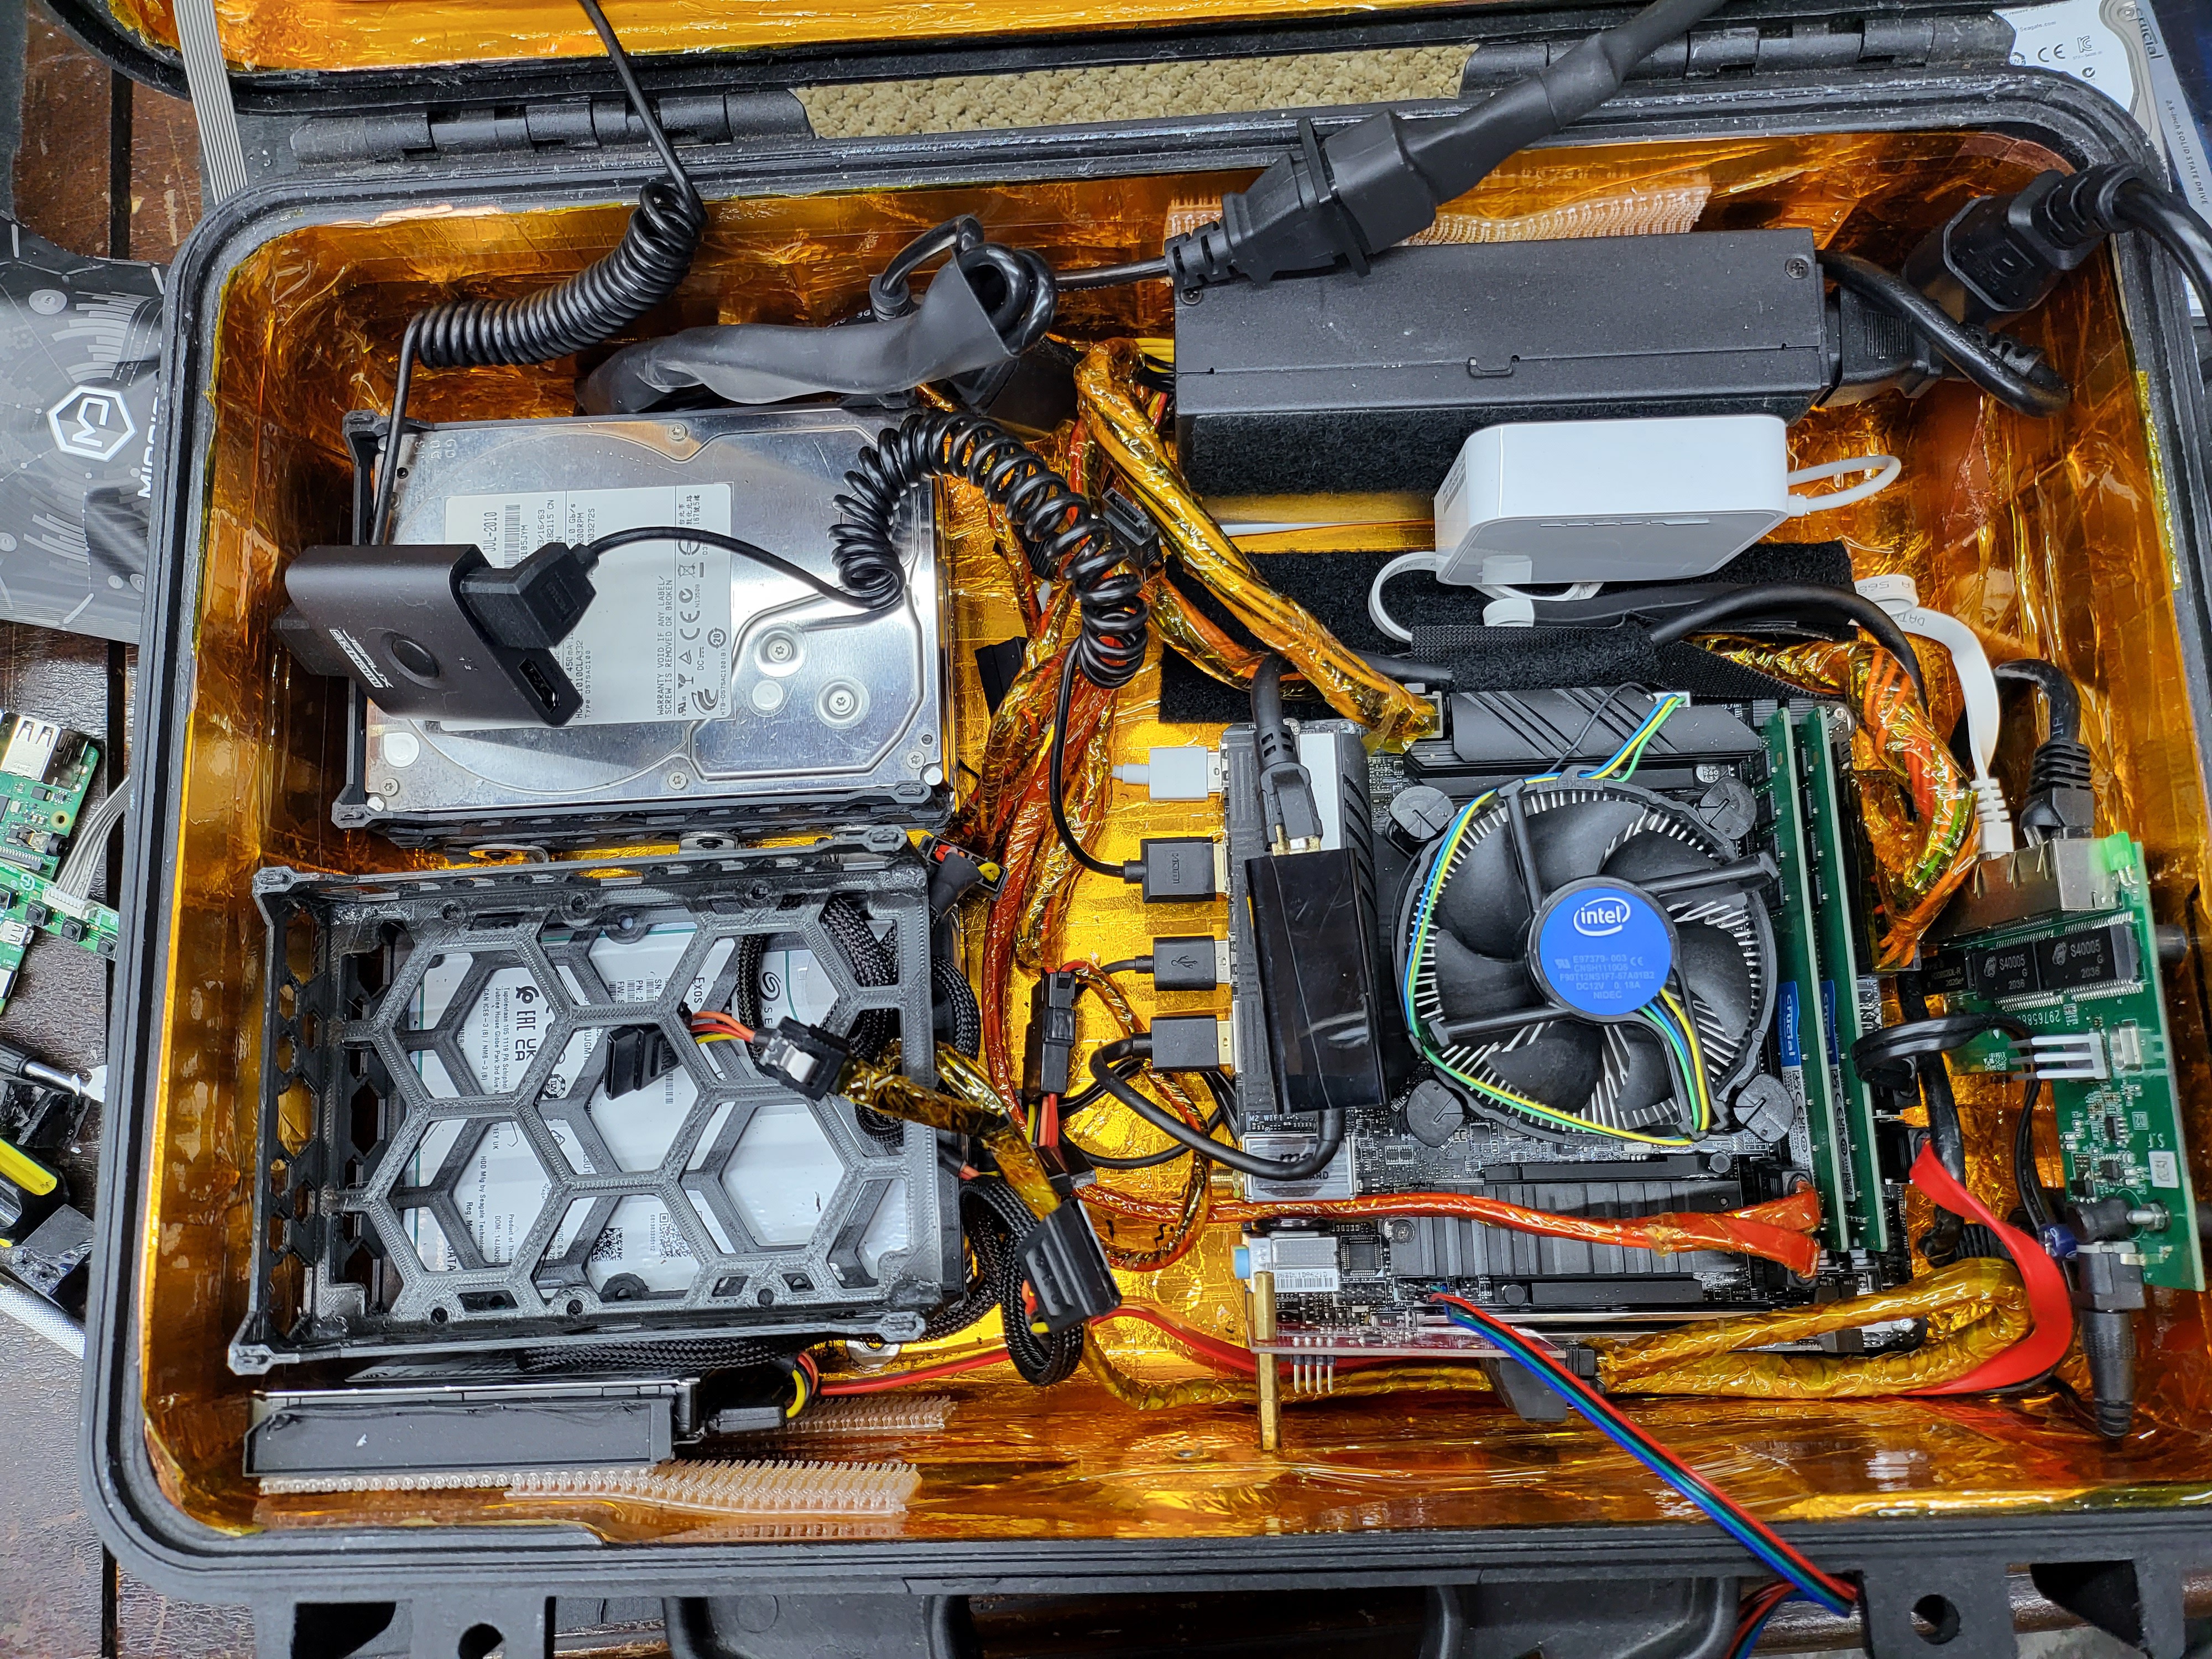
RF and Heat protection was something that spent a week on laying down alternating layers of copper tape and kapton tape. After that was done was 10 coats of high heat clear enamel rated for 1200 deg F that is used to clear coat engine components with 10 hours of curing time between them.... Then one more layer of kapton tape after airing out the box for another week.  (The ladies who do this at NASA for Satellites and components have the patients of saints, much vulgar language was used during this process as i had constant tears in the copper tape layers that i had to go over again)

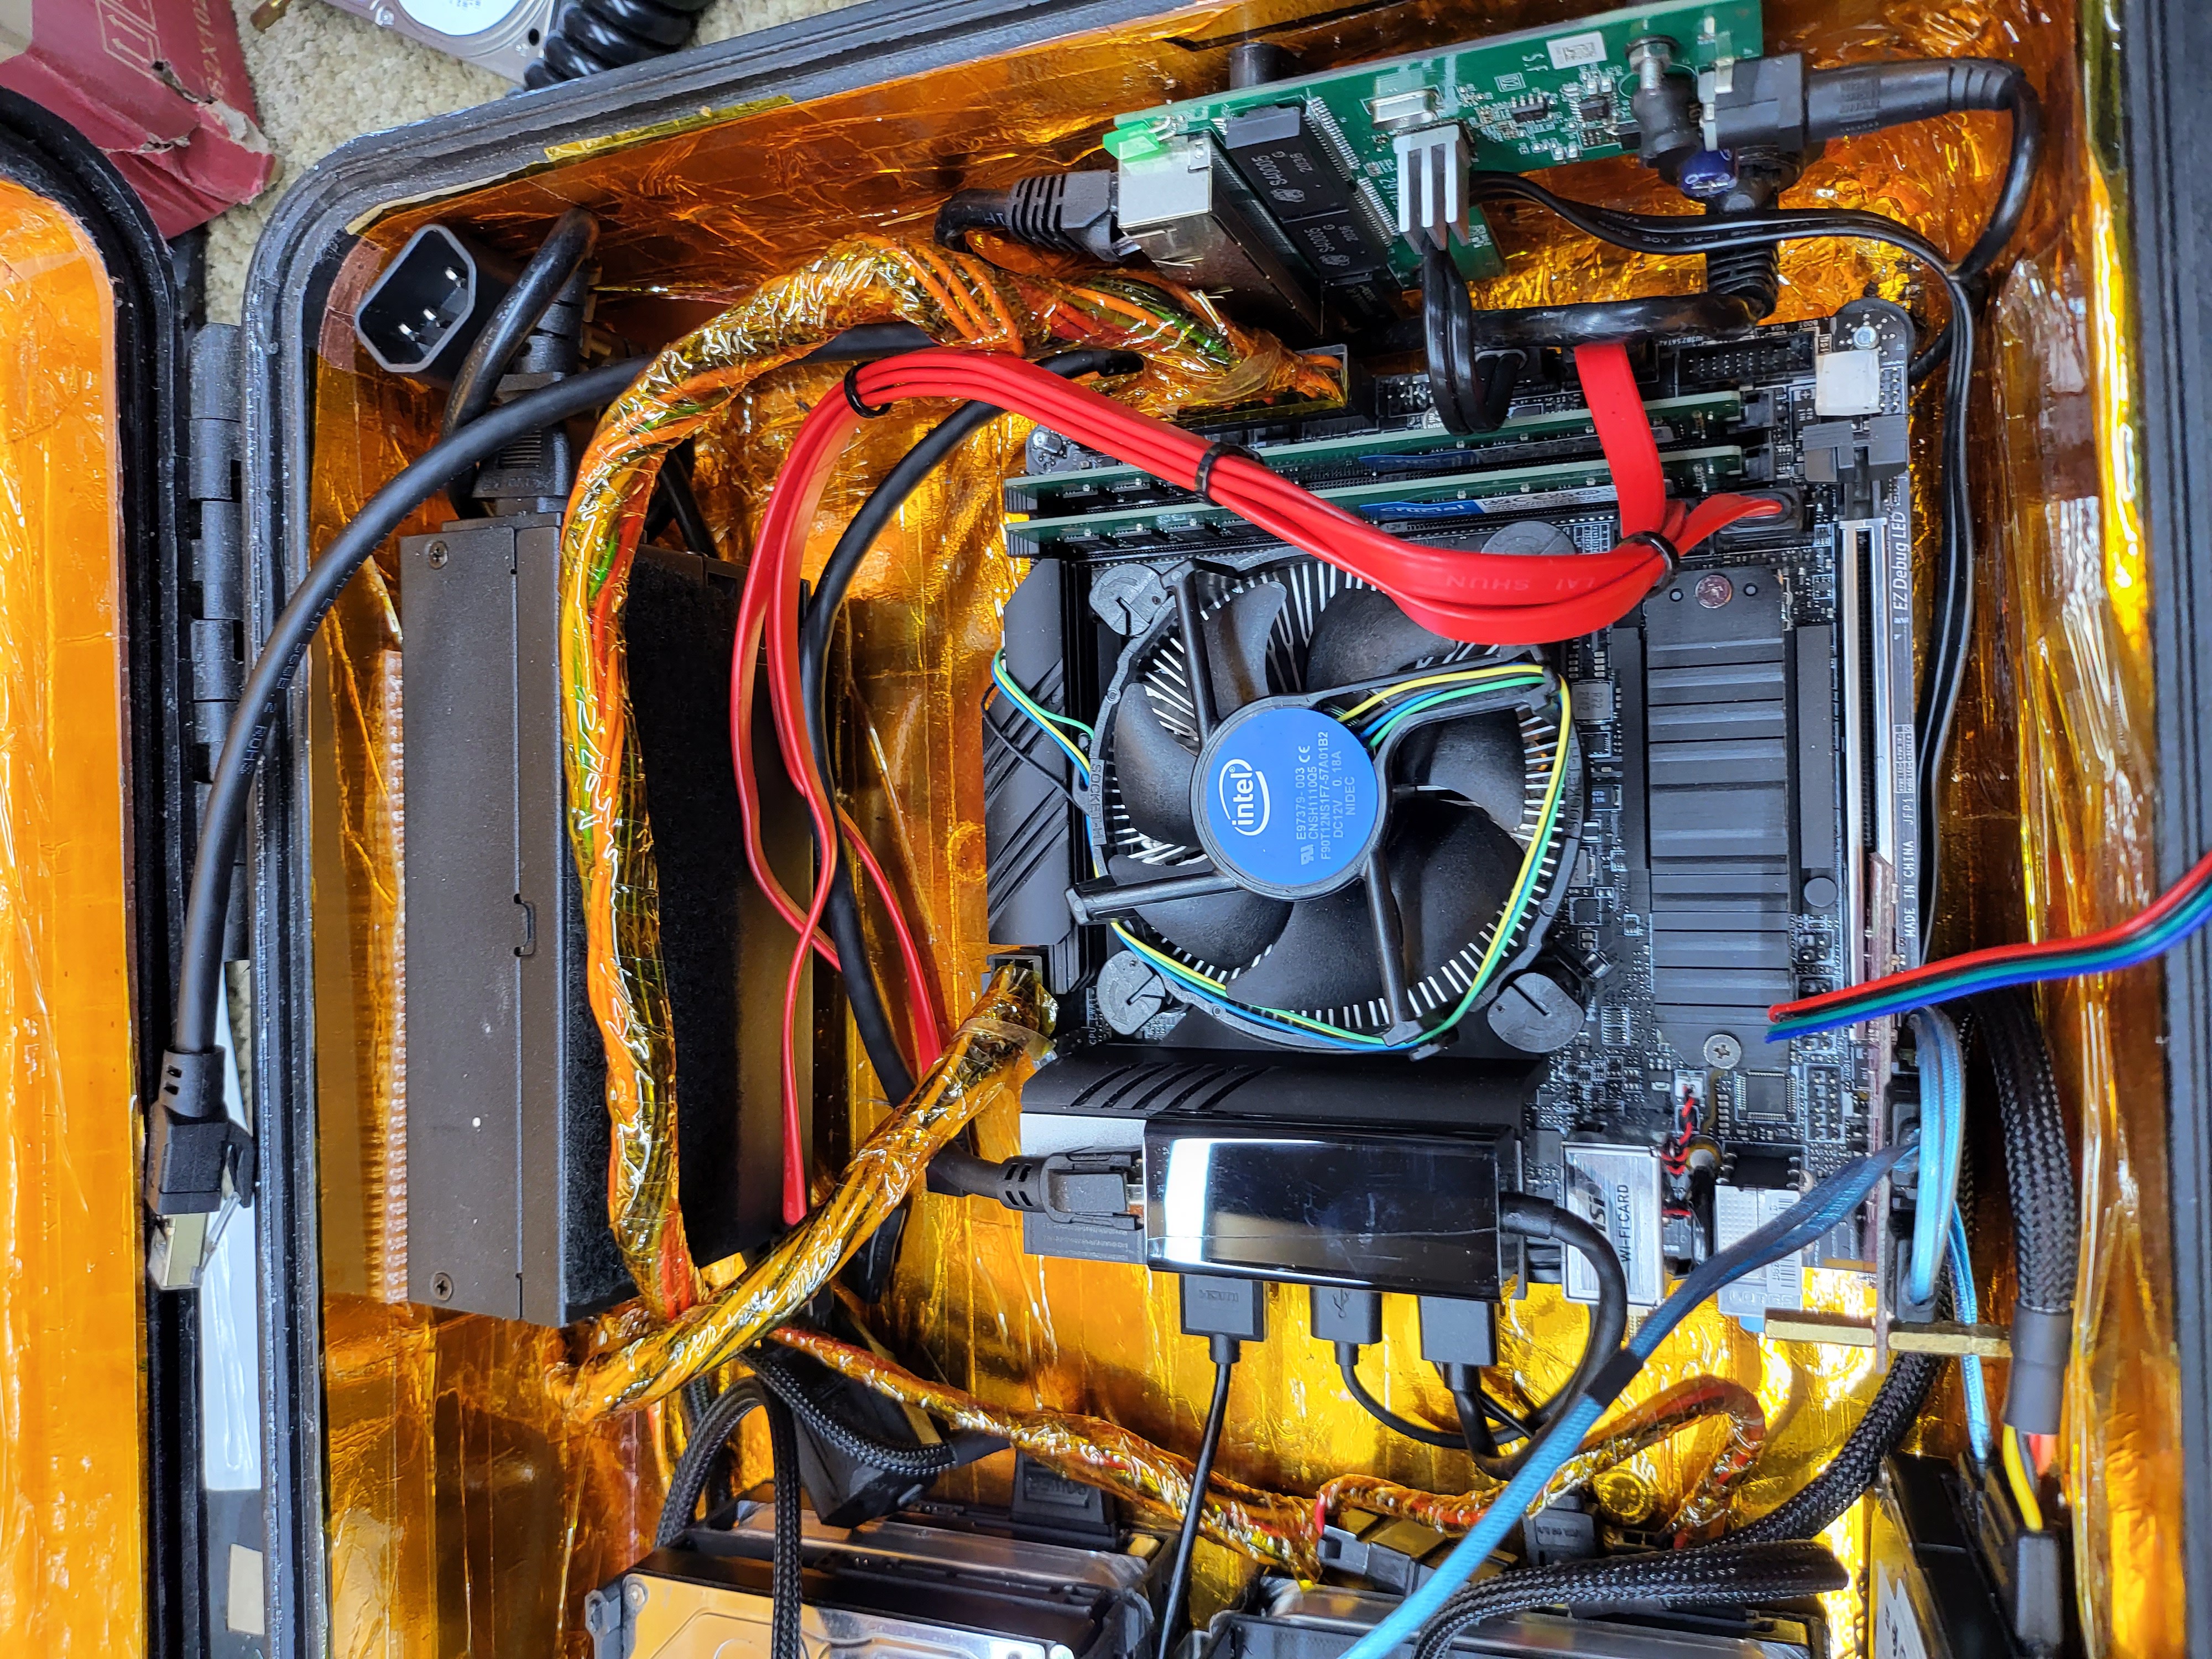
Then shock absorption was the next challenge. How to i protect the innards from itself and from each other due to vibration and shock? So after much research i was able to find vibration dampening mounts that can fit the  Mini ATX motherboard  with a 3.3 GHz CPU and 32 GB of RAM and 6 20 TB drives (20 TB drives are not cheap so they had to be protected! )

Storage

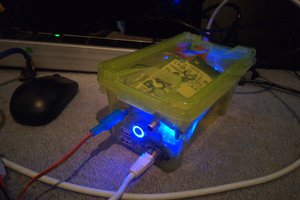
The Drive cradles are custom made 3d prints done in graphite filament and then put on shock absorbers to isolate them from the case and keep them isolated from each other as well as trying to fit as may drives as possible in there. 6 20 TB drives hit the storage target that i was looking to hit so 2 stacks of 3 drives in 2 Vdevs on a ZFS pool and each of the drives are semi hot swappable. There is also a 5 TB SSD that is used as the cache for the array.

Gotta have the Pi's

I knew that the NAS operating system that i chose (TrueNAS) didn't have anything gui'ish native to the server itself so that means that it was time to cram so Raspberry Pi's in there so we can use all the good data that is on the array so there is just enough room for 2 of them. One RPI CM4 on a RPI Carrier board that has Soundwave Linux. This will be the main interface/desktop for the whole system and another RPI 4B that is a WiFi router (This is being changed to a ddWRT Micro Router after many discussions with my brothers & sisters of the CyberDeck Cafe). So others can enjoy the hoard. The CM4 is powered from the power supply using the Floppy 4 pin plug and the 4b from USB off the mATX motherboard and will have a SDR Hat attached to it to be able to interface with the airwaves via GnuRadio.

Monitors

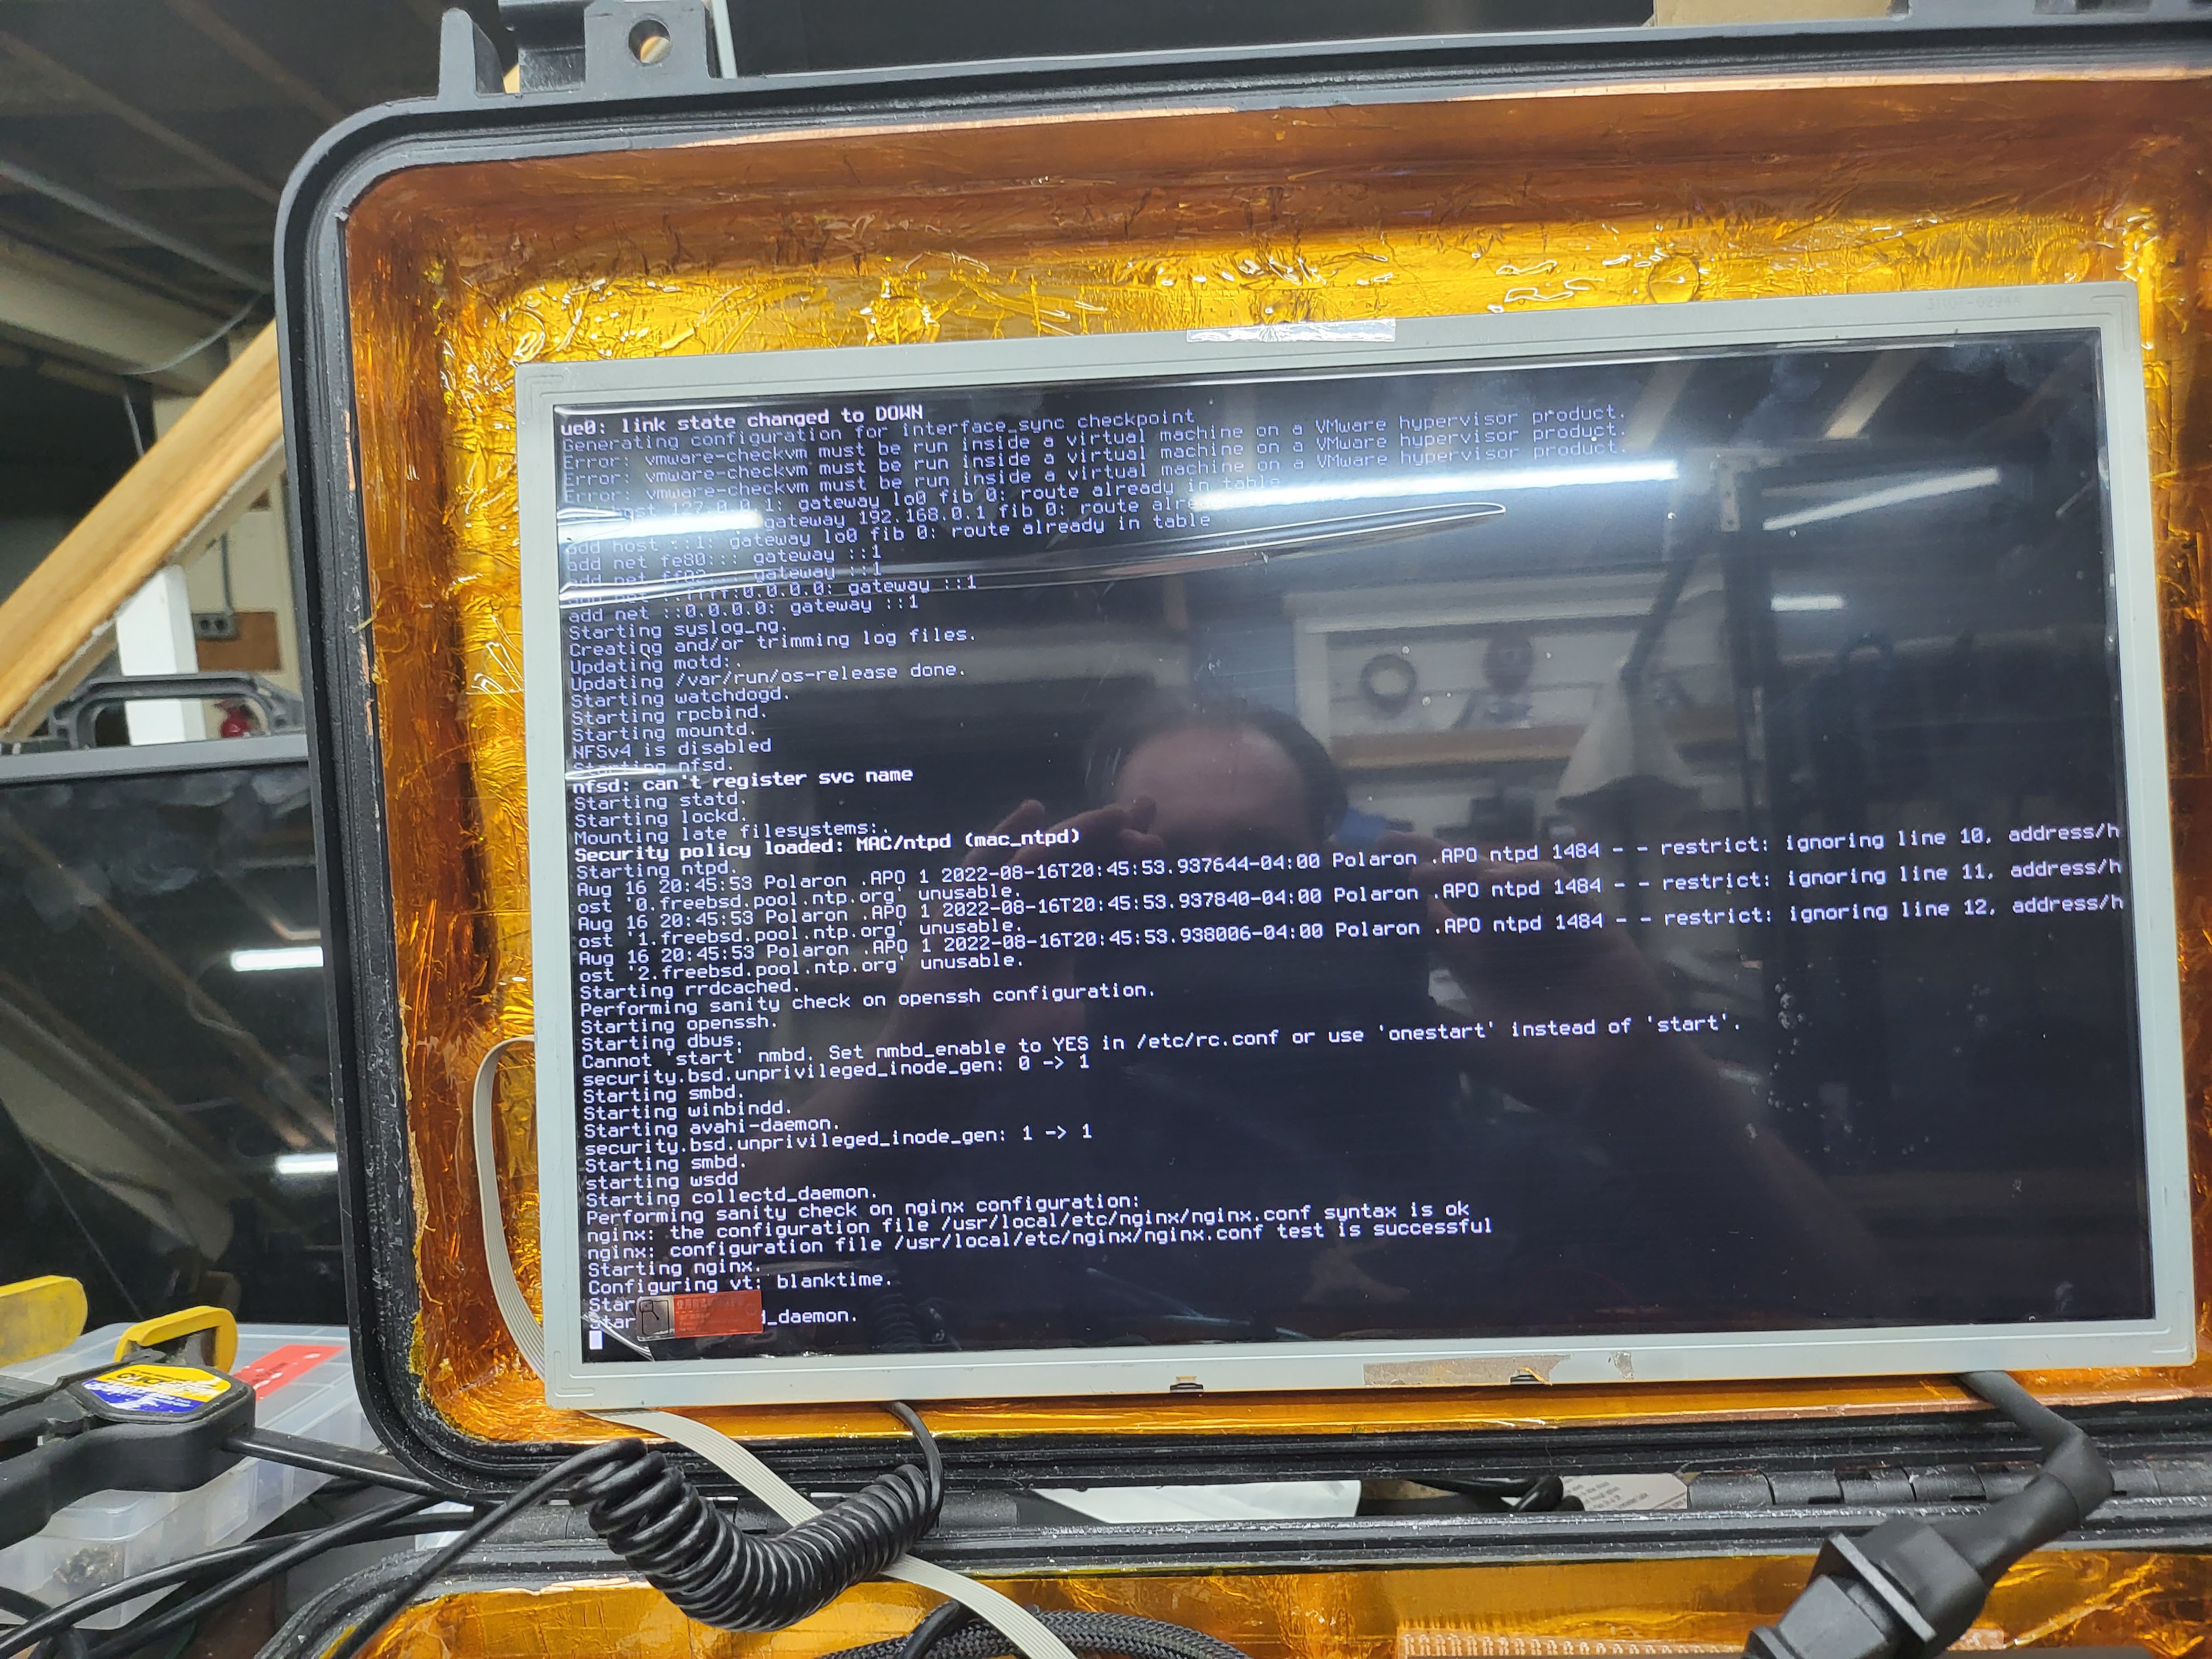
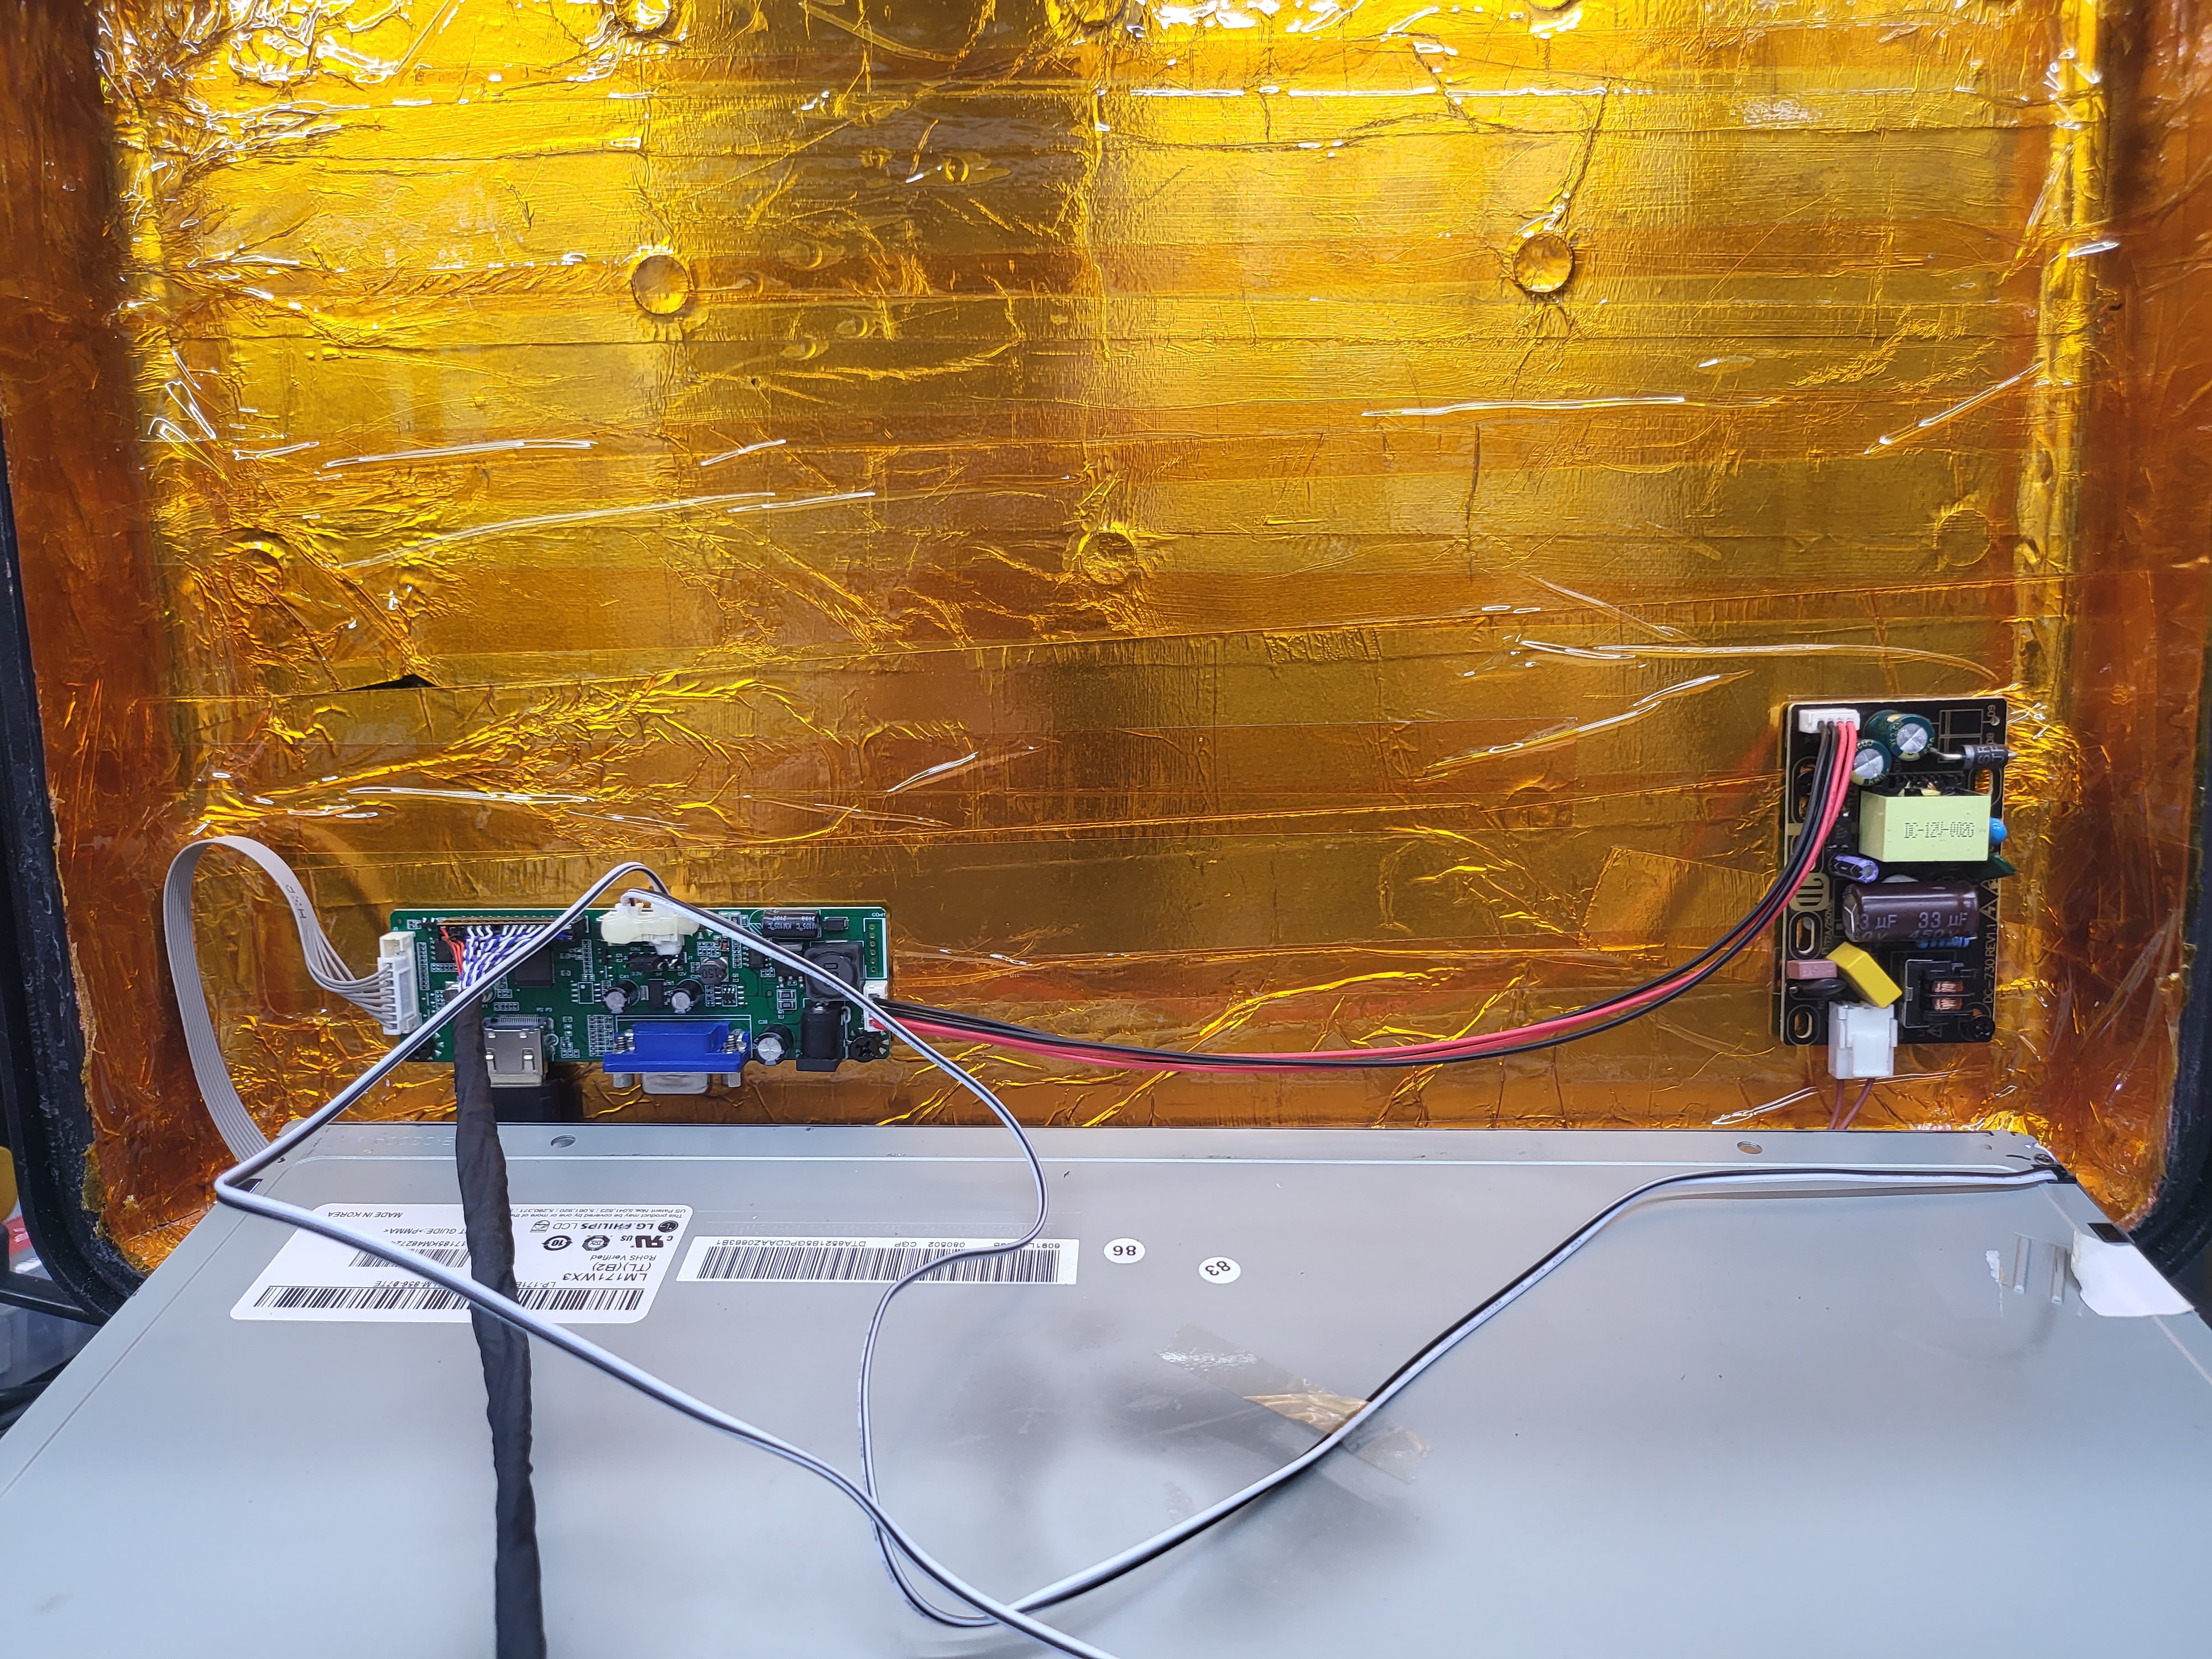
17" HDMI flat panel monitor enclosed into the lid of the pelican case with a 3 port HDMI KVM switch to be able to connect to all of the devices attached.

Networking

Netgear 5 port switch that i stripped down and shock isolation mounted to the side of the case that is powered by a USB C- to barrel jack adapter that is plugged into the motherboard. i mounted a RJ45 Bulkhead waterproof connector to the side of the case for external access. All internal components are connected to the switch and the P1-4b is the Network and Wireless router as well as a firewall that controls the flow

Still to do

  • Mount the monitor in the lid and route power
  • Add fans for ventilation
  • wire touch sensitive keyboard and mouse for access and tie into KVM
  • Finish cover plate that protects the innards from sheet of PEEK (also not cheap)
  • Mount Antenna cables for SDR on Top Lid of the case and weather seal

  • 1 × Pelican Case
  • 1 × MSI H510I PRO WiFi ProSeries Motherboard
  • 2 × Micro SD Card Extension Cable Adapter a 120 TB Network attached storage inside of a pelican case that is TEMPEST/RF isolated inside 10 coats of clear coat high-heat enamel rated for 1200 deg F.. 6 - 20 TB HDD'S in custom built shock absorbed cradle printed with graphene filament to reduce vibration and shock 32 GB of Ram Raspberry Pi CM4 - 8GB/WiFi Raspberry Pi 4b 8 GB for wireless routing Contained 5 port switch for network access 250 W isolated & contained power supply for all devices Software defined radio 17" built in monitor Dual touchscreen keyboards/mouse in top base HDMI KVM switch to control Pi's and NAS
  • 20 × Copper Foil Tape Rolls
  • 1 × 5-Port Gigabit Ethernet Unmanaged Switch

View all 9 components

  • Polaron Build Log - 20220912

    Cybermage201909/13/2022 at 02:17 0 comments

    HEAT


    So got everything in the pelican case and started to do a limited transfer of some of my datahoard and even with the case open and the monitor not on there was an insane amount of heat that i am going to have to find a way to mitigate. If anyone has suggestions besides .....Fans.....let me know. The 2 main contributors to the Btu's are the CPU and the HDD's Those 20 TB drives generate some serious kelvins when they are at high use.
    Also got done with all the EM hardening that i could do with all the components outside of the motherboard and the drives themselves.

    Need to find someone with a decent CNC so i can finish the cover for the components because doing it by hand is going to be a royal mess and only have one PEEK sheet to work from as they are hella expensive.

    Swapped the 2 port SATA PCI-E card for a 4 port and added a 5TB Cache and a 2.5 TB Log drives to the array to make transfers faster and have better redundancy and some expansion later.

    I am also going to swap out the 17" monitor that i have in the lid for a smaller form factor touch screen to be able to add some more control with the touch sensitive keyboard that i am working on from 2 RPI 7" touchscreens but not sure if that is going to work out and may have to use some sort of fold able KB/Touch pad combo


    Haven't had much time to dedicate to Polaron lately as the job has been keeping me on my toes lately but will try to add some more build logs as i go

  • Polaron Build Log - 20220816

    Cybermage201908/17/2022 at 00:57 0 comments

    Today the monitor came in for the box and i wasted no time shucking it and starting to do the placement for where its going to live. Now that it is here i can start to make the bezel that is going to hold it into the lid 

    The size is perfect (17") to be able to fit into the 19" lid....Tried to put a 19" in there and it was just a touch too big to fit but with the 17" i am able to mount all the monitor hardware to the lid and have enough room to spare for other things in the future

    The control boards are affixed with a plastic backing so there is no chance of shorting at all. I plan to also heat shrink the boards to better protect them.

    The TPLink Mini wireless router came in today. Had 2 GLNet ones that i attempted to put ddWRT onto but gave up after i bricked one of 2 of them that i have. From what i read the TPLink one should be easier to flash

    Last 2 20TB Drives come in a few days and then i can reload the O/S for the NAS part and then start to do the first part of final assembly.....

  • Polaron Build Log - 20220813

    Cybermage201908/14/2022 at 01:09 0 comments


    Today was just some light weight stuff.  Added EM isolation tape and kapton to all the bundles of the power supply and rerouted the power cables a little better. Did a little more work on the shaping of the case cover to get a better fit and get the lid to close air tight. Still need to lay out all the holes that need to be drilled and milled out of the base-plate

    A

  • Polaron Build Log: 20220812

    Cybermage201908/12/2022 at 23:04 0 comments

    20220812

    • Ordered the last 2 20 TB drives and the monitor for the lid
    • Began forming and routing the face plate for the monitor - This is much harder than it seems with a wood router without a plunge base,,,,, Much sanding and filing to do to get it into shape
    • Have to reload TrueNAS as it is corrupted. Will wipe 250Gb SSD and reload....considering VMware to expand scope of options this may overload the Pi Router RAM and NIC. may PoC what other Open Source options there are with Nix

View all 4 project logs

Enjoy this project?

Share

Discussions

Similar Projects

Does this project spark your interest?

Become a member to follow this project and never miss any updates