 0x17
0x17
The DevTerm keeps popping up at my feet at regular intervals.
It's beautiful but it comes at a price - $339 is a bit much for a toy and not in the budget here.
If you don't have the budget, you'll probably have to build it yourself. Devterm didn't invent the form factor.
There were various old "notebooks" that also had a display at the top and a keyboard at the bottom.
There was also the EPSON HX-20, TANDY 102 or the AMSTRAD NC100.
I was able to get hold of the latter on EBay and it was even affordable.
The NC100 now has rather unusable hardware installed. So the idea of turning the device into a cyberdeck came very close.
I have to say I'm not a big vintage computer collector, I like hardware that I can use and I hope forgive the vintage nerds
disassembling the AMSTRAD NC100.
So what should happen to make the AMSTRAD NC100 more usable?
PRE
The rough timetable of everything that should go into the Cyberdeck and what it should be able to do:PRE
NixOS as operating system
Raspberry Pi as the processing unit
Modern display
Mechanical keyboard (ortholinear, low profile)
Bring all ports to the outside
These are the rough key points.
The greatest effort is probably in adapting the case to the requirements. In contrast to the OMNIBOOK 425, which is also lying around here, the NC100 is clear easier to open and most importantly the display is easier to remove.
But before a lot of individual parts can be ordered and tinkered wildly, a little more planning is needed.
Let's start with the display. The old LCD display is beautiful from a nostalgic point of view, but a little more color and Resolution would be great. Inspired by the DevTerm, I searched through the various shopping platforms and came across a display that fits perfectly. It's an 8.8" display with a resolution of 1920px x 480px. So a slightly different format. The display comes with its own board that is connected to the Raspberry Pi via HDMI and controls the signal.
The all-rounder Raspberry Pi is used as the computer. Then comes the beloved NixOS with XMonad and Xmobar. Now the Raspberry Pi is somewhat loose in the Case of the Amstrad. So it makes sense to put the ports on the outside. The RJ54 connector is placed on the left side of the Amstrad via a built-in socket and three USB ports on the top. The keyboard is a CRKBD / CORNE. However, not in the actual sense of use but as a unibody split. I save myself the handwiring out of laziness and use the CRKBD PCBs instead. Kailh Choc browns come on the board as switches and first unlabeled compatible caps.
So much for the preliminary considerations. So we have a part list that looks like this:
PARTS LIST
AMSTRAD NC100 Notepad

2x crkbd PCBs
42x 1N4148 diodes
42x Kailh Choc Switches (brown)
42x Kailh Choc Keycaps
02x Pro-Micro Microcontroller
3D printed switchplate

8.8" Display
02x USB built-in socket
01x RJ45 built-in jack
02x Micro USB built-in socket

Raspberry Pi
32GB MicroSD Card
So that you can also order the right parts, it means measuring, measuring, measuring. If you don't measure, your parts may not fit and that's frustrating. So the Amstrad is now being attacked and dismantled.
DISASSEMBLING
The Amstrad is very easy to disassemble.All you have to do is loosen the 5 screws on the bottom of the device. Three of them are directly on the bottom of the case. Another is for the flap under which lies the beautiful Amstrad chip and the last screw is hidden in the battery compartment.
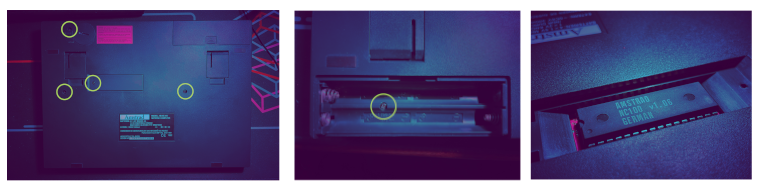
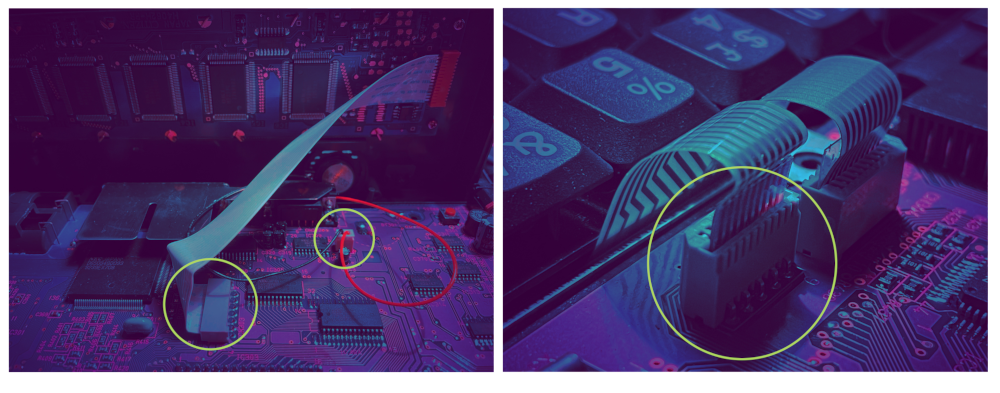
When you have loosened all the screws and can open the Amstrad, the wonderful world of vintage computer mainboards is in front of you. Nevertheless, caution is advised. On the mainboard of the NC100, the display and speaker are connected by plugs or ribbon cables. If you don't want to just rip this off, lift the lid with caution, there's plenty of room to maneuver, but be careful. You can unplug or pull them out and you can separate the two halves. You can also remove the keyboard directly after unplugging it.


 Cees Meijer
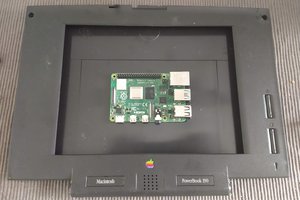
 Dan Jilek
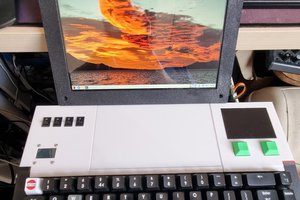
 Steve Anderson
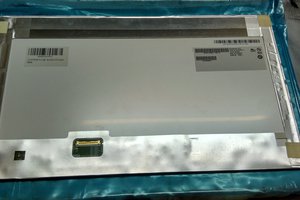
 Kumar, Abhishek
@Nazwa (sorry can`t reply to your post) I have two keyboards with rotary encoders but i never use it no. I have only one computer that use audio (for podcasting) and there is a small split keyboard where I control the volume with keys. A friend of mine uses them for scrolling. i could imagine that, but there wasn't much room in the cyberdeck anyway, so i just left them out :)