 Tyler Richard
Overall, because the MX Master 3 is so overpriced, you can get that and this for around the same price excluding man-hours on your part, with the only major feature differences being a nice GUI interface and magnetic smooth scroll wheel. The custom mouse has a better sensor, though, so you should definitely go with it :). There are plans to make it support wireless operation in the future, but I'm busy with college apps right now, and don't have time.
Features:
- 1 Customizable buttons without code
- 6 Customizable buttons with code
- The option to lift the mouse quickly to send a customizable key combo
- View battery level
- Read off an excerpt from Lorem Ipsum
- Say Hi
- View what the sensor sees, in real time
- Whatever you want, if you can code it :)
Video From Sensor:
Building It:
While not super accessible, I feel that building this mouse is something anyone with enough time and money available can do. It requires some precise placements, complex soldering, and embedded knowledge, but all of that can be gained while building it.
Here's a loose guide on what to do:
- Find a way to obtain a PMW3389 mouse sensor from PixArt. This is hard to do, but contact them through their support and see what options are available. I was able to get them easily because I am a student, for example.
- Order all the parts from Digikey using the spreadsheet in the files section below
- Order this mouse from Amazon
- Order this device from NXP, so you can upload the code
- You can use your own OpenOCD probe if you want, just make sure it supports the MAX32625
- Order the PCB from JLCPCB, or whatever PCB manufacturer you want
- Make sure you get a solder stencil with this, or else soldering will be near impossible
- Use KiCad as a guide to assemble everything properly
- There's a nice plugin called Interactive HTML Bom that makes this super easy
- Check for shorts between all the voltage rails and the ground plane, since this is expensive and shorting stuff would be sad
- It should read 0 ohms briefly, because of the caps, but should also rise in resistance quickly. Anything above around 10k is probably fine
- Plug it in, and make sure nothing happens. If you have a USB current draw monitor, make sure it's only drawing around 10mA
- Use the git repo to compile and upload the code. This is the hardest part if you have no experience, but generally it should just work once you configure OpenOCD
- I used windows to develop all of this, so if there are any bugs on other platforms, let me know
- You also need rust + cargo installed for this, so make sure you have those.
- Get the Cortex-Debug VS-Code extension to make everything super easy
- Run it, and it should work. Emphasis on the should, it refuses to work on the front IO of my computer, so try multiple ports in different areas of your/other people's computers if it doesn't work.
- 🎊 You're Done! 🎊
Future:
Currently, the mouse is lacking features. The bottom button does nothing, and the LEDs on the bottom don't light up either. Currently, my main annoyance with the mouse is that I don't want the lift key bind on while gaming, since it's not 100% consistent and can randomly activate, but that takes a whole command to disable, compared to just pressing the button on the bottom. The LEDs could be used to show which mode the mouse is in. There is also an antenna and radio chip sitting unused. Both can hopefully function, so that's something that needs to be coded in. Finally, there's the whole USB half to the mouse. I haven't even began programming that, and it would allow for fully wireless mouseage.
Finishing Up:
Contact me at tylerrichard215@gmail.com if you
- Have any questions
- Find any programming bugs
- Want any features
- Etc
This project is still going, but it's on hold for now. I have school + college to work on, and not enough time.
Thank you for reading my nearly 7 month journey
- Tyler Richard

 Alex Hunt
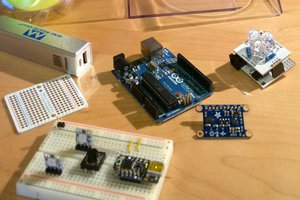
 Elecia White
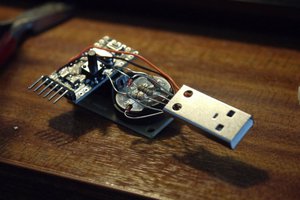
 Alistair MacDonald
 jens.andree