 Ben Brooks
Recently I came across this Hackaday article by Elliot Williams linked from a more recent post. I’d considered roasting my own coffee in the past using the air popcorn popper method, but avoided it as I didn’t need yet another hobby/interest to take up my time. But after having done a fair bit of travelling around the US in an RV and striking out every time we bought coffee, the serendipity of reading that article inspired me to take the plunge (and make a bit of a project out of it too).
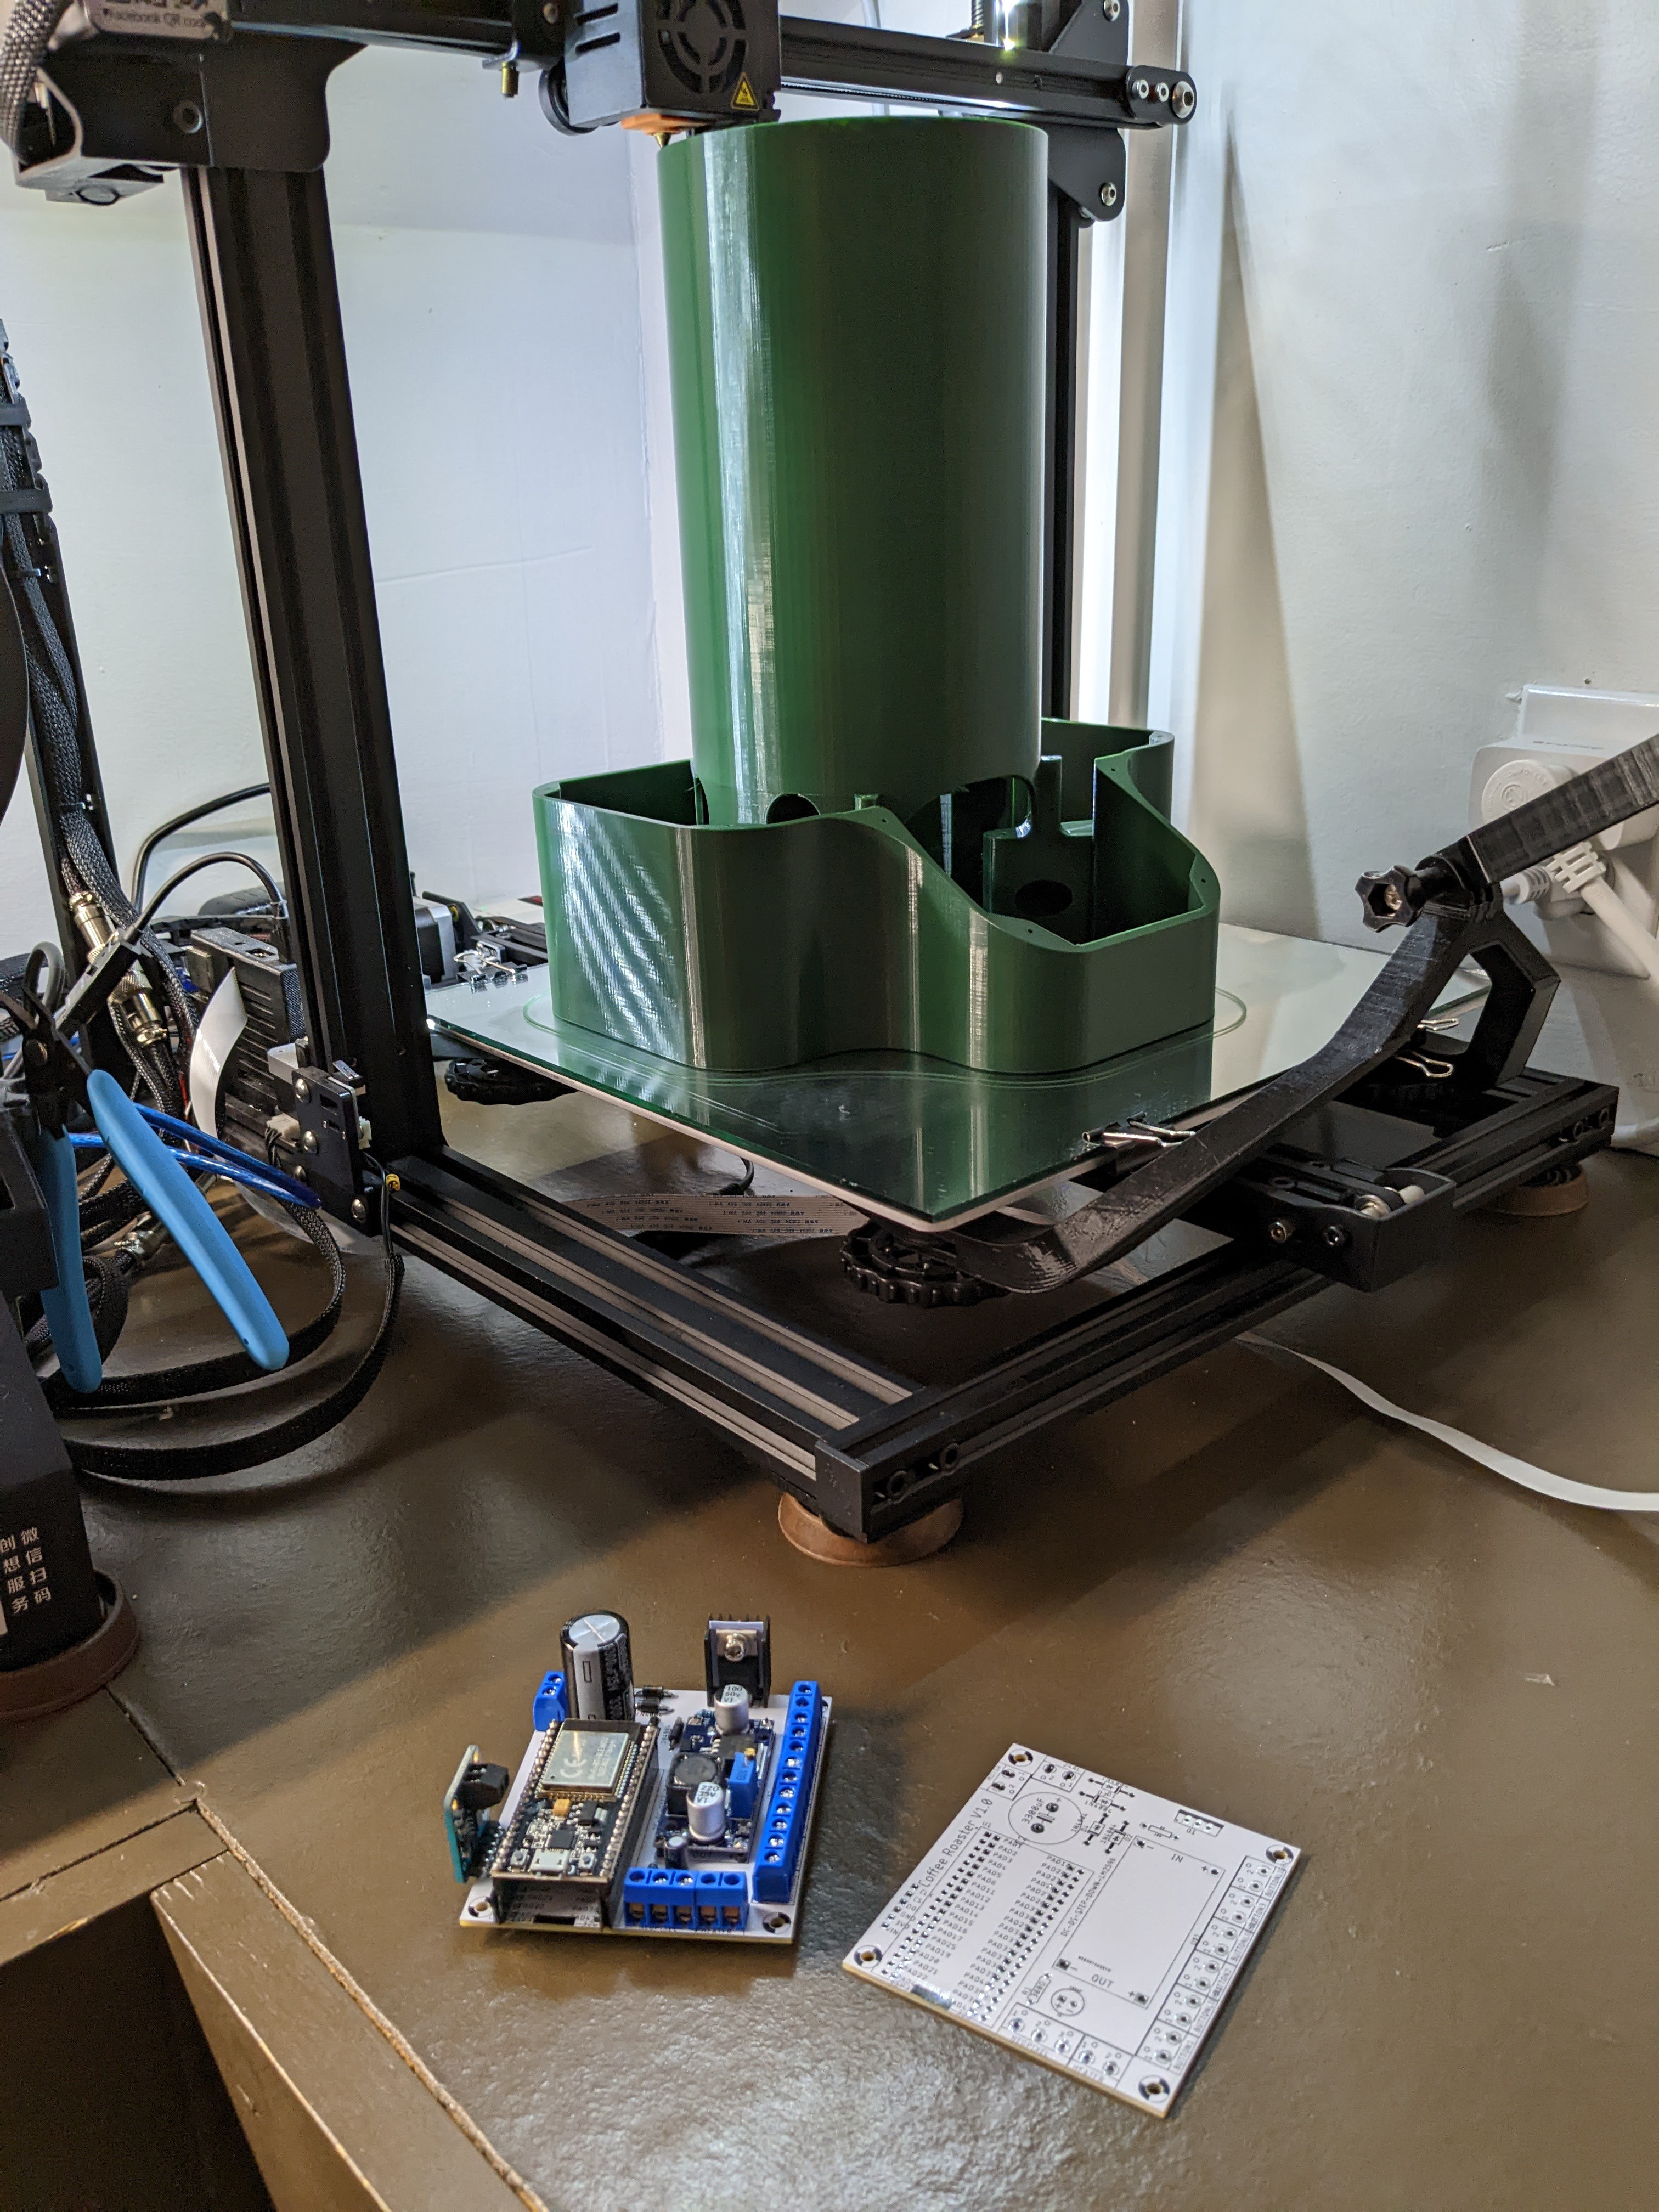
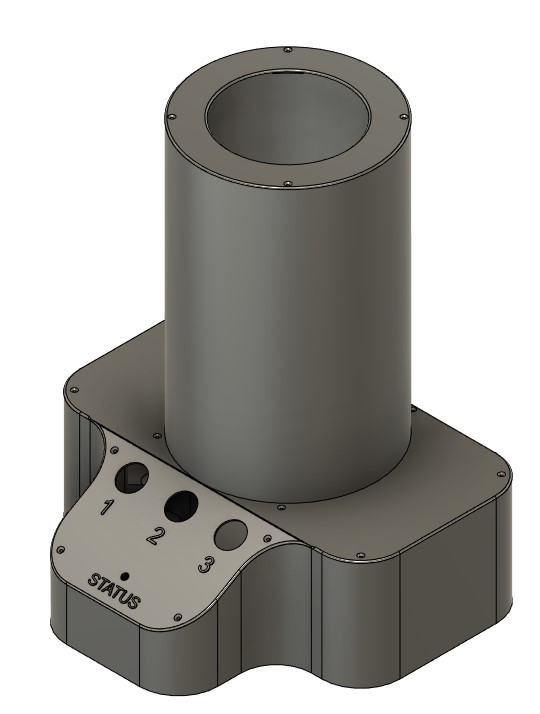
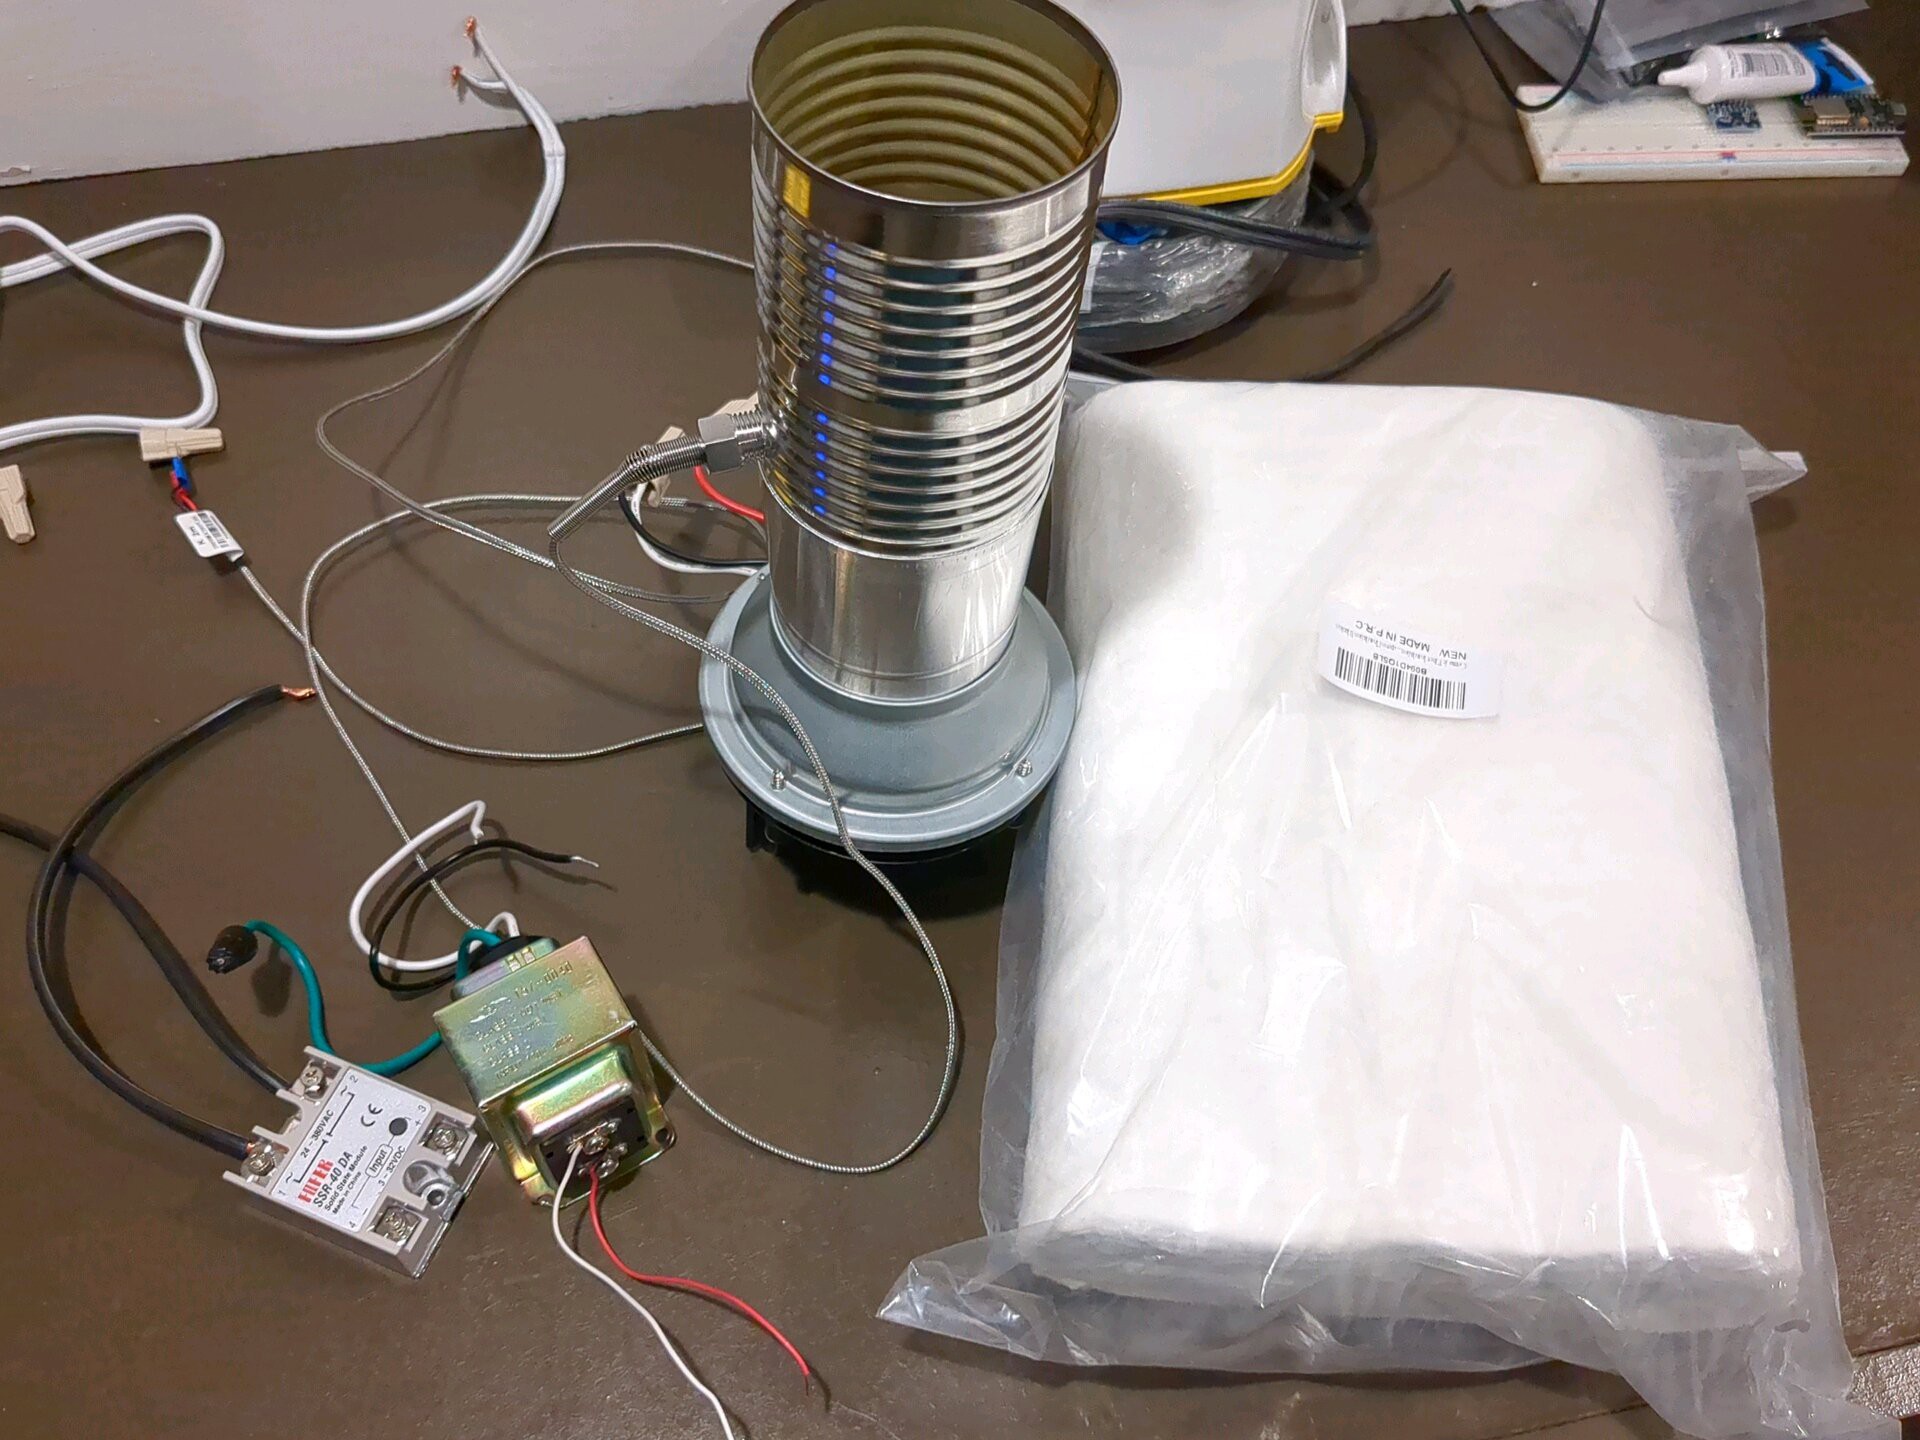
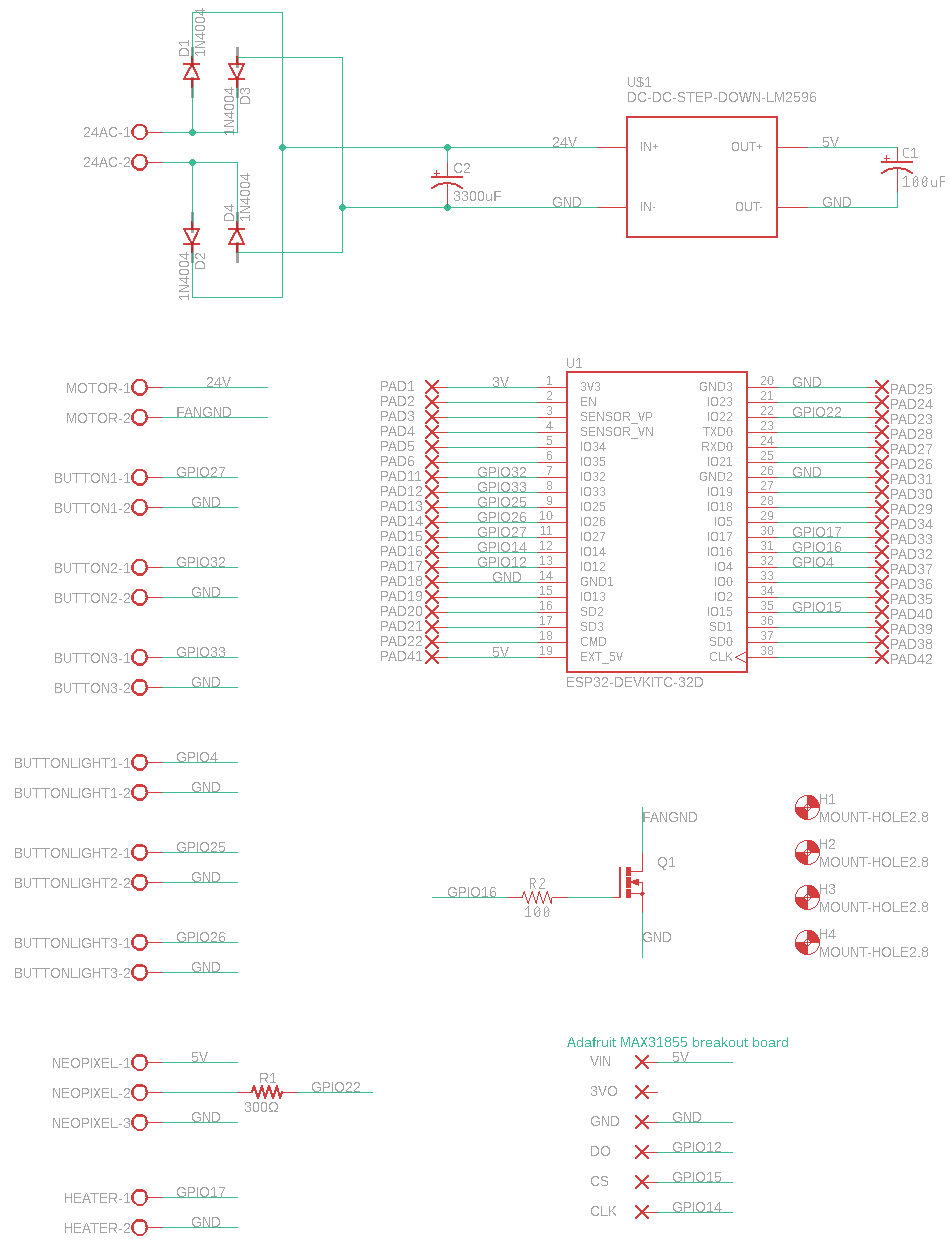
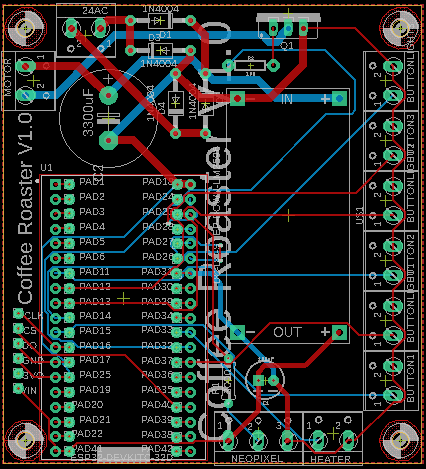
I more or less followed the original build, subbing components I either could get or already had on hand. I opted for the popper I got, mainly because it seemed to be the most ‘name-brand’ while still being inexpensive. I was also hoping the actual components MIGHT be slightly better and that the particular model more likely to find again if I need to buy another (to hopefully avoid redesigning/printing the enclosure I was going to make). One change from the source post that I made was a safety one: the original just bypassed a thermal fuse on the popper to allow for higher temps, but I went ahead and added a higher-temp thermal fuse instead. A pack of them was inexpensive and it seemed like a wise choice to have as many safety mechanisms (both physical and electronic) as possible, considering the high temps it will be operating at (think the highest setting on your oven). I also decided to not just enclose all the electronic bits, but the roasting chamber as well. The high temperatures it would be getting to and the fact that I planned to let it do it’s thing unsupervised, I really didn’t want it exposed (especially with little-ones around). Because the temperatures are north of the nozzle temperature for most printing materials, I ordered some high-temp thermal blanket material to wrap it with and hopefully keep the PLA I planned to print the enclosure out of from getting soft.
For the brains, I went with an ESP32 and for the code I went with ESPHome to make it play extra-nice with Home Assistant. While I’ve used ESPHome for lots of ‘dumb’ connected devices, this was my first time using it to do automation and control all locally: the only thing I’m using Home Assistant for is to visualize the data and as a way to make small changes to the roast setpoints and tell it to start the actual roast. It just makes sense for this type of project to have all the control done locally and not dependent on a wireless connection, but I also specifically wanted the ability to operate it wherever (say in an RV in the middle of nowhere). At the end of the day, it was quite easy automating it within ESPHome (minus the crazy-particular indentation syntax of YAML), but it took me quite a while to fully realize how to write it (I originally went down the path of using a custom component and writing the automation in C++ before realizing how easy it is to do natively). Part of the reason I chose the ESP32 instead of an 8266 was because I wanted to use the Web Server component of ESPHome, that way I have a simple UI to interact with it when not at home; the documentation warns away from doing so on an 8266. This was extra-important as I was going to be having the ESP render everything locally rather than pulling templates from the web.
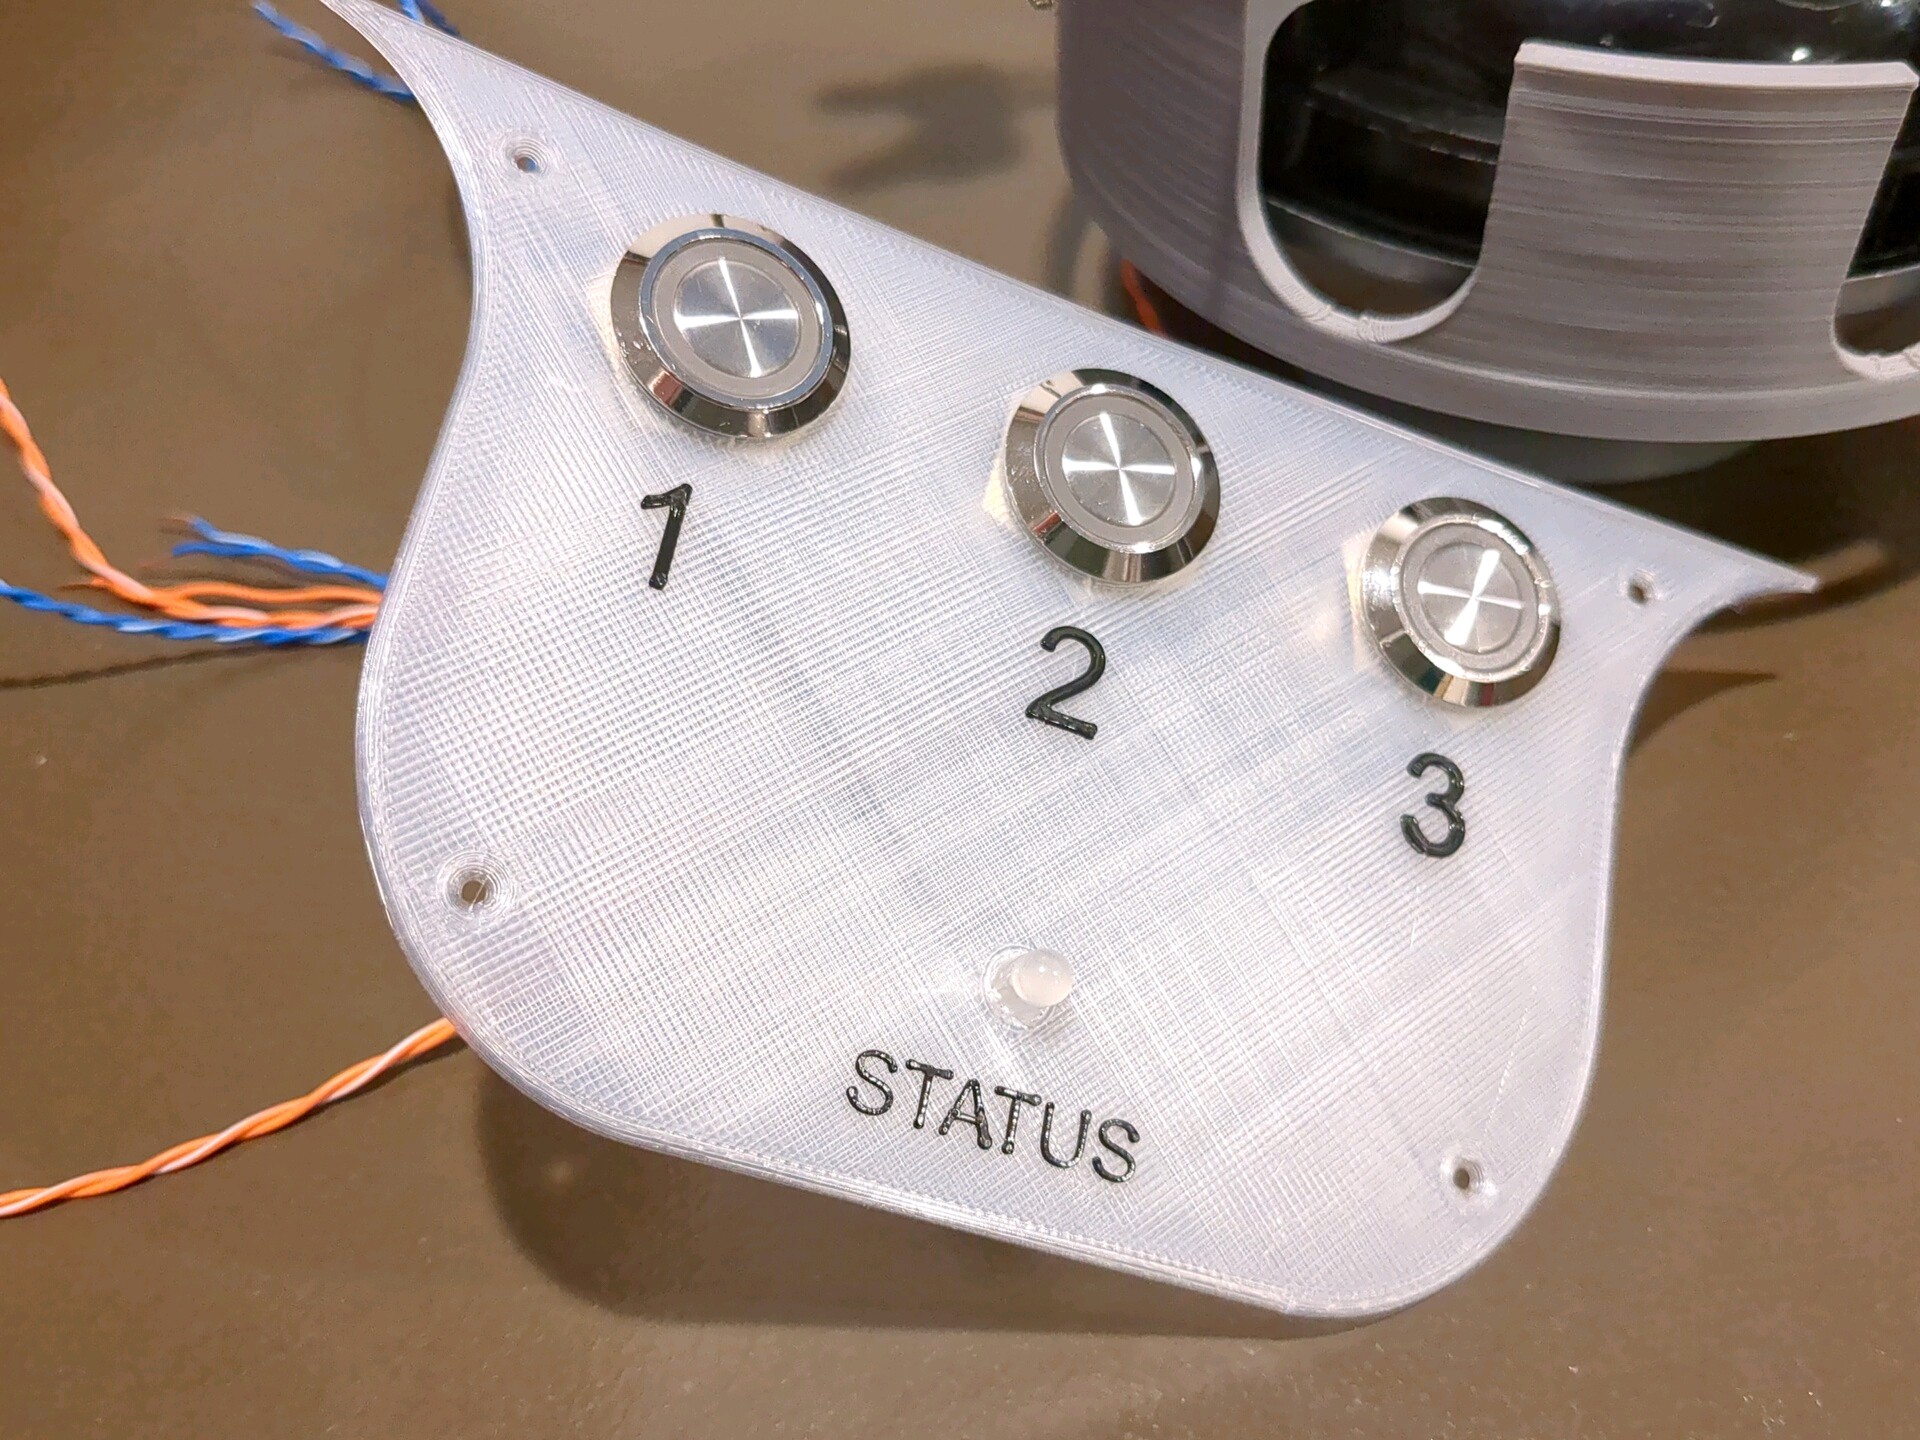
As far as physical IO devices, I settled on having 3 lighted buttons that would be used to initiate 3 different roast profiles (with the lights indicating which one is currently running) and a single Neopixel LED that changes color based on the current state of the roast or to alert to any errors. Obviously, I can pull out my phone or laptop to get ALL the data, but at the end of the day I wanted it to be very ‘set it and forget it’ once I found what I liked; the end goal was to pull the roaster out, add some beans, select the roast and walk away until my phone tells me that it’s done. As a starting point, I used the original roasting profile from Elliot’s post but making the code customizable on-the-fly. So while...
Read more »


 Jarrett
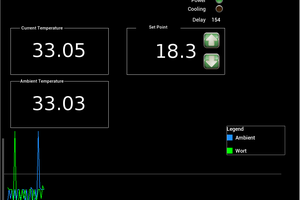
 deric
deric
 Charles Yarnold
We are the pioneers in making the best bean bags in town. We are delivering in bean bags dallas and at the same time across the USA.