Close
0%
0%

HOW I HACKED MY INTERCOM SO I CAN BE MORE LAZY

Answer intercom and open the door with phone

Public Chat
Similar projects worth following
I am too lazy to get up and open the door.
So I came up with the idea that I should mod my intercom so I could do everything from my smartphone.

THE CONCEPT

When I started thinking about this project I thought that the best way to do this was to develop some mobile phone application that talks to an esp32 that sends and receives audio.
The implementation of this idea could have taken so much time! 

Looking on some github I've found that ESP-ADF framework from Espressif has a voip example that could be perfect for my case. I discovered that even android phone have a SIP VOIP client built in! 

In this way I could save so much programming time.

But now the problem was on how I could open the door by making a phone call.
At first I thought about some vocal commands, but it would have been uncomfortable and awkward to use. Then I remembered about the call you have with phone operators! They use the phone call keyboard to allow the user interact with an automated system.

Great! That's the way to take!

  • 1 × ESP32 Audio kit
  • 3 × BC547 Discrete Semiconductors / Transistors, MOSFETs, FETs, IGBTs
  • 1 × AZ822-2C-3DSE Switches and Relays / Electromechanical Relays
  • 1 × MP1584EN
  • 1 × Reed Switch

  • 1
    Setting up ESP-ADF framework

    Pain.
    This is all I felt by configuring and getting the board working with the framework.
    Unfortunately this board is a mess.
    The elettronic schemes found on the internet are wrong and in newer version they changed the audio codec to an es8388.

    The best way to get this working is to look at issues and pulls request to esp-adf, arduino-audiokit and the official repo of the board.

    After a while, I got the voip example from esp-adf working!
    I could listen to sound by connecting headphones to the output and pick up sound from the headphone speaker (yes the headphone speaker were acting as microphone and not the microphone per se) if connected to the line input.

  • 2
    Setting up a PBX server

    To configure a VOIP server on my raspberry I almost cried.
    Tried any docker PBX image, some worked but the networking was completely broke, some were so outdated and at some point I even installed FusionPBX that broke my entire raspberry configuration so I had to format and reinstall everything again (from now on I got backups). 

    But then I found miniSIPServer.

    if i was going to cry for the previous misadventures, this time I wanted to cry with joy at how easy it was to set up and start a VOIP PBX server with just 1 command.
    The only issue is that the software is not open source and you must pay a licence to use more than 5 clients. 

    but, who cares? 

    The final result is what matter the most!

  • 3
    Piping audio to the board

    This was pretty straightforward.
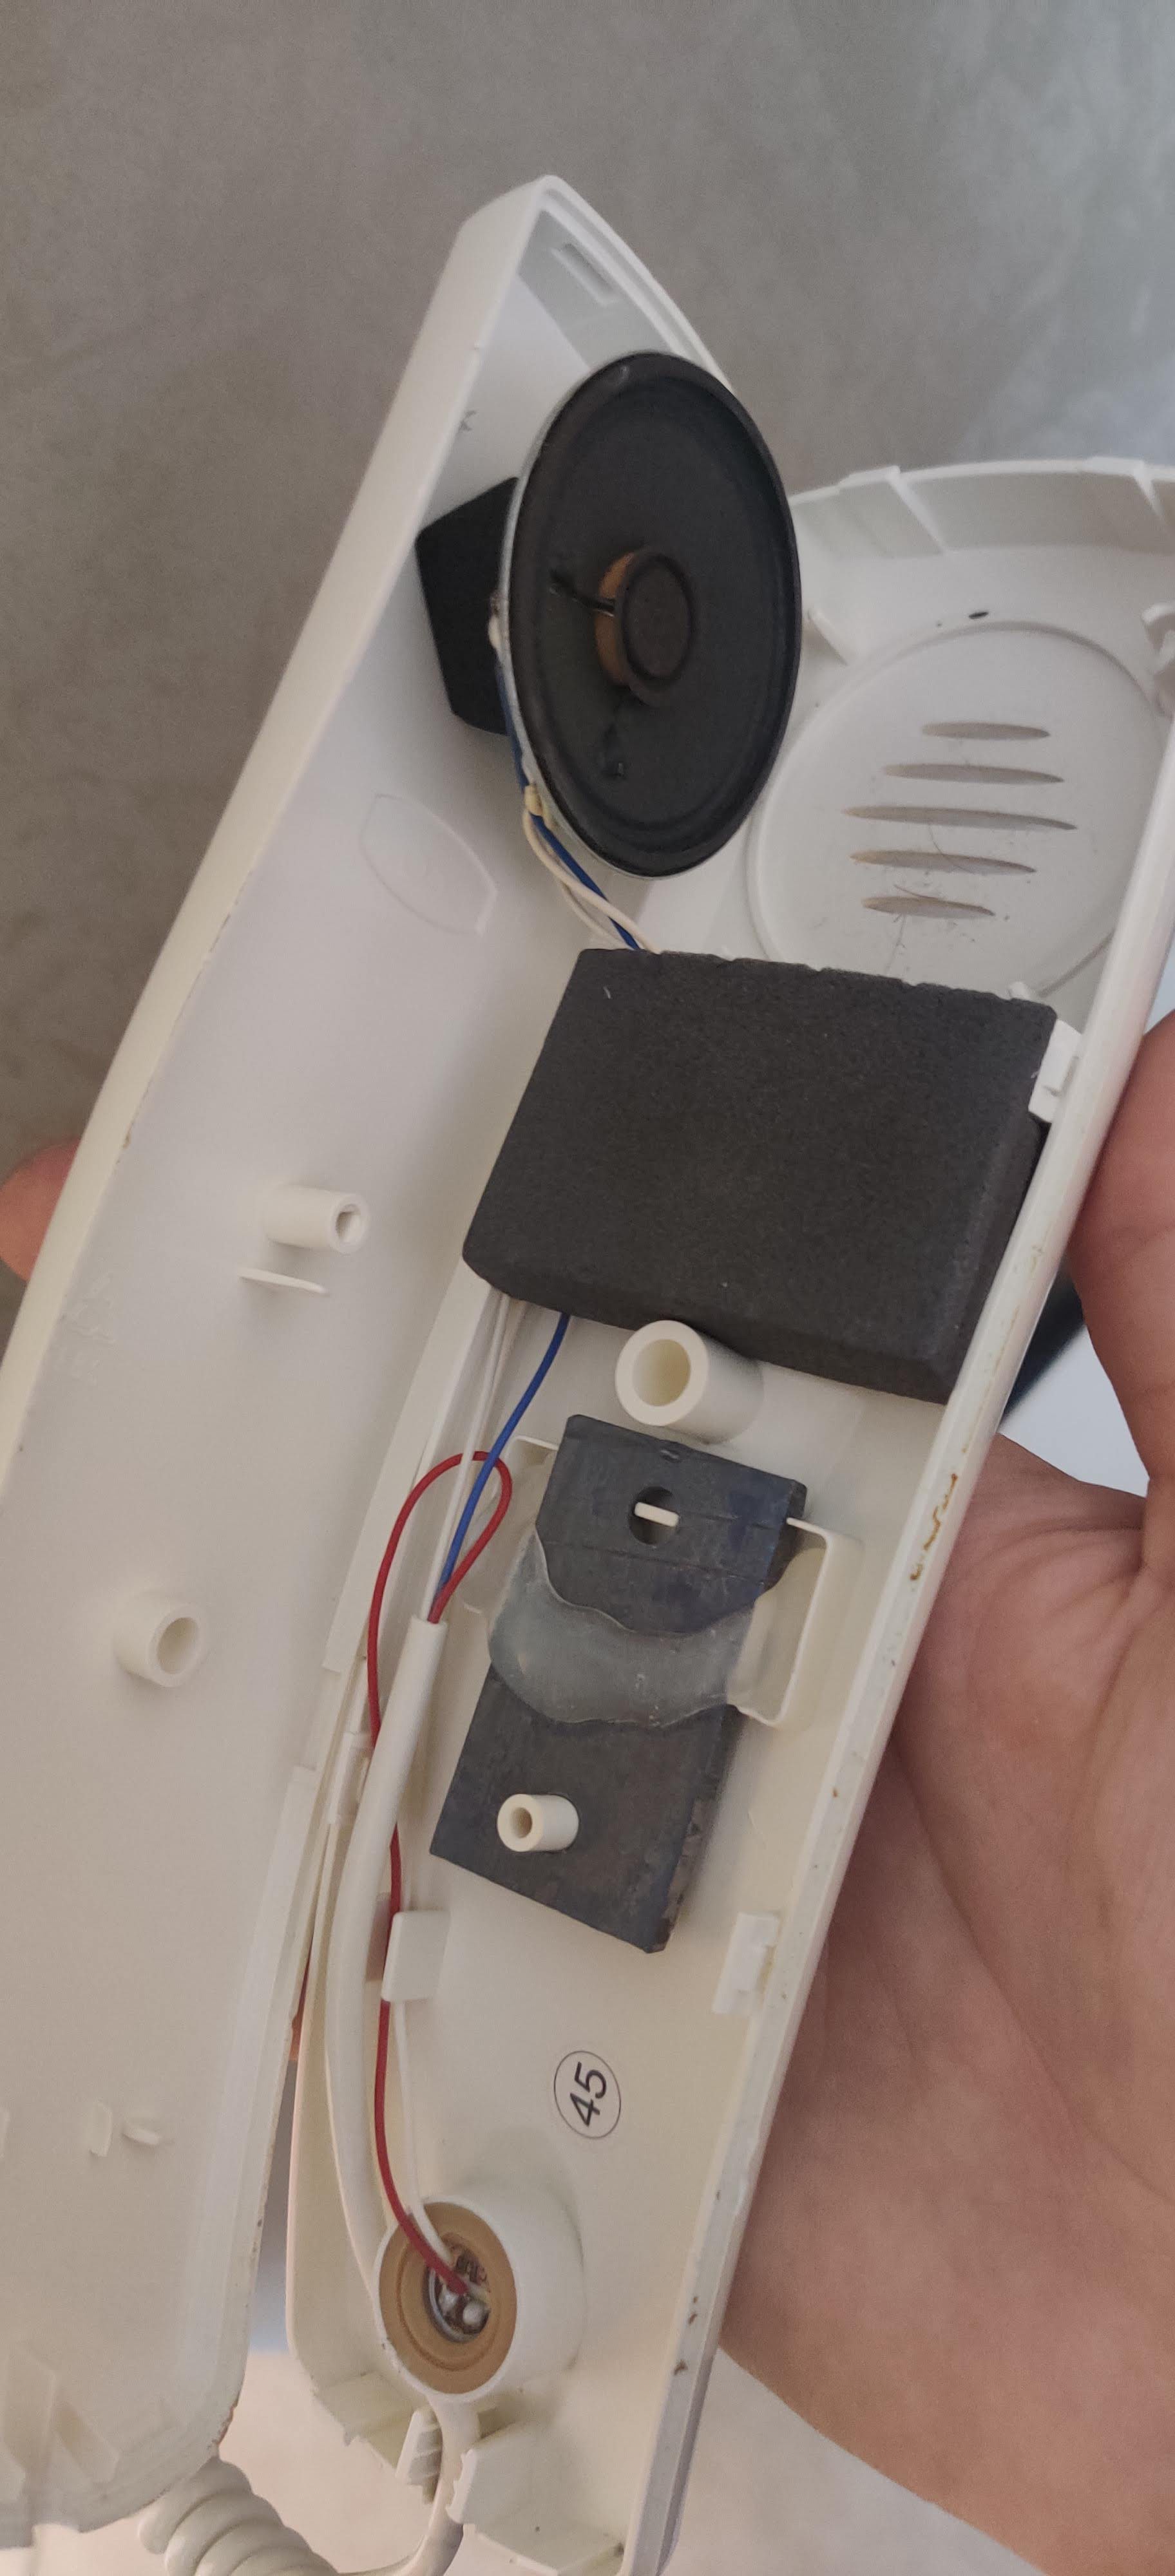
    After dissasembling the intercom I discovered that the handphone is connected with 3 wires.
    White is shared between speaker and microphone (ground), blue goes to speaker and red goes to microphone.

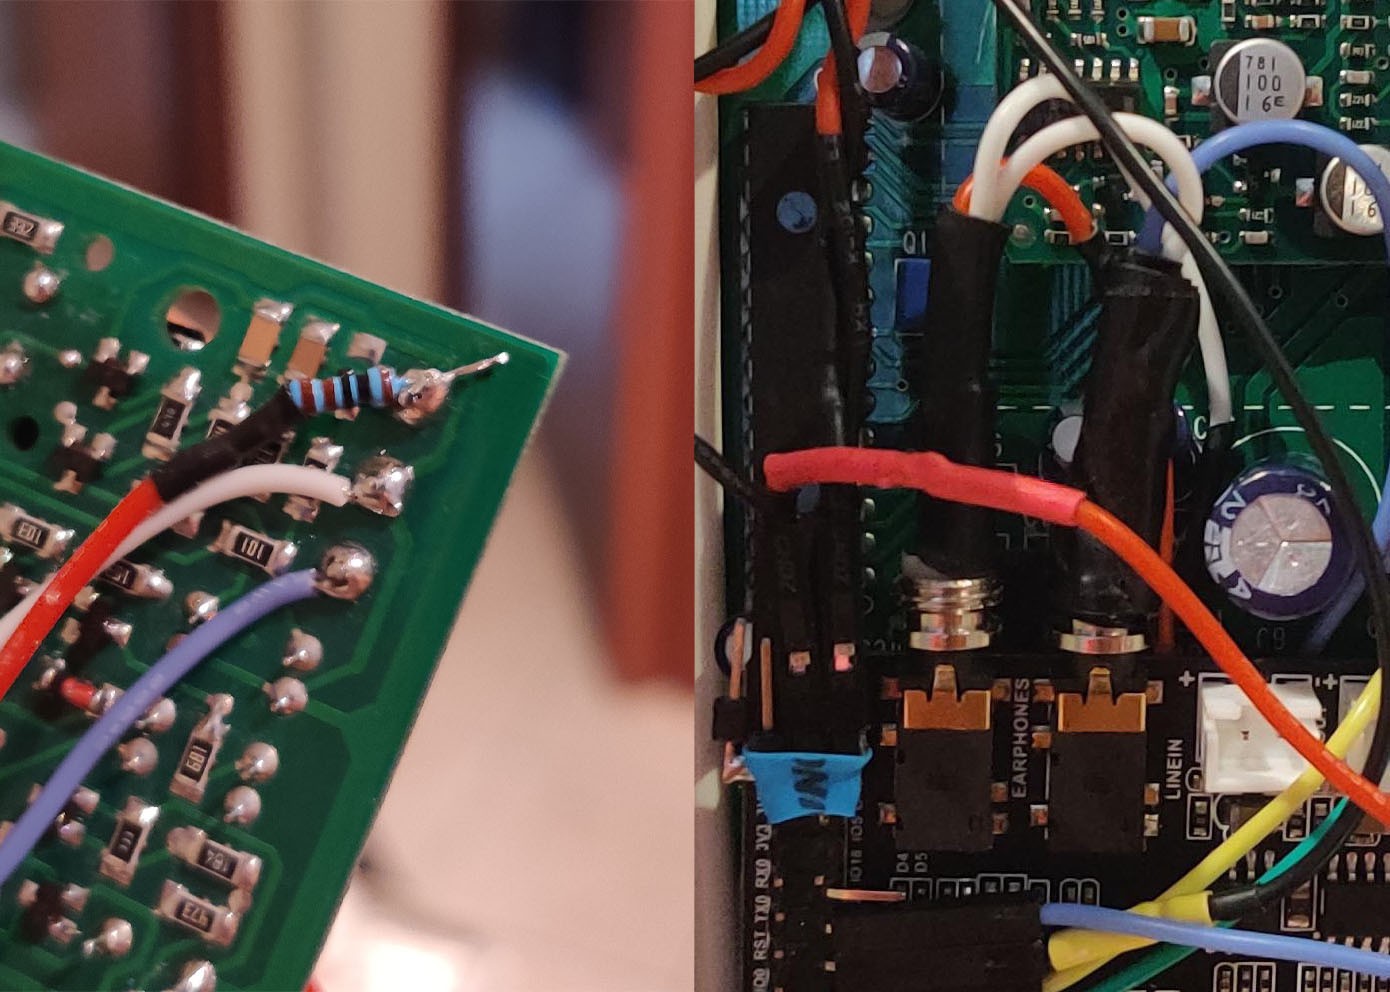
    The idea is very simple, to inject audio into the intercom I should connect the audio board output to the handset input (red wire) and handset speaker (blue wire ) to the audio board input. 

    The audio driver tries to keep the output quiet so it actively drives the microphone signal to ground. This prevented the handset microphone to work properly. To fix that I've used a 1K ohm resistor before connecting the board ouput to intercom handset microphone. (Big thanks to netl for the suggestion!)

    After properly soldering the wires to the two jacks I can now call the board with my phone and hear sound from the outsite!

View all 6 instructions

Enjoy this project?

Share

Discussions

Similar Projects

Does this project spark your interest?

Become a member to follow this project and never miss any updates