Daren Schwenke
-
DeckTails (whoOOOoo)
09/02/2022 at 14:56 • 0 commentsI want to mount some rubber bumpers on the four corners of the deck. They will protect home, dogs, shins, and perhaps even ducks. A little rubber will help a lot.
I don't want them to extend onto the deck. The deck is going to be smooth and flat.
They need to be strong and strongly mounted enough to withstand skidding to a stop on concrete.
This resulted in needing to mount rubber strips that could possibly experienced hundreds of pounds of force, to thin air as that area is the cutout on my AL rail.
Enter... DeckTails (tm).
I have large enough single bit of thin poly carbonate (Lexan) that I can cover the deck with it and have enough on the ends for tails to wrap around the end of the rails. This gives my rubber corner guards a secure mounting spot and perhaps a spring...
Basically, I'm adding tabs on the corners that will wrap around to the bottom.
Time to get that tubeless tire holding air and free of metal filings.
-
Little stuff
08/31/2022 at 18:30 • 0 commentsMade a nice battery mount. Gives my lights some more clearance and a better spot to mount. Heat bent some poly carbonate. This is actually really, really simple. Draw a line on the material, and then heat with a micro-torch right on the line, on both sides, with a little more time spent in the middle. If you start to get bubbles, you are too hot or concentrated. Five minutes later, bend against something hard.
![]()
It is intentionally over sprung a bit to be pulled into tension when the batteries are mounted.
I removed the front crossbeam and replaced it with a smaller one. The headlight was not fitting nicely with the old one as it is mounted at a 15 degree angle and takes up the full height of the deck.I sized the rim on my 6in wide tire. I had a 4in wide before, but I didn't like it. The bead area on the tires is about 1/8th in too small in diameter to fit the hubs straight away. Careful grinding with a sanding disc on the angle grinder brought it to the right size. This grinding was pure art honestly. The rubber turned in to rubber cement as it was ground and so this was a sticky blind cutting mess that came out beautifully.
![]()
I extended the wiring for the tail-lights, made some kind of mount for them, and add the ground effect LED lights, reflector, and diffusion material.
![]()
Preliminary tests prompted me to move the lights higher up into the body to give the lights some more depth for better diffusion. Internal reflection isn't nearly as nice as my mylar light sabre tubes.
I actually have some proper sheets of diffusion material from disassembly of back-lit LCD panels. We will see if they show up before final assembly.
I decided to not add another layer to the top. It was going to be 3 layers at some spots. Now the only place that is happening is the rear lip. This means my top cover can be a single sheet, which means if I have the exact profile for the tire I can do a perfect cutout. This could eliminate the need for a fender.
I have not done final assembly on the tire/hubs/o-ring combo.
I got some iron filings up in the motor somehow. Given I glued the hubs together, I will need to get creative to remove them. This is after wiping the entire thing down with adhesive tape to ensure no stray filings were floating around, and then covering the opening with tape. There must have been some filings inside the tire when I assembled it last. Argh.
I think the pressure washer probably has enough oomph to knock the filings free of the magnets. I will need to be careful to not cut into my hub though with the high pressure, and they will likely just re-attach to the other side until I get lucky enough times.
-
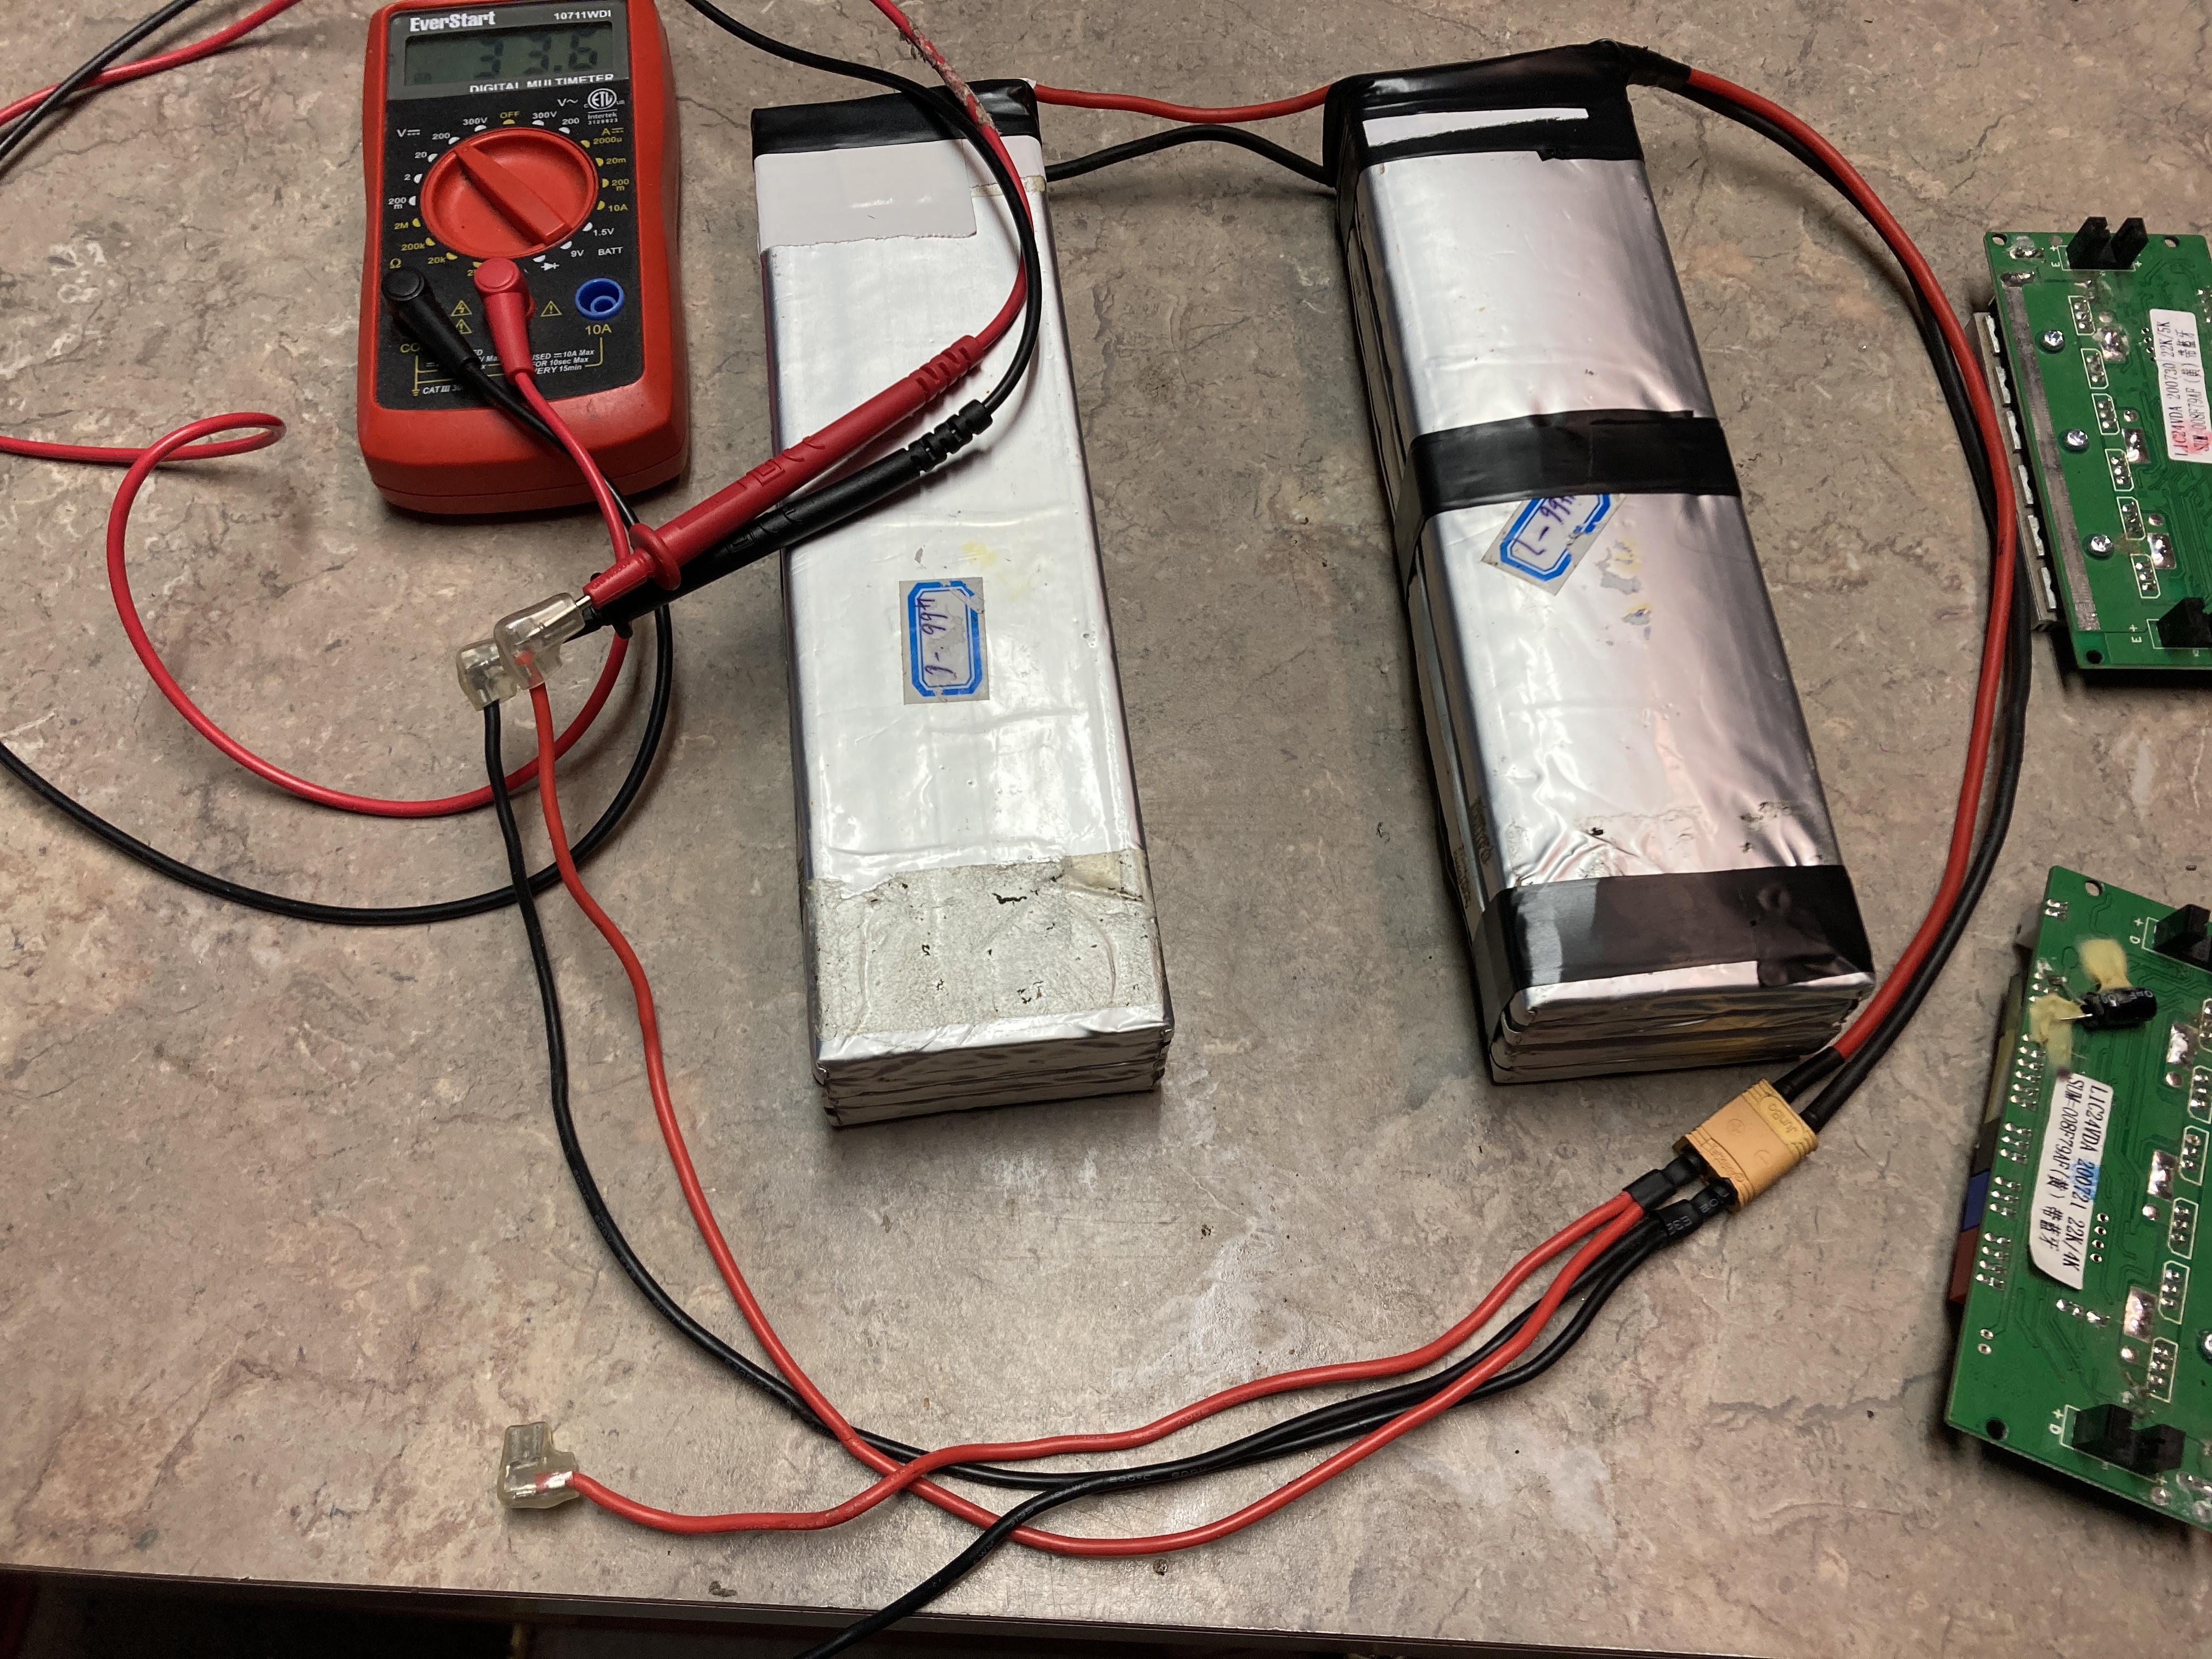
Battery, Terminated
08/28/2022 at 18:19 • 0 commentsFinished the wiring for the battery and it is fully charged.
![]() Incidentally I have an RF excited CO2 laser that runs on 30 V in the garage.
Incidentally I have an RF excited CO2 laser that runs on 30 V in the garage.Perhaps an upgrade!
As long as I don’t give it leaning for steering I think we should stay out of Terminator realm.
Or a gyroscope.. I wonder how much turning I could get out of spinning a steel pipe on a brushless motor.. I need to get open CV running again
-
Deck
08/28/2022 at 16:58 • 0 commentsI plan on putting plywood on the top deck, but the front area needs to sense the presence of the rider.
The existing way this was done was to pivot the deck and use compression of some rubber bits to detect the rider. The rubber bits have the advantage that they pop through to an extent, so the force required to keep them engaged is less than the force required to engage them. That is kind of nice..
![]()
However, this open area directly under the rider's front foot gave me an idea
I think I'm going to try using cap-sense through the deck.
![]()
This drops the plywood altogether in lieu of two layers of poly carbonate, or one layer of AL and a layer of poly carbonate. For the area with two layers, I will embed some copper foil. With some luck this will still give me a signal when you step on it with your booted foot.
Doing that.
Did that.
![]() A couple more panels and this part will be done.
A couple more panels and this part will be done.![]()
-
Making the most of the moment
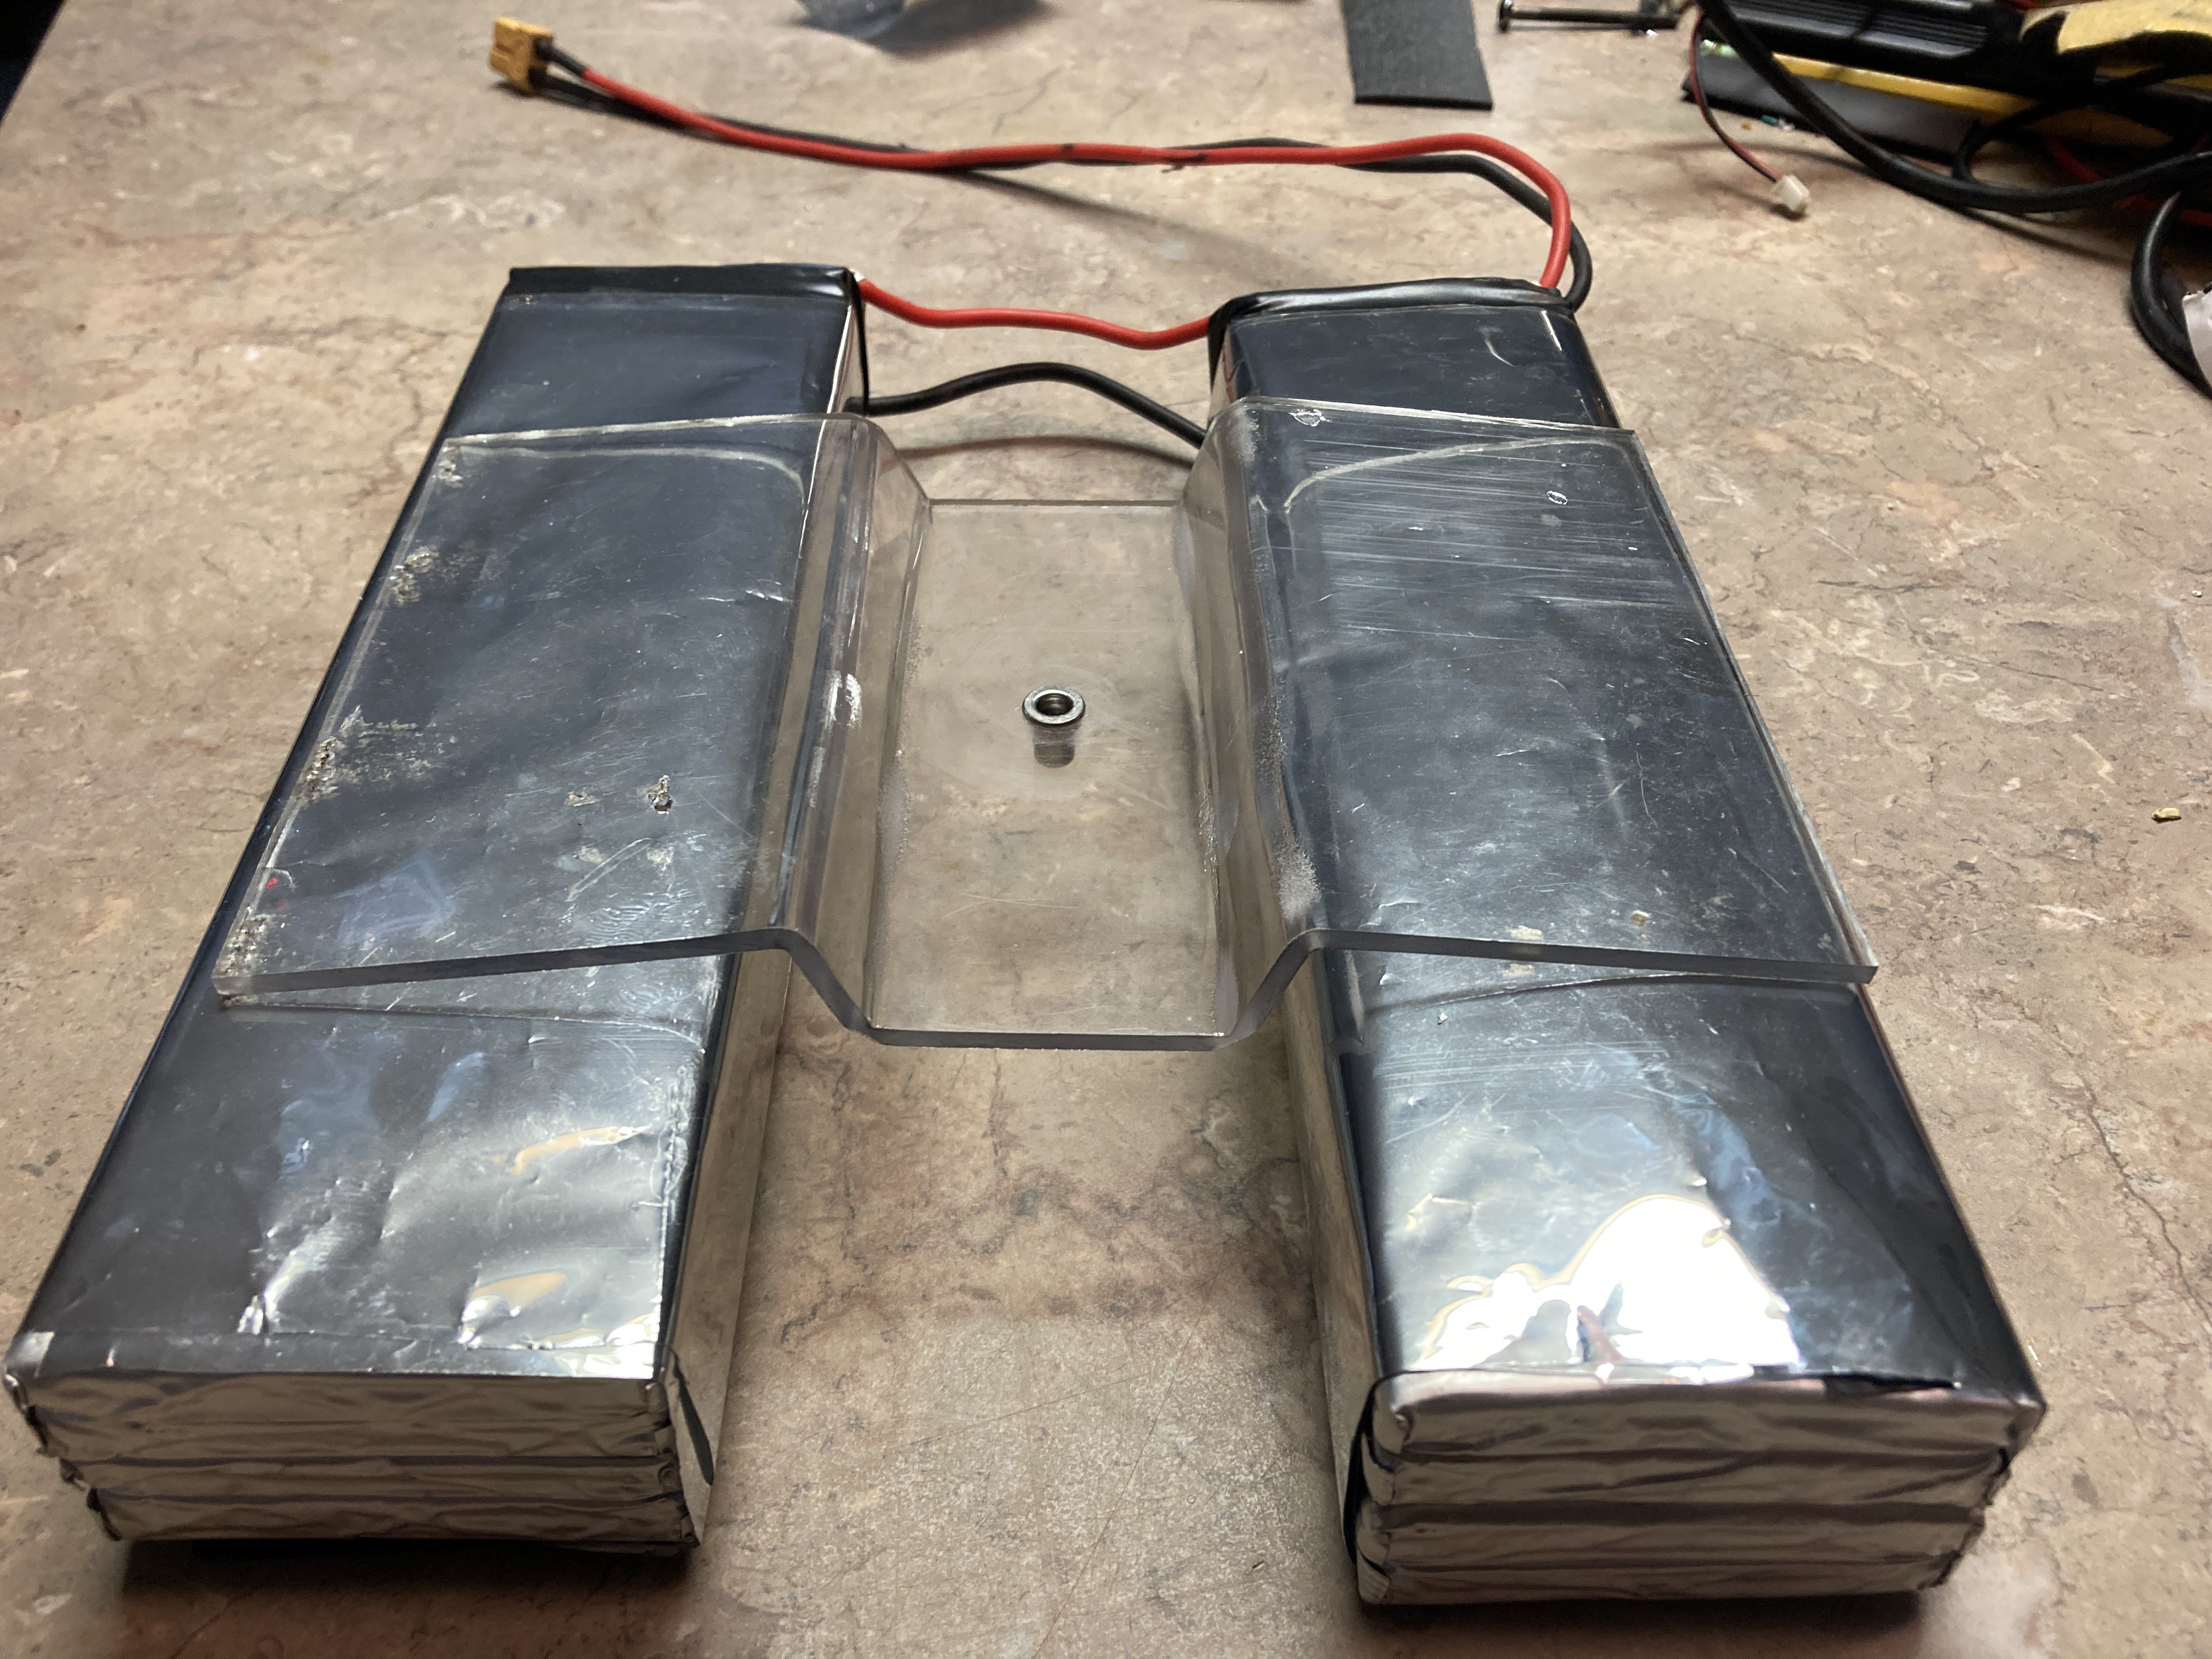
08/28/2022 at 13:41 • 0 commentsI was having a geek moment deciding how to mount the batteries. I moved the AL plate for the back to the top.
It was a little too long for the bottom or to be cut without dragging out my table saw, and so I started to invent other reasons to move it.. like then entire bottom could then be a lighted panel.
![]()
I decided to place the batteries as far apart as possible.
![]()
(this shot was actually stupidly dangerous as I had not taped the terminals and just balanced them there for the shot)
The reasoning is that for the same mass, spreading them apart will maximize the moment of inertia of the platform along the long axis of the board.
The figure skater in the triple axle now has Hellboy hands.
This should enhance stability.
-
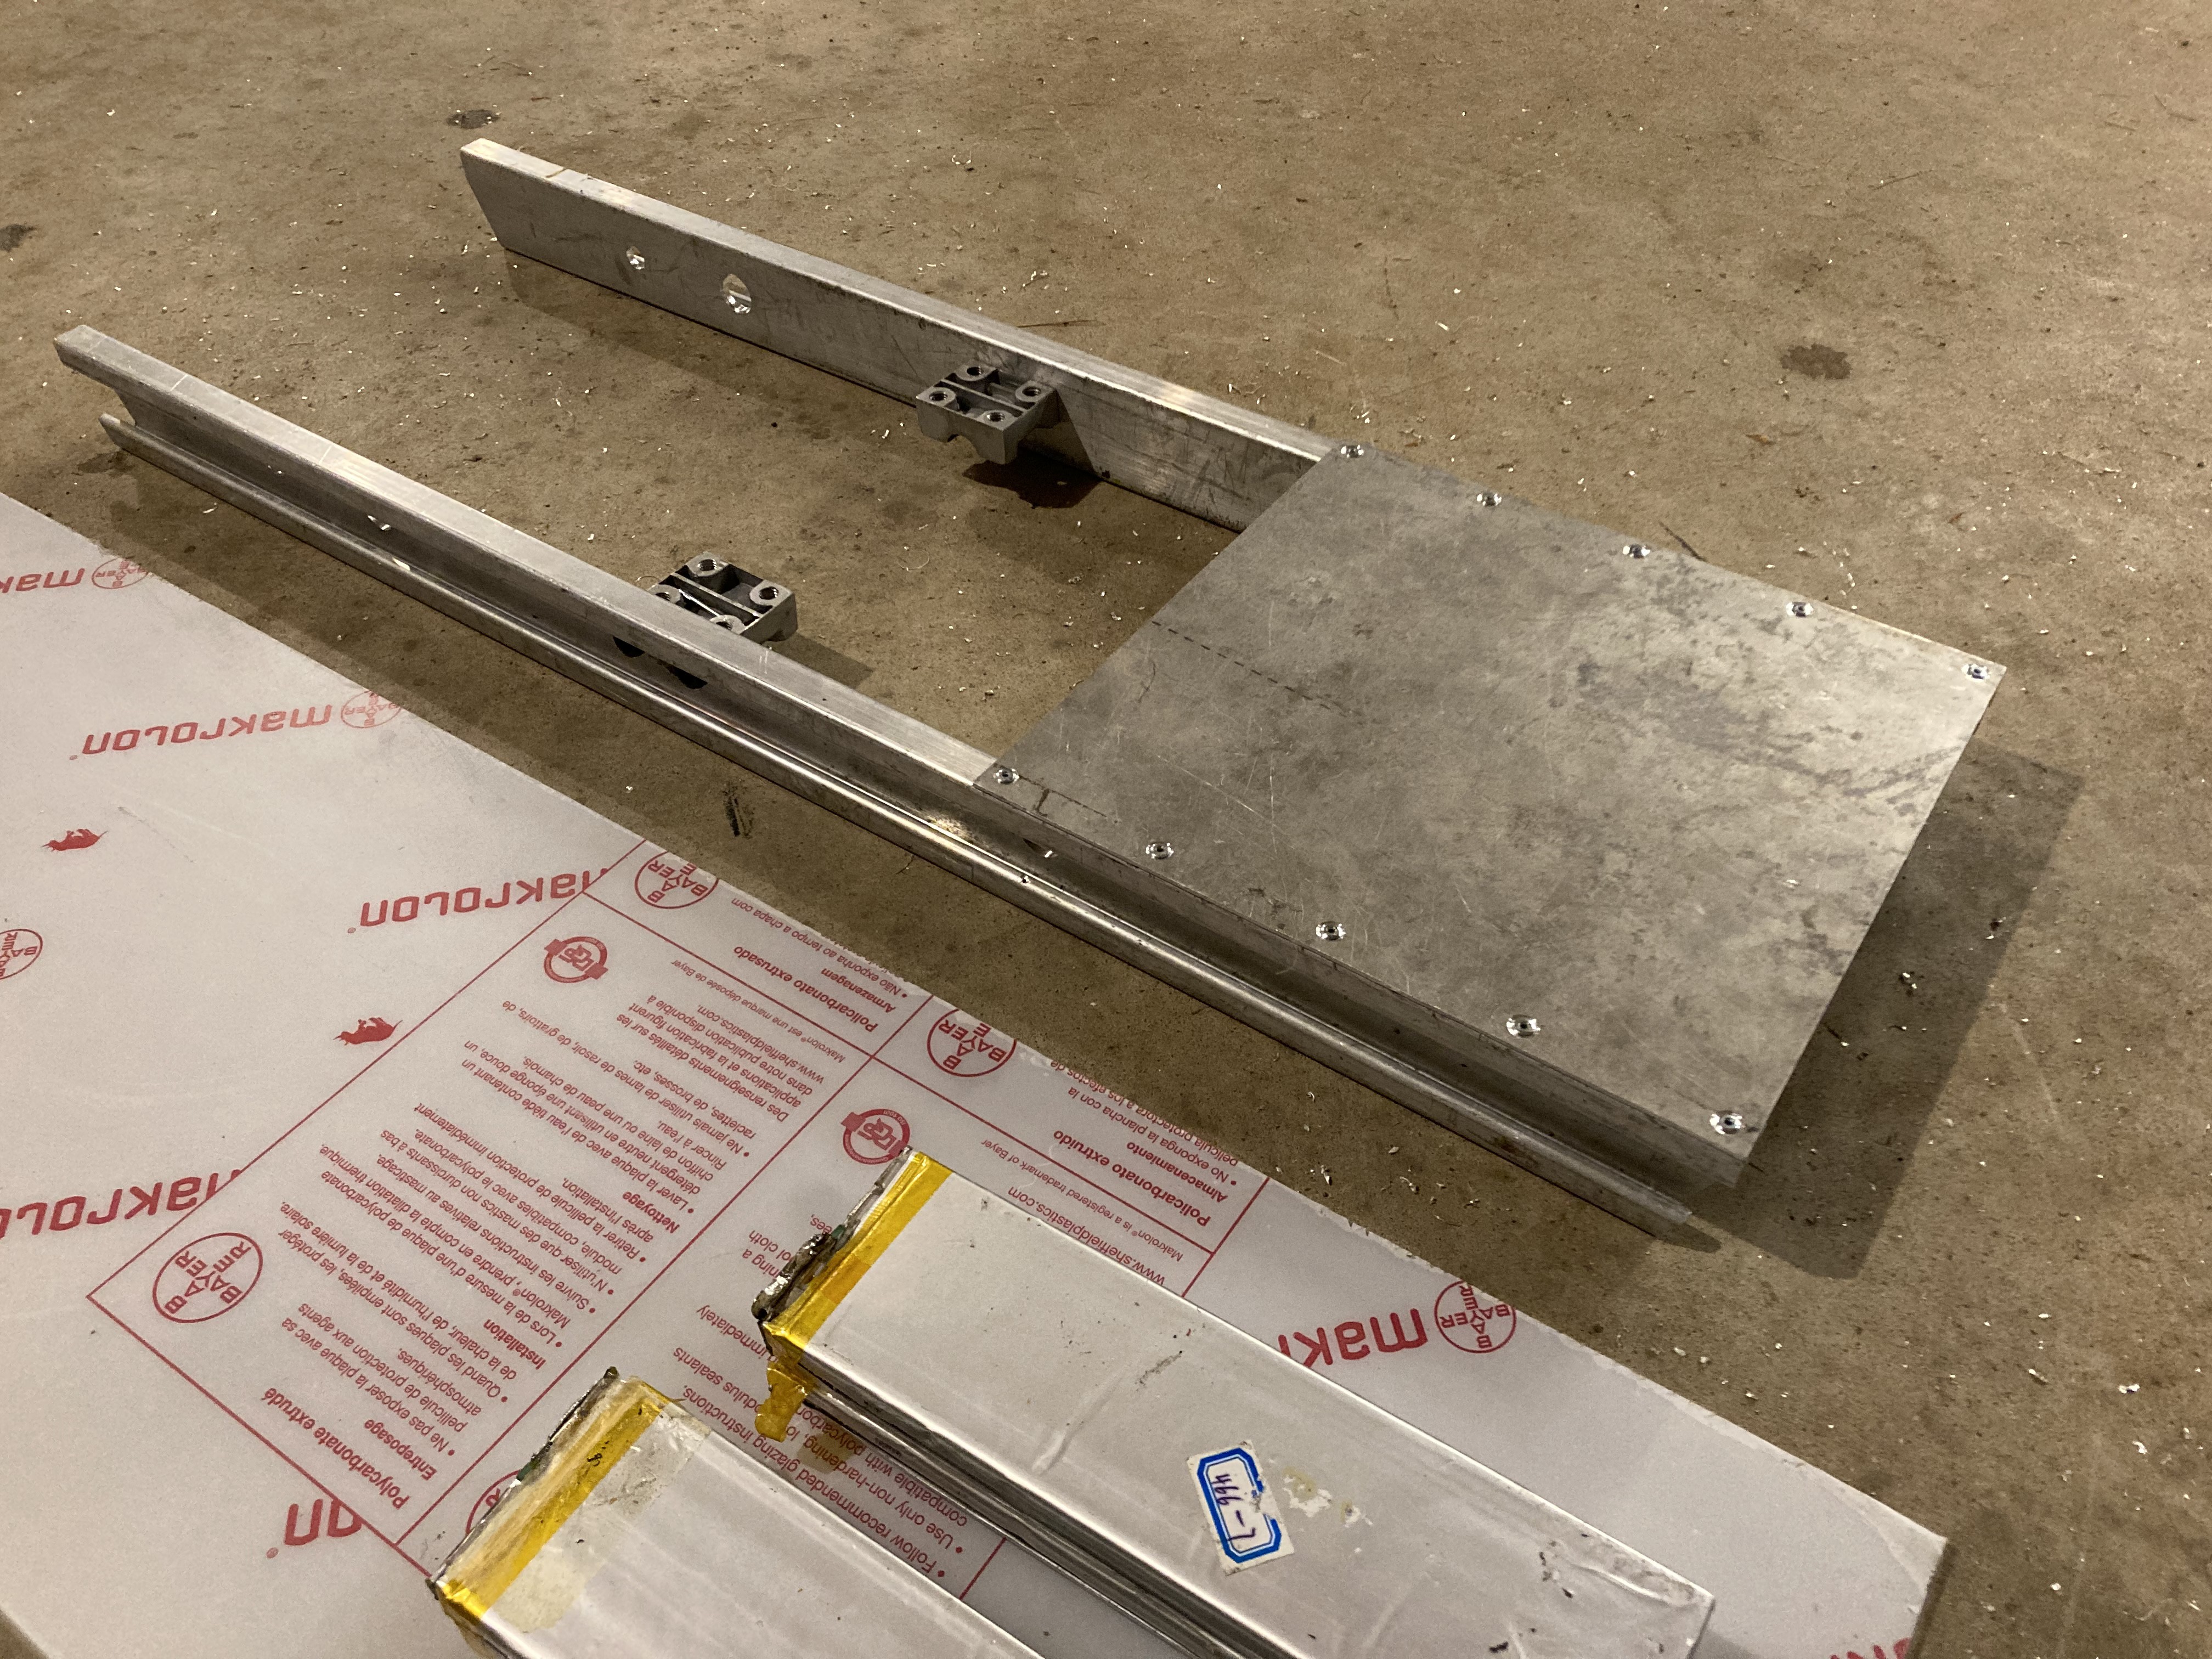
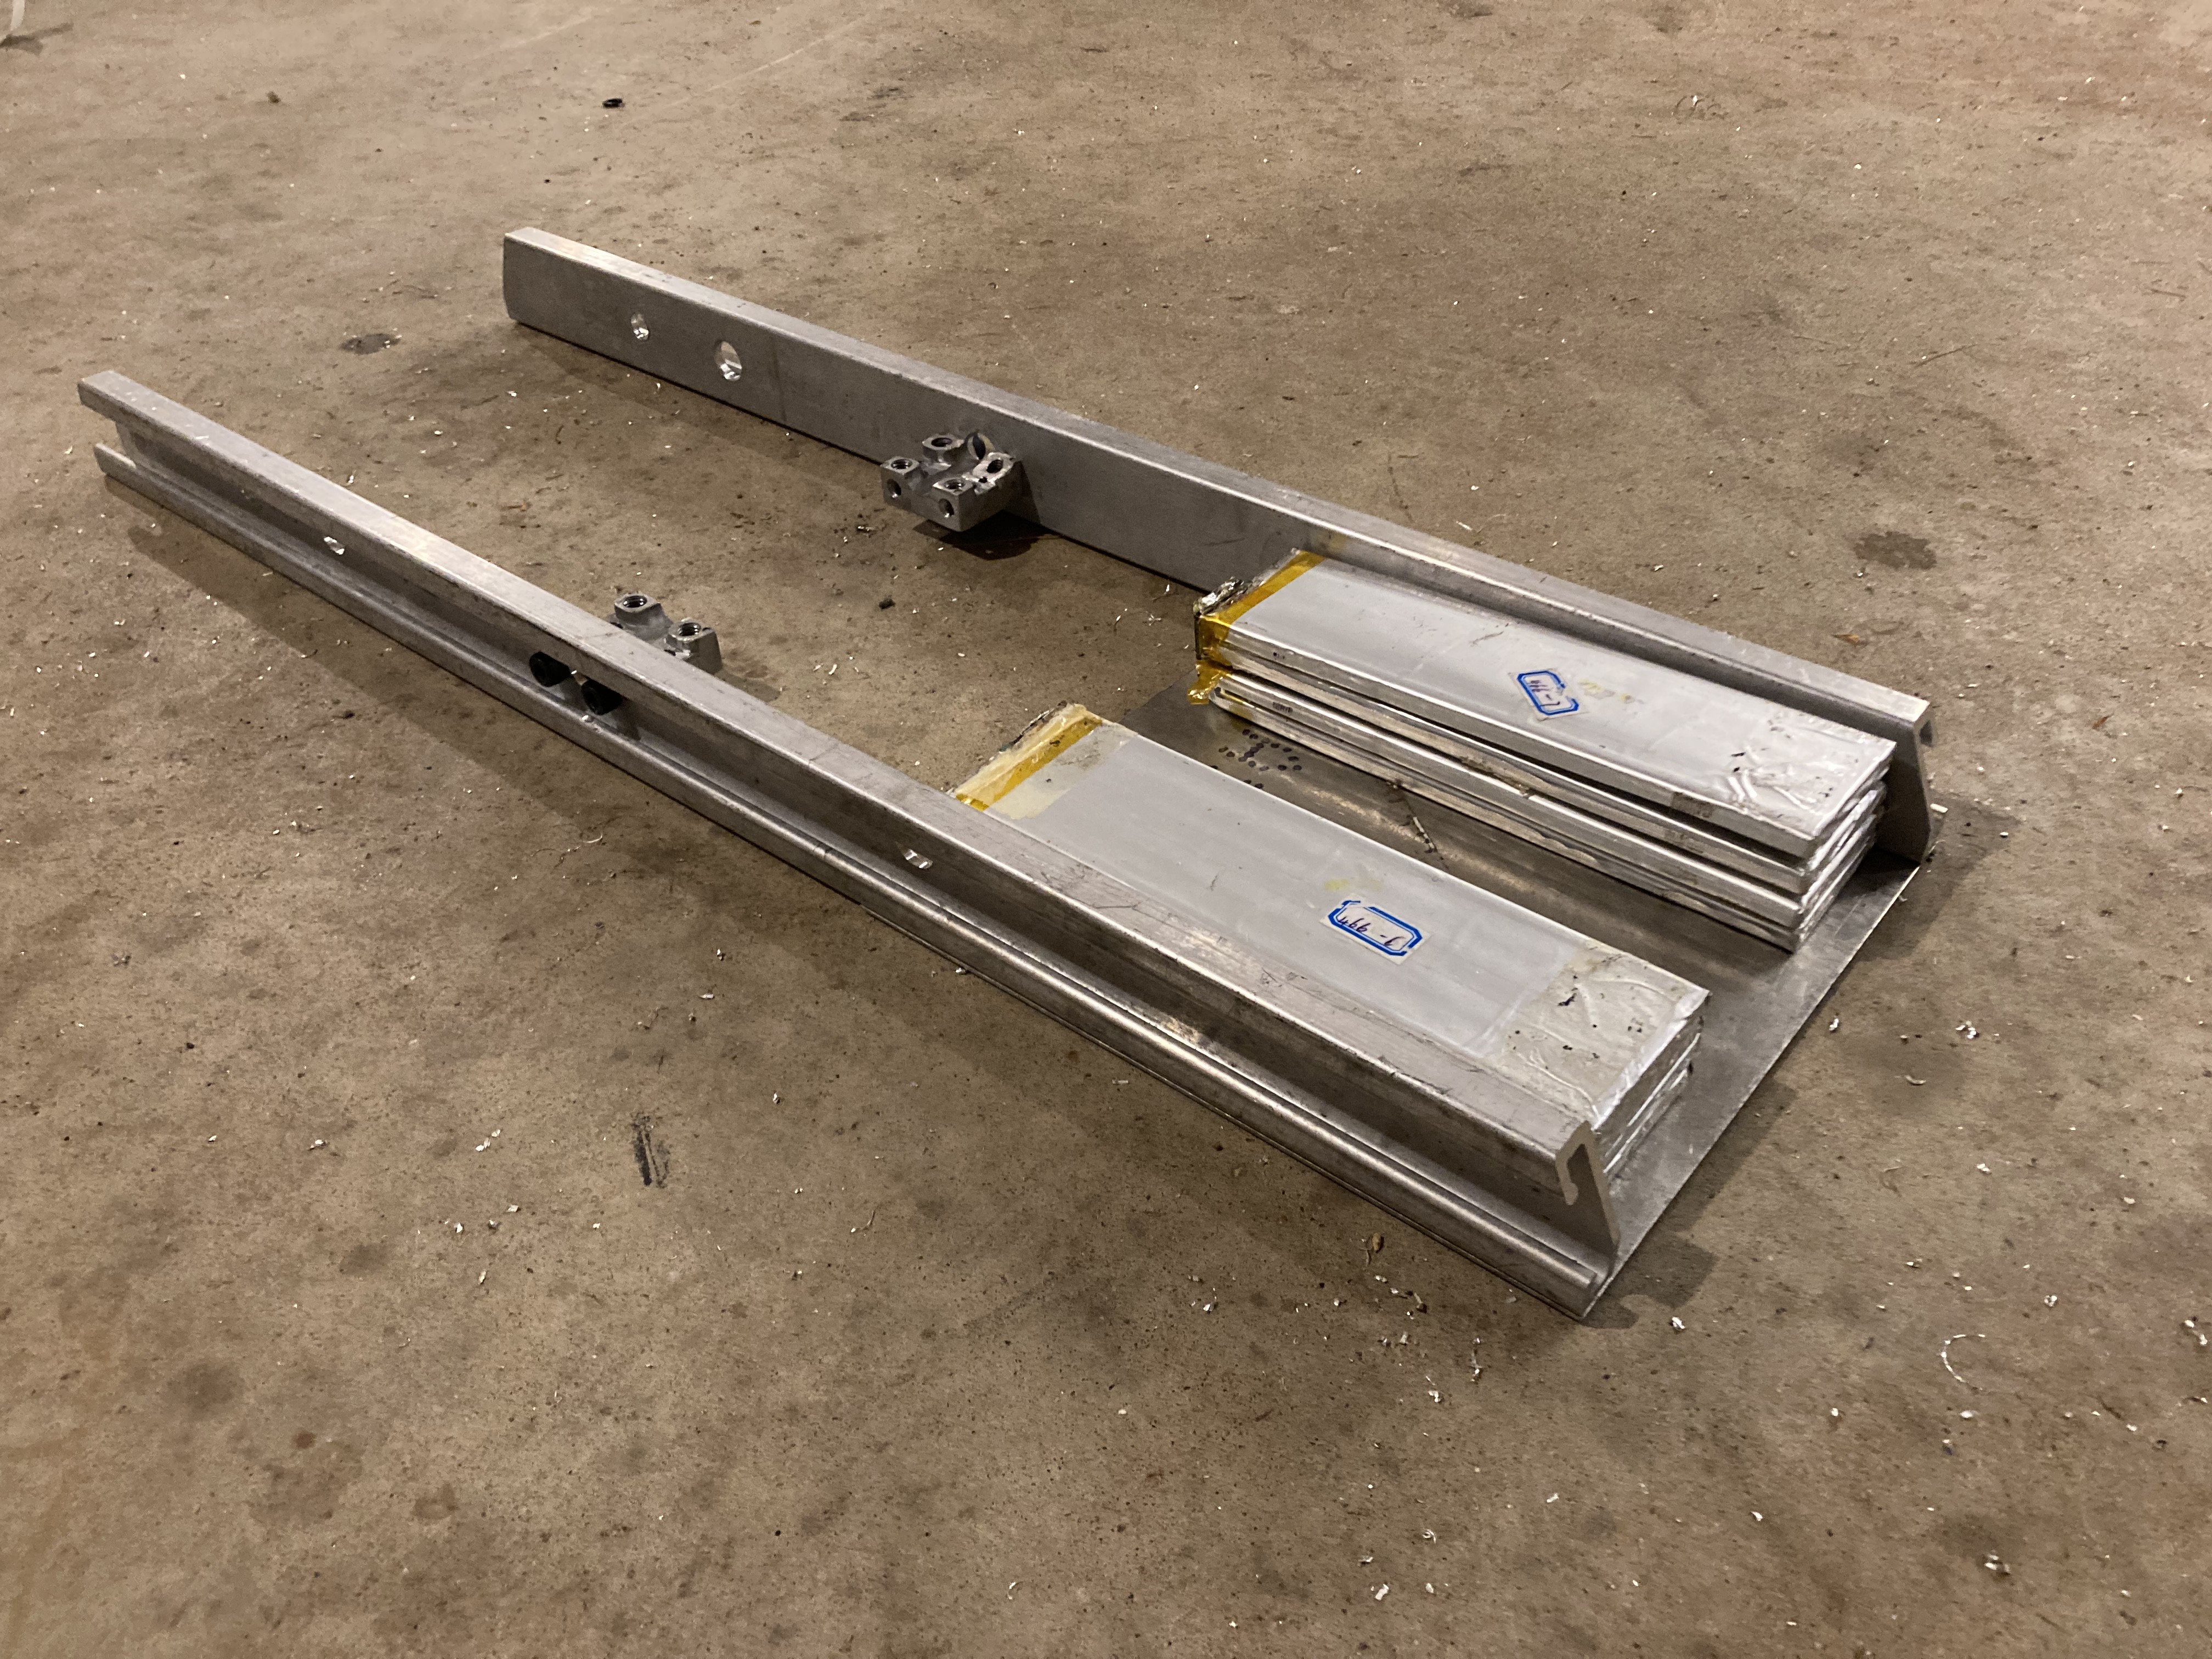
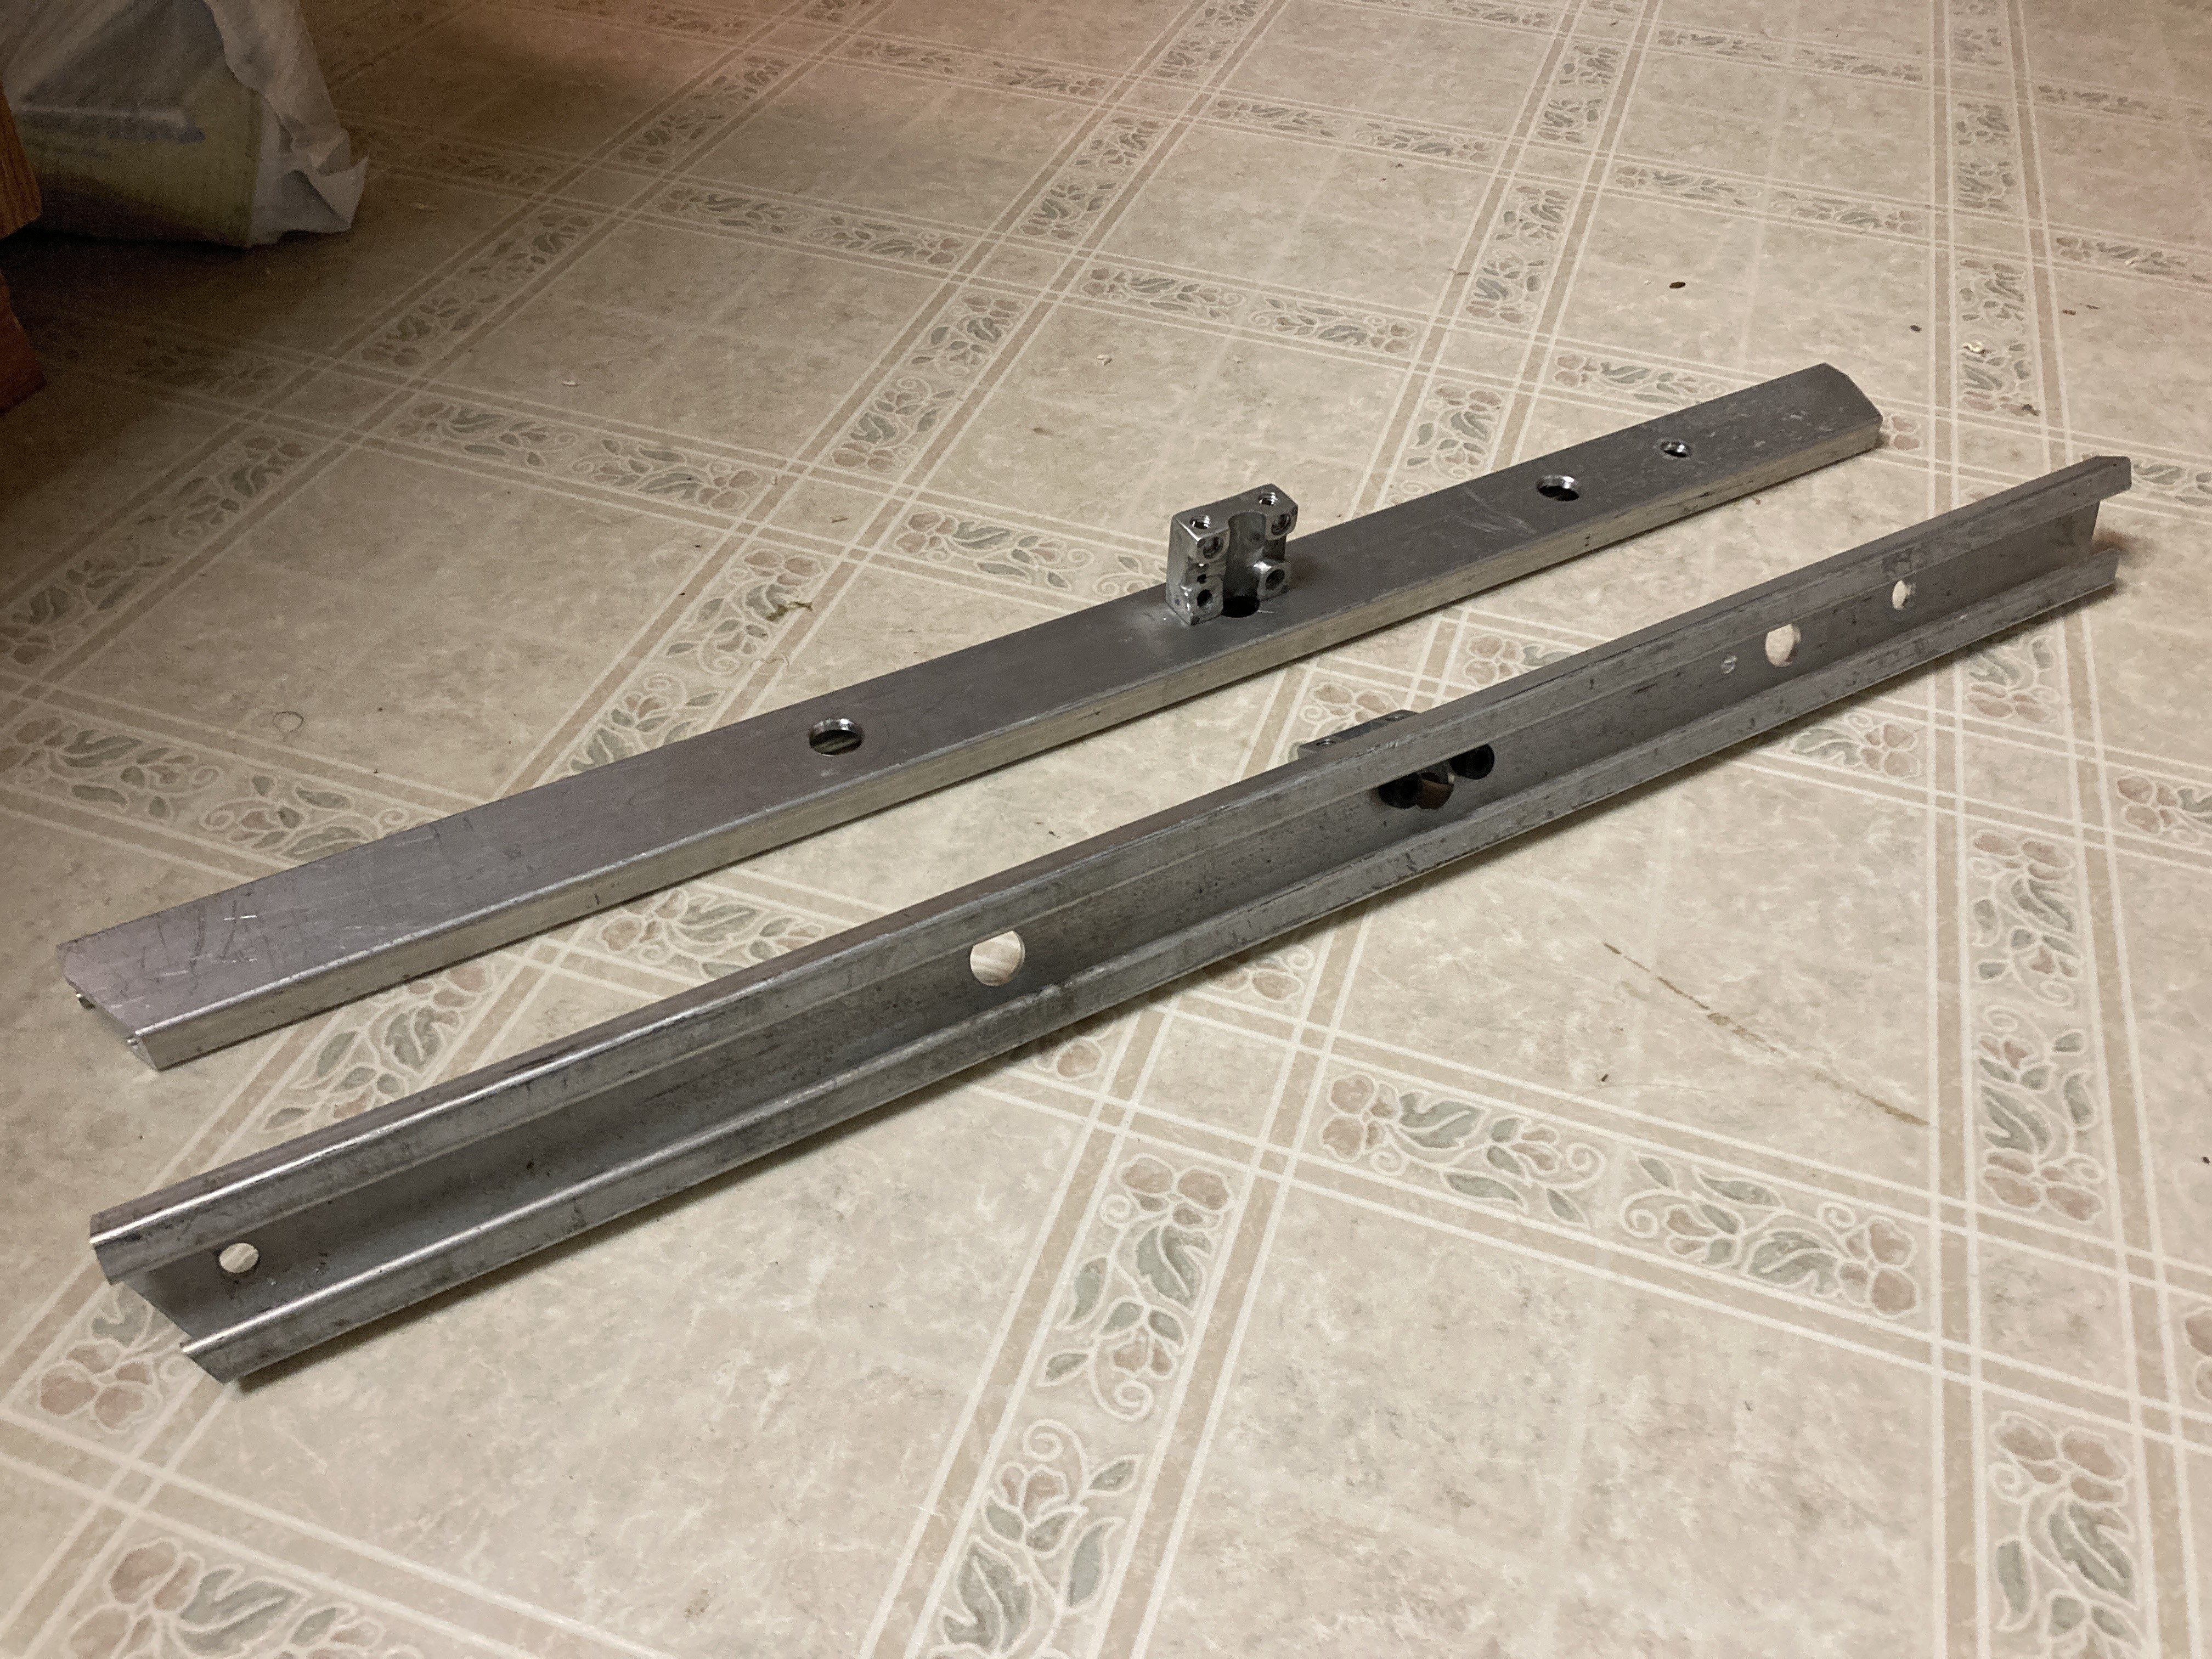
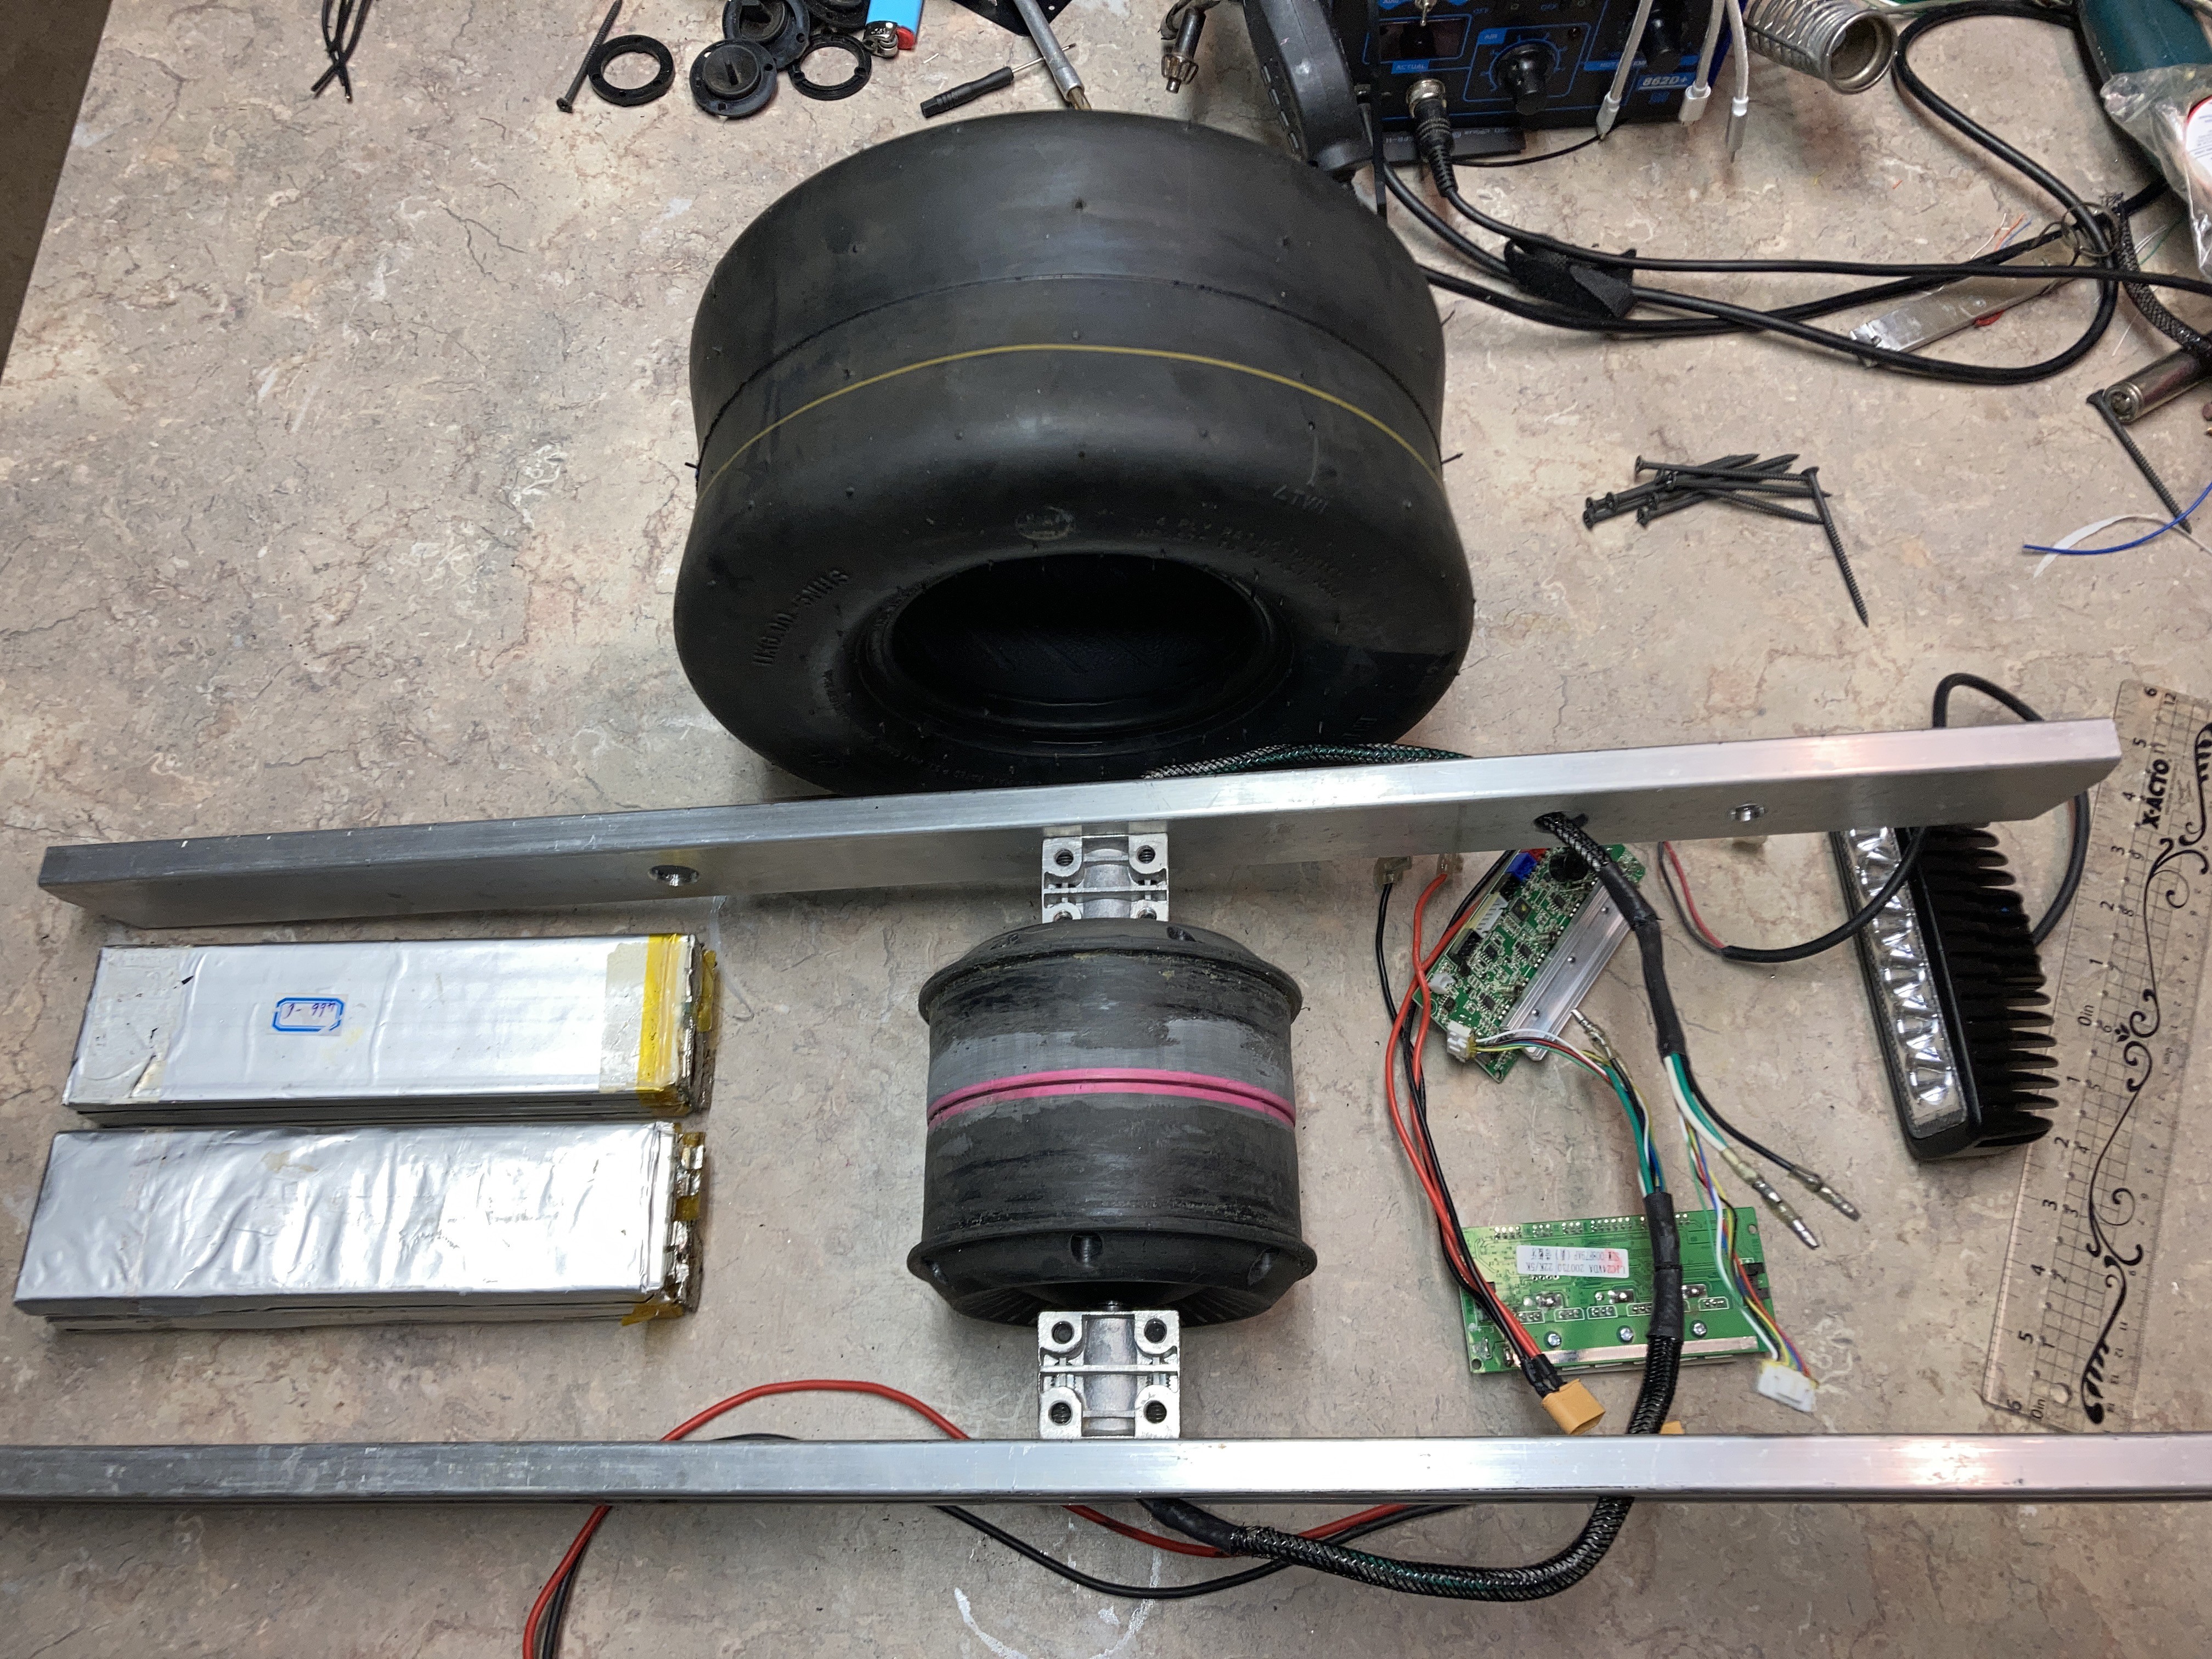
Rails
08/28/2022 at 01:31 • 0 commentsThe side rails.
![]()
This is the AL stock I had of the appropriate dimensions. I believe this is from some garage wall mount system.
It is conveniently strong in all the right directions and has a channel for wiring if I play my cards right.
I started to model some covers to slide into the sides. Should bring the project together nicely. I may need to populate that space with an LED strip..
![]()
I will probably integrate end-caps for the rails so they don't stab people before I go further with this. The rail corners were looking rather sharp, this may be ridden around people, and the rear is going to need some sort of consumable bumps for grinding to a stop after lifting your foot from the front.
I like the idea of them pressing into end of the rail.
More work required.
This is more or less how it’s going together. The tire being 6 inches further down though.
![]()
I’ll be mounting an aluminum plate to protect the rear/battery area and then wrapping the rest of this in poly carbonate.
I went with an asymmetric layout with the front being shorter for the frame than the rear as the rear need to be 9in long to house the battery
The front only needs to house the electronics and headlight. I think I may cut a handle in the top/front deck..
The outer dimensions ended up being 29x9in.
-
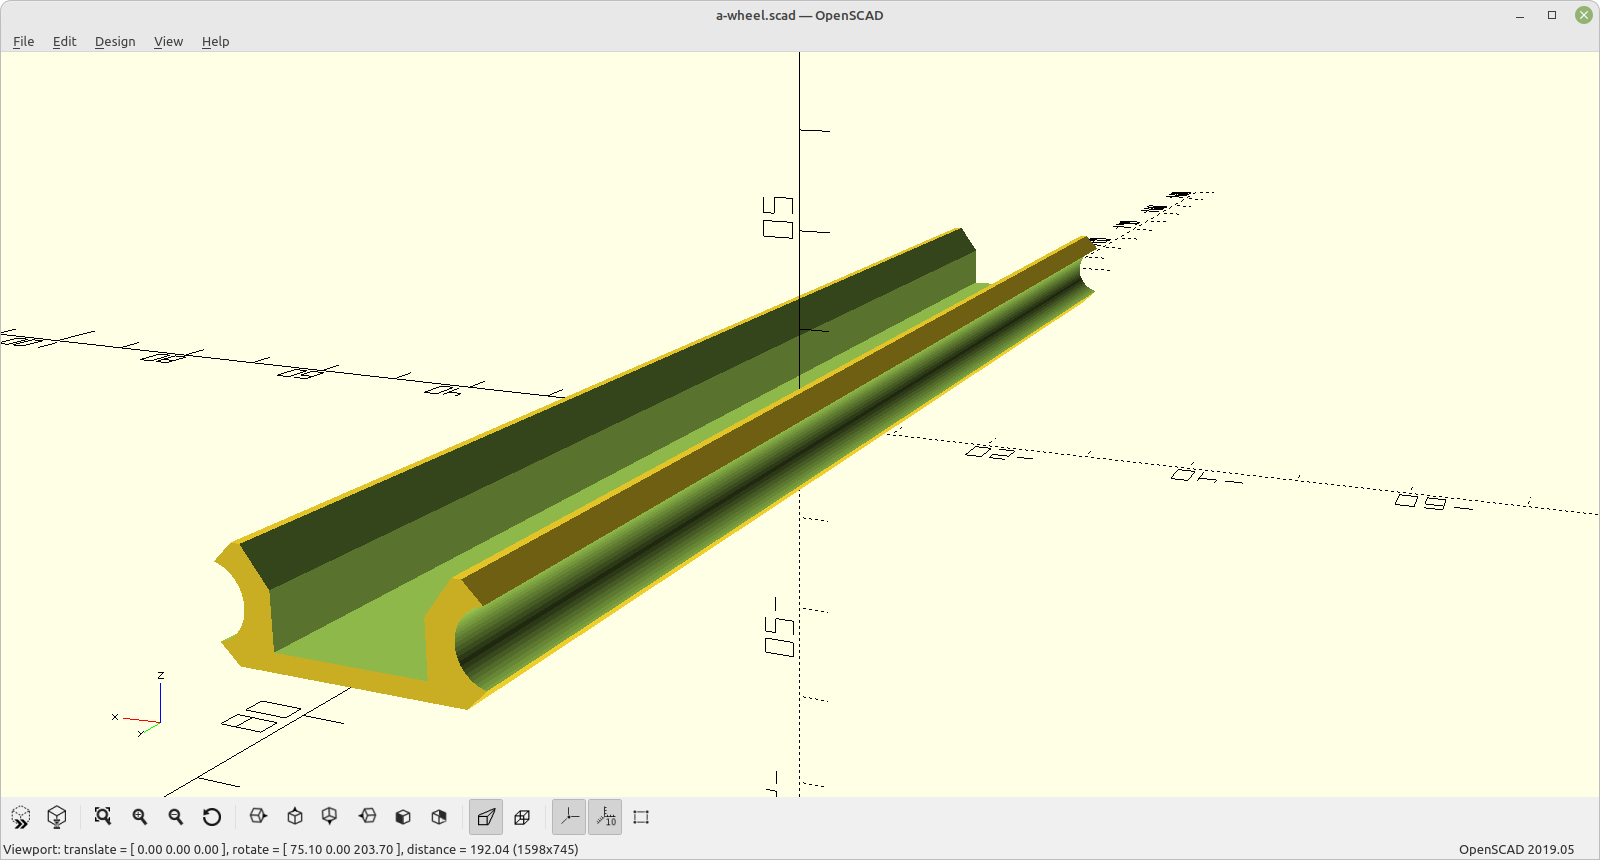
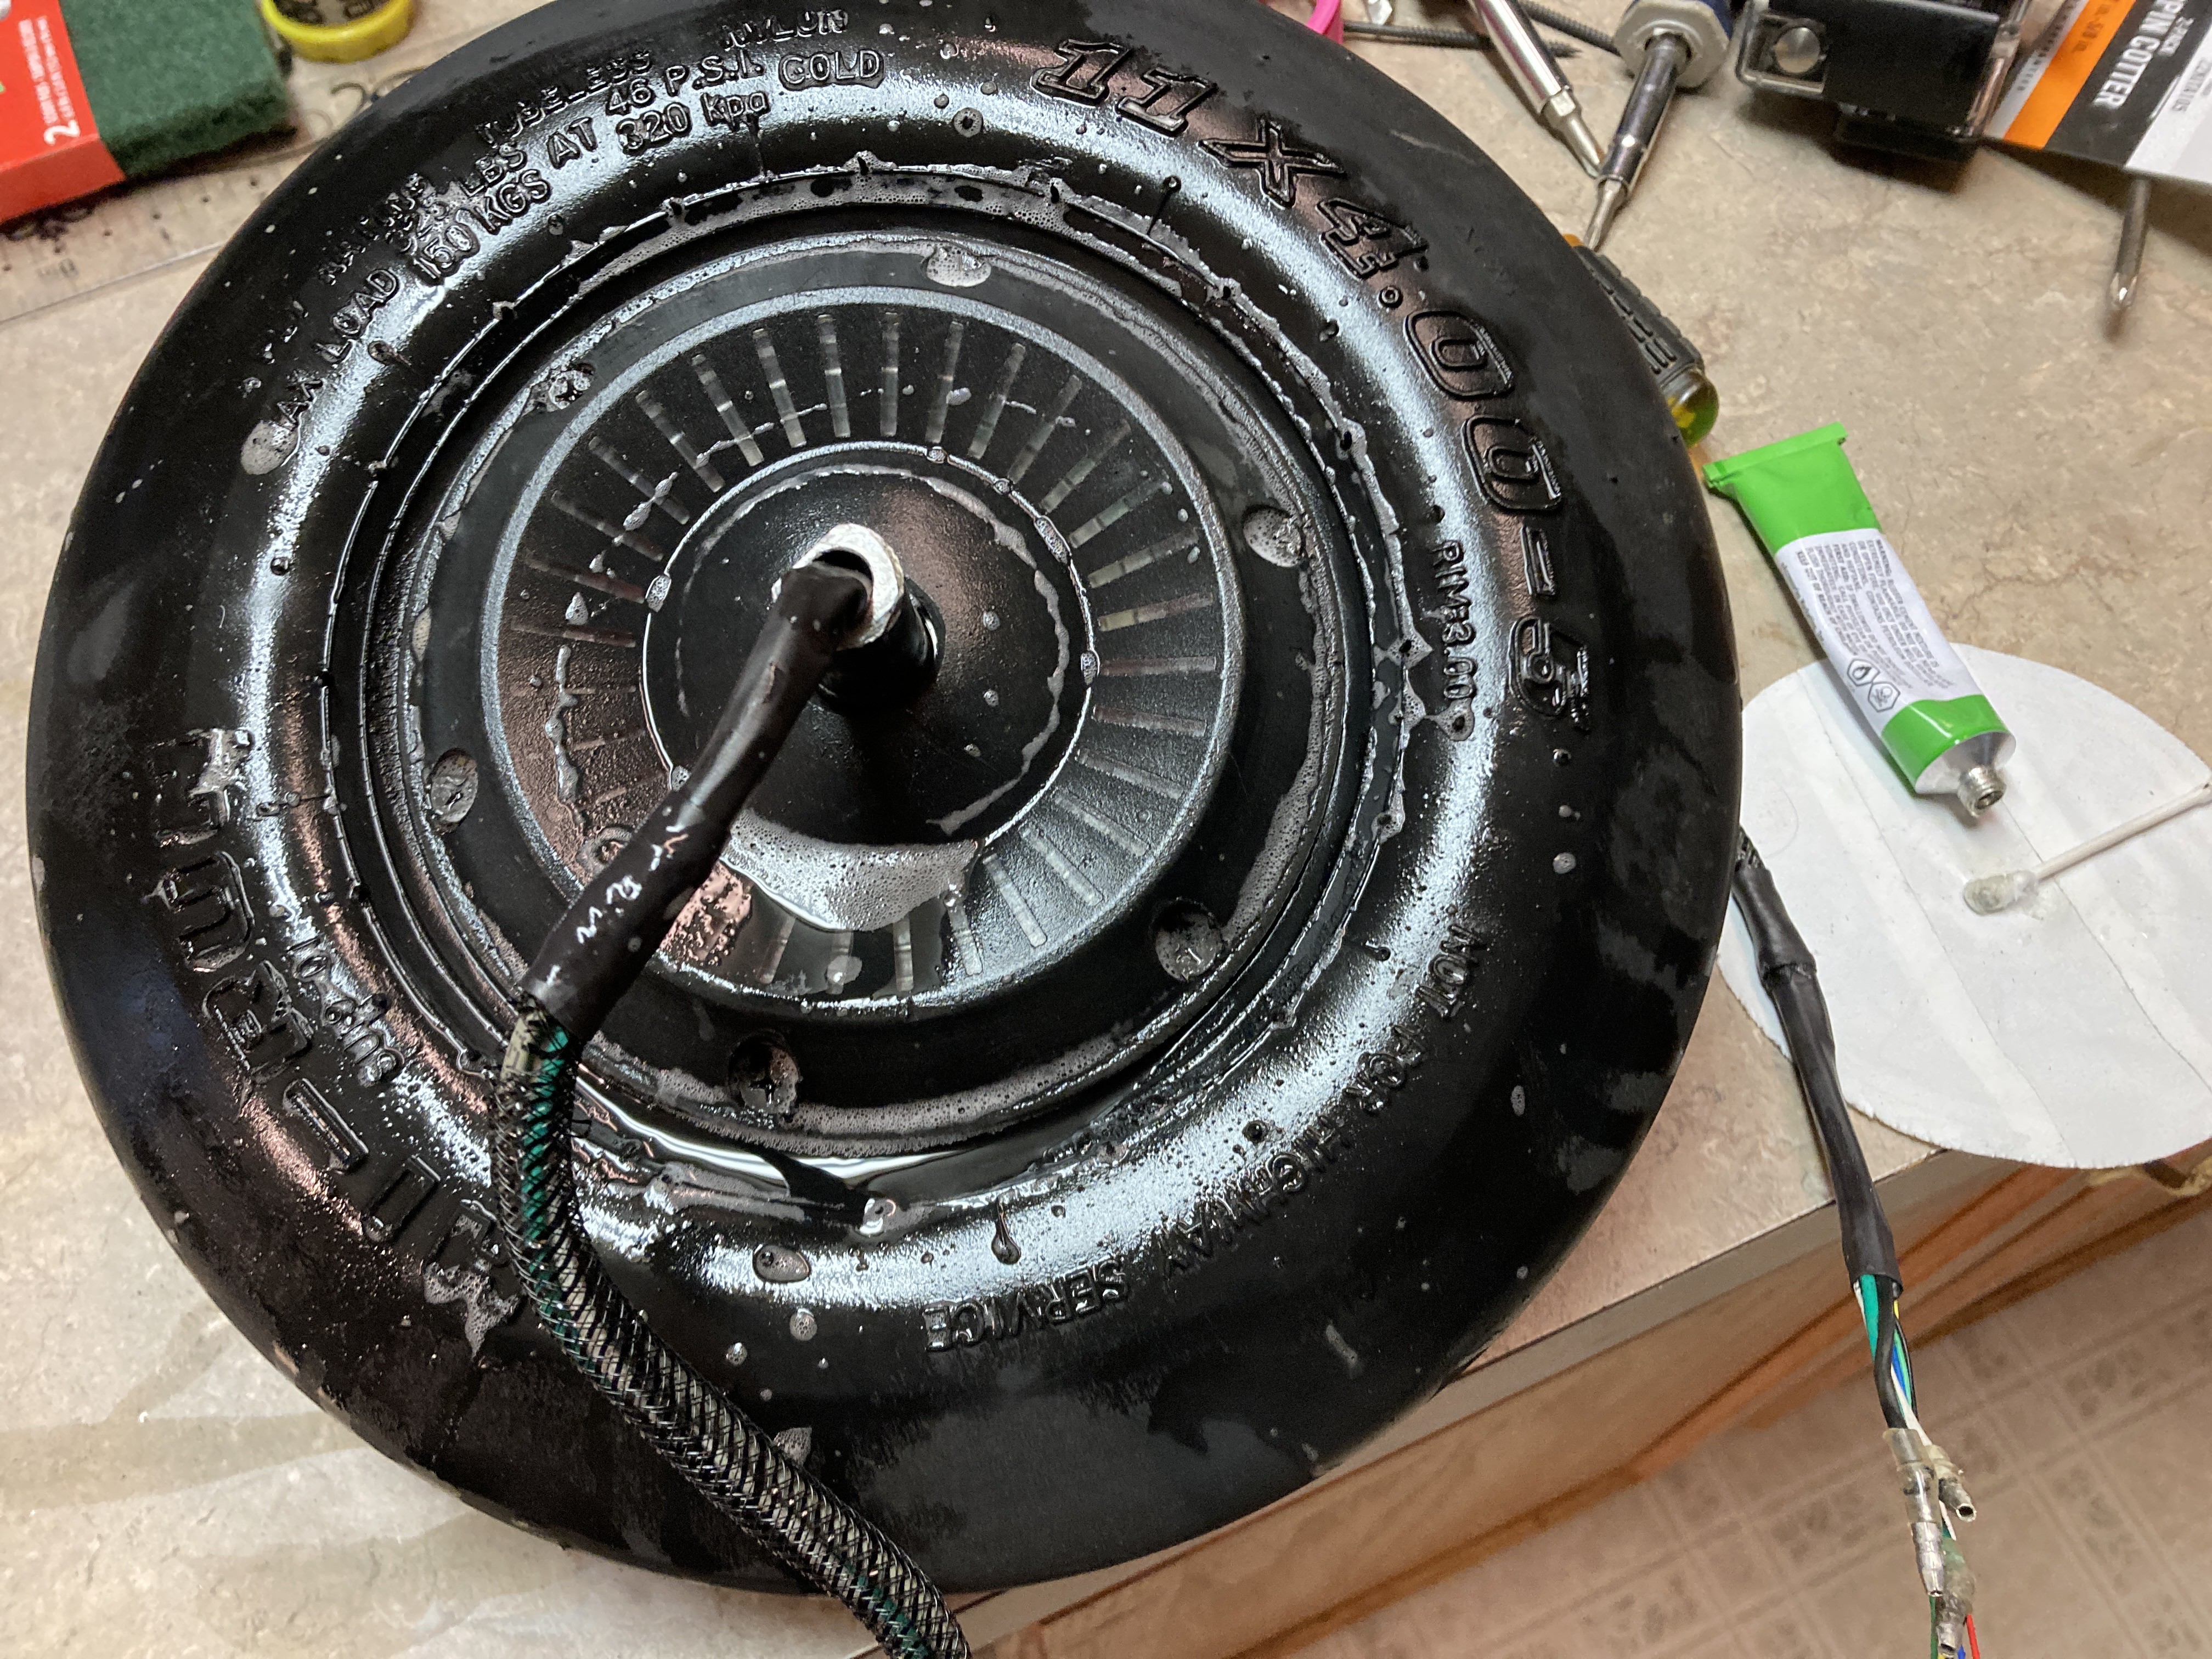
The wheel, almost.
08/27/2022 at 16:00 • 0 commentsThe sweet sweet sign of no bubbles, on the rim or screws at least.
![]()
Correction. It leaks through the shaft area, which at this point leaves my o-ring to be at fault.
I'm increasing the thickness of the o-ring by 20% and trying again.
![]()
I also set the complexity of the circle used to rotate_extrude that o-ring to 10 sides. Will be easier to clean up and gives the tape something to grab onto.
-
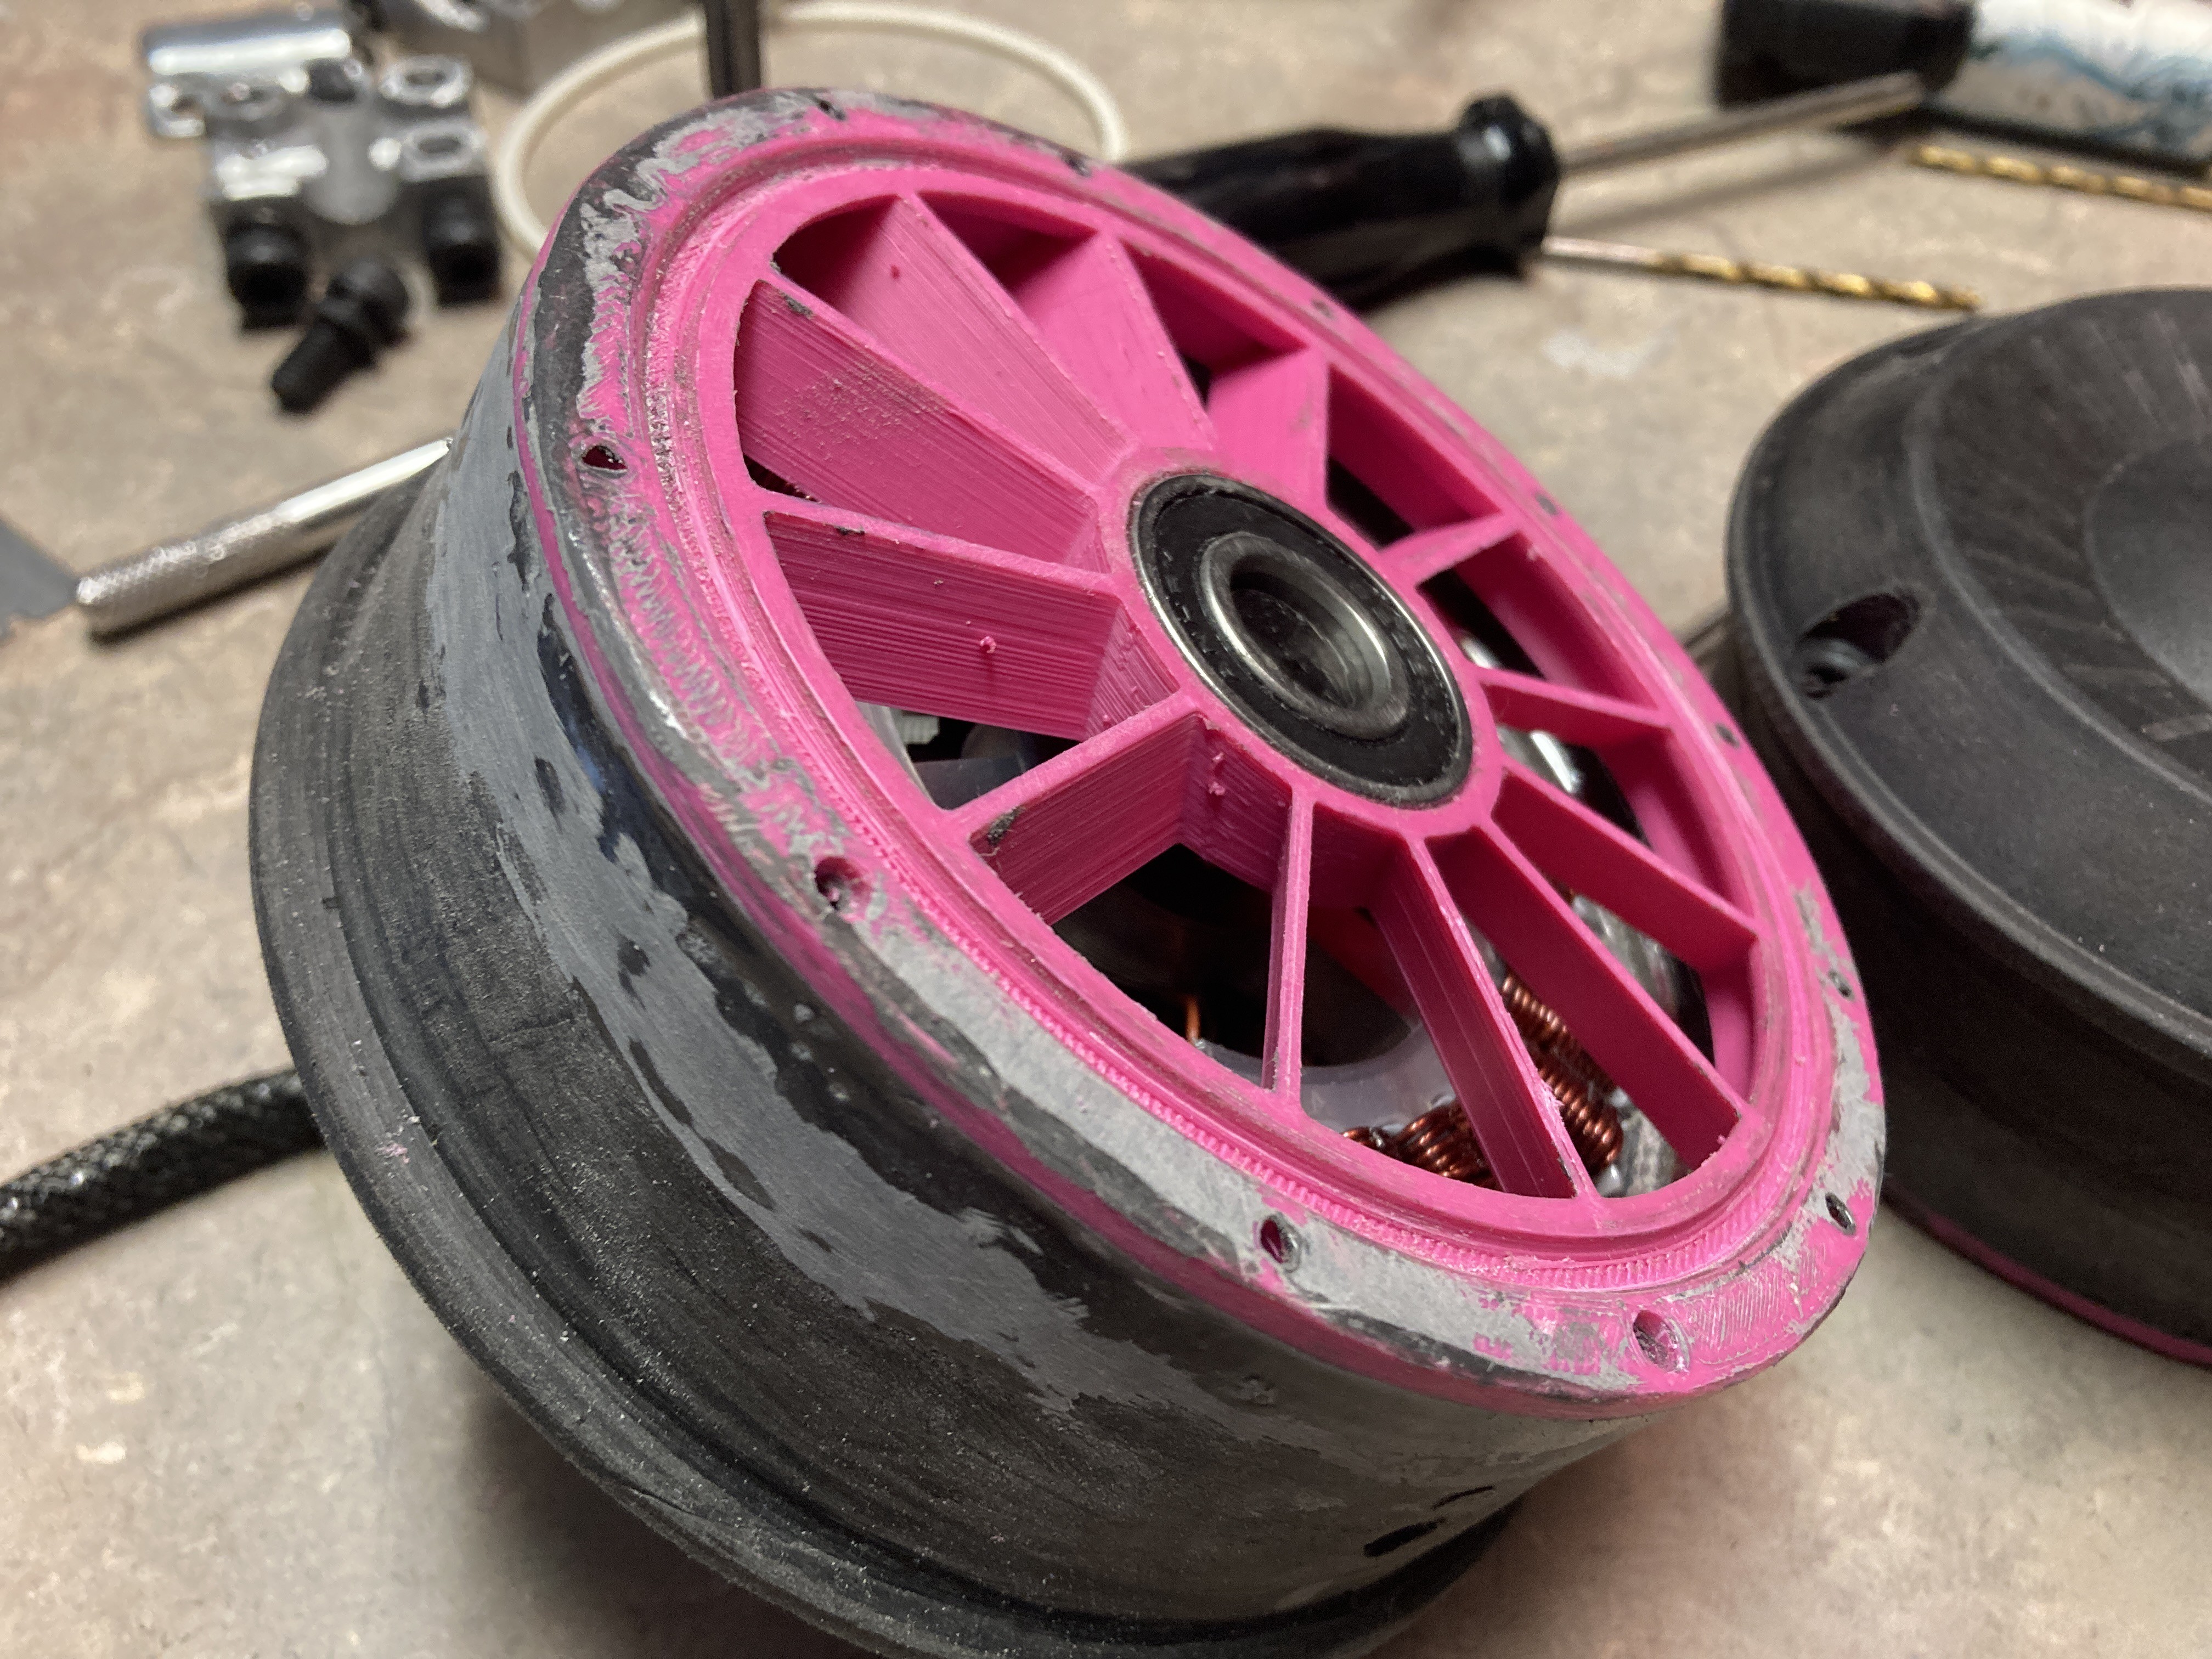
Sealing the hubs
08/25/2022 at 16:02 • 0 commentsI decided to go with the gobs of epoxy route of sealing the hub to my printed parts.
![]()
I also smoothed out the mating surfaces with extra epoxy, filed it back down, and then re-drilled all the holes to ensure that my screws don't crack the relatively thin printed rim.
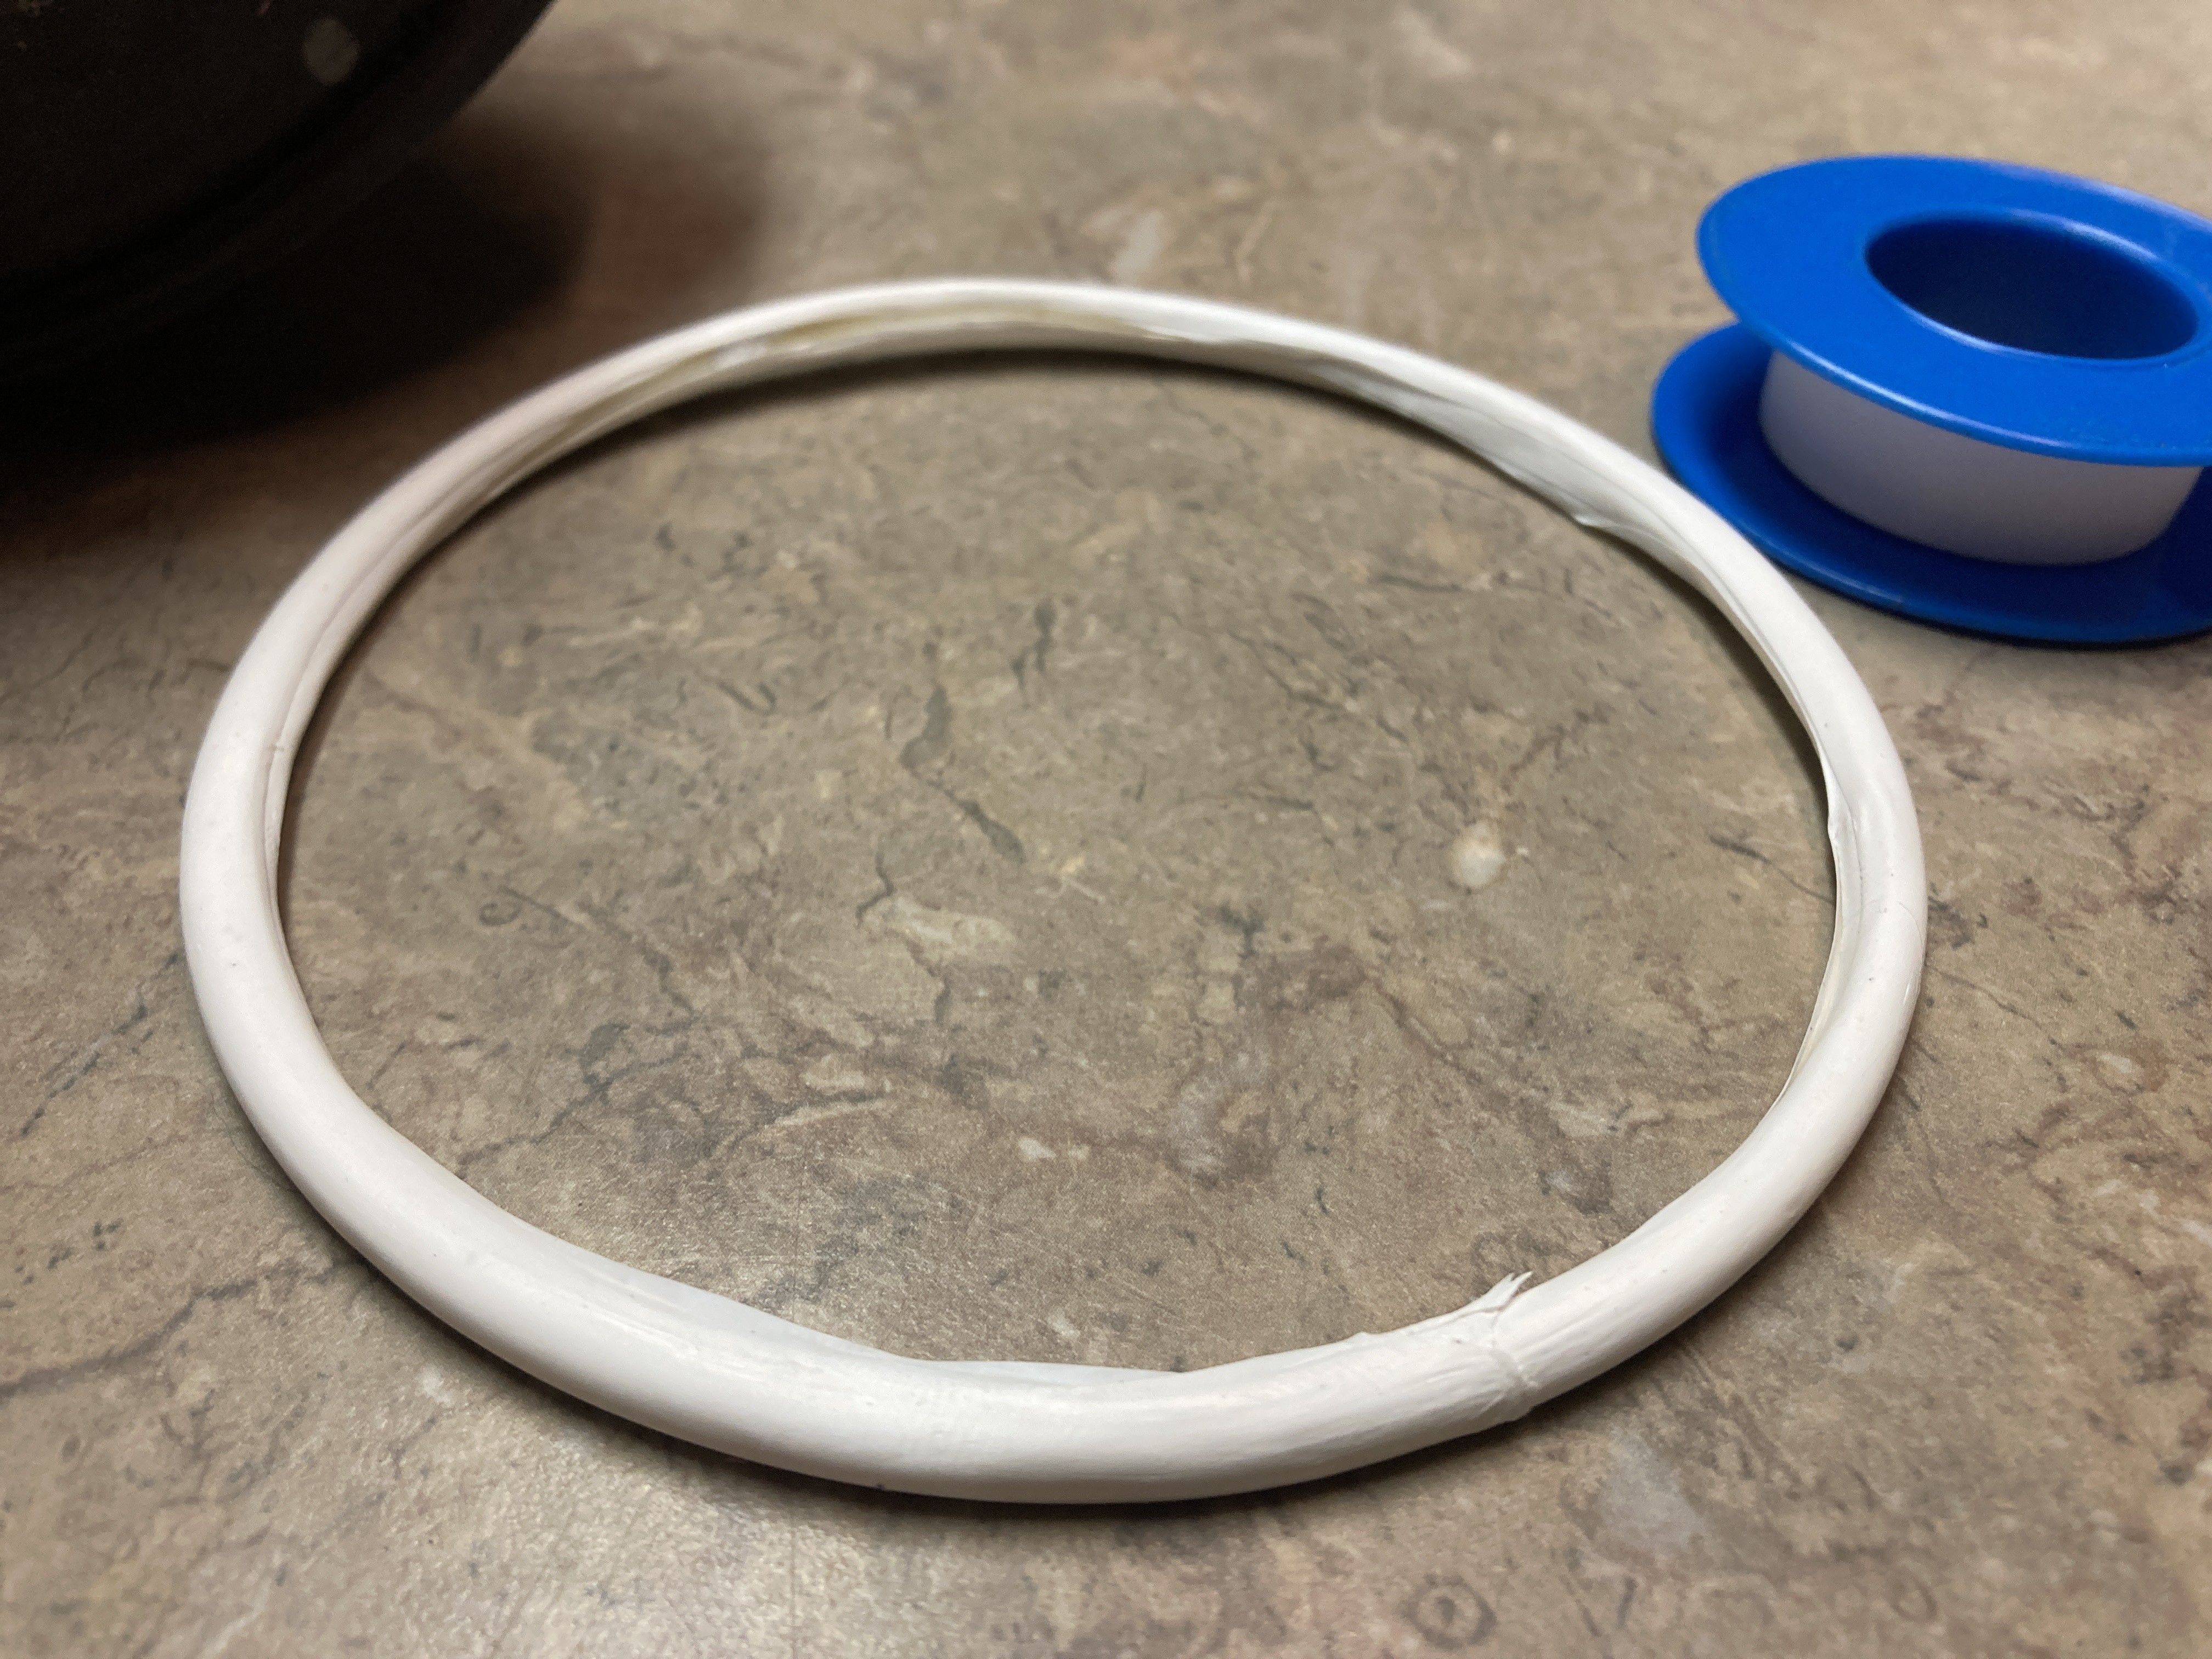
I printed a slightly thicker o-ring, sanded it, and wrapped it around the circumference in Teflon tape.
![]()
This keeps the tape in the proper orientation to seal around the ring and in the grooves. The tape is strong in the long direction, but weak across the tape. Across the width the tape can deform to fill voids.
-
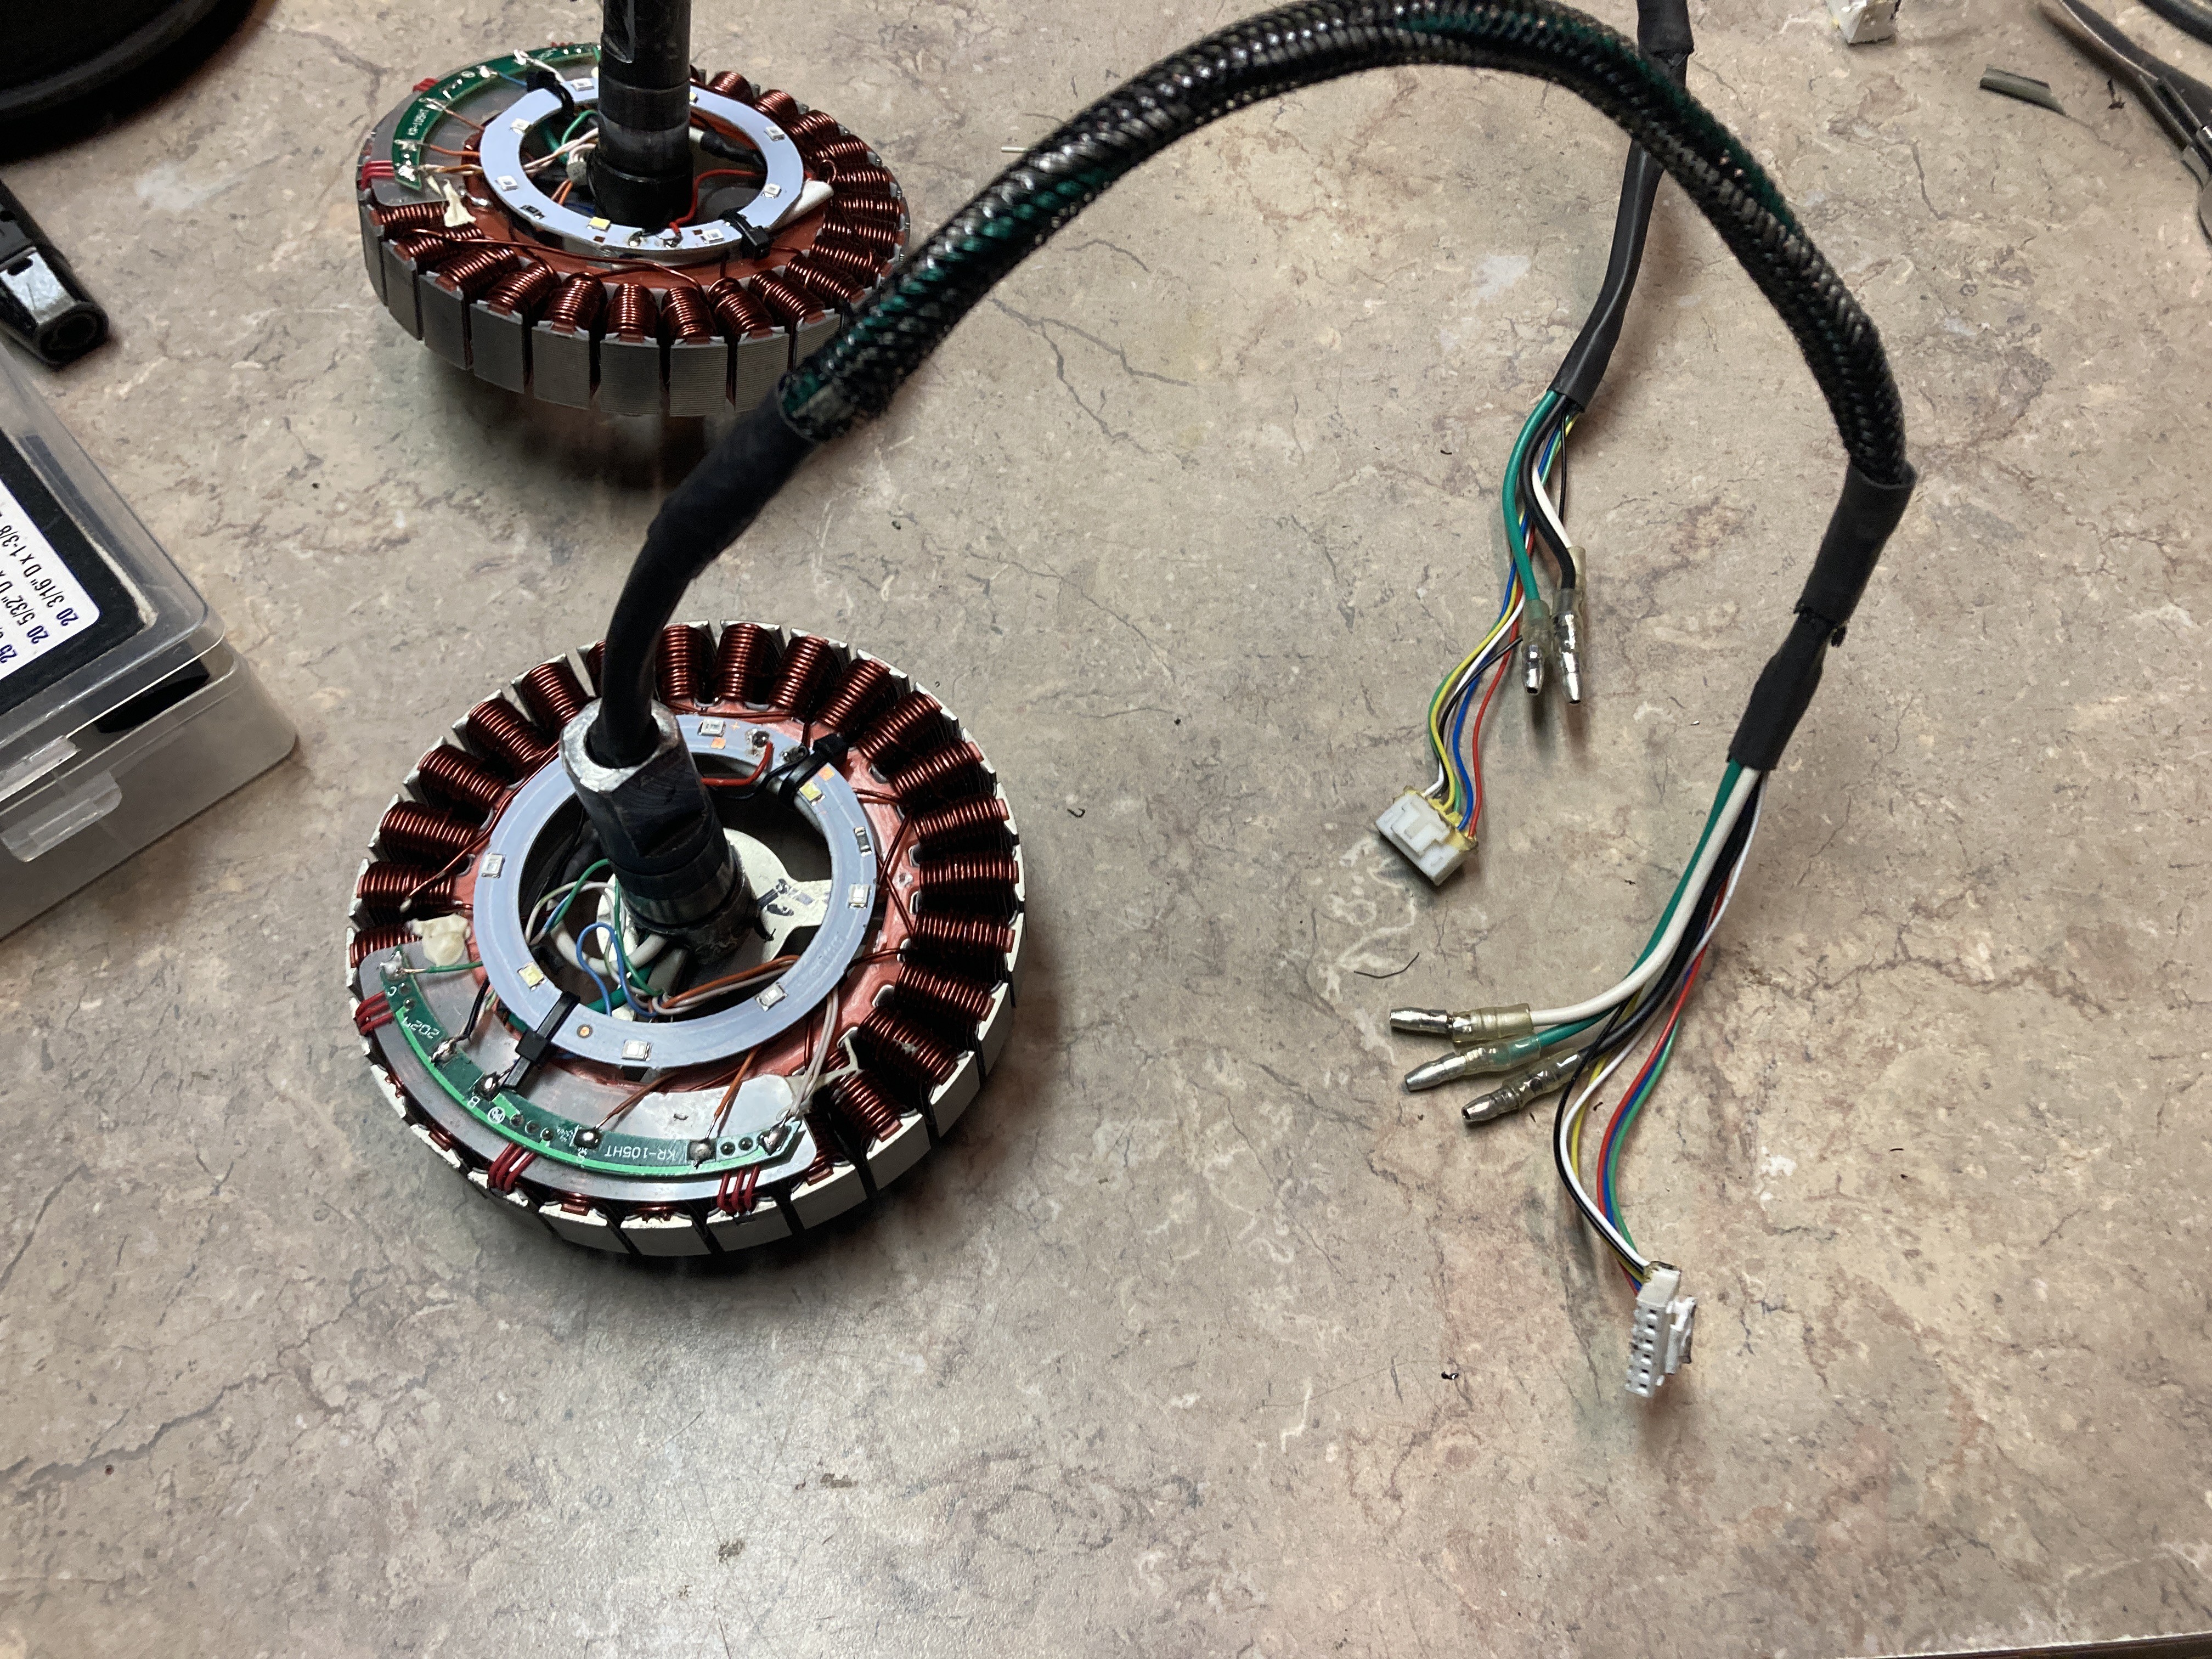
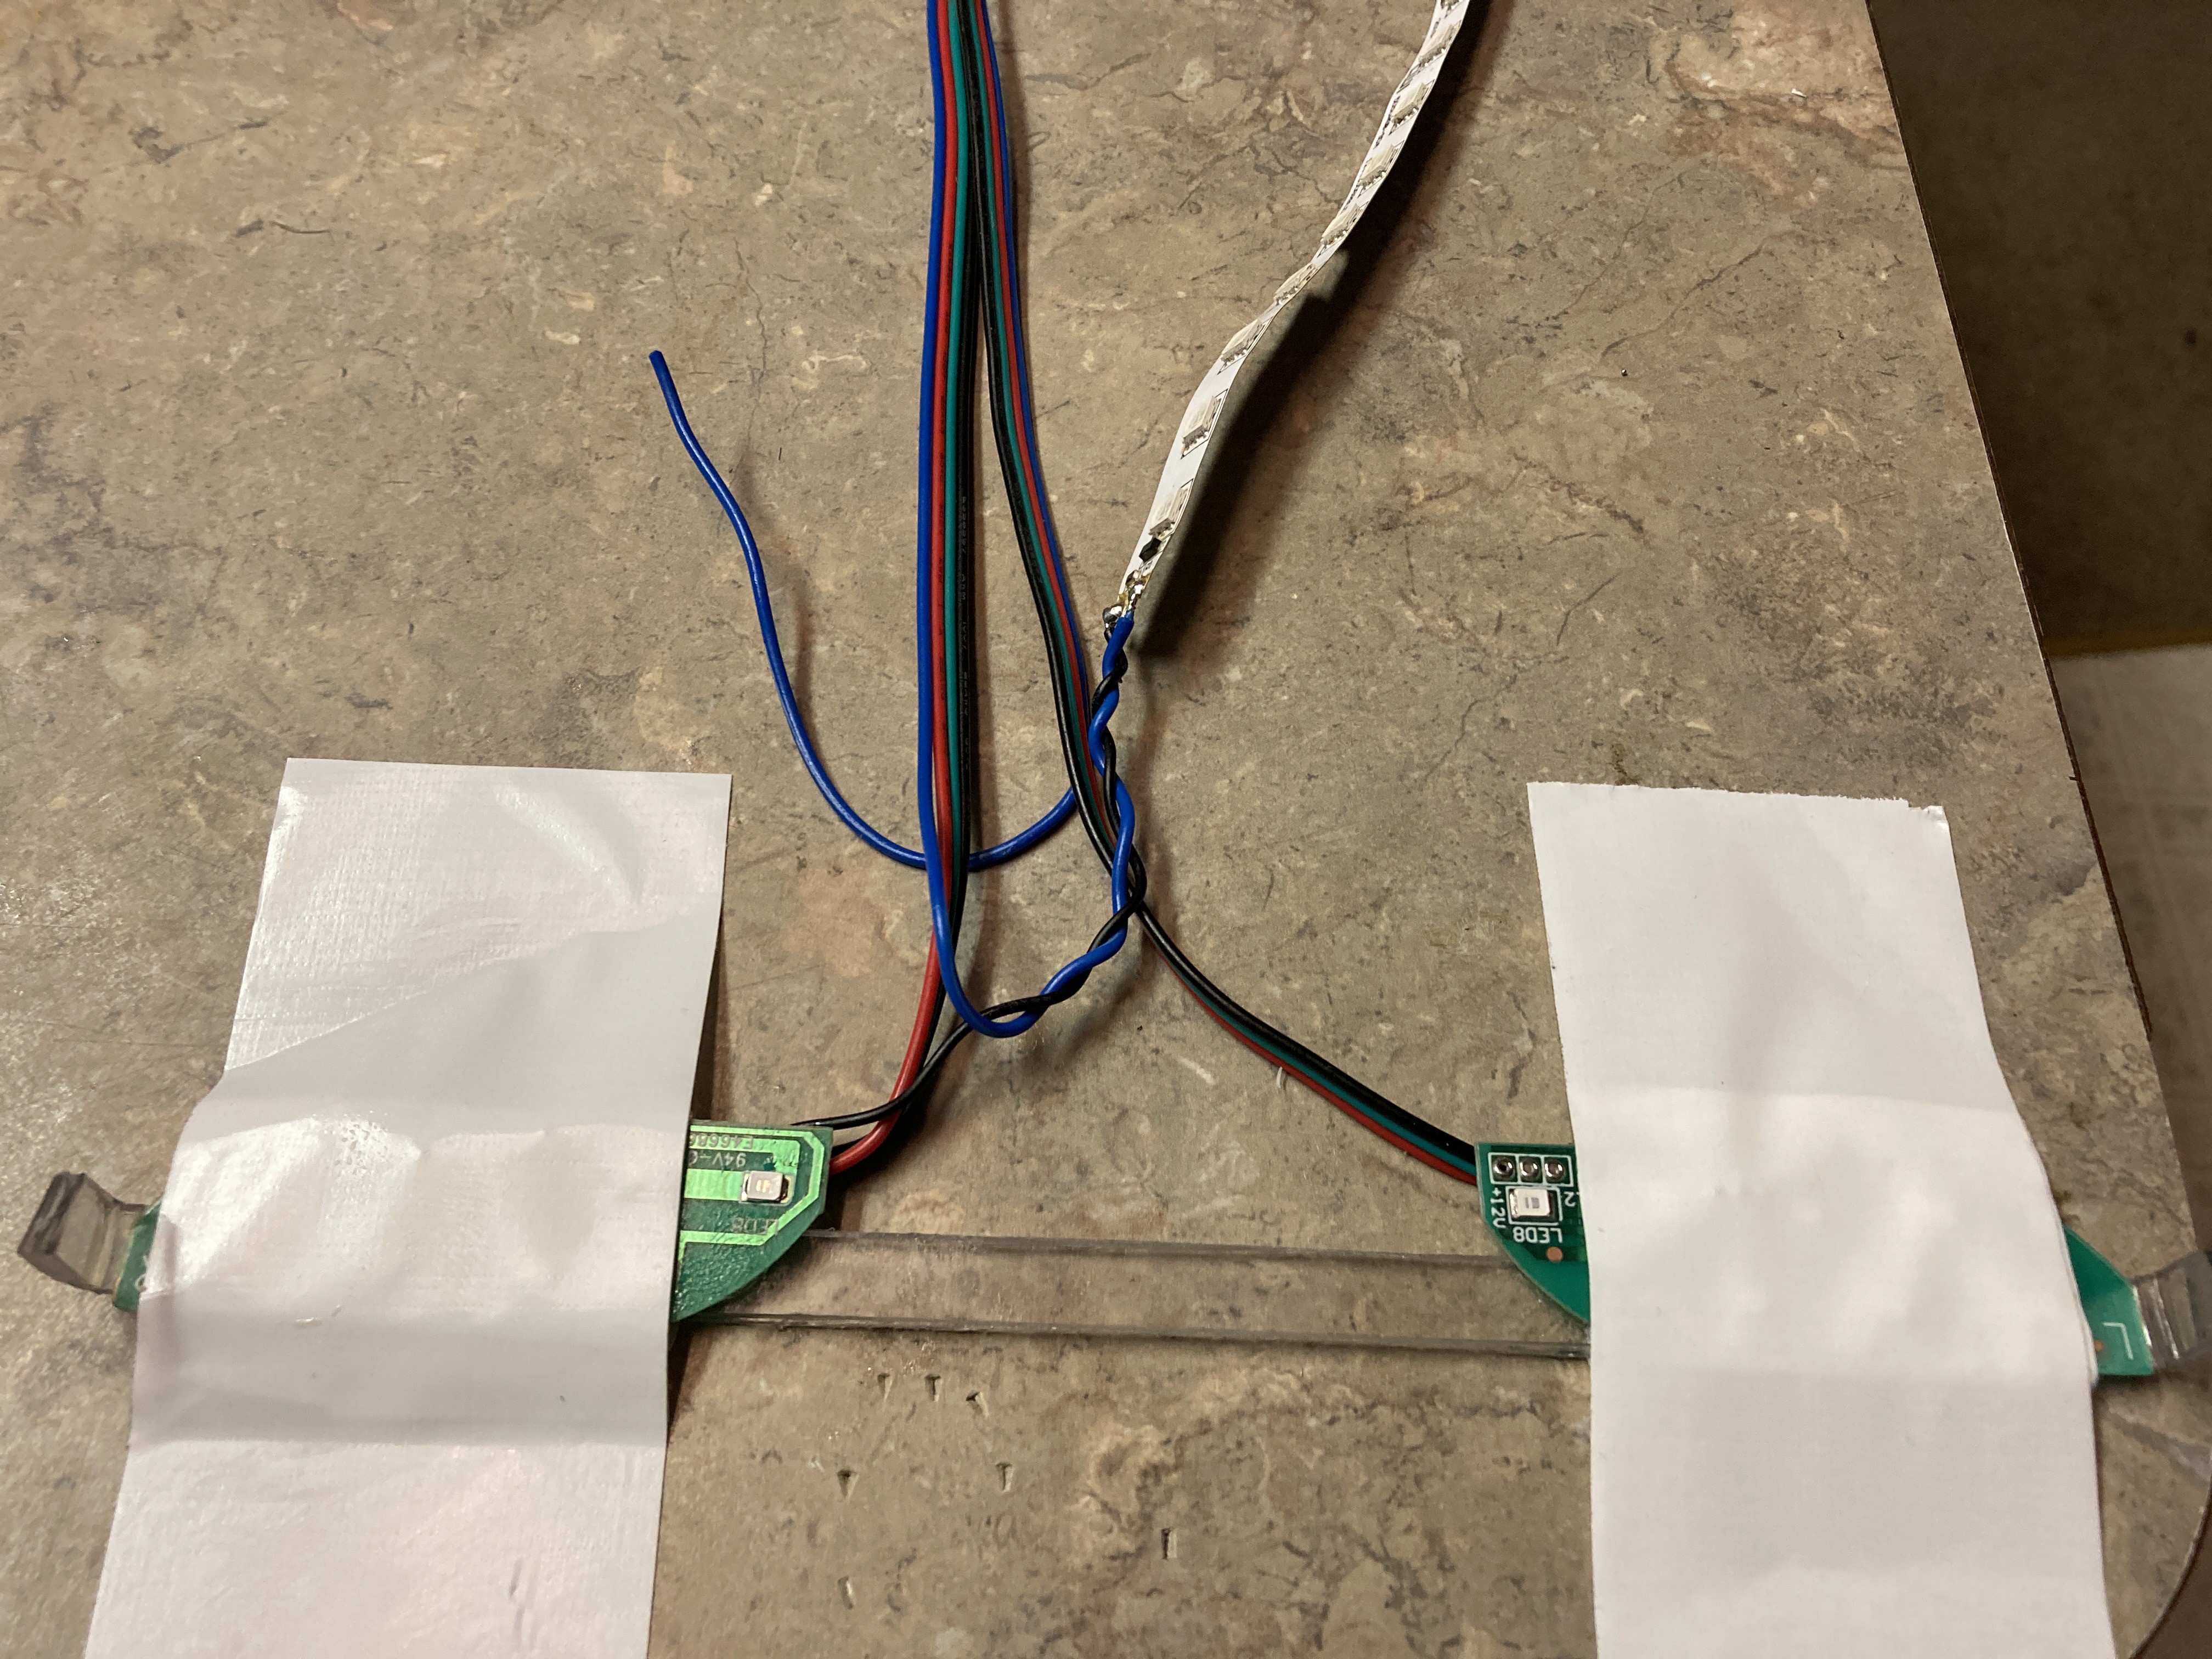
Extended motor wiring
08/25/2022 at 00:18 • 0 commentsI extended the sensor and motor winding harness.
The four most interesting signals got the solid colors for the sensor harness. Ground and Vcc then share the shield for those 4. This should provided a modicum of shielding, not that this really needs it.
![]()
A Wheel
Another Satisfying Single Wheel Terrifying Hoverboard Conversion
 Incidentally I have an RF excited CO2 laser that runs on 30 V in the garage.

 A couple more panels and this part will be done.