 Jan Neumann
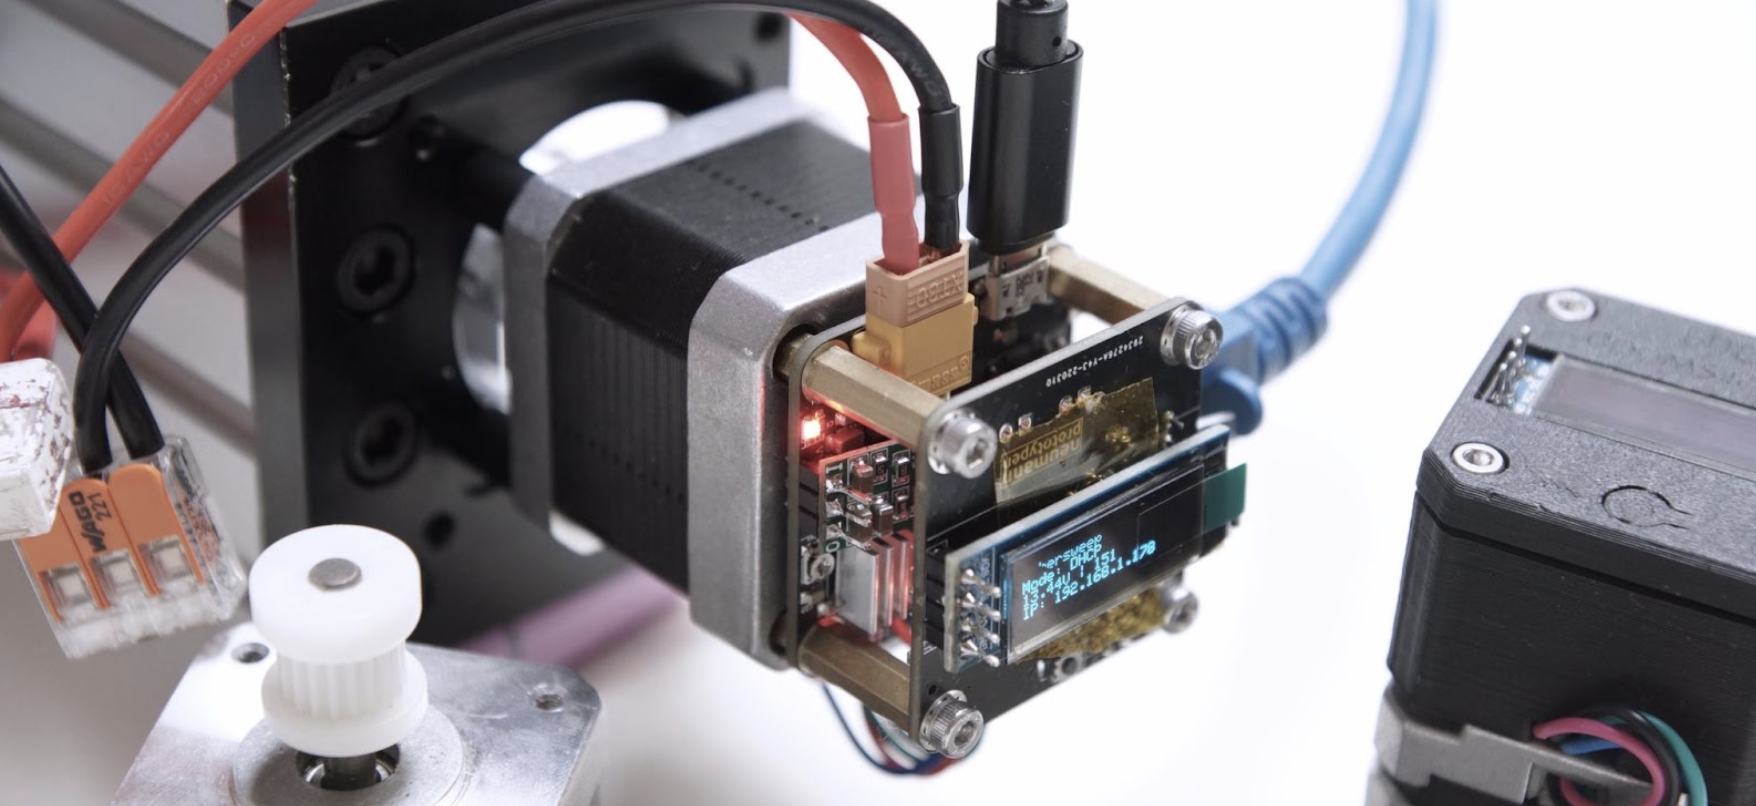
What it does:
Ethersweep offers easy interfacing from computers/machines/backends to motion control. Every UDP-supporting language can communicate with it and can control as many motors (on your network) as you like.
It gets an IP address from a DHCP server and shows data like IP, operating voltage, button, and operating states on the OLED display. It can be powered from any DC power supply between 5.5V ... 30V, as long as it delivers enough power (approx 1A, but this depends on the motor). The motor current (motor torque) can be set by a potentiometer.
When no network is available, or you need only a few motors for your project, you can also use the USB option to send drive commands to the motor. It takes the same JSON-encoded strings as the Ethernet connection.
Ethersweep is a great way to get easy access to robotics and automation, as the interface is fast to learn and shortens the build time of robotics and automation projects. People without electronic knowledge can use Ethersweep to build machines without the need to build electronics or drivers. In mechatronics projects, it makes the electronics part less complicated and faster to implement and lets you focus more on the mechanics and software side.
Ethersweep was used in the WiFi scanner project: https://hackaday.com/2021/11/22/visualizing-wifi-with-a-converted-3d-printer/
How to get started:
Build an (or multiple) Ethersweep controllers. All manufacturing and assembly files work with JLCPCB (or any other board house, but part numbers have to be changed) and it only needs some simple THT soldering + ICSP bootloader burning when the boards arrive. Arduino code is available in the GitHub repository and in the files.
After you have built and flashed the firmware onto the boards, connect your Ethersweep controller to your network via ethernet and connect it to a 5.5...30V power source. Stick an encoder magnet (magnetized) on a NEMA17 motor shaft and connect the controller to the four M3 screws of the motor. Once connected to power and Ethernet, it searches for an IP address using DHCP. When an IP is found, the controller shows it on the display, and it's ready to use. When no IP is found, it defaults to 192.168.1.111. When you want to use USB instead of Ethernet, just send a byte at 9600 baud to the controller while it starts up. It will automatically switch to USB mode.
When connected to Ethernet or USB, you can send JSON-encoded strings like this to control the motor:
{'drivemode': '2', 'speed': '300', 'slope': '100', 'steps': '800', 'stepmode': '4', 'direction': '0', 'hold': '1'}
This command drives the motor in ramp mode, with a delay of 300 μs delay between the steps, a slope of 100% (ramps the speed 50% of the steps up and 50% of the steps down), for 800 steps, in 1/4 steps (motor takes 200 full steps per revolution), in direction 0 (left in this case), and holds the motor shaft after execution (could also be set floating).
The command can be sent via a virtual serial USB interface (for example via the Arduino IDEs serial monitor), or via UDP and Ethernet to port 8888 and the IP address that is shown on the display.

To try out the motor, you can use the Flask application to send commands to the controller using a small web interface and test different drive modes. You can also copy the JSON strings and send them from the programming language of your choice.

How to build an Ethersweep controller:
Code and Assembly files are on GitHub and in the attached files of this project. https://github.com/neumi/ethersweep
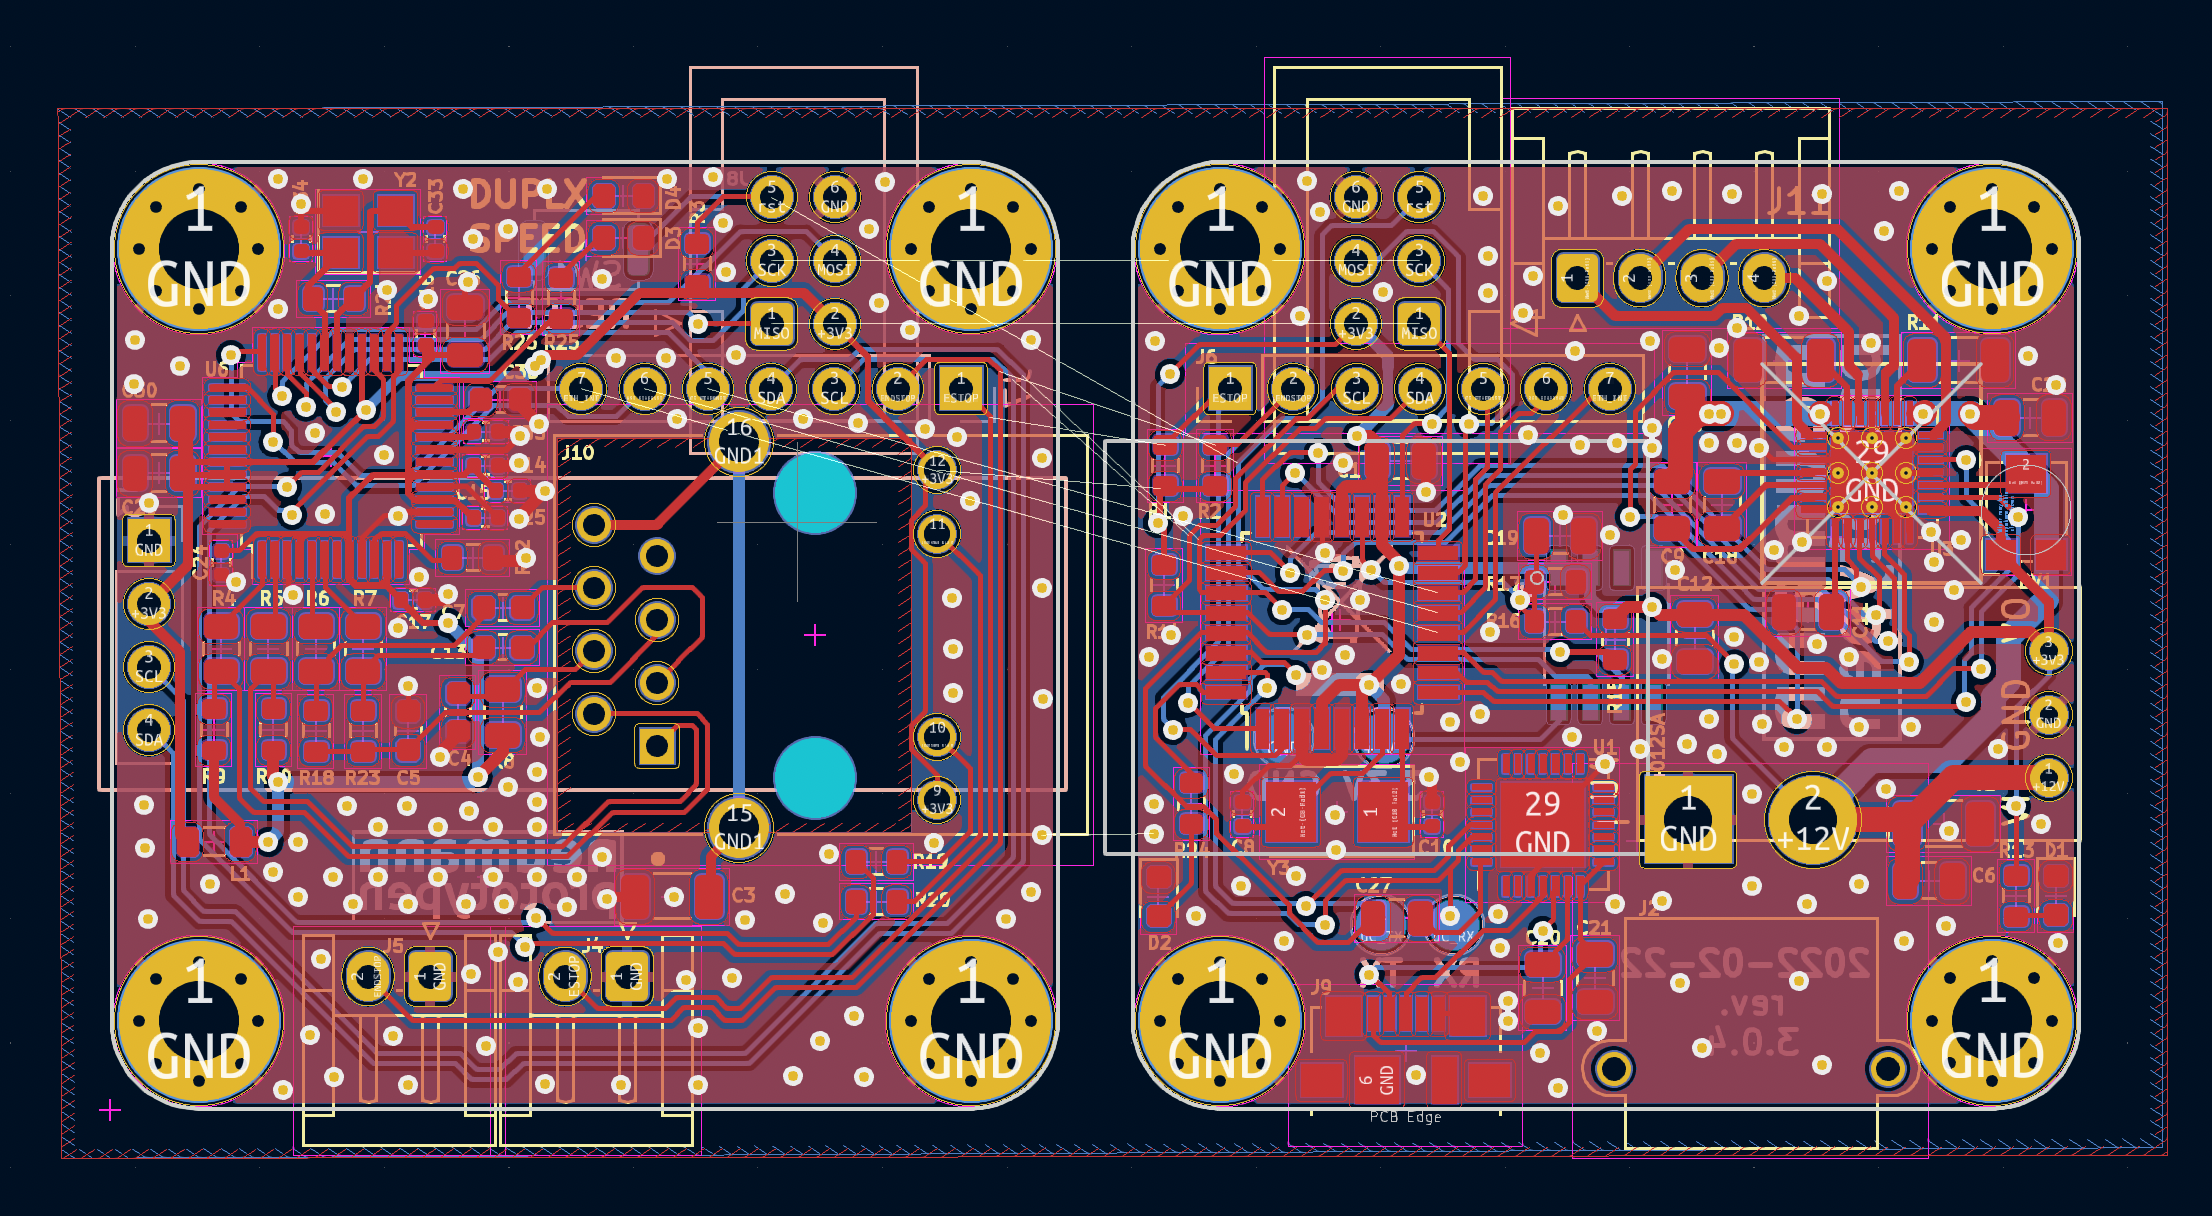
You can directly order the PCBs at JLCPCB with the attached production files. Costs are currently around 100€ for five boards with assembly plus shipping.
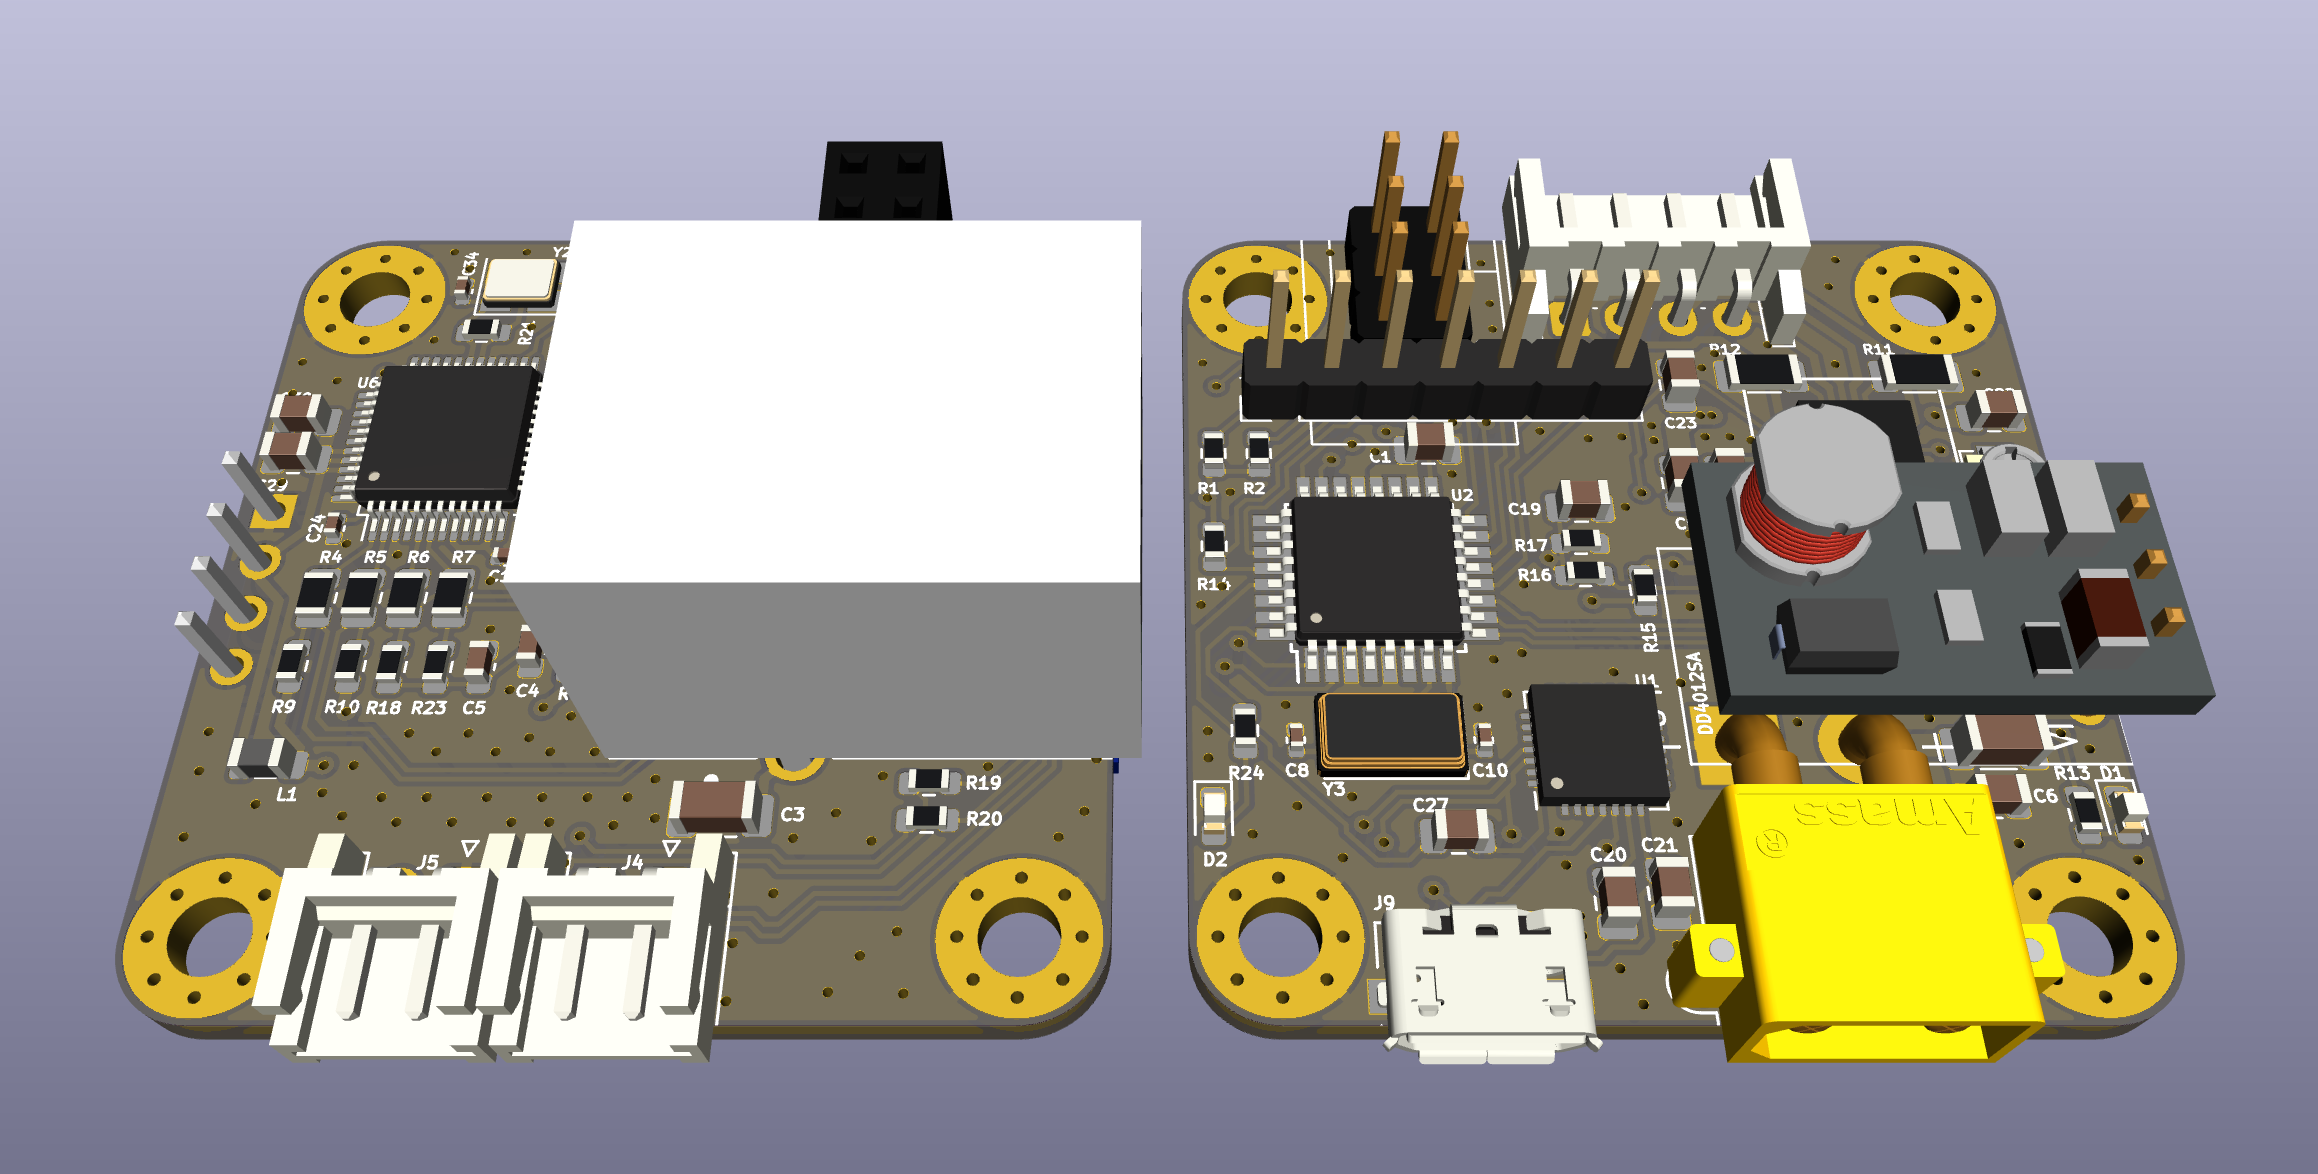
After the finished boards arrive, you can assemble all missing components according to the CAD files and KiCAD drawings. Then cut the two boards with a hacksaw and sand the edges smoothly. Solder all missing THT and SMD parts to the boards.
After all components are soldered, you can flash the Arduino Bootloader onto the atmega328 controller with an ISP programmer on the SPI pins on the top part of the mainboard. The selected controller has to be an Arduino ProMini 3.3V @ 8Mhz.
Then the two boards can be stacked on top of each other and programmed via the USB cable and the Arduino IDE. The Ethernet/Display board has to be installed while uploading code.
The hardware.ino file is the main program for the controller and can be complied using the Arduino IDE. You can download the ArduinoJSON, AS5600 and SSD1306Ascii libraries from the lib manager or GitHub.
Additional components you need:
- 5x Stepper Motor Link
- 5x 6mm x 2,5mm diametrically magnetized disk magnets Link
- 5x HR911105A Ethernet Connector Link
- 20x M3 Standoffs in 5mm and 16mm Link
- 20x M3 Screws Link
- 20x M3 Threaded Rod (depends on Stepper motor)
- 5x AS5600 Magnetic Encoder Link
- 10x JST Connector 2 Pin Link
- 5x JST Connector 4 Pin Link
- 5x 6-Pin Connector Link
- Some Connectors and Headers 15mm Link
- 5x XT30 Cable Female Link
- 5x Oled Display Link
- 5x Heatsinks for TMC2208 Link
- 5x DD4012sa 3.3V Buck Converter Link
- 5x Push Button 3x4x2 mm SMD Link
- ISP Programmer for initial bootloader flashing Link
- micro USB cable
- super glue for the magnet
The assembly process is relatively straightforward. When you order the boards from a manufacturing house, they come pre-assembled and all SMD parts are already soldered (except for two on the backside). The only components you have to solder are THT connectors, the display, and the buck converter. The AS5600 magnetic encoder and SMD reset button also have to be soldered by hand. The whole assembly process takes around 30-60 minutes.
You also have to equip the NEMA17 motor with the encoder magnet using super glue and add threaded rods and standoffs instead of the normal screws in the motor.


Once the hardware is done, you have to burn the Arduino bootloader onto the atmega328 chip and upload the Ethersweep firmware to the controller. To do so, choose the board parameters like in the screenshot below. When an ISP is connected, you can burn the bootloader by pressing "Burn Bootloader". When the bootloader is already burned onto the atmgea328, you can upload firmware and updates using the USB connection. You have to set the board parameters like in the screenshot below. Ethersweep behaves like an Arduino Pro Mini at 3.3V and 8MHz.
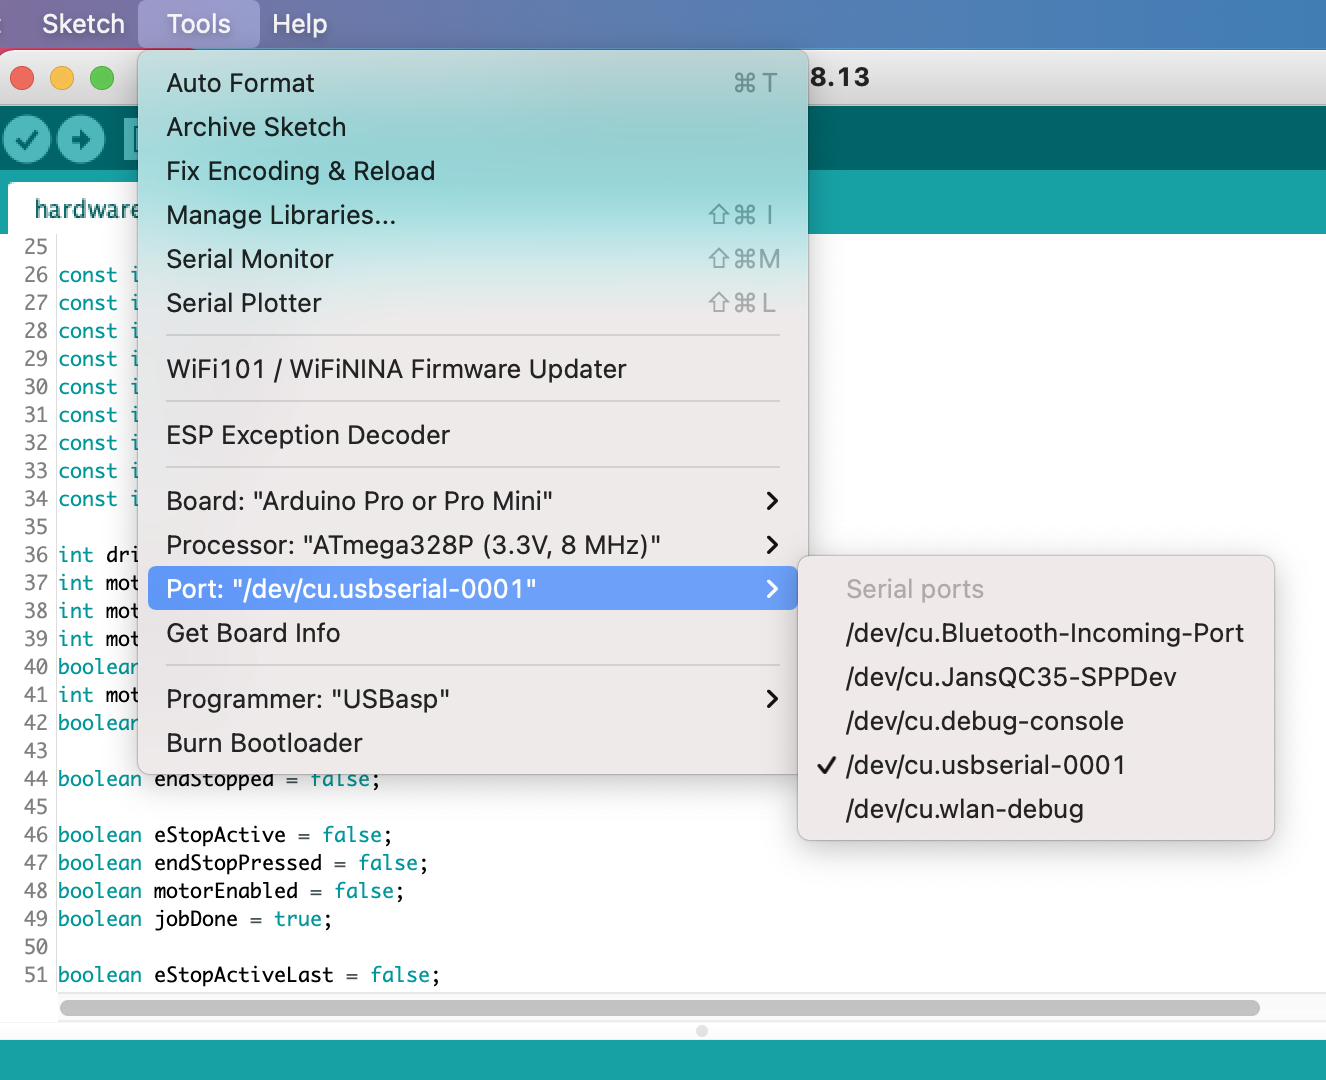

As the ISP bootloader burning only has to happen once, the SPI connection to the Ethernet/Display board is also used for this purpose and has the standard 6-Pin ISP header format and shape.
After burning the bootloader the board can be programmed just like an Arduino. For the CP2102 USB/Serial chip to work, the Ethernet/Oled board has to be connected, and power has to be plugged in.
Now your controller is assembled and programmed.
Go play with it and build cool stuff!
It is this simple to control a stepper motor from Python on a computer:
import socket
import json

IP_MOTOR = "192.168.1.185" #local motor controller IP
UDP_PORT = 8888


def drive_motor(steps, speed, direction, stepmode, motor_ip):    json_data = json.dumps({'steps': steps, 'speed': speed, 'direction': direction, 'stepmode': stepmode})    message = json_data.encode()    sock = socket.socket(socket.AF_INET, socket.SOCK_DGRAM)    sock.sendto(message, (motor_ip, UDP_PORT))


drive_motor(100, 9500, 1, 32, IP_MOTOR)
Or if you are more of a terminal person:
nc -u 192.168.2.120 8888
Then send this JSON:
{'drivemode': '0', 'speed': '1000', 'steps': '400', 'stepmode': '4', 'direction': '0', 'hold': '0'}
More images, videos...


See more (recent) info, code, and CAD files on GitHub:
https://github.com/neumi/ethersweep
Thank you so much for all the community support, comments, messages, beta testers, and issues on GitHub!
Without you, the project wouldn’t be where it is right now!
Neumi