Close
0%
0%

pandaPi

Portable RetroPi console based around a RaspberryPi model 4

Similar projects worth following
298 views
This is my attempt at creating a handheld emulation console. The project is based around a RetroPie install on a Raspberry Pi 4.

I've set out to build a portable emulation machine. Emulators were always fun as a kid and I've recently realized that I have most of the skills to build a portable version, while lacking some skills that will likely be fun to learn (3D modeling/printing mostly). So why not! The process sounds fun and the end result will most likely get some good use. One thing to note is that I think the cost of this is going to be more than the pre-made portable retro consoles that seem to be on the market and less than the Steam Deck. The goal is for the end result to be a higher quality than the cheaper pre-made consoles.

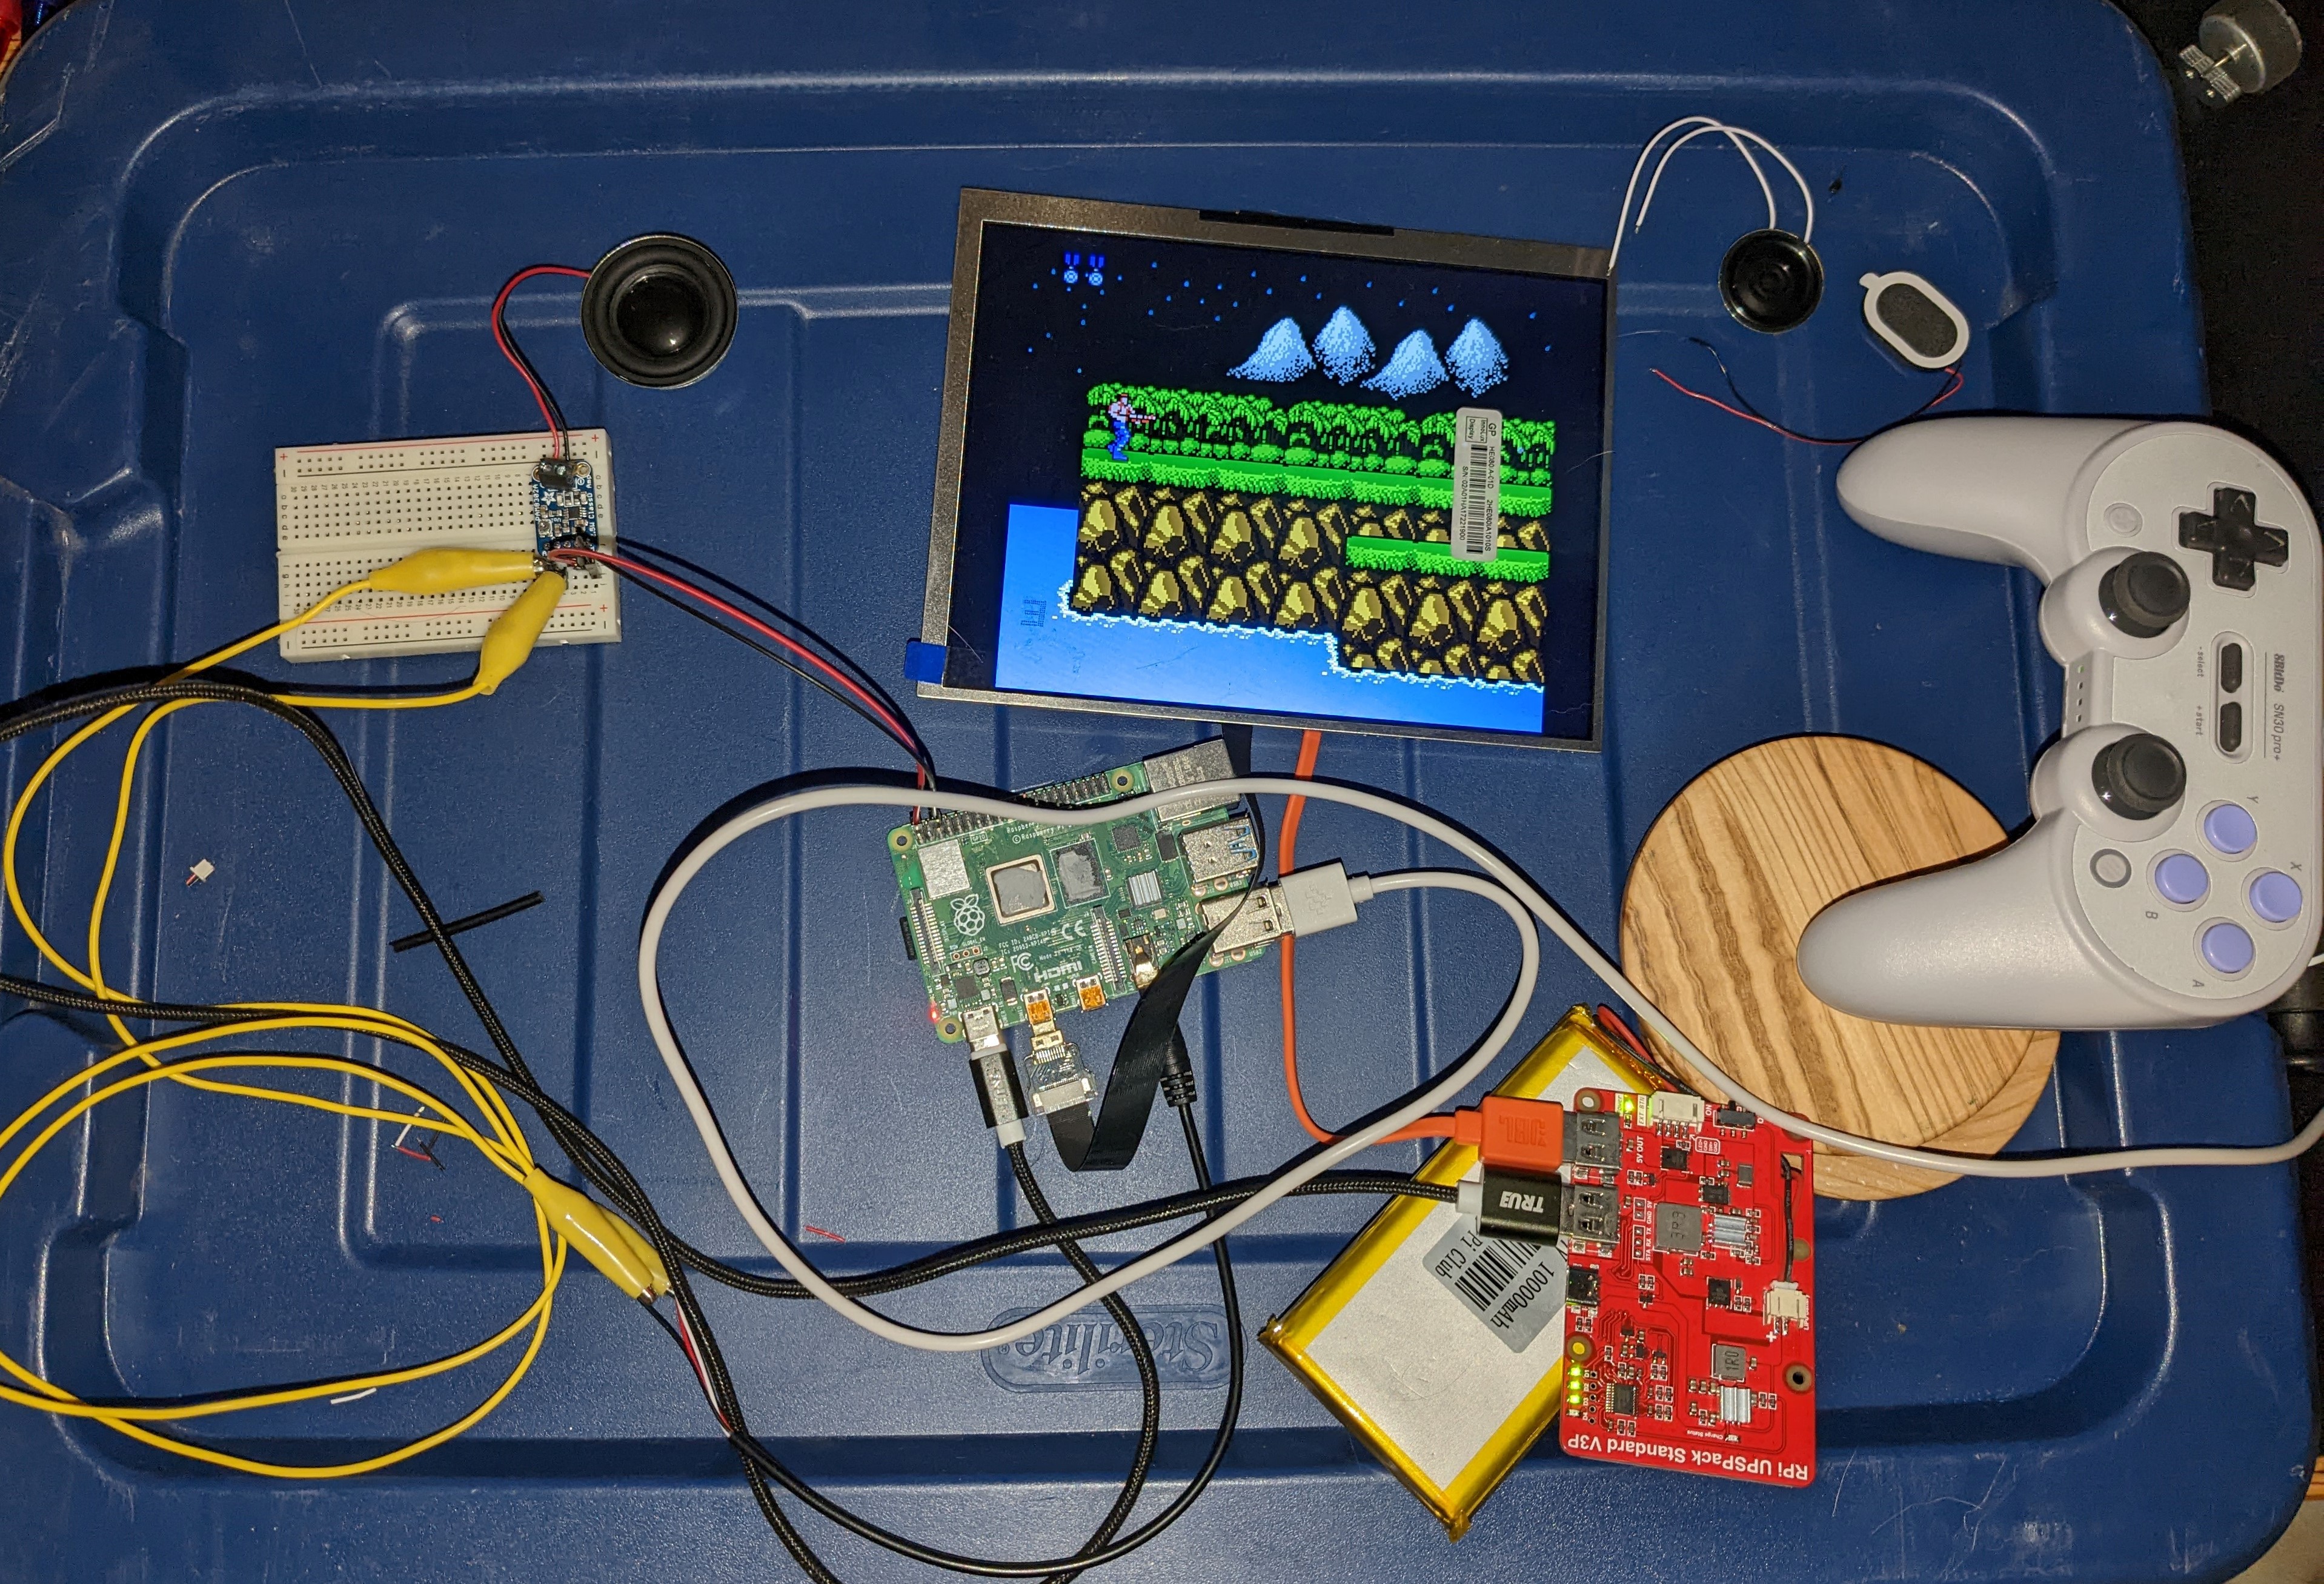
At the time of writing this, I've already done a non-portable proof-of-concept (e.g. just following others' RetroPie tutorials) and am now working to making it portable. The major components included in this project are as follows:

  • Raspberry Pi 4 Model B (4gb???)
  • 8" IPS Display (4:3 Aspect Ratio)
  • 2.5W Class D Amplifier, and Speakers
  • TeensyLC Xinput Controller based on 8Bitdo Pro 2 Xbox model
  • 10,000mAh Litheum Ion Battery and Charger PCB
  • 3D Printed Case

To-Do:

  • Raspberry Pi
    • Custom settings such as shaders
    • Explore N64 and Playstation usability
    • Explore overclocking
  • Audio
    • Test amplifier
    • Test bluetooth
    • Circuit for speakers and headphone jack
  • Controller
    • Create custom PCBs
    • Final TeensyLC code to include all buttons
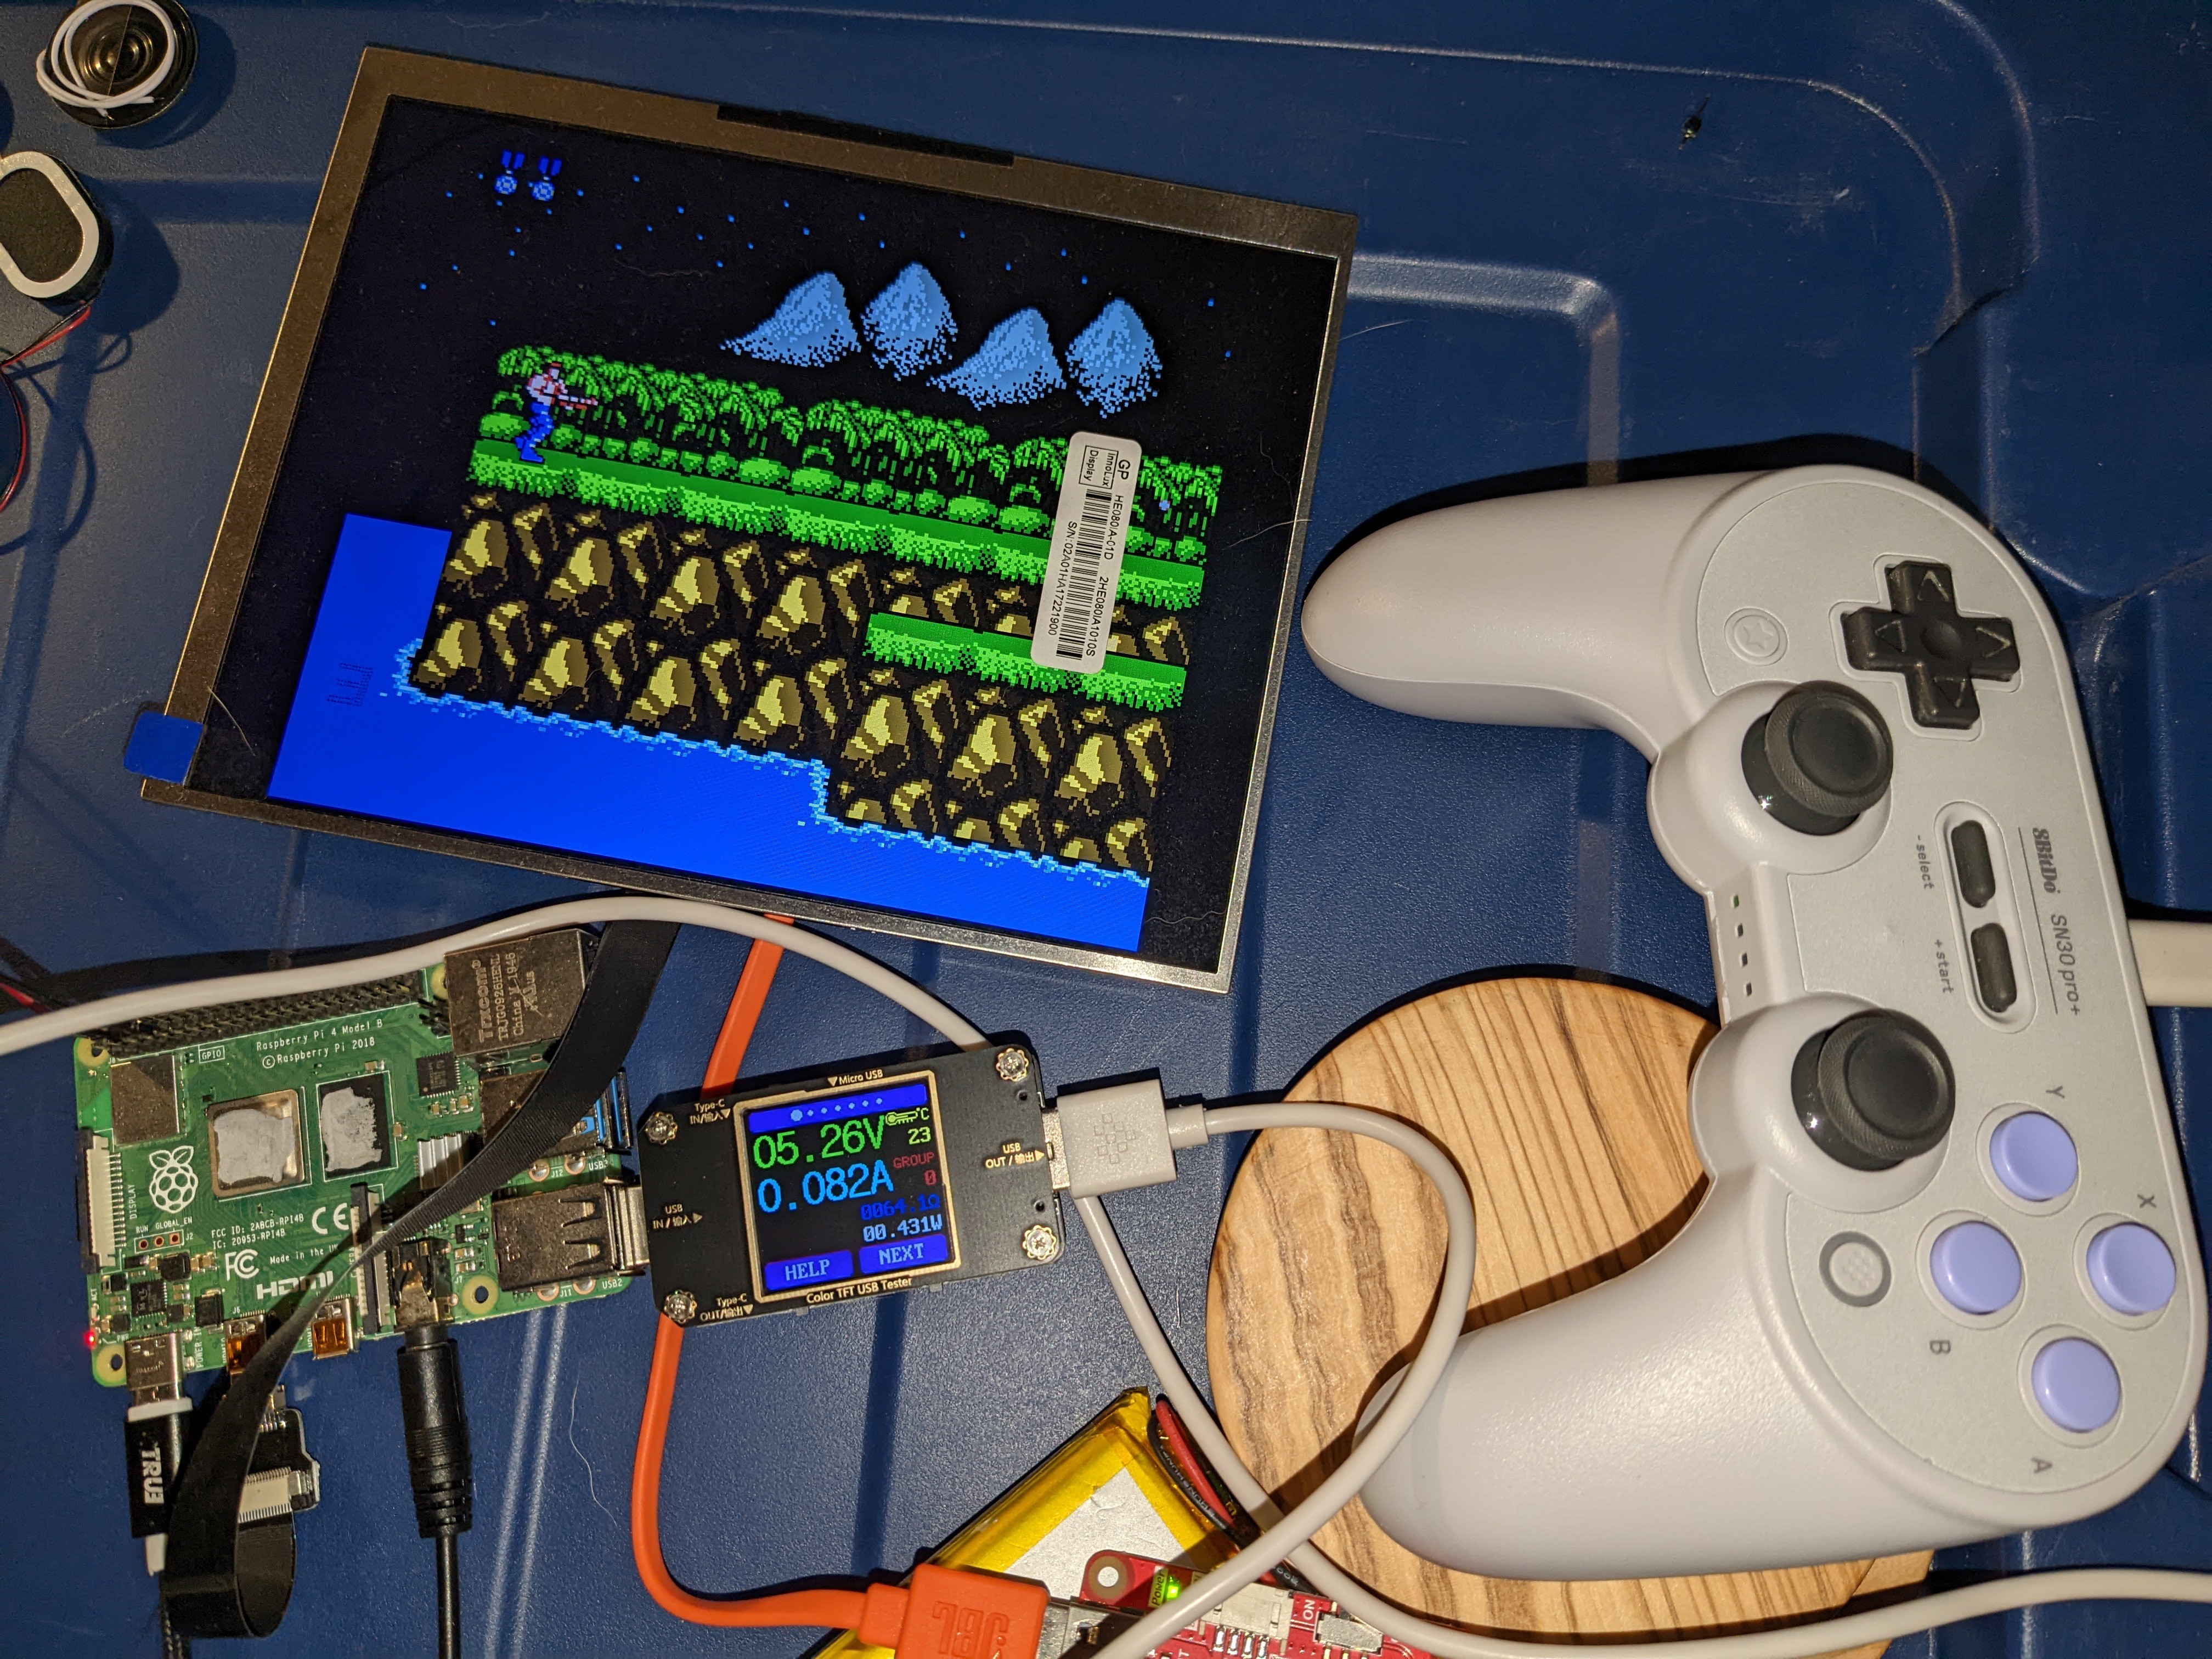
  • Power Supply
    • Test new charger board
    • Test power consumption of individual components
    • Test serial data capabilities
  • Case
    • Prototype and refine
    • Prototype and refine
    • Prototype and refine....
  • Enjoy an old game on a newly created handheld

  • Component Power Consumption

    pandaman500010/18/2022 at 03:48 0 comments

    Test Results

    Individual Component Power Consumption

    Raspberry Pi 4
    ~580-700mA
    Raspberry Pi Zero W
    ###
    8" Display and Driver Board (35%, 50%, 75%, 100% Brightness)
    ~425, 490, 610, 750mA
    5" Display and Driver Board (50%, 75%, 100% Brightness)
    ###
    8Bitdo Controller (using currently)***~40mA
    TeensyLC Controller (will use in final system)***
    ###
    Mono Amplifier w/ 3W Speaker***
    ~8-20mA
    Fan Style 1
    ~35mA
    Fan Style 2
    ~170mA
    WIFI disabled
    ###
    Headphone Jack***###
    Bluetooth Headphones***###
    Total of Currently Used Components
    ###

    ***Note: component powered by Raspberry Pi


    Battery Runtime Test #1 (Rpi4, 8" display @100% bright, 3W audio, 8Bitdo ctrl, NES emulator running)

    Indicator LED Description
    Capacity
    Calc
    Total
    Runtime
    (min)
    Total
    Runtime
    (H:MM)
    Lap
    Time
    (H:MM)
    4 LEDs lit100%00:000:00
    3 LEDs lit95%120:120:12
    2 LEDs lit
    64%921:321:20
    1 LED lit32%1732:531:21
    1 LED blinking
    24%1943:140:21
    Power Down
    0%2564:161:02

    Battery Runtime Test #2 (Rpi4, 8" display @50% bright, 3W audio, 8Bitdo ctrl, NES emulator running)

    Indicator LED Description
    Capacity
    Calc
    Total
    Runtime
    (min)
    Total
    Runtime
    (H:MM)
    Lap
    Time
    (H:MM)
    4 LEDs lit
    100%00:000:00
    3 LEDs lit
    84%490:490:49
    2 LEDs lit
    56%1402:201:31
    1 LED lit32%2163:361:16
    1 LED blinking
    26%2343:540:18
    Power Down
    03165:161:22


    [10-18-2022]

    I finally received the replacement battery charger PCB and have a fully charged battery! This means that it's feasible for me to power the console back on. I've got a little USB power meter that will allow some measurements to be taken on the individual components in the console. These measurements aren't strictly necessary, but are really just for the curiosity of it. And I'm especially curious how the measured power stacks up against the 10,000mAh battery and what kind of runtime I'll get. From my limited experience with batteries, I believe that the rating is referencing the total energy capability of the battery. And because the system will need to be shutdown before all the energy is discharged (@ about 3.5V), this means the entire rated mAh isn't usable energy and the "effective" battery rating will be lower than 10,000mAh.

    Here's a picture of the console guts with an 8Bitdo controller instead of the final TeensyLC controller. Also note from this picture that I am testing out speakers and the amplifier board right now and will create a separate log for that process.

    And here is a picture showing the USB power meter connected to the controller USB cable. I tried to take the highest consistent peak that I was seeing from the meter when creating the table below.

    And finally, here is a table listing the power consumption for each component. For components powered by the Raspberry Pi, I first took a base measurement of the RPi without anything connected to it. Then I took a measurement with the component attached and subtracted the base measurement.


    [11-27-2022]

    So, I had originally thought that measuring the power consumption of each component in this project was unnecessary and only served to satisfy my curiosity. However, after actually making some of the measurements, the process actually highlighted a couple areas of concern. 

    First of all, my testing process wasn't the best and was causing the measurements to be weirdly low. I was measuring power with the components connected to the battery, and started noticing the Rpi throwing out a low voltage warning. I have a suspicion that the battery charger board has a high-ish output impedance, and I'll plan on investigating it at some point. This also prompted me to find an alternative battery charger for comparison. And after measuring the power consumption of components while connected to outlets instead of battery, the measurements shot up closer to values I was expecting.

    The second area of concern is the battery life. From the testing I have done, the battery life has been abysmal. To the point that if I can't find a way to improve it, this project may be dead in the water. I haven't tested it well yet,...

    Read more »

  • Current Status of Design

    pandaman500010/07/2022 at 07:36 0 comments

    [10-07-2022]

    So, I started this project page quite a ways into my effort for the project. This project log is intended to review what I've done on the project to this point. With that said, here are some design aspects along with their status:

    Processing and Software

    The brains of the console are run from a Raspberry Pi 4 model B. I think that it's got 4gb of RAM, but am having a hard time pulling up the Ebay page that I purchased it from to see. So, I'll have to figure out how to find that info in the RetroPie OS the next time I turn it on.

    RetroPie is successfully installed on an SD card and a lot of the initial setup is done. A keyboard is connected via Bluetooth, an IP address is setup and SSH enabled, and some games have been loaded and tested. There's definitely a lot more to configure here, including getting shaders dialed in for each console, testing the limits of running N64/Playstation games, and testing overclocking.

    Display

    The current display being used is an 8" IPS with 4:3 aspect ratio (1024x768). Honestly, this is a little bit larger than I'd like, but there just isn't much that I can find at the 4:3 aspect ratio. I am a bit worried that the end result will be too big and unwieldy, but we'll just have to wait and see. I originally tried a 7" 16:9 display (I was surprised at how much smaller the 7" 16:9 display was compared to the 8" 4:3, but it totally makes sense after thinking about it a bit... math!), and I couldn't accept having to choose between a skewed looking game or having black bars on the side.

    This display is a Pimoroni product and comes with a driver board that interfaces to the LCD screen ribbon cable and provides an HDMI port for video from the RPi and a usb port for power. This has the advantage that it easily plugs into the RPi with an HDMI cable and doesn't require any special drivers or setup in RetroPie. I would have considered an LCD screen with a DSI interface if there was much available, but choices were limited. And it saves me from having to learn about DSI interfaces and install the correct drivers.

    One lament that I have about the larger screen size is that it doesn't feel necessary for retro games. And being a portable device, weight and battery consumption are big considerations. Maybe the larger size will be a win if N64 and Playstation games run well, but I'm skeptical of the impacts of battery life and think that later generation games will require overclocking (further draining precious battery).

    Audio

    When all is said and done there should be three audio sources for the pandaPi. Bluetooth, speakers, and a headphone jack. I'm a little worried that if I put the effort in for the speakers and headphone jack, that I'll just fall back on bluetooth 100% of the time. But it just feels wrong to not have them as an option.

    I have purchased a 2.5W Class D amplifier and a couple different speakers to test out for volume and sound quality. The initial test I ran was absolutely horrendous, very little volume and what sound did come out was only treble... after reviewing the connections I definitely didn't make the correct connections. Long story short, I didn't really understand the amplifier board terminals well before making connections. After re-viewing the terminals and what signals they are meant for, I believe that I've got it wired correctly now. Just waiting for a new battery to ship so I can try it out...

    The plan is to simply extend the headphone jack to the console case via a perf-board. I'm going to try some Adafruit breadboard style perf-boards that look pretty slick. I know how to do PCB layout and could have a custom board manufactured, but it's expensive, time consuming, and I don't want to. I'm hoping that these Adafruit boards are a nice compromise that are more accessible than a custom PCB and also less sloppy than the old RadioShack perf-boards. And at the end of the day, if it came down to not having enough room inside the case, I would be willing to...

    Read more »

View all 2 project logs

Enjoy this project?

Share

Discussions

Similar Projects

Does this project spark your interest?

Become a member to follow this project and never miss any updates