This project presented numerous challenges I've never encountered before. I am a big fan of the iterative design process. I often find a solution that I don't 100% like, but like it enough as a near-term solution. If designed in a modular fashion, it is easy to improve things in the future. Given multiple other time-sensitive priorities I have these days, it was essential I kept things as simple as possible while still striving toward a truly unique & useful device. It is not a simple device, but at its core it is merely a light-weight tool box with some sweet widgets built in.
Speaking of weight, I decided to use light-weight Luan plywood & wood glue to fasten things together. I used square aluminum tubes I up-cycled from an old RV TV antenna. The only hardwood (which was up-cycled from a nice old TV entertainment center) is what frames the screen & the dowel rod handle.
The screen simply swings out from behind the box with the dowel rod handle as its axis. I originally planned to have the screen extend upward via linear actuators, but that plan was scrapped due to time constraints & to help keep overall weight down. The screen has curved wooden pieces that rest against the aluminum tubes to prevent it from falling too far forward. This forward-weight of the screen is what helps ensure the Retrodeck stays properly balanced. That, and the friction of the keyboard tray. There are a pair of kickstands that can be easily deployed if deemed necessary. The door for the storage bin above the woofer on the left side of the box is secured by a spring-loaded latching magnet, which can be found in the cabinetry section of most hardware stores.
The exterior of the box is covered in carpet typically used for pro speaker cabinets. I had not worked with nor affixed such fabric before. It went on with relative ease with some Spray Adhesive. I modified aluminum from the local hardware store for the main faceplate & some accent pieces. I often used a drill press, rotary tool & a metal "nibbler" tool for those. My favorite feature is the pair of MR11 workspace spotlights, which are mounted on some old "room accent lighting" fixtures I realized I had in an old parts bin. They connect to the Retrodeck via right-angle 1/4" phono plugs. It took a while to figure out how to make those right-angle connectors work well.
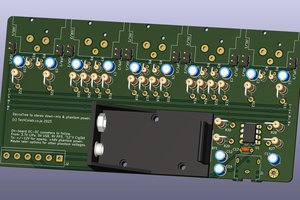
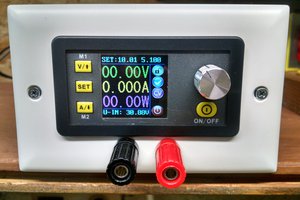
As for the electronics -- there's a lot packed into this little box! We'll start with the ZK-MT21 2.1 Bluetooth Audio system I got on Amazon. It powers 2x 2" speakers & 1x 4" woofer. I had the speakers on hand -- the woofer was pulled out of a little Samsung passive woofer I got at the thrift store for a few bucks. The audio system receives its power via a LM2596 DC-DC regulator, since it can only handle about 24VDC (Retro Modules supports up to 40VDC by default). That regulator (among others) is down-stream from a XH-M609 low-voltage cut-off module, to help protect expensive batteries from over-discharge. When soldering, bumping music & running the computer, big power tool batteries can be easily drained. I plan to add UPS functionality to the PC module to allow a few minutes for a power supply switch. It can run from a power brick, but the brick needs to reliably supply about 100W. The TS100 soldering iron & the Drok "Buck Power Supply" are both down-stream from a "GERI® Dc-dc 250w Constant Current Boost Step-up Module", which is configured to boost variable supply voltage to 40VDC. This allows for smaller wires throughout the Retrodeck & fewer D-Sub connector contacts for higher-power tools (like the soldering iron or hot glue gun). With this boosted power supply, the TS-100 typically heats from cold to 600F in about 5 seconds. Like the NucBox PC, the 4K screen is a bit of a power hog. I plan to swap out the 12V 3A regulator I'm using with a 10A regulator -- so there's some power left over for the panel-mount 58W USB-C outlets module I'll be adding soon. I pulled the 15" 4K screen from a "IVV" portable monitor & placed...
Read more » William

 Yonghan
 alnwlsn
 ogdento
Construction materials are the backbone of any infrastructure development, and their prices play a crucial role in determining the overall cost of construction projects. In Pakistan, the cost of construction materials has witnessed significant fluctuations in recent years. This article aims to shed light on the real construction material price in Pakistan, exploring the factors that influence these prices, the impact on the construction industry, and strategies to mitigate the challenges faced by construction businesses.
https://alsyedconstruction.com/construction-material-price-in-pakistan