 Leandra Christine
## BOM
Other than the 3d printed parts (all FDM parts printed in black PETG, all Resin printed in Elegoo ABS-like clear-red) the following was used:
### Base
- Raspberry Pi 4 (+SD card)
- Corsair K65 RGB 60% mechanical keyboard (don't get too attached to it)
- Waveshare Raspberry Pi 7.9 inch Capacitive LCD HDMI Display 400 x 1280 (comes with great Raspi HDMI and USB connectors)
- Geekworm Raspberry Pi UPS, X728 V2.1 (or alternative)
- 2x 18650 (unprotected due to the X728 spacing) Lion cells
- 2x Goobay 4-Port USB 2.0 Hub (needs a super slim form factor to fit. I used this: https://www.berrybase.de/4-port-usb-2.0-hub-mit-0-4m-anschlusskabel-farbe-schwarz)
- Stero USB Speaker (2 x 0,5W, I used: https://www.berrybase.de/externer-usb-mini-lautsprecher-schwarz)
- Alumnium Angle 40mm x 20mm, cut to a length of 290mm (the 3d files include 2 drill-guides to help get the holes right)
- 3x 4mm Brass rods ~330mm length (cut a 1m part into 3, to clamp the 3d printed parts cut a thread at the end of each rod)
- M4 Nuts to secure the clamping shell to the brass rods
- M2 cylinder screws of various lengths
- M2.5 screws and standoffs of various lengths (for the raspi, USP and waveshare display)
- M3 cylinder screws of various lengths
- Wiring (e.g. 0.14mm), Connectors and general soldering stuff
- Some USB and MINI-USB connectors to solder (to configure custom wires that are slim enough below the keyboard)
- Threaded inserts / Knurled Nuts (M3) (pretty much used everywhere)
- (optional) microSD / T-Flash to microSD extension (to get to the SD card easier)
### Rolling mouse
- 8mm stainless steel shaft
- 3x IGUS drylin® R Lineargleitbuchse RJUM-01 (or LM8UU, but it will not feel as nice and smooth)
- optics, chip and bits off a cheap, wired, optical mouse (I used ISY ICM-1000, which has a A2803 optical mouse sensor: http://www.nst-ic.com/nstfileupload/productsinfo/20190703095231_293.pdf)
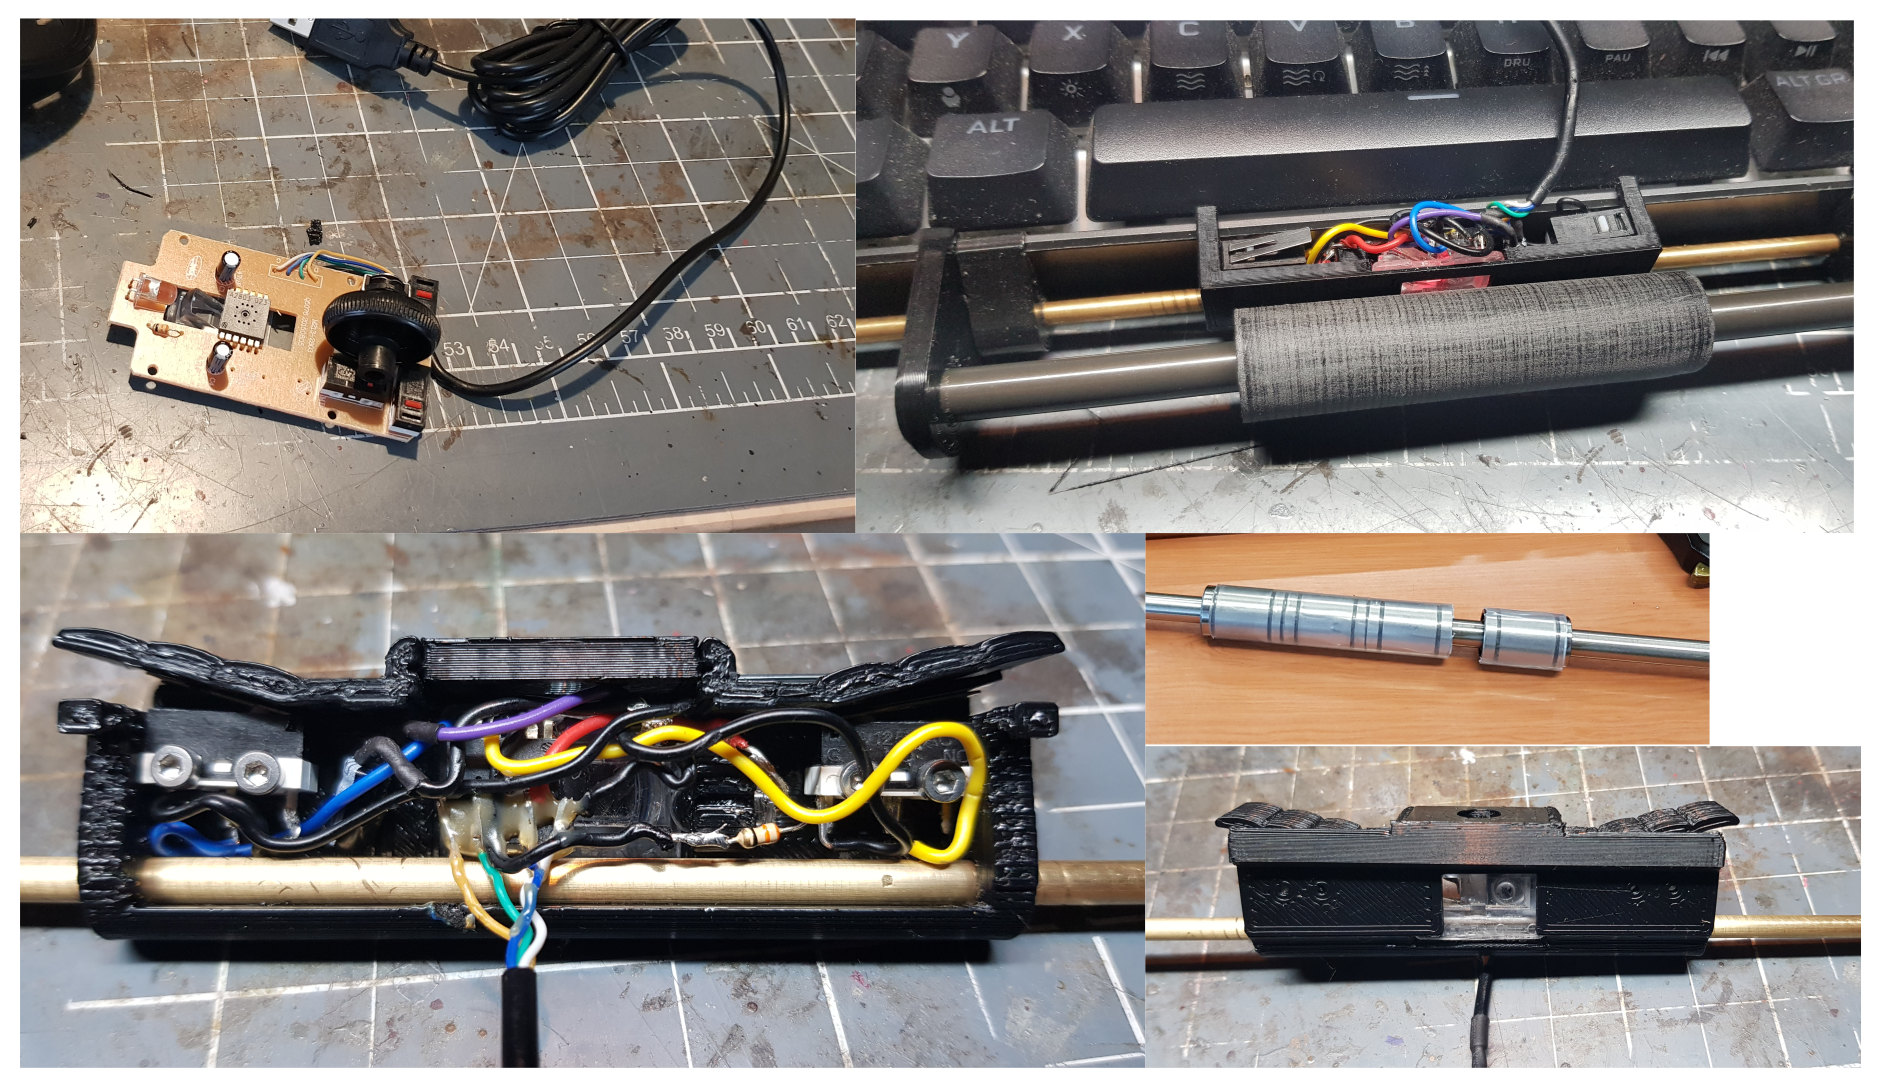
Easily the most trial-and-error on this project: the ergonomic mouse replacement. In the end I swapped the LM8UU for IGUS drylin®
### Additional Features
- Adafruit 15x7 CharliePlex LED Matrix Display FeatherWing - Red
- Adafruit OLED for Raspberry Pi Pico, 128x32, I2C (scratch that, it died randomly and was replaced by a Generic 0.91 Inch, White 128X32 I2C OLED)
- AZDelivery Logic Analyzer 8 CH, 24MHz
- 2x 4mm Banana Jacks (22mm length, one red, one black...I did not like the red I got so a 3d file for resin printing your own is included)
- InLine 33441G USB 3.1 Adaptercable Male C to Female C (for the charging port connected to the UPS)
- 0.28" mini Digital Voltmeter Display
- (optional) 4x WAGO 221-412 2 Fach clamps (to expose the I2C Bus on the backside)
- PSP Slim analog Controller Joystick
- Teensy LC (to generate a HID Keyboard and Mouse, you can try a different controller here....but I had some issues with the Circuitpython ones)
- 7x different color 5mm LEDS (and resistors matched to the GPIO output)
- 7x LED housing for 5mm leds (I used Signal Construct 1089)
- 4x Miniature Toggle Switch (I scavenged for these, you can also use any other switches or buttons that fit in the front panel)
- Hefty, vandalism-safe Button with LED indicator for 10mm hole (power button, there is plenty of space reserved for this in the housing so even longer models should fit)
- 5mm hole momentary switch (for below the screen, wired to the waveshare display's on/off switch so it can be used to conserve power)

Components on the sides are all mounted to brackets, clamping the original keyboard case.
### Handle
- Bike Handle Grip (Diameter: ~24 mm. Length: ~ 110 mm, cut to size)
- Aluminum Pipe 24mm OD, 20mm ID - M5 threaded rod ~140mm length
- 2x M5 Ring nut (screws to the threaded rod)
### Strap
- 2x Tactical Belt (so you get two buckles to remove the strap completely)
- Some more M3 Bolts & Nuts
- USB or other cables you wish to carry
- Cable ties (to attach the belt-buckles to the 4mm rods on the main case)
### Greeblies
- 2x CPU cooler above the speaker covers
- 1x rectangular cooler on the left side
### Experimental
- SMALLRIG Ultra Slim 4K HDMI Kabel Micro HDMI Male to Full HDMI Female 14cm (to expose the 2nd HDMI output on the back, but so far I did not get that to work nicely)
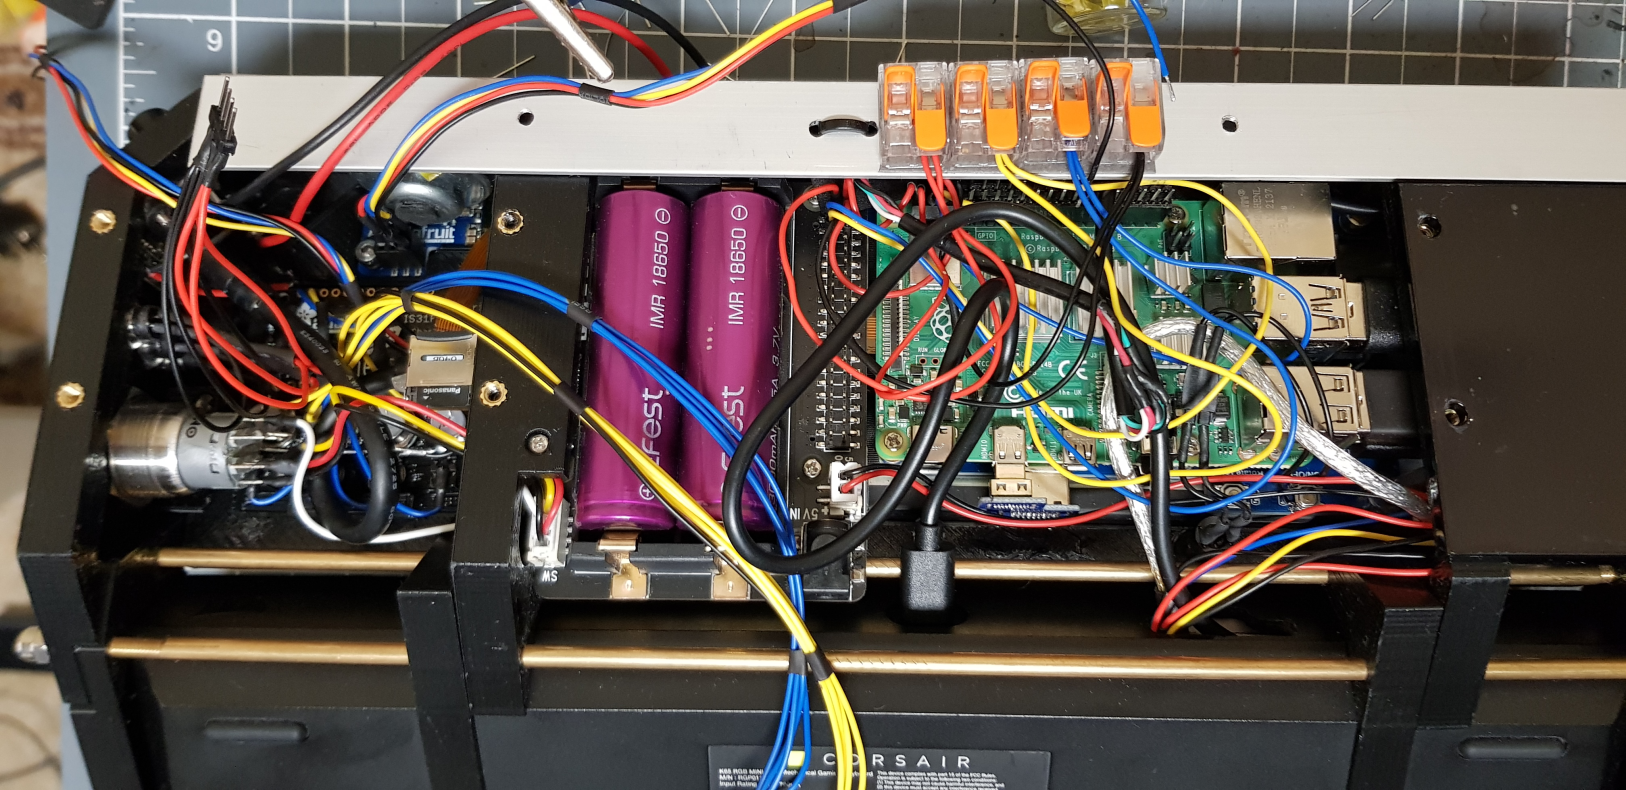
The inside ended up pretty tight with all components and wiring installed.