 ElectroBoy
I got my hands on Seeed studio version grove modules, I made one under the competitive program using BH1750 sensor. Which is used to measure the luminous intensity and known as LUX meter. Seeed studio is giving a chance to assemble your PCBs using fusion service in free. Just give an idea and complete your designs. Every approved design may win up to $300 cash and 2 free PCBA. I am working on light sensor on an auto turn on/off light with precision. And I got an entry to convert this sensor to grove. Seeed will only give approval to those designs which are not in their existing list of sensors. Check the full list of sensors from here and try to innovate something new.

PCBA means full Printed circuit board assembly, so no need to solder any component by yourself and all the components are provided by the service. Now here is an interesting thing you will get 2 sensor boards in free if any of the designs got approved.
Ignite Your Passion, Fire Your Thoughts:
In order to give back to our community and make your great ideas a reality, Seeed Fusion are launching the Grove Sensor Co-brand Campaign to help engineers turn their Grove designs into real products that the community can purchase.
If your design is selected by us and the designer is happy to license the product to Seeed for manufacture and sale, then we will produce your Grove Modules Design at Seeed Fusion and make it available via Seeed Bazaar. After providing specific software documentation and Getting Started instructions, the designers will receive the payment over $300USD directly from Seeed Fusion.
Getting excited? Keep reading to find out more.
Difference b/w LUX and LUMENS:
Summarizing, while light output is expressed in lumens, light intensity is measured in terms of lumens per square meter or lux. Both the units are different from each other. Let’s have a basic idea about them.
Lumens (lm) are the unit of measurement we use to quantify the amount of visible light the human eye can see. The luminous flux of a particular light source is measured in lumens. You may have noticed the lumens output printed on led bulbs available in market. More the lumens more will be the light intensity, spreading power and vice versa.
Lux is simply the unit of measure used to describe the number of lumens falling on a square foot (footcandles) or square meter (lux) of a surface
LUX measuring sensor:
BH1750FVI is a digital Ambient Light Sensor IC for I2 C bus interface. This IC is the most suitable to obtain the ambient light data for adjusting LCD and Keypad backlight power of Mobile phone. It is possible to detect wide range at High resolution ( 1 - 65535 lux ). Which proves the 16bit interface of this IC.
BH1750:
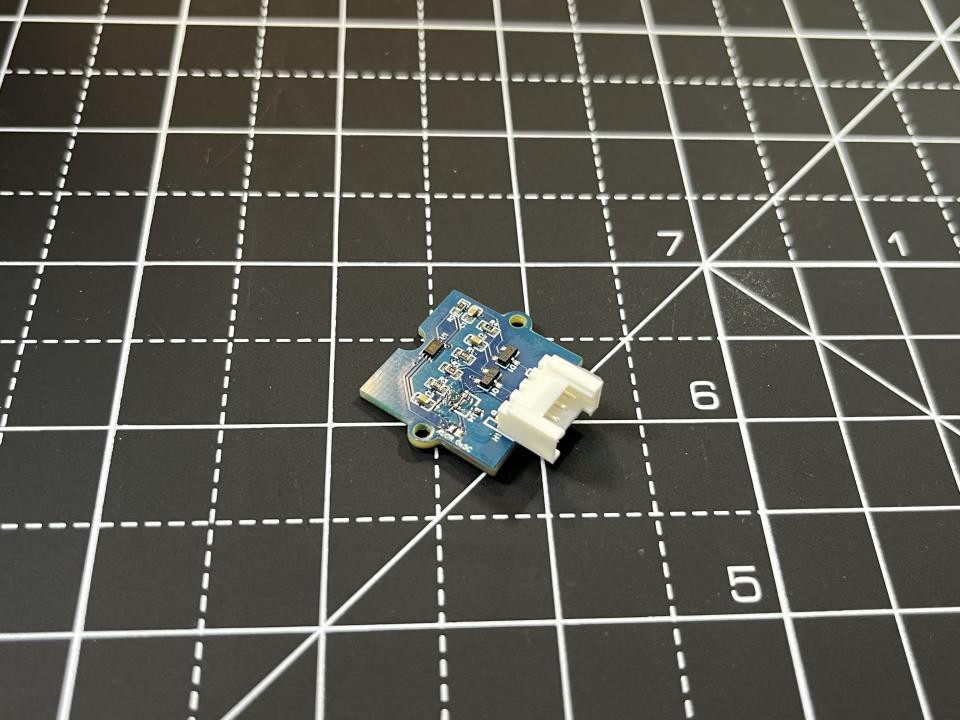
Coming to my sensor module, it is an environment light sensor used to measure the ambient light. It works on I2C protocol and bh1750 comes with very low power ratings. From here you can see the full info directly from datasheet.
Low Current by power down function
Low Current by power down function
Small measurement variation (+/- 10%)
The influence of infrared is very small.
It is possible to select 2 type of I2 C slave-address.
Different modes of sensor:
BH1750 has six different measurement modes. They are divided in two groups; continuous and one-time measurements. In continuous mode, sensor continuously measures lightness value. In one-time mode the sensor makes only one measurement and then goes into Power Down mode.
Each mode, has three different precisions:
- Low Resolution Mode - (4 lx precision, 16ms measurement time)
- High Resolution Mode - (1 lx precision, 120ms measurement time)
- High Resolution Mode 2 - (0.5 lx precision, 120ms measurement time)
By default, the library uses Continuous High-Resolution Mode, but you can set any other mode, by passing it to BH1750.begin() or BH1750.configure() functions.
[!] Remember, if you use One-Time mode, your sensor will go to Power Down mode each time, when it completes a measurement and you've read it.
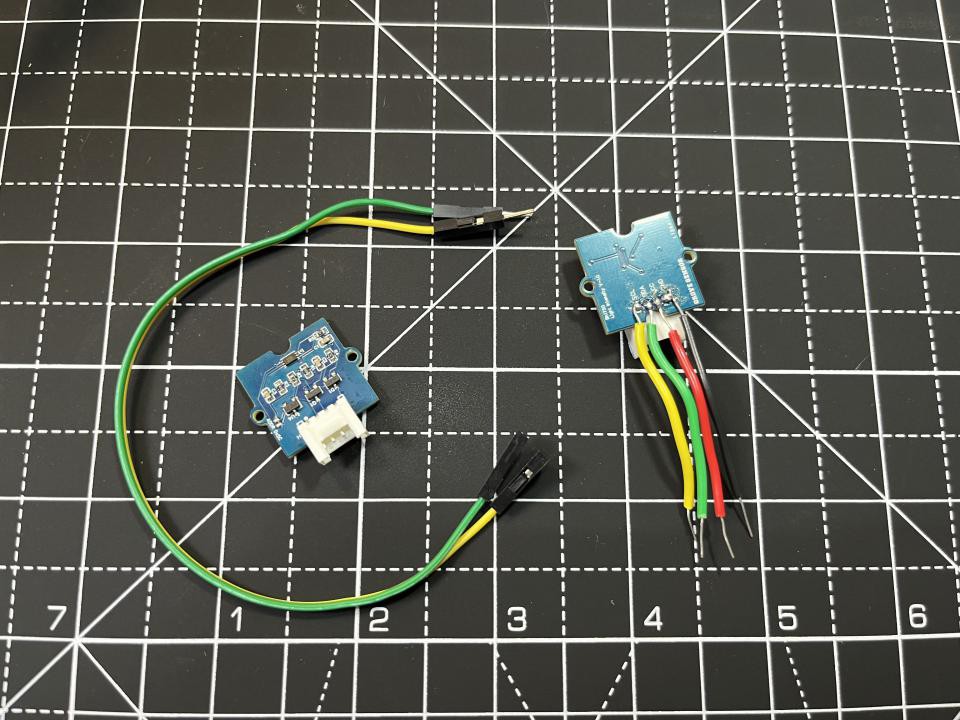
Components required:
1) BH1750 sensor from Seeed studio
2) Arduino NANO/UNO
3) 12C LCD 16X2, OLED
4) Connecting wires
5) Battery
Circuit diagram:
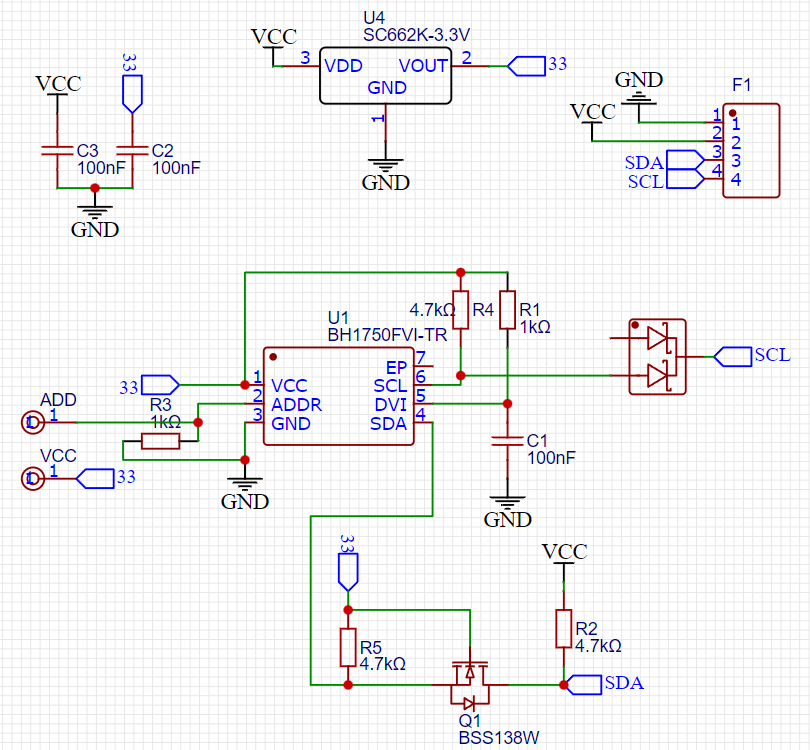
I used very minimal components to make this sensor. The main problem in designing is that the sensor works on 3.3volt logic and my interfacing microcontroller Arduino works on 5volts. That’s why I have to use a logic level convertor to set up a connection via I2C protocol. In BH1750 using some pull up transistors on SDA and SCL lanes I got the perfect circuit. With some capacitors on the power lines to filter the input voltage.
I used 4.7k pull ups to get match the signal with microcontroller, in addition a MOSFET on SDA pin and a diode on SCL pin is required. Grove 4 pin connector is mounted on the PCB to connect directly with grove shield. And an external volt regulator to give a constant 3.3volt to the sensor.
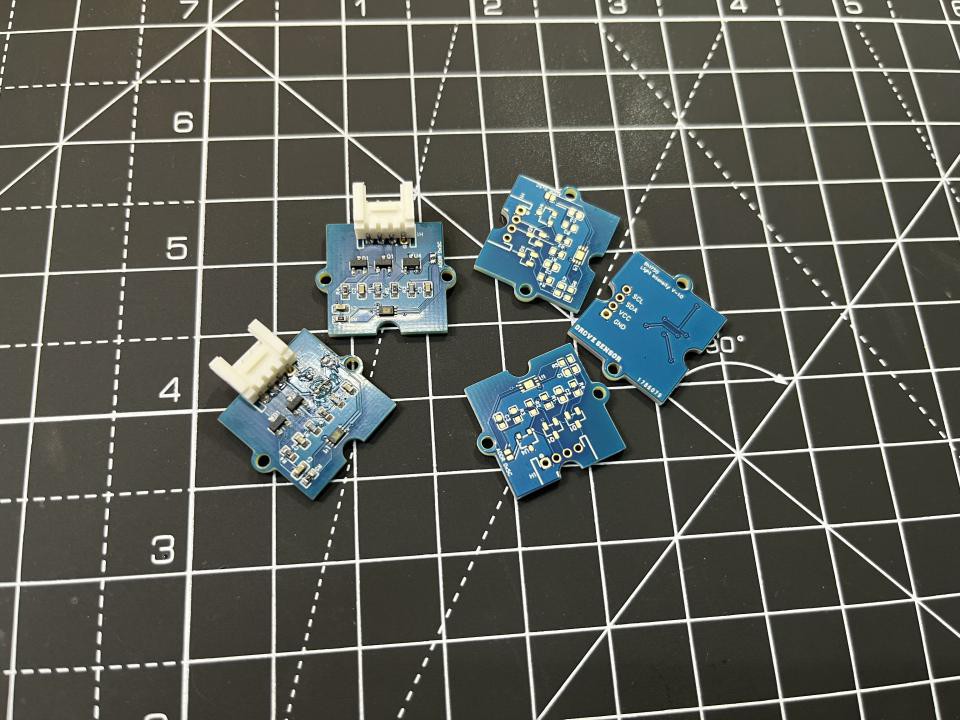
My Grove sensor design:
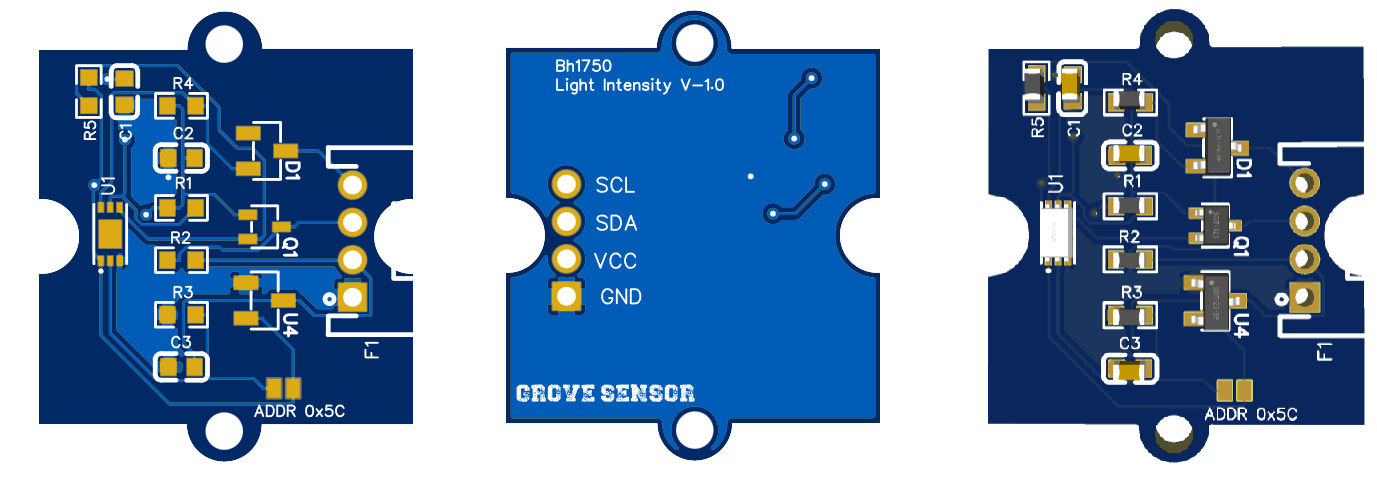
I designed this PCB using Altium and then exported as Gerber, you can download the all files including schematics from here. And then quote my sensors SEEED fusion service. After 10 days I received these boards and working as commercial one. Now it is your turn to innovate a new sensor or modify the existing ones.
Detecting the address:
BH1750 comes with dual address compatibility option. By default, address pin of BH1750 is pulled down to archive an address 0x23 but by giving a logic high signal of 3.3volts can change the address to 0x5C.
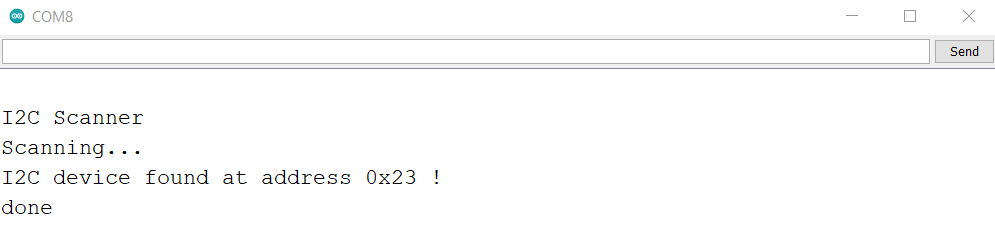
Now connect the Arduino using this schematics with BH1750 and upload the I2C scanner code from examples under I2C/ wire library. Open the serial monitor and get the address of your sensor.
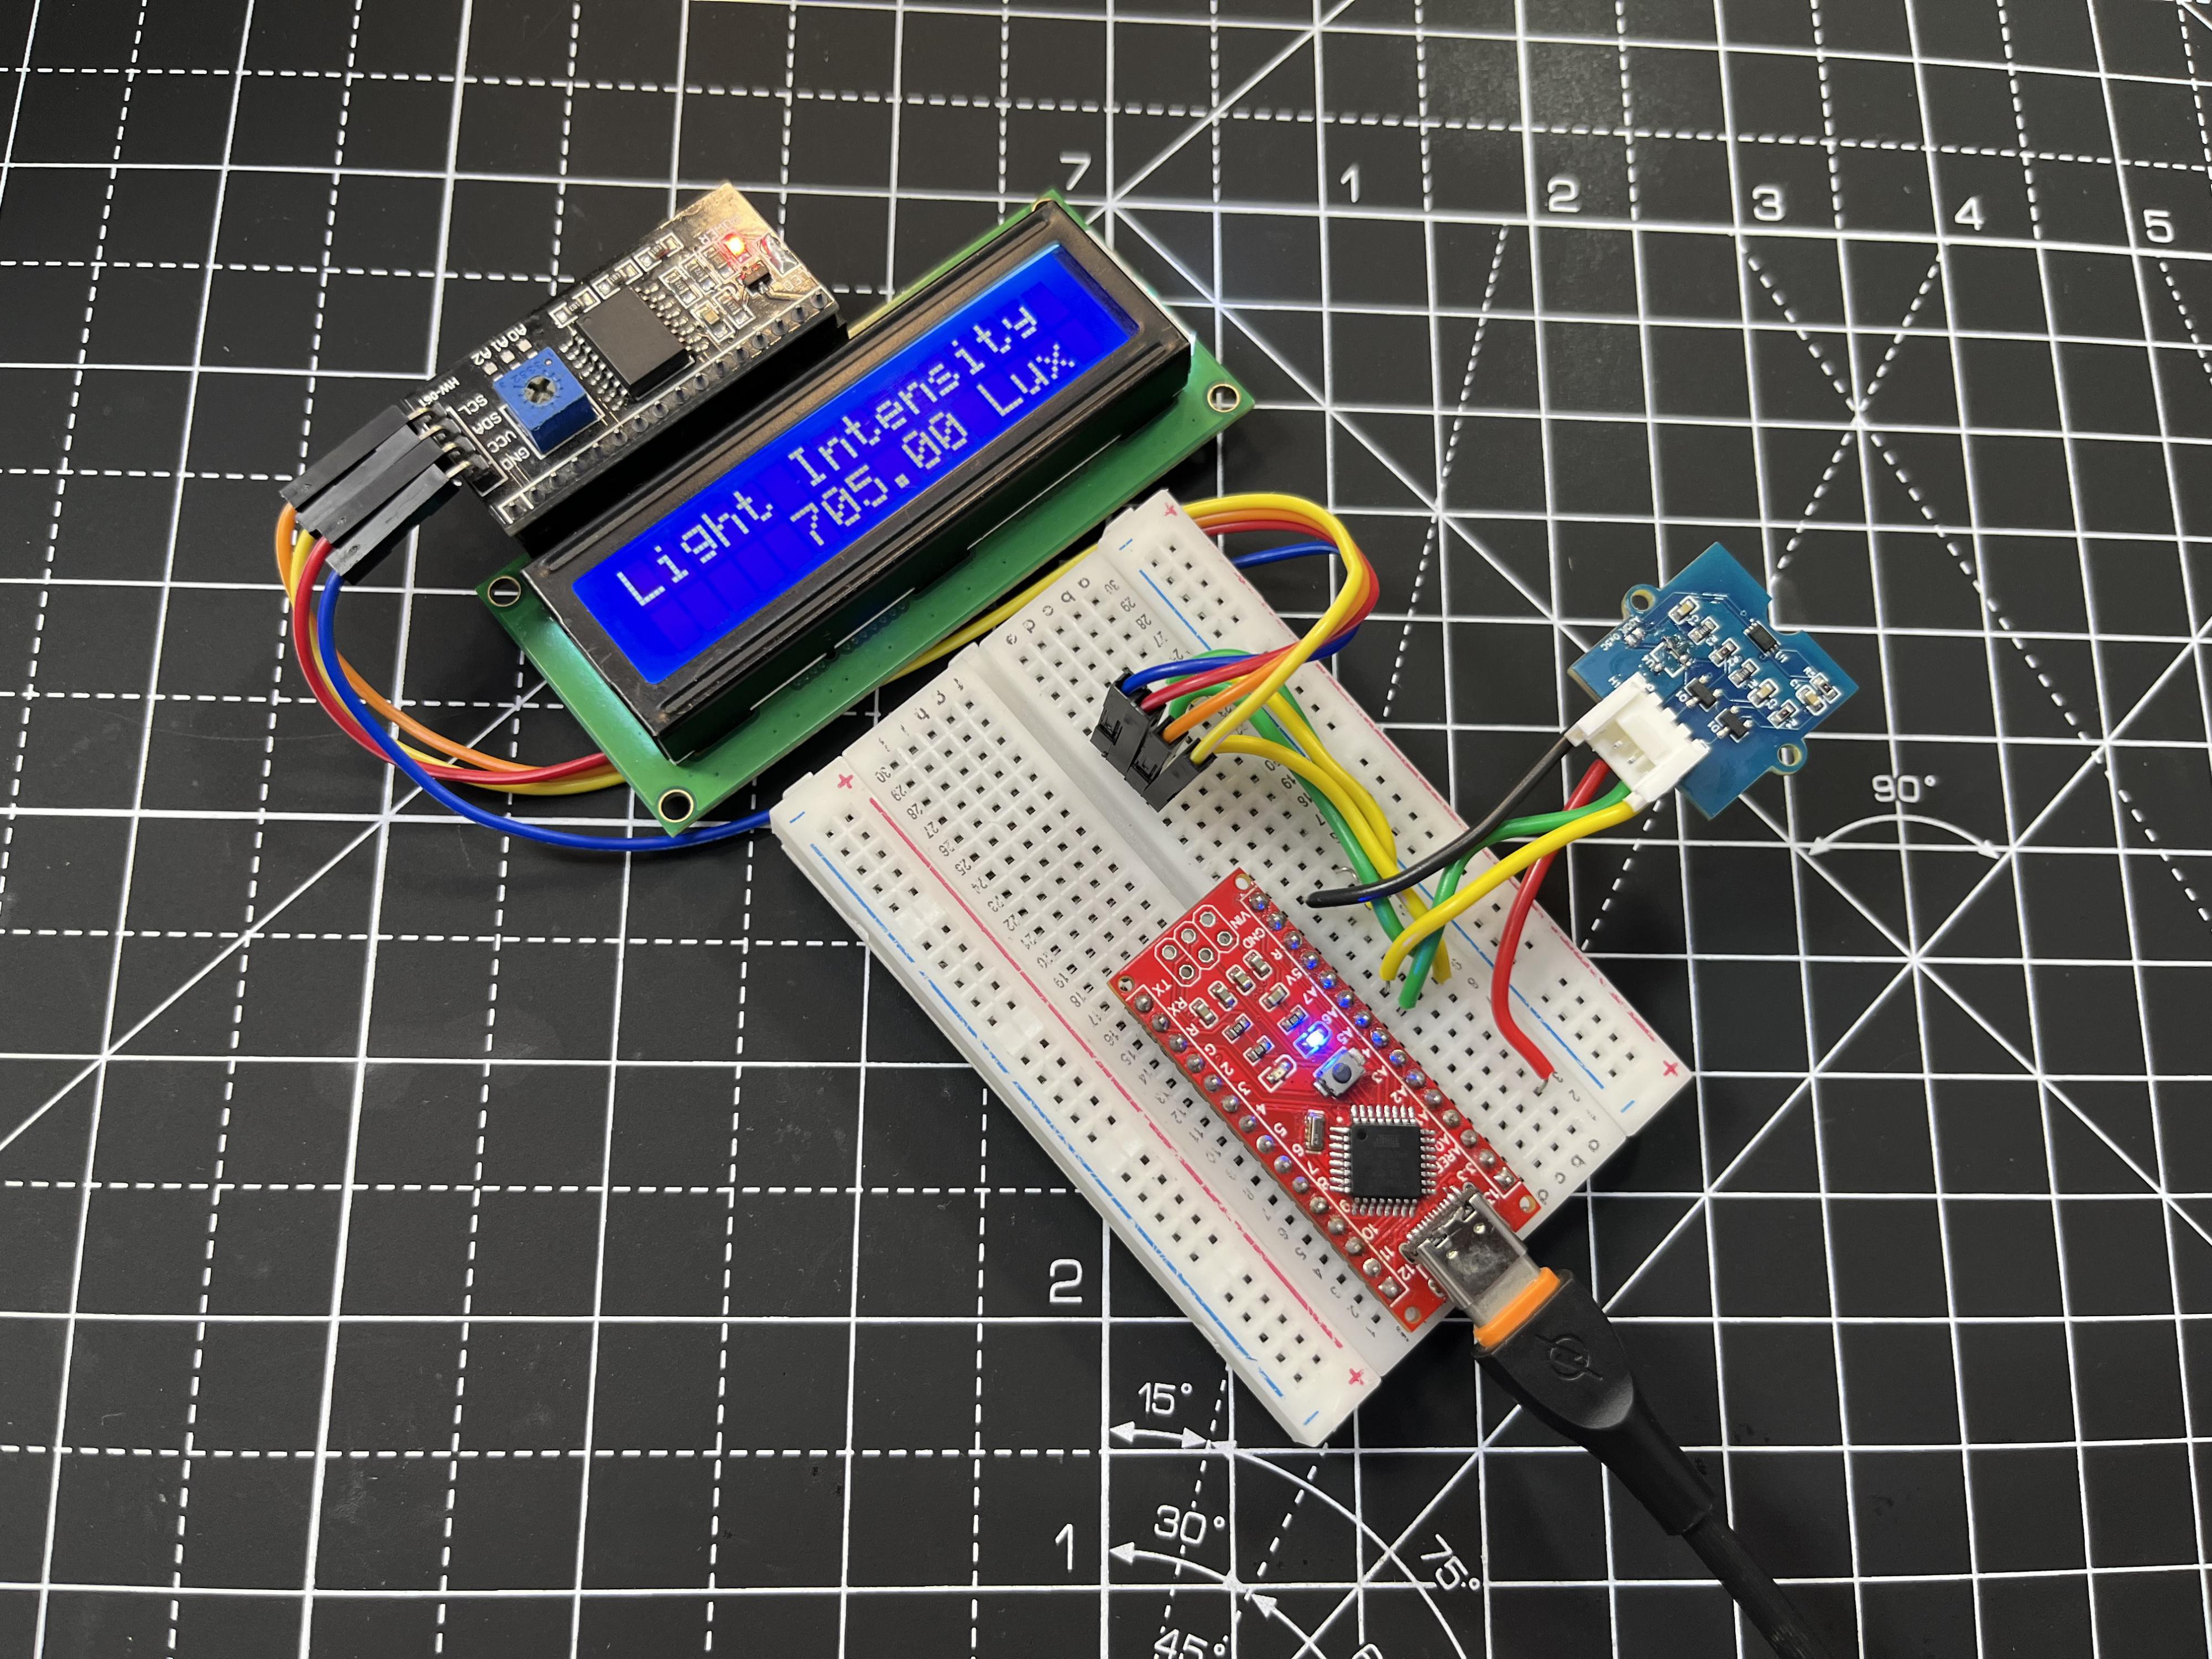
BH1750 with 16X2 LCD:
Then I tried a code with 12C liquid crystal to give a better user interface and to turn it into a real-world LUX gauge. I follow the connection of the schematics given below, both of sensor and LCD can be interfaced using same I2C port because of having different address.
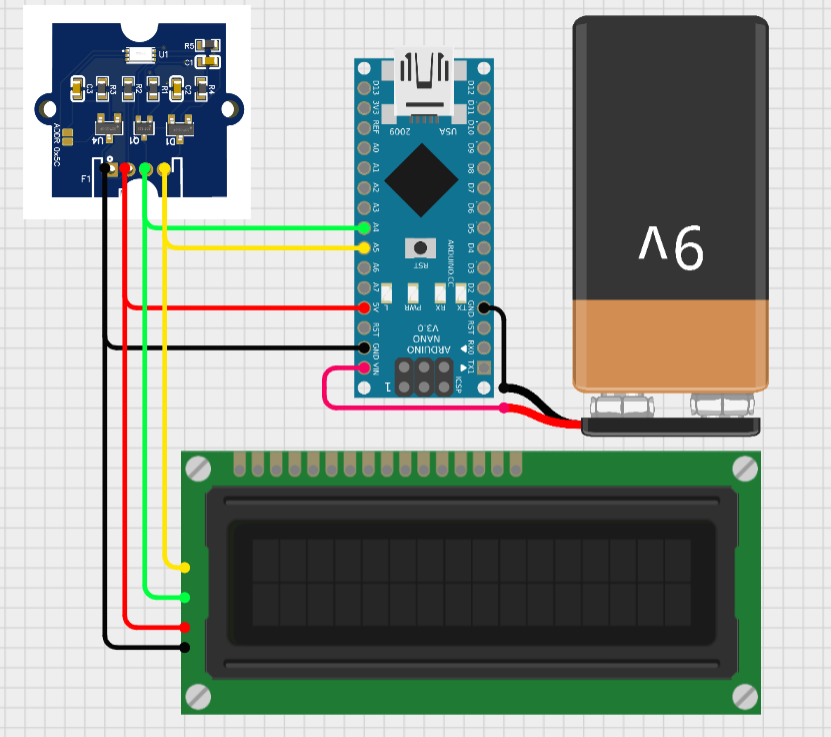
VCC to 3V3 or 5V
GND to GND
SCL to A5
SDA to A4
Code for 12C LED:
#include <BH1750.h>
#include <Wire.h> // Library for I2C communication
#include <LiquidCrystal_I2C.h> // Library for LCD

BH1750 lightMeter;
LiquidCrystal_I2C lcd = LiquidCrystal_I2C(0x27, 16, 2);

void setup() {
  Wire.begin();
  lightMeter.begin();
  lcd.init();
  lcd.backlight();
  lcd.setCursor(0,0);
  lcd.print("BH1750 Test");
  lcd.setCursor(0,1);
  lcd.print("Please wait...");
  delay(3000);
  lcd.clear();
}
void loop() {
   lcd.clear();
   lcd.setCursor(0, 0);
   lcd.print("Light Intensity ");
   lcd.setCursor(5, 1);
   float lux = lightMeter.readLightLevel();
   lcd.print(lux);
   lcd.print(" Lux");
   delay(2000);
}
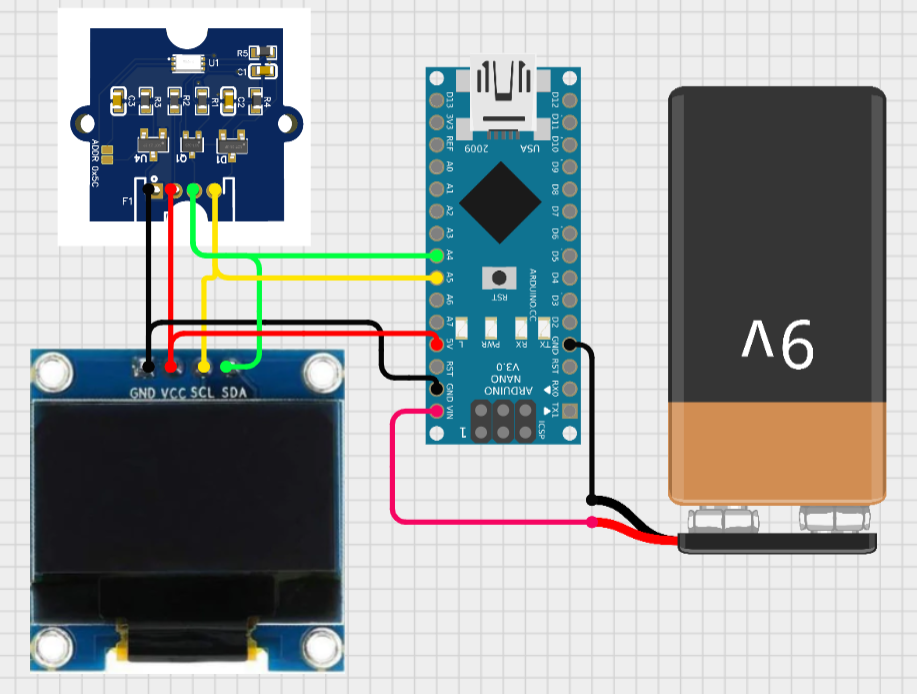
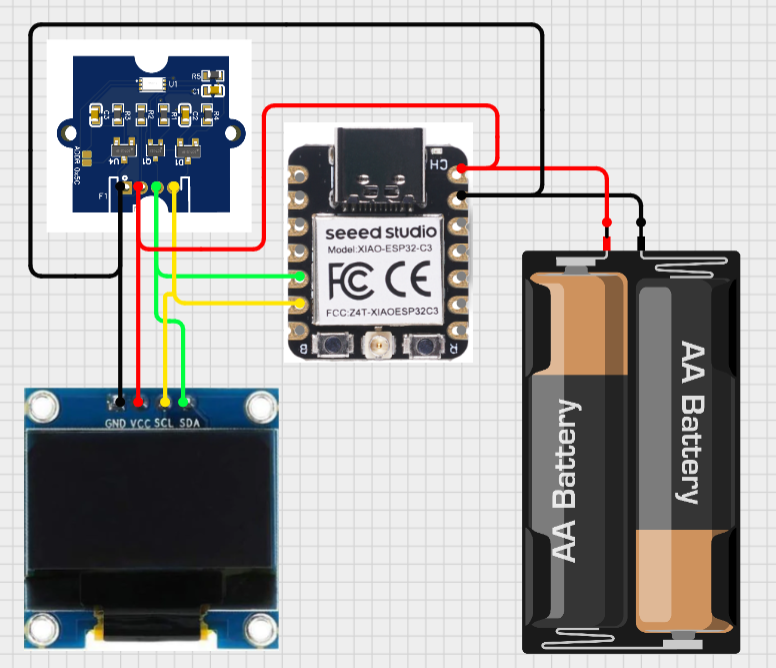
BH1750 with OLED display:
Using the same I2C method I interfaced one more display. This is SSH1306 0.96 inch OLED panel working on a 0x3C address. Make all the connections using this schematics and then upload the Arduino code given below:
Code for OLED:
#include <BH1750.h>
#include <Wire.h> // Library for I2C communication
#include <Adafruit_GFX.h>
#include <Adafruit_SSD1306.h>

BH1750 lightMeter;
#define OLED_RESET 1
Adafruit_SSD1306 display(128, 64, &Wire, OLED_RESET);

void setup() {
  Wire.begin();
  lightMeter.begin();
  display.begin(SSD1306_SWITCHCAPVCC, 0x3C);
  display.clearDisplay();
}
void loop() {
   display.clearDisplay();
   display.setTextSize(1);
   display.setTextColor(WHITE);
   display.setCursor(20,10);
   display.print("Light Intensity");
   display.display();

   float lux = lightMeter.readLightLevel();
   display.setTextSize(2);
   display.setCursor(20,30);
   display.print(lux);
   display.display();

   display.setCursor(30,50);
   display.print("   Lux");
   display.display();
   delay(2000);
}
Working and representation in different environment:
This sensor has ability to reject the infrared rays and to detect the light intensity with high precision. In low light the sensor works very well as compared to any analog sensor like LDR. In daylight, we can perform different tasks as light intensity changes. This project can also be configured as clock if environment is clean.

Same code can be used to interface the sensor with XIAO ESP32C3 module. This is the lowest possible formfactor of esp32 MCU. BUY XIAO ESP32C3 from here.
Register now using this link to seeed studio and get free coupons from my side as a free gift. Participate in the competition (Ignite Your Passion, Fire Your Thoughts) and get a chance to win up to $300 cash price.