 Dave Henry
The Wireless World Nanocomp 6809 project was published in July 1981. Scans of the original paper-based articles are included in the Files section. The full January 1981 and July 1981 Wireless World issues are available online but are not quite as clear as the scans.
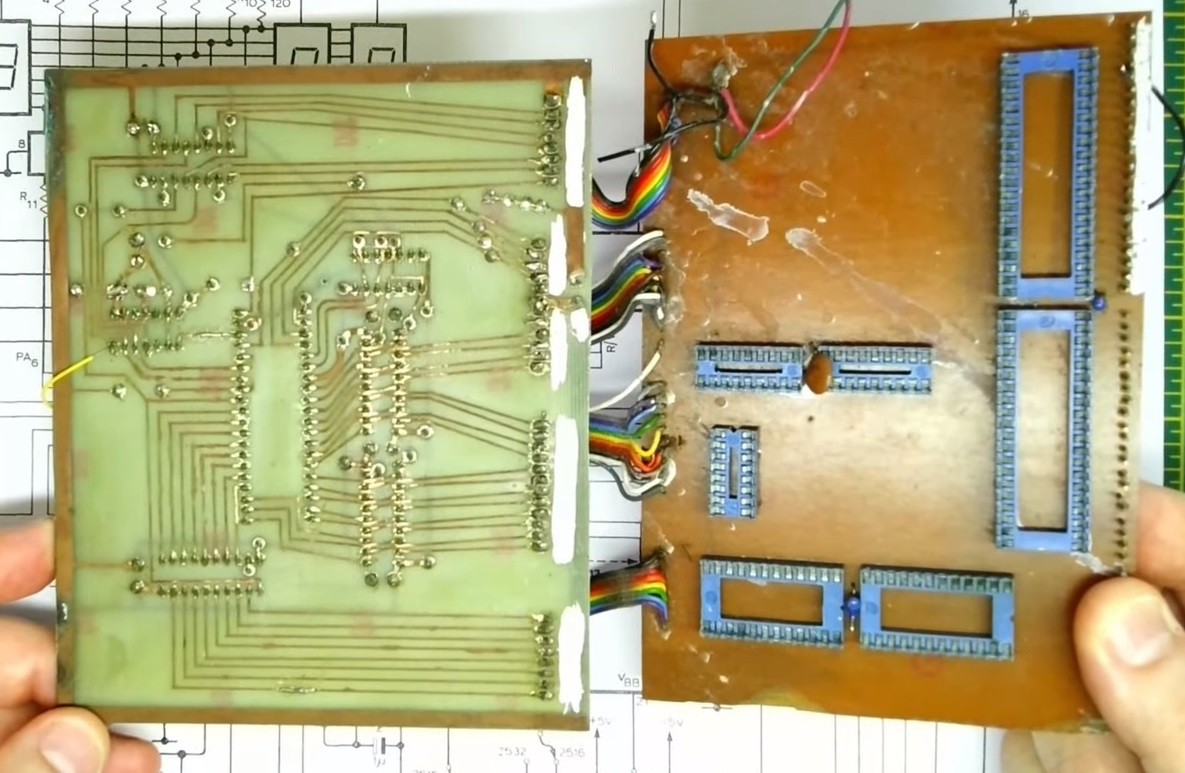
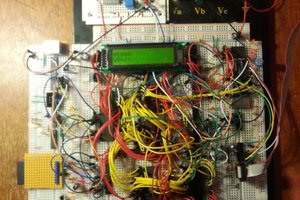
I had started to build a Motorola 6809 based micro earlier in the 1981 but then adapted the design to incorporate the memory map used by the Nanocomp and adopted the keypad and 7 Segment LED display design so the Nanocomp 6809 Monitor ROM could be used. During the COVID Lockdowns, I came across the original PCBs and wiring pen boards in the attic. They were quite corroded, and the key caps had gone missing but the EPROM with the monitor will still readable using an EEPROM programmer.
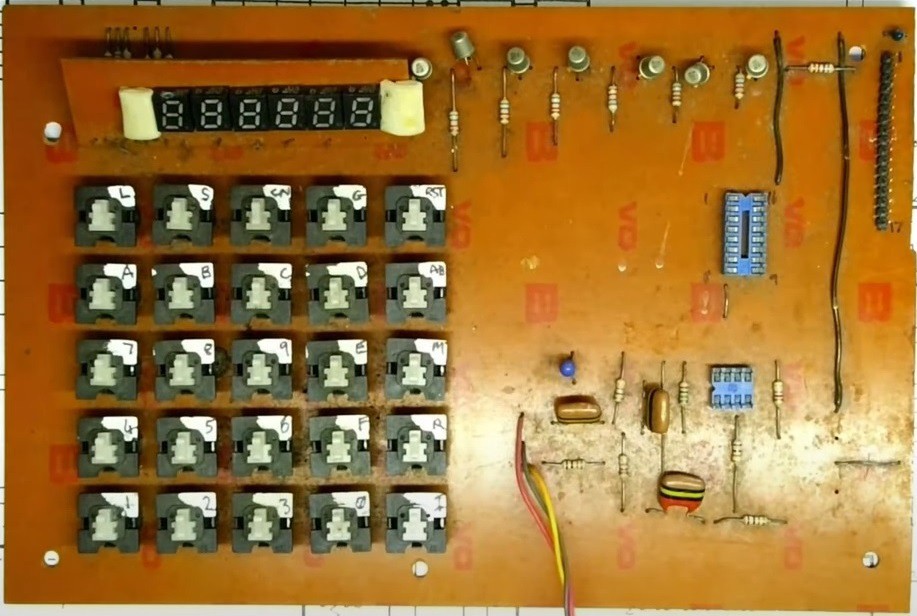
The Keypad, LED 7 Segment Display, BCD Decoder and Cassette Interface using a mixture of Printed Circuit Board and RoadRunner Wiring pen (below)
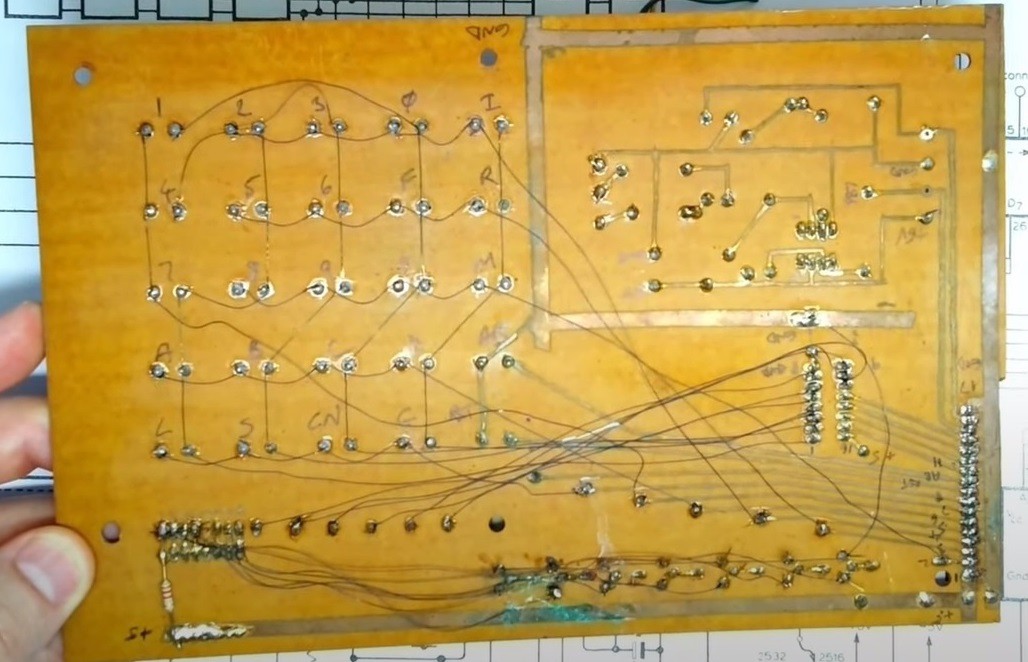
My design for the main CPU board was going to include buffer chips, but since the Nanocomp had so few chips, it didn't need them so I re-used the board and put wire links in place of the buffer chips. The second board included the address decoder, RAM, ROM and MC6821 PIA for controlling the keypad and display.
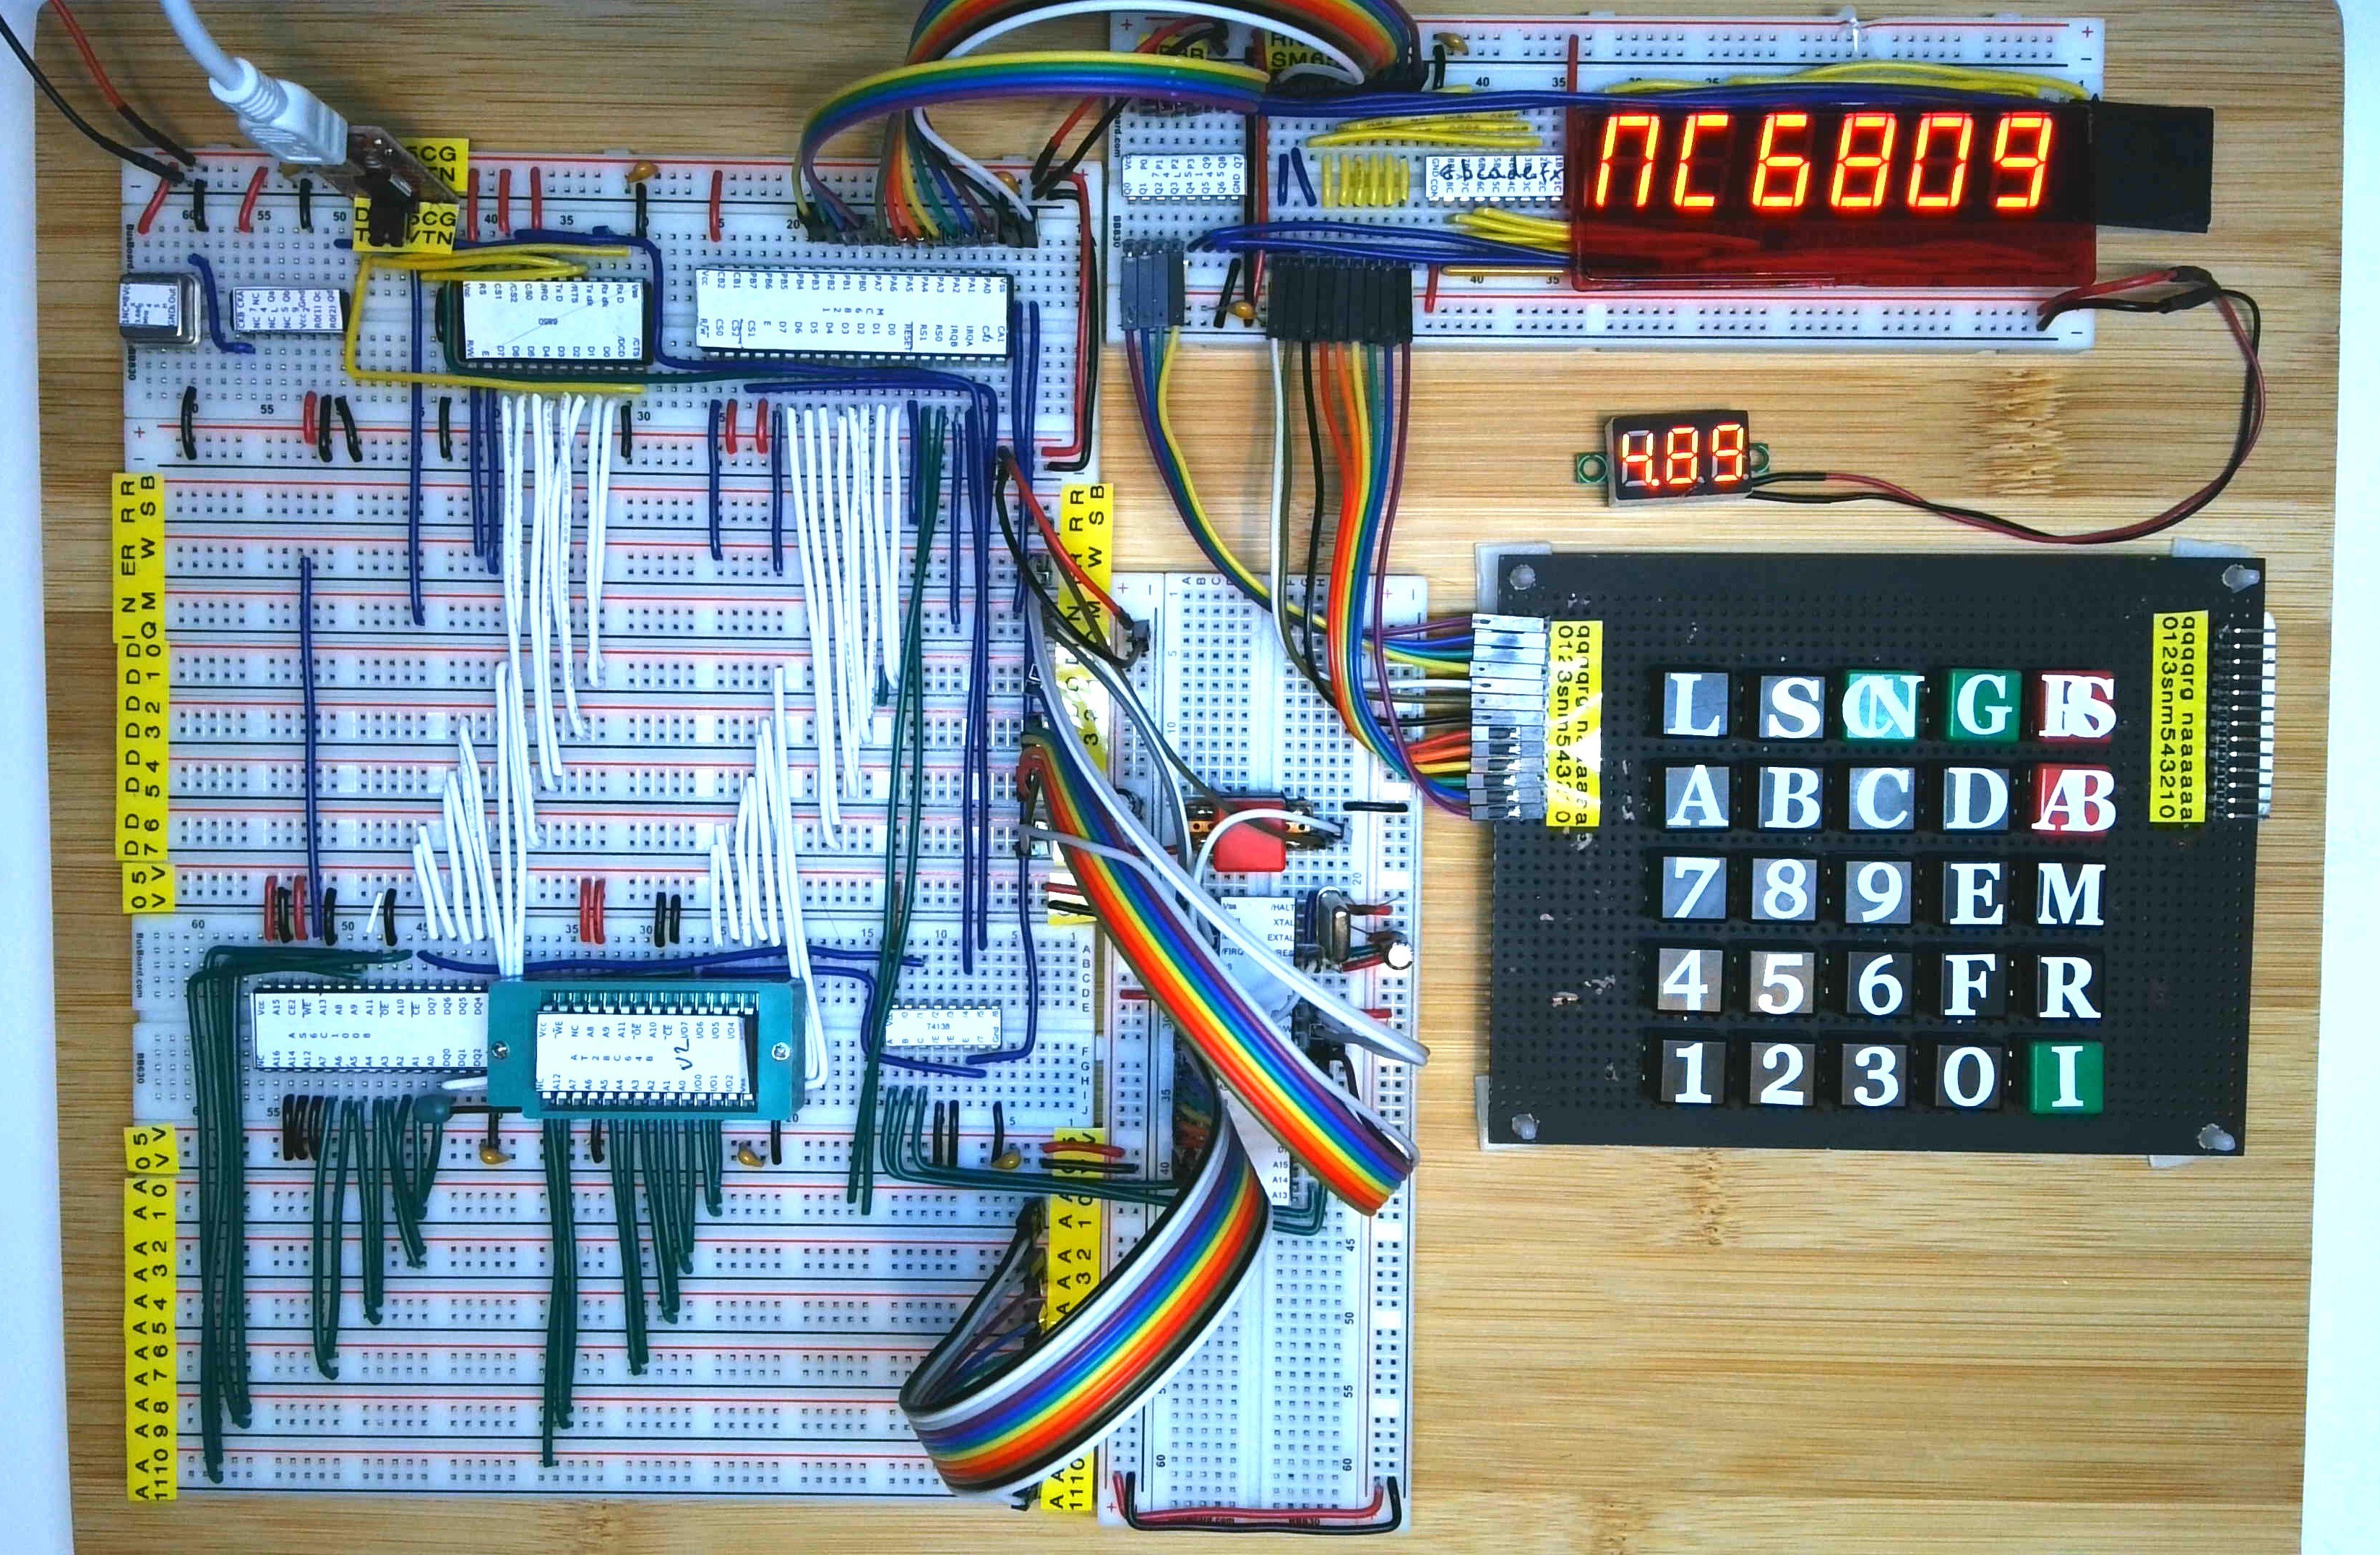
Needless to say that creating PCBs like this was time consuming and error prone (I know it's easier now) but I thought it would be interesting to see if I could re-build the Nanocomp on solderless breadboards which is where this project started.
There is a full step by step video series in the following Nanocomp 6809 Playlist. I would recommend enabling subtitles (CC) and run at 1.5x or 2x speed. All videos have chapters and manually corrected subtitles so should be fairly accurate.
For those who want something a bit quicker, there is a 15 minute video, with the entire build compressed into a 10 minute speeded up sequence.
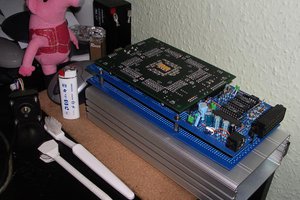
The current version of the Nanocomp project is Version 2.0 which is shown below. This is based on the 1981 original but with a serial port with TLL to Serial USB adaptor to allow software to be saved to a PC or loaded from the PC.
Recent Project Log updates show the basic configuration of a VGA compatible video controller, starting with basic CRTC configuration and video Digital Analogue Converter (DAC).
Then this was extended to include a Character Bitmap RAM loaded with a VGA 8x16 font displayed in a test pattern.

Then added Video RAM to allow more than a predefined test pattern to be displayed with hard coded foreground and background colours.
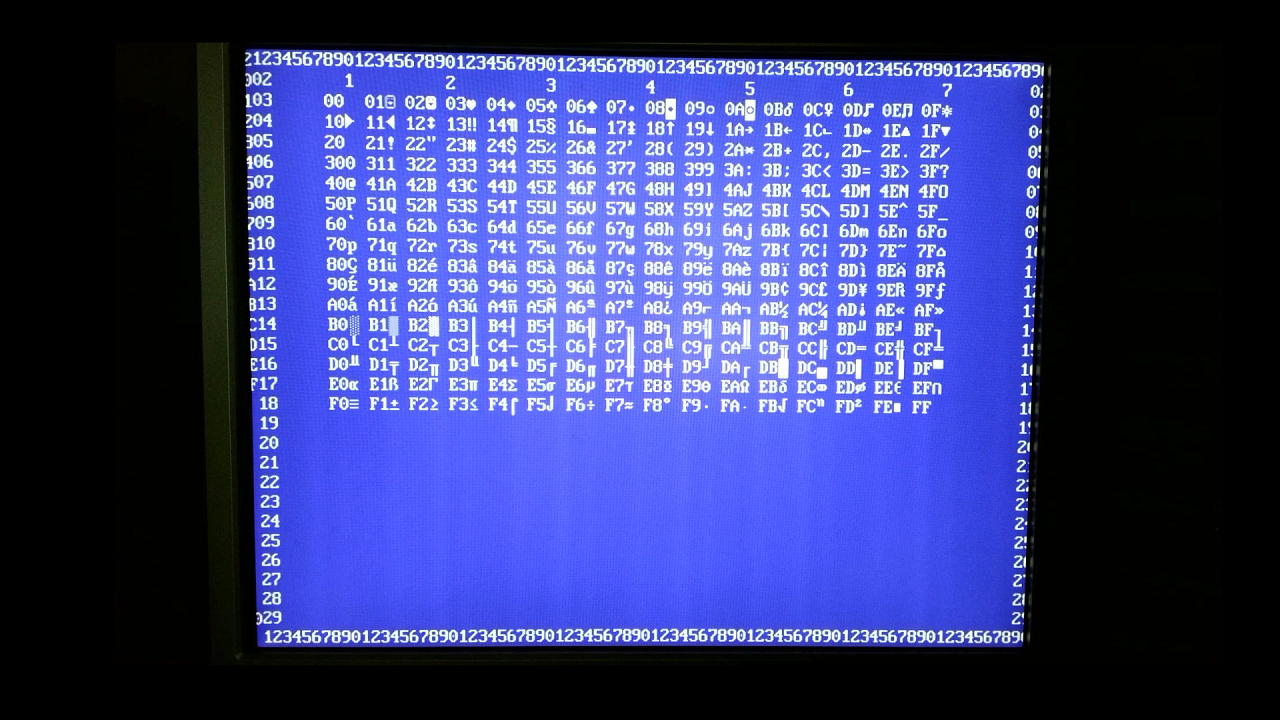
Updated timing so the display is better centered suppresses stray characters at the end and enable cursor.
Replaced 6 logic chips with one Programmable Logic Device (PLD/GLA)


 Keith
Keith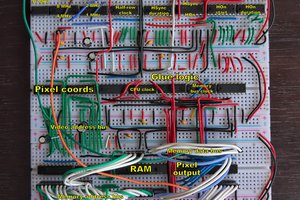

 Leon
Leon