 Mark VandeWettering
On my blog, I've written a number of posts about sending Morse code using the Arduino. They mostly have centered around using an Arduino as a beacon controller to automate the repeated sending of simple messages via Morse code. Despite being licensed as K6HX and having an Amateur Extra class license, I'm actually pretty bad at both sending and receiving Morse code. But, from time to time, I give it a whirl, and if you keep to embarrassingly slow data rates, I can barely decode callsigns and some tiny amounts of traffic. I need more practice.
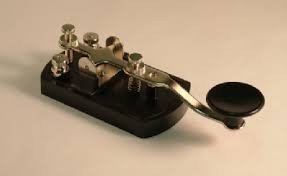
But I'm even more of a novice at sending Morse code. If you've seen anyone send Morse code, you probably imagine them tapping out the signals on a gadget like this, which is normally called a "straight key":
But there are other ways to send Morse code as well. Various mechanical means of sending dits and dahs that are more evenly spaced, usually by a semiautomatic key such as those made by Vibroplex which are often referred to as "bugs." They look like this:
 At the right you can see a paddle which is had between the thumb and forefinger of the right hand. When pressed to the right, it operates as a norrmal key, and is used to generate dashes. But when pushed to the left, a mechanical pendulum frequently makes and breaks contact, which allows the user to send a nearly continuous stream of dits. The mechanism itself is pretty complicated and fussy, to these keys are pretty expensive, and can require considerable skill to use.
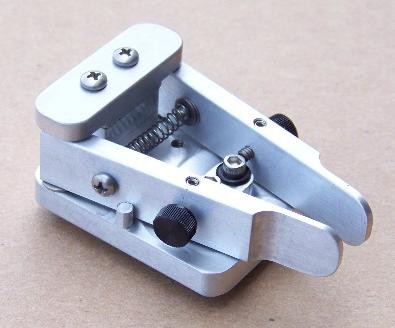
The type of key that I'm most interested in are iambic keys (or paddles) which have two different keys for dots and dashes. If you push the left switch to the right, you are closing the "dit" circuit, and if you push the right switch to the left, you are closing the "dah" circuit. These are often used in combination with a special keyer circuit, which generates all the timing, and often implements an interesting feature: if you squeeze both switches, you end up with an alternating string of dits and dahs. Thus, you can send a character like C by starting the character by squeezing the right key to the left (which starts a dah), then moving the left key to the right, which will start alternating dit-dah-dit and then letting go of both to finish the character.
I have this tiny little iambic paddle that I haven't used nearly enough to become proficient.
http://www.americanmorse.com/dcp.htm
So, my goal is to implement a simple keyer that you can easily use in your shack or other homebrew radio projects. I like the idea of using the ATtiny13, which has 8 pins and would seamingly be ideal for this purpose:
- VCC
- side tone switch
- sidetone audio
- push button switch
- keying output
- dit paddle
- dah paddle
- ground
Which is roughly the same as K1EL's excellent keyer chip that you can order from him for just $8. His stuff is awesome, and if you are an really wanting a keyer with a lot of features, you'd be smart to just order one of his chips or even his more sophisticated kits. But I wanted one feature not implemented on this simple chip: I wanted to be able to send serial data to it, and have it automatically translate it into the right keying sequence. That requires two more pins (for Rx and Tx) which meant that I had to go to a larger version of the chip. But economically, it hardly makes sense to use the ATtiny2313 or a larger chip. If you order parts from China, you can get an Arduino Mini for about $3 (or maybe even less) and it will have the power regulators, crystals and a reset switch on board. I've got a pile of ones that run on 3.3V at 8Mhz, and that will be the target development platform for this code.
My next update will include a list of features that I plan to implement. I am going to keep all the code to 1K or less both to keep it simple, and to make it eligible for the Hackaday 1K code competition. But keeping the code short has an additional benefit: it should be relatively easy to modify for your own devices, and/or include it in other radio related projects. I'll be releasing the full code under a BSD license, so feel free to hack it and use it as you like.
Discussions
Become a Hackaday.io Member
Create an account to leave a comment. Already have an account? Log In.