 Maso
MasoAs I said in my previous revision, I maintained a list of improvements that I would apply to this next revision. While accuracy and power consumption were still high on my list, a growing concern of mine was how to present the project without looking like a hazard to others or myself. Revision A had a depth of 25 millimetres (approx 1 inch), which can be quite pronounced when seen side-by-side with other wearable devices. A chance conversation with a family member led me to consider using an off-the-shelf wearable strap/case, which seemed to provide the perfect scaffolding for the latest build.
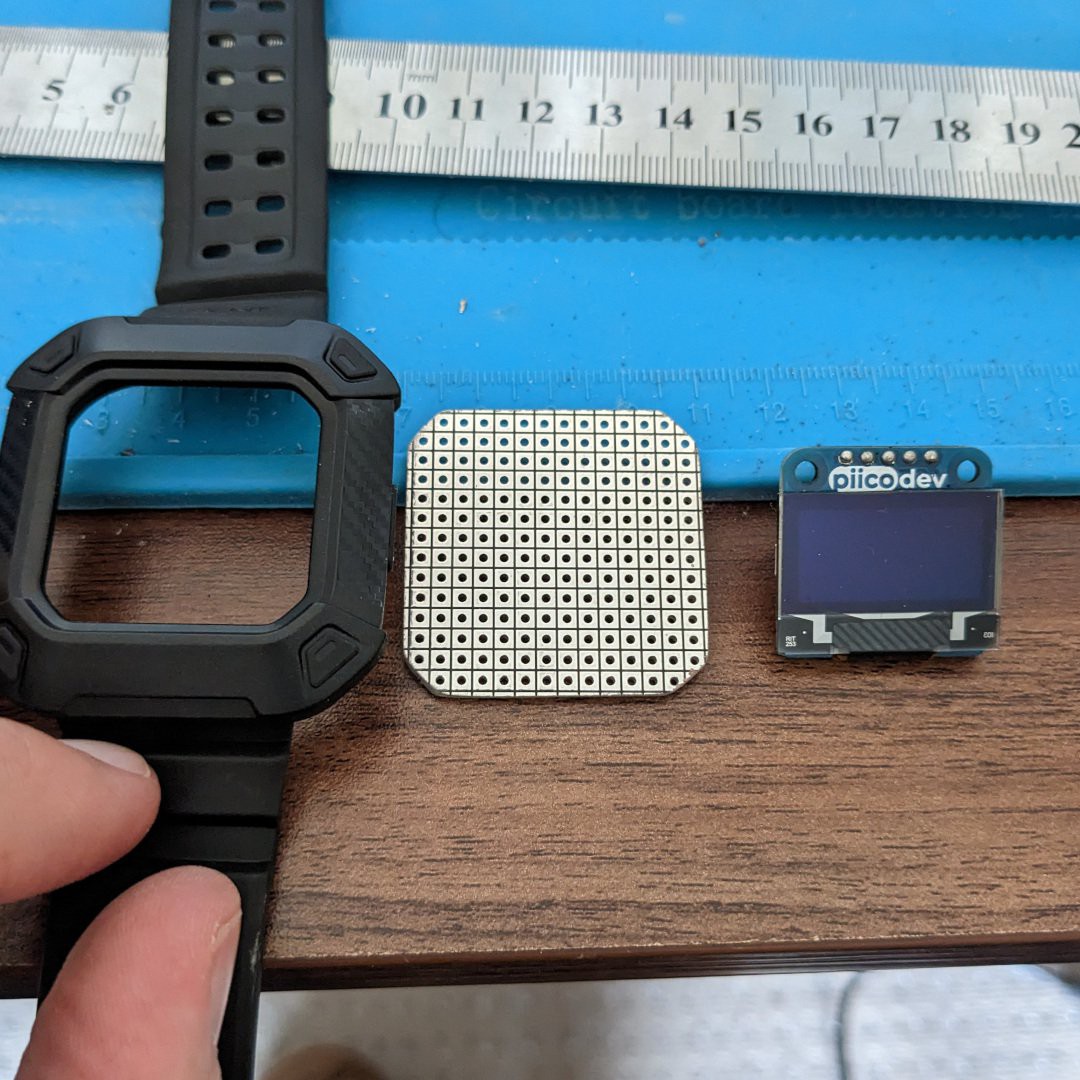
From there I began my work to fit the Dumbwatch into a Fitbit Versa case. Trimming down the prefboard and rounding off the corners for the case proved fruitful as I was able to affirm that the required parts would still fit in these limited dimensions. While at this stage of the build I became concerned about the mounting of the OLED display.
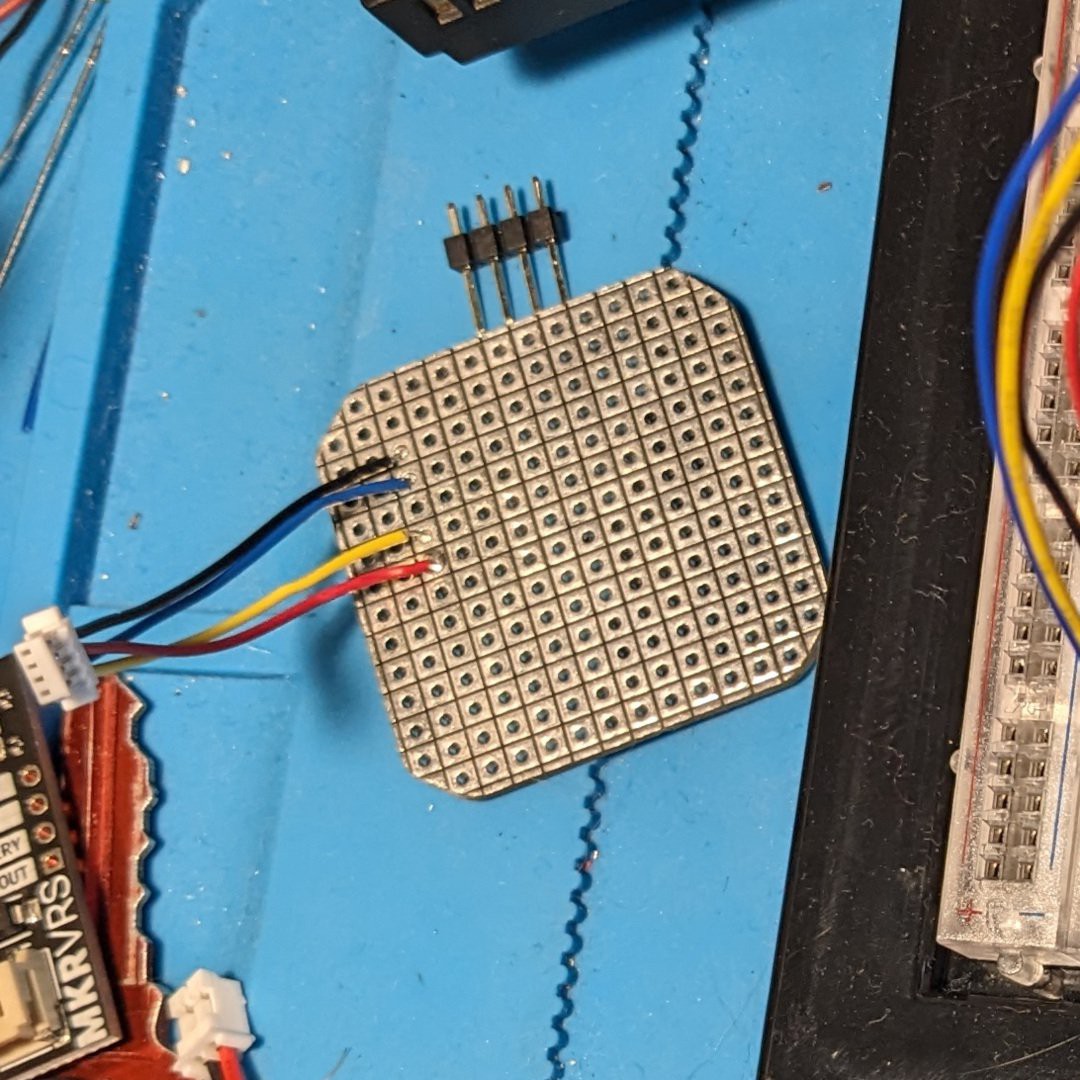
Headers had been my go-to for each previous version but added way to much height to the overall build. A lot of modules I have in my workspace have the four pin JST connectors (Stemma, Grove or in my case PicoDev) for fuss free I2C connectivity. I challenged myself to give this interface a go in the name of slimming down my timepiece. Instead of wiring up a connector from scratch, I took the cheat’s way out and cut up a male to male connector, stripped the sub 20AWG wire and soldered it in place. Several runs of continuity testing one afternoon confirmed that I had a feasible interface for my display.
I briefly left the physical part of this project to return to the code. It was time to tackle the twin headed monsters of the time leak (still at two minutes per hour) and the power drain. In my readings for the ATTiny85 it seemed that the power issue would be the easier of the two issues to tackle. Following the discover of Gammon’s guide to MCU power saving I was able to tap into disabling the extraneous peripherals (mostly the ADC) that I was very much not using.
Next up, the timekeeping. I maintained my policy to NOT use an RTC in this design and continued to do so with this revision. Going through my code, I found a check loop (a spin on “blink without delay”) seemed to be the biggest culprit for my lost minutes. In addition, I sought to try out a more agnostic way of displaying the time in the eventual case I want to integrate other (less power hungry displays). Through adjusting my routines to combine the time as a unified value as opposed to displaying “hours” and “minutes” as two separate values I seemed to reduce the minute leak even further to the point that it was now only a single minute lost every hour. For a non-RTC device I felt that this was as good as I was going to get and so returned to the hardware for the home stretch.
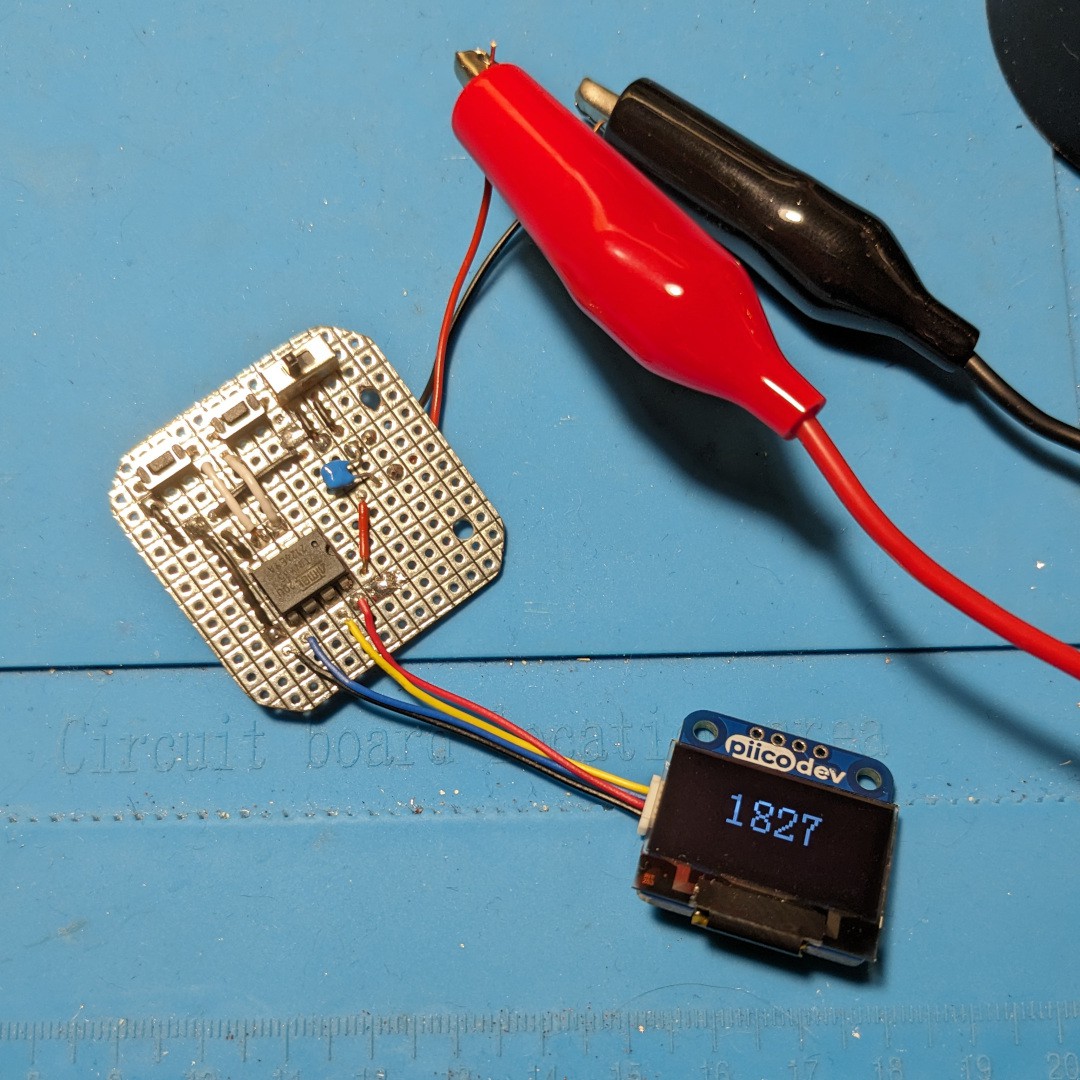
In assembling the components I was put off by the prospect of needing to solder the MCU right onto the board to shave off those millimetres. My approach at this stage of the build was to have the supporting components as complete as possible before applying the chip at the very end. Much point-to-point soldering and continuity testing later. Even applying volts to double check that everything was in its right place I felt ready to attach the chip. In the end, thanks to the many magnetic helping hands I got the chip attached, connected the screen and bench power...with much success! After the mess of diving into hard soldering logic with the first Dumbwatch I felt like a weight had lifted of my shoulders.
As everything came together, it became clear that I had one more hurdle to clear. In my layout for this device, the screen became offset to accommodate the the “hours” and “minutes” (no way I was reverting to the one button time setting, it would almost take five minutes to get the correct time on Rev A). This meant that the aperture on the case needed widening. The case was a mix of super soft plastic on the inside and harder wearing plastics on the outside. Not wanting to use side cutters, I started with varying degrees of sandpaper to remove material. However, in the first thirty minutes I barely made a dent in the case. It was time for more “robust” persuasion with a bastard file. Lo and behold it proved to be the right tool for the job and finally I had a Dumbwatch in a case...like a real timepiece.
Several applications of double sided tape later to mount the Li-Po board and battery and Revision B was complete. After a few days of wear I can see that there’s much to go with this project but to have the watch in a more inconspicuous form is a step in the right direction.

Discussions
Become a Hackaday.io Member
Create an account to leave a comment. Already have an account? Log In.