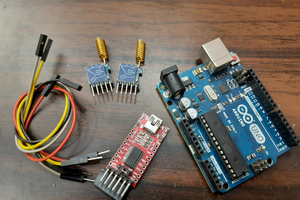
In this tutorial we will interface the world’s smallest GNSS+GPS module to get the readings on the screen. There are many GPS modules available in market which are very accurate and can be easily configured with small microcontroller but we are using RYS8830 from Reyax Technologies which comes with small onboard antenna. So no need of any high gain big ceramic antenna. We will also see how the RYS8830 development board directly configured and connected via the USB to Serial interface.
Details
In this tutorial we will interface the world’s smallest GNSS+GPS module to get the readings on the screen. There are many GPS modules available in market which are very accurate and can be easily configured with small microcontroller but we are using RYS8830 from Reyax Technologies which comes with small onboard antenna. So no need of any high gain big ceramic antenna. We will also see how the RYS8830 development board directly configured and connected via the USB to Serial interface.
Gerber files of GNSS shied is also shared below so that you can directly upload the files and order the prototypes. Get your prototypes designed from our custom PCB service.
GNSS and Positioning:
global navigation satellite system (GNSS) is a general term describing any satellite constellation that provides positioning, navigation, and timing (PNT) services on a global or regional basis.
The performance of GNSS is assessed using four criteria:
Accuracy: the difference between a receiver’s measured and real position, speed, or time.
Integrity: a system’s capacity to provide a threshold of confidence and, in the event of an anomaly in the positioning data, an alarm.
Continuity: a system’s ability to function without interruption.
Availability: the percentage of time a signal fulfills the above accuracy, integrity, and continuity criteria.
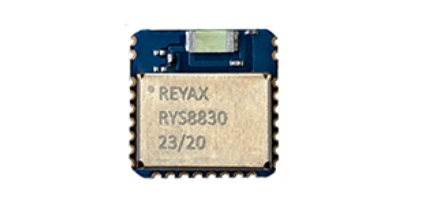
RYS8830:
The REYAX RYS8830 1.8V GNSS module is built on the high performance of the SONY CXD5605AGF GNSS engine. The RYS8830 module utilize concurrent reception of GNSS systems offering high sensitivity in a small SMD form factor.
FEATURES:
SONY CXD5605AGF multi-GNSS receiver for GPS, GLONASS, Galileo
Small SMD form factor 121mm^2
Enhanced GNSS Filter and Low Noise Amplifier
Ultra-low power consumption
Up to Position accuracy 1.0 m CEP
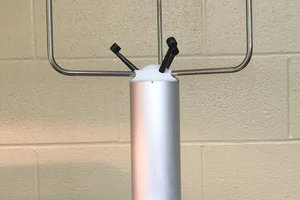
Embedded Antenna
Optional external antenna
Different modes:
The hot start is when the GNSS receiver remembers the time (UTC), the last calculated position and a sufficient number of satellites in view (e.g. more than four satellites) and some information about the satellites constellation (almanac). In particular, the receiver used the stored information and makes an attempt to lock onto the same satellites and calculate a new position. The hot start is only applicable when the receiver is started in the same location where it was turned off. The benefit of the hot start is that it does take much less time to get the new position compared to the other modes.
The warm start is when the GNSS receiver remembers only some data, such as the time, last calculated position, almanac. In contrast to the hot start, the receiver does not remember which satellites were in view. The warm start takes longer than a hot start but not as long as a cold start.
The cold start is when the GNSS receiver is switched on for the first time or does not remember the previous data. The cold start takes much longer than the other two modes.
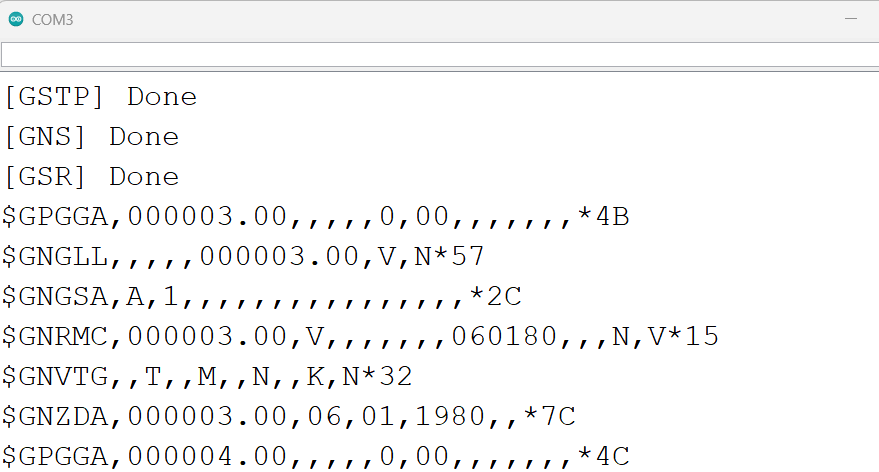
To quick start and get the GPS readings immediately, Connect the EVB shield to laptop directly and open any Serial to USB communication IDE. Here I am using Arduino IDE which has a better interface and can print the readings on the serial port.
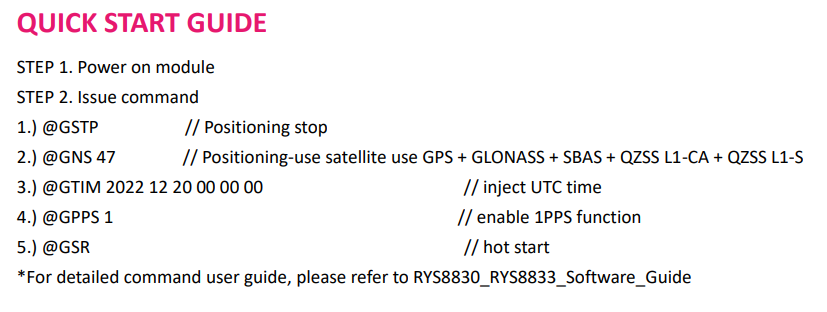
Here are some quick commands to start the GPS after establishing the connection with any COM port. Just open the serial port and type these commands.
1) @GSTP
2) @GNS 47
3) @GSR
This will stop the position first at one instant and then second command establish the connection for positioning and time. GSR command will hot start the module so it will take less time to configure, if it not works then go automatically for warm and cold start method discussed in brief above.
Getting the serial readings:
You will get the instant readings of different positioning systems in the serial monitor and it will take some time (usually 1-2 minutes) to...
 Sagar 001
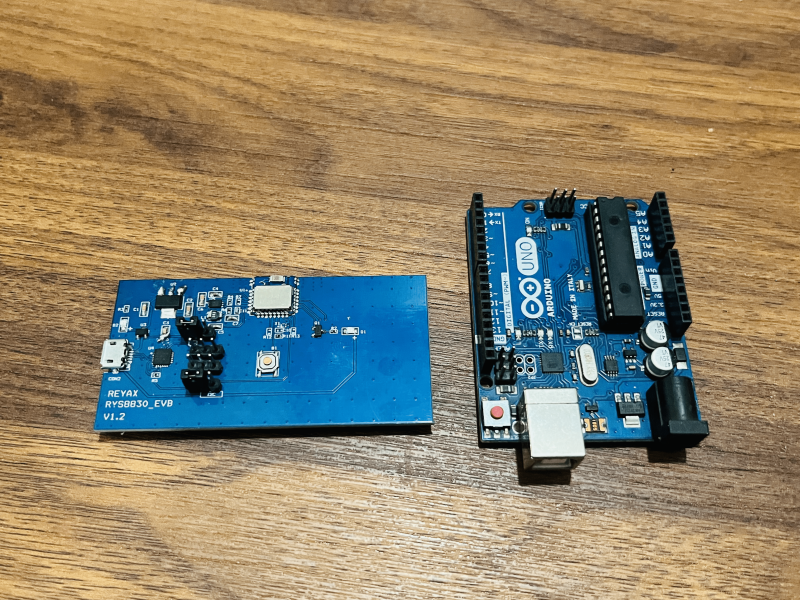

 R. Scott Coppersmith
 Capt. Flatus O'Flaherty ☠
 Ken Yap