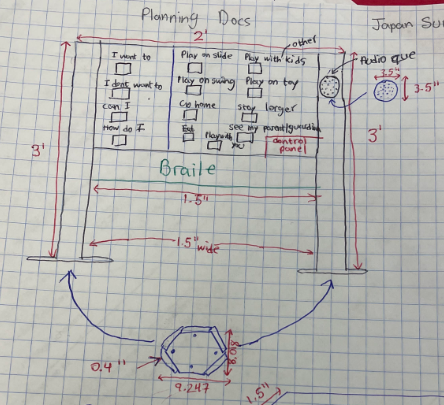
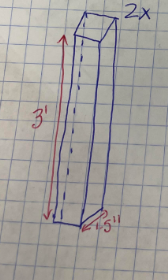
We first got the idea to make a communication board by inspiring people our teacher set up with this. First, we brainstormed how we could make the communication board. We first thought of an idea of two posts that are 3' x 1.5' x 1.5', a board that is 3' x 2' x 0.5' (we did 4' depth so we can do lining easier), and a base plate that is 9.247'' x 8.018'' x 0.4''. We started by mapping out what we had on our paper. We drew the designs shown below.
 Next, we put our ideas onto CADing software. We used onshape to CAD all our pieces. The link to using onshape and how it works is here: https://osd.onshape.com/c/activity
We put each box and braile to the top left side of board because it will look neat and professional. (We made the thickenss 4'' in this picture below because it was easier for us to do the lining.)
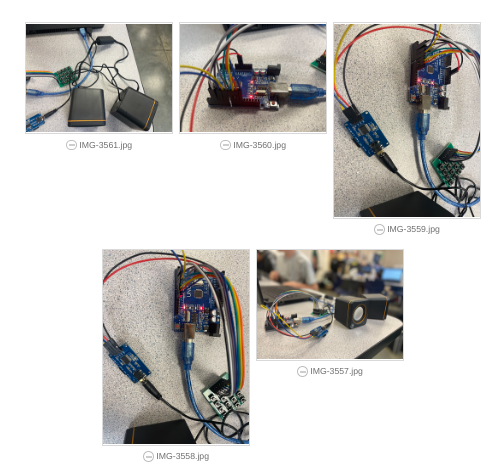
After we had a solid idea of what we were doing we started coding. We coded arduino code. When you press a metal square, (that will be shown on the final project), the code will trigger that sound and it will play on the board through the speakers. We used machinery to do this code.
These are the machinery we used :
Then we used software called Sillohete Studios, (https://www.silhouetteamerica.com/software), which allowed us to correctly trace our images, words, and braille to be able to put onto our Easel Inventables board We needed to trace because we cannot import pictures like that onto our board. We then sent our tracings to our teacher and he gave us back a sns file which allows us to import them onto board.
We then started making our finalized board that will be printed using CNC milling.
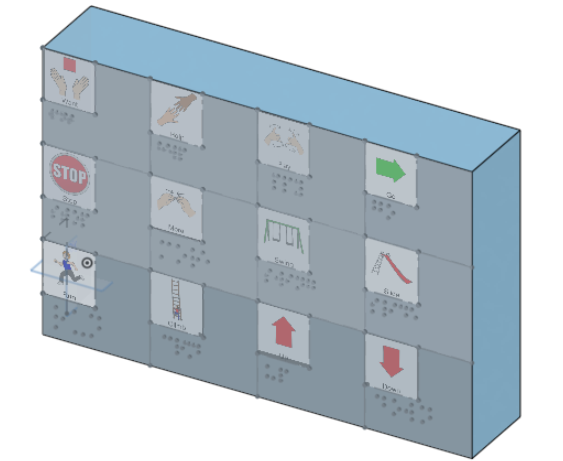
We started by gathering the correct pictures, words, and braille. We used the correct braille measurements set by the government so people with blindness can read it correctly. We placed each picture, word, and braille for 12 phrases on the board. We carved the braille using the square feature to push down the board around the braille. The finalized board is this:
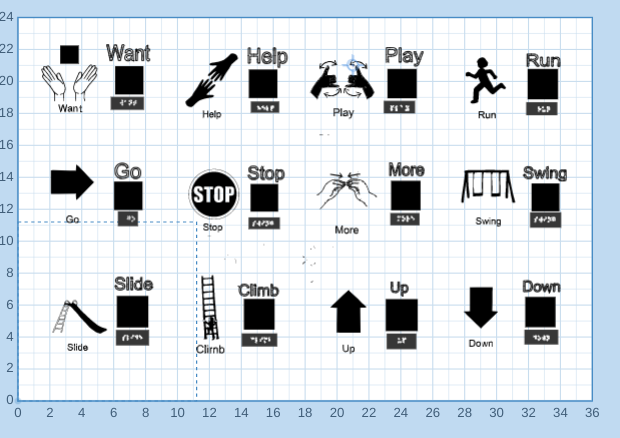
As shown above, we cut squares for the metal to go in. The metal is attached to a wire and when touched it will trigger the could and say the word that is shown to the left of the button. We then put words on top of the box to signify which box represents which word/picture.

This is our project and we are very thankful for our teacher helping us throughout the journey of this project of making a playground communication board.
Discussions
Become a Hackaday.io Member
Create an account to leave a comment. Already have an account? Log In.