 Elisa Leterrier
Brainstorming
Our first idea was to keep the idea of a lamp, but we had to remake the story in order to use more sensors. We also had to decide what sensors we wanted to use, so that way we could adapt our story to the sensor we were using. We knew that with the knowledge we had and with a little bit of help, we could use:
- Touch sensor
- Big sound sensor
- Small sound sensor
- Motion sensor
- Temperature sensor
The next step was to determine the design of the lamp, and for this we also had to establish the possible user. We decided that kids on ages 6-10 would be our perfect user. Because of this, we made a mood-board to brainstorm a possible design.
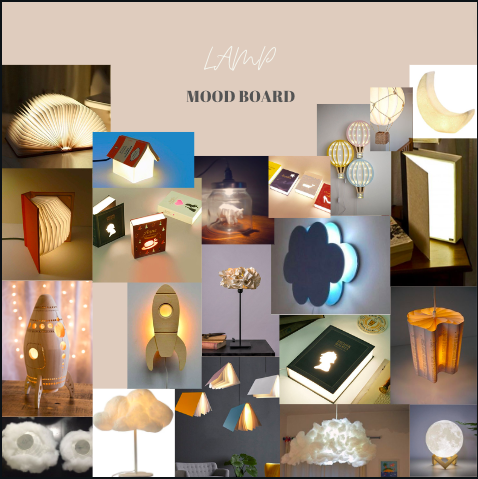
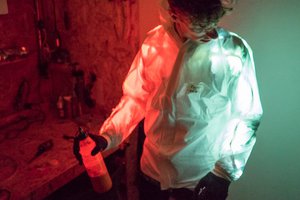
As our lamp is supposed to be used by little kids, we wanted it to be the most interactive, fun and attractive. We opted for a book design with a fun cutout on the cover that had to do with the story, this way the little kids could imagine the story more and have fun while using the lamp as it would be 100% interactive.
Story & Design
After deciding the types of sensors we wanted to use, we had to create a story. We parted by the fact that it had to be a children's story and that the story had to have different outcomes along the story line, in which each outcome had to make the listener choose between two options. The main idea of the project is that the user has to interact with the book either making a sound, shaking the book, blowing to it , etc. for the story to continue in the direction they want.
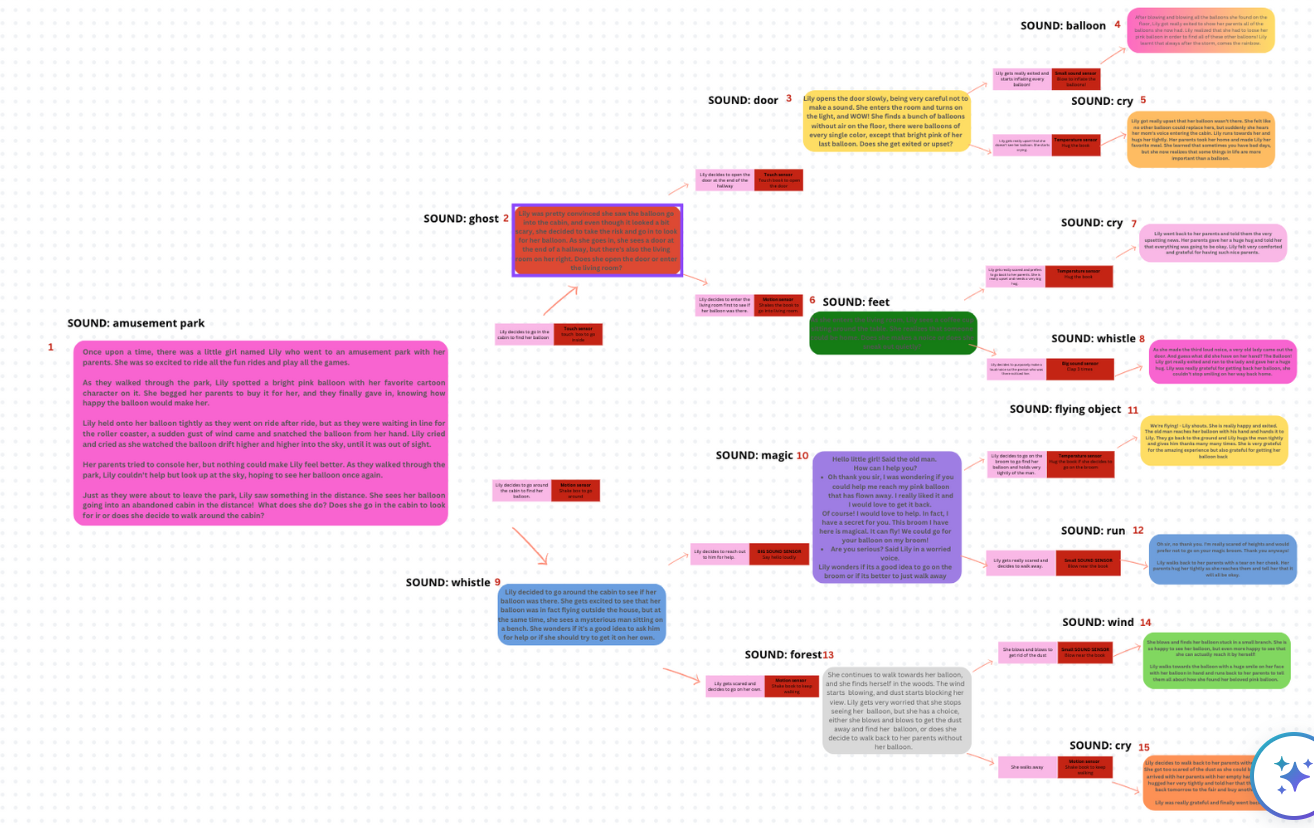
We created a story with 14 different outcomes, in which the user had to have different interactions with the book to keep the story going, all depending on what they choose.
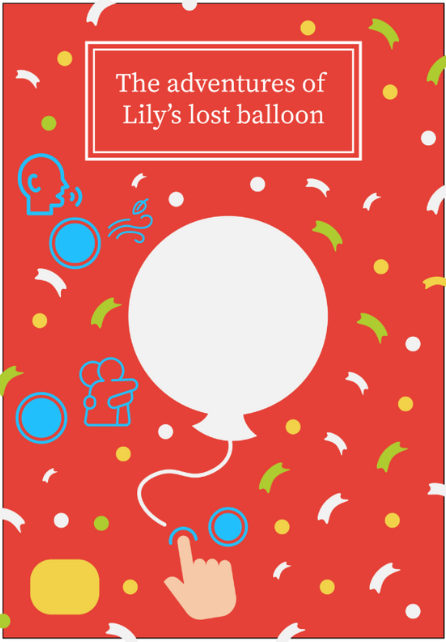
For the cover of the book, we decided to make it fun and easy to understand for the users. The main idea of the story it has to do with a balloon, so the cover has a big balloon cutout in it. Also, we decided to decorate the cover with different symbols were the sensors are placed, so the user knows where exactly they have to interact with the book when it comes to the different decision making along the story.
Here the code of our project, the different elements of our code work individually but once assembled the code no longer works :
// ** Librairies **
#include <Wire.h>

#include "SoftwareSerial.h"
#include "DFPlayer_Mini_Mp3.h"
#include "DHT.h"
#include <Adafruit_NeoPixel.h>
#ifdef __AVR__
 #include <avr/power.h> // Required for 16 MHz Adafruit Trinket
#endif

// Which pin on the Arduino is connected to the NeoPixels?
// On a Trinket or Gemma we suggest changing this to 1:
#define LED_PIN    6
#define LED_COUNT 56

// Declare our NeoPixel strip object:
Adafruit_NeoPixel strip(LED_COUNT, LED_PIN, NEO_GRB + NEO_KHZ800);
// Argument 1 = Number of pixels in NeoPixel strip

#define DHTPIN 12
#define DHTTYPE DHT11

DHT dht(DHTPIN, DHTTYPE);

// ** Pins **
int micPin = A3;      // Big sound sensor
int tempPin = A4;     // Temperature sensor
int buttonPin = 5;    // Tilt sensor
int SENSOR_PIN = 8;   // Touch sensor

// Le capteur de pression a deux sorties : A4 et A5.

// ** Variables **
int currentState;
int lastState = LOW;
int val;
float tempValue;
float voltageOut;
float temperatureC;
float sensorValue2;
float voltageOut2;
float temperatureC2;
int micValue1 = 0;
int micValue2 = 0;

int blowValue1 = 0;
int blowValue2 = 0;

SoftwareSerial mySerial(10, 11); // RX, TX

// ** Conditions **
bool touchActivated = false;
bool motionActivated = false;
bool bigActivated = false;
bool smallActivated = false;
bool tempActivated = false;

bool tempChanged = false;
bool bigChanged = false;
bool smallChanged = false;
bool touchChanged = false;
bool motionChanged = false;

void setup() {
  #if defined(__AVR_ATtiny85__) && (F_CPU == 16000000)
  clock_prescale_set(clock_div_1);
#endif
  mySerial.begin(9600);
  Serial.begin(9600);
  mp3_set_serial(mySerial);
  mp3_set_volume(15);
  mp3_set_EQ(0);


  Serial.println(F("DHT11 test!"));

  dht.begin();

  // Touch sensor :
  pinMode(SENSOR_PIN, INPUT);

  // Motion sensor :
 pinMode(buttonPin,...
Read more »

 Drap & Design
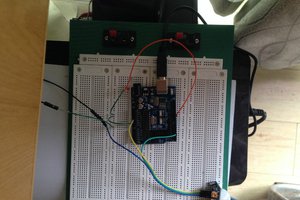
 Andrew
 dariocose
At first I loved interactive books - these exciting adventures, where every decision made influenced the course of the plot. However, once I decided to return to university for a second degree, time became a luxury, and interactive books were a luxury I could no longer afford to spend hours on. I even found an assignment help service, I use https://mysupergeek.com/assignment-help-service for this. Now my days are filled with studying. Maybe in the future, when studying becomes less intense, I will turn to interactive books again.