Ben Brooks
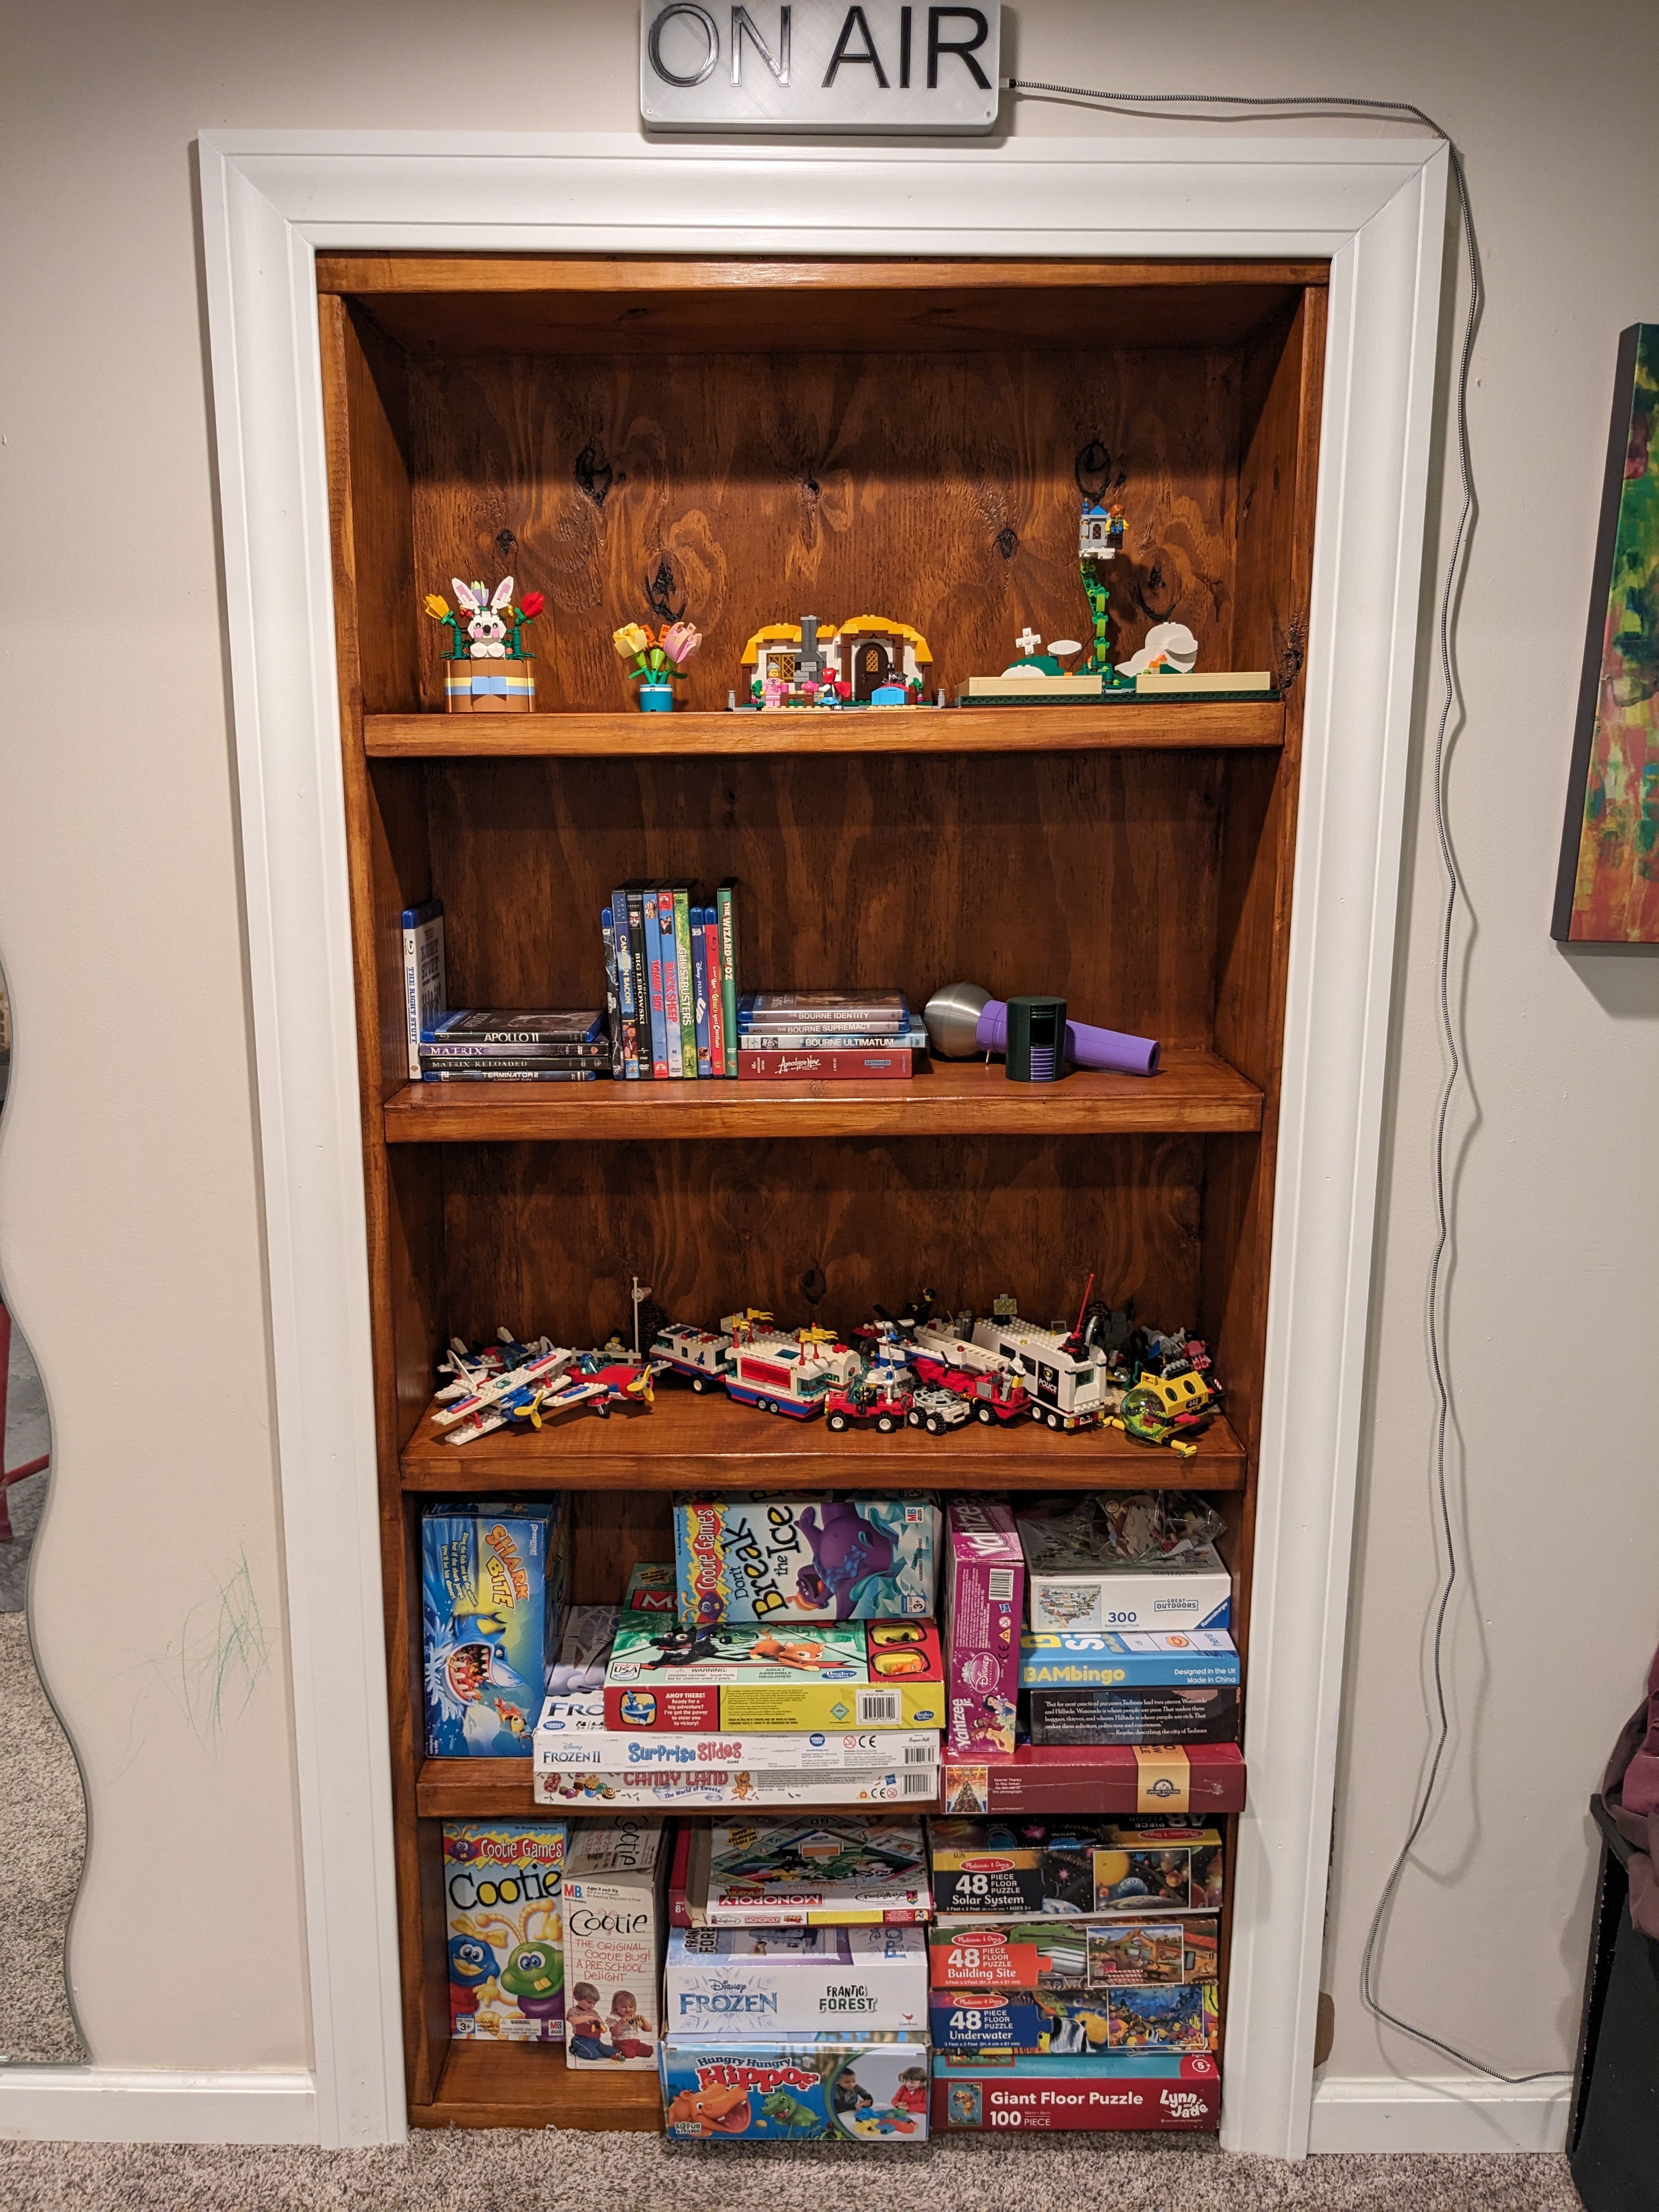
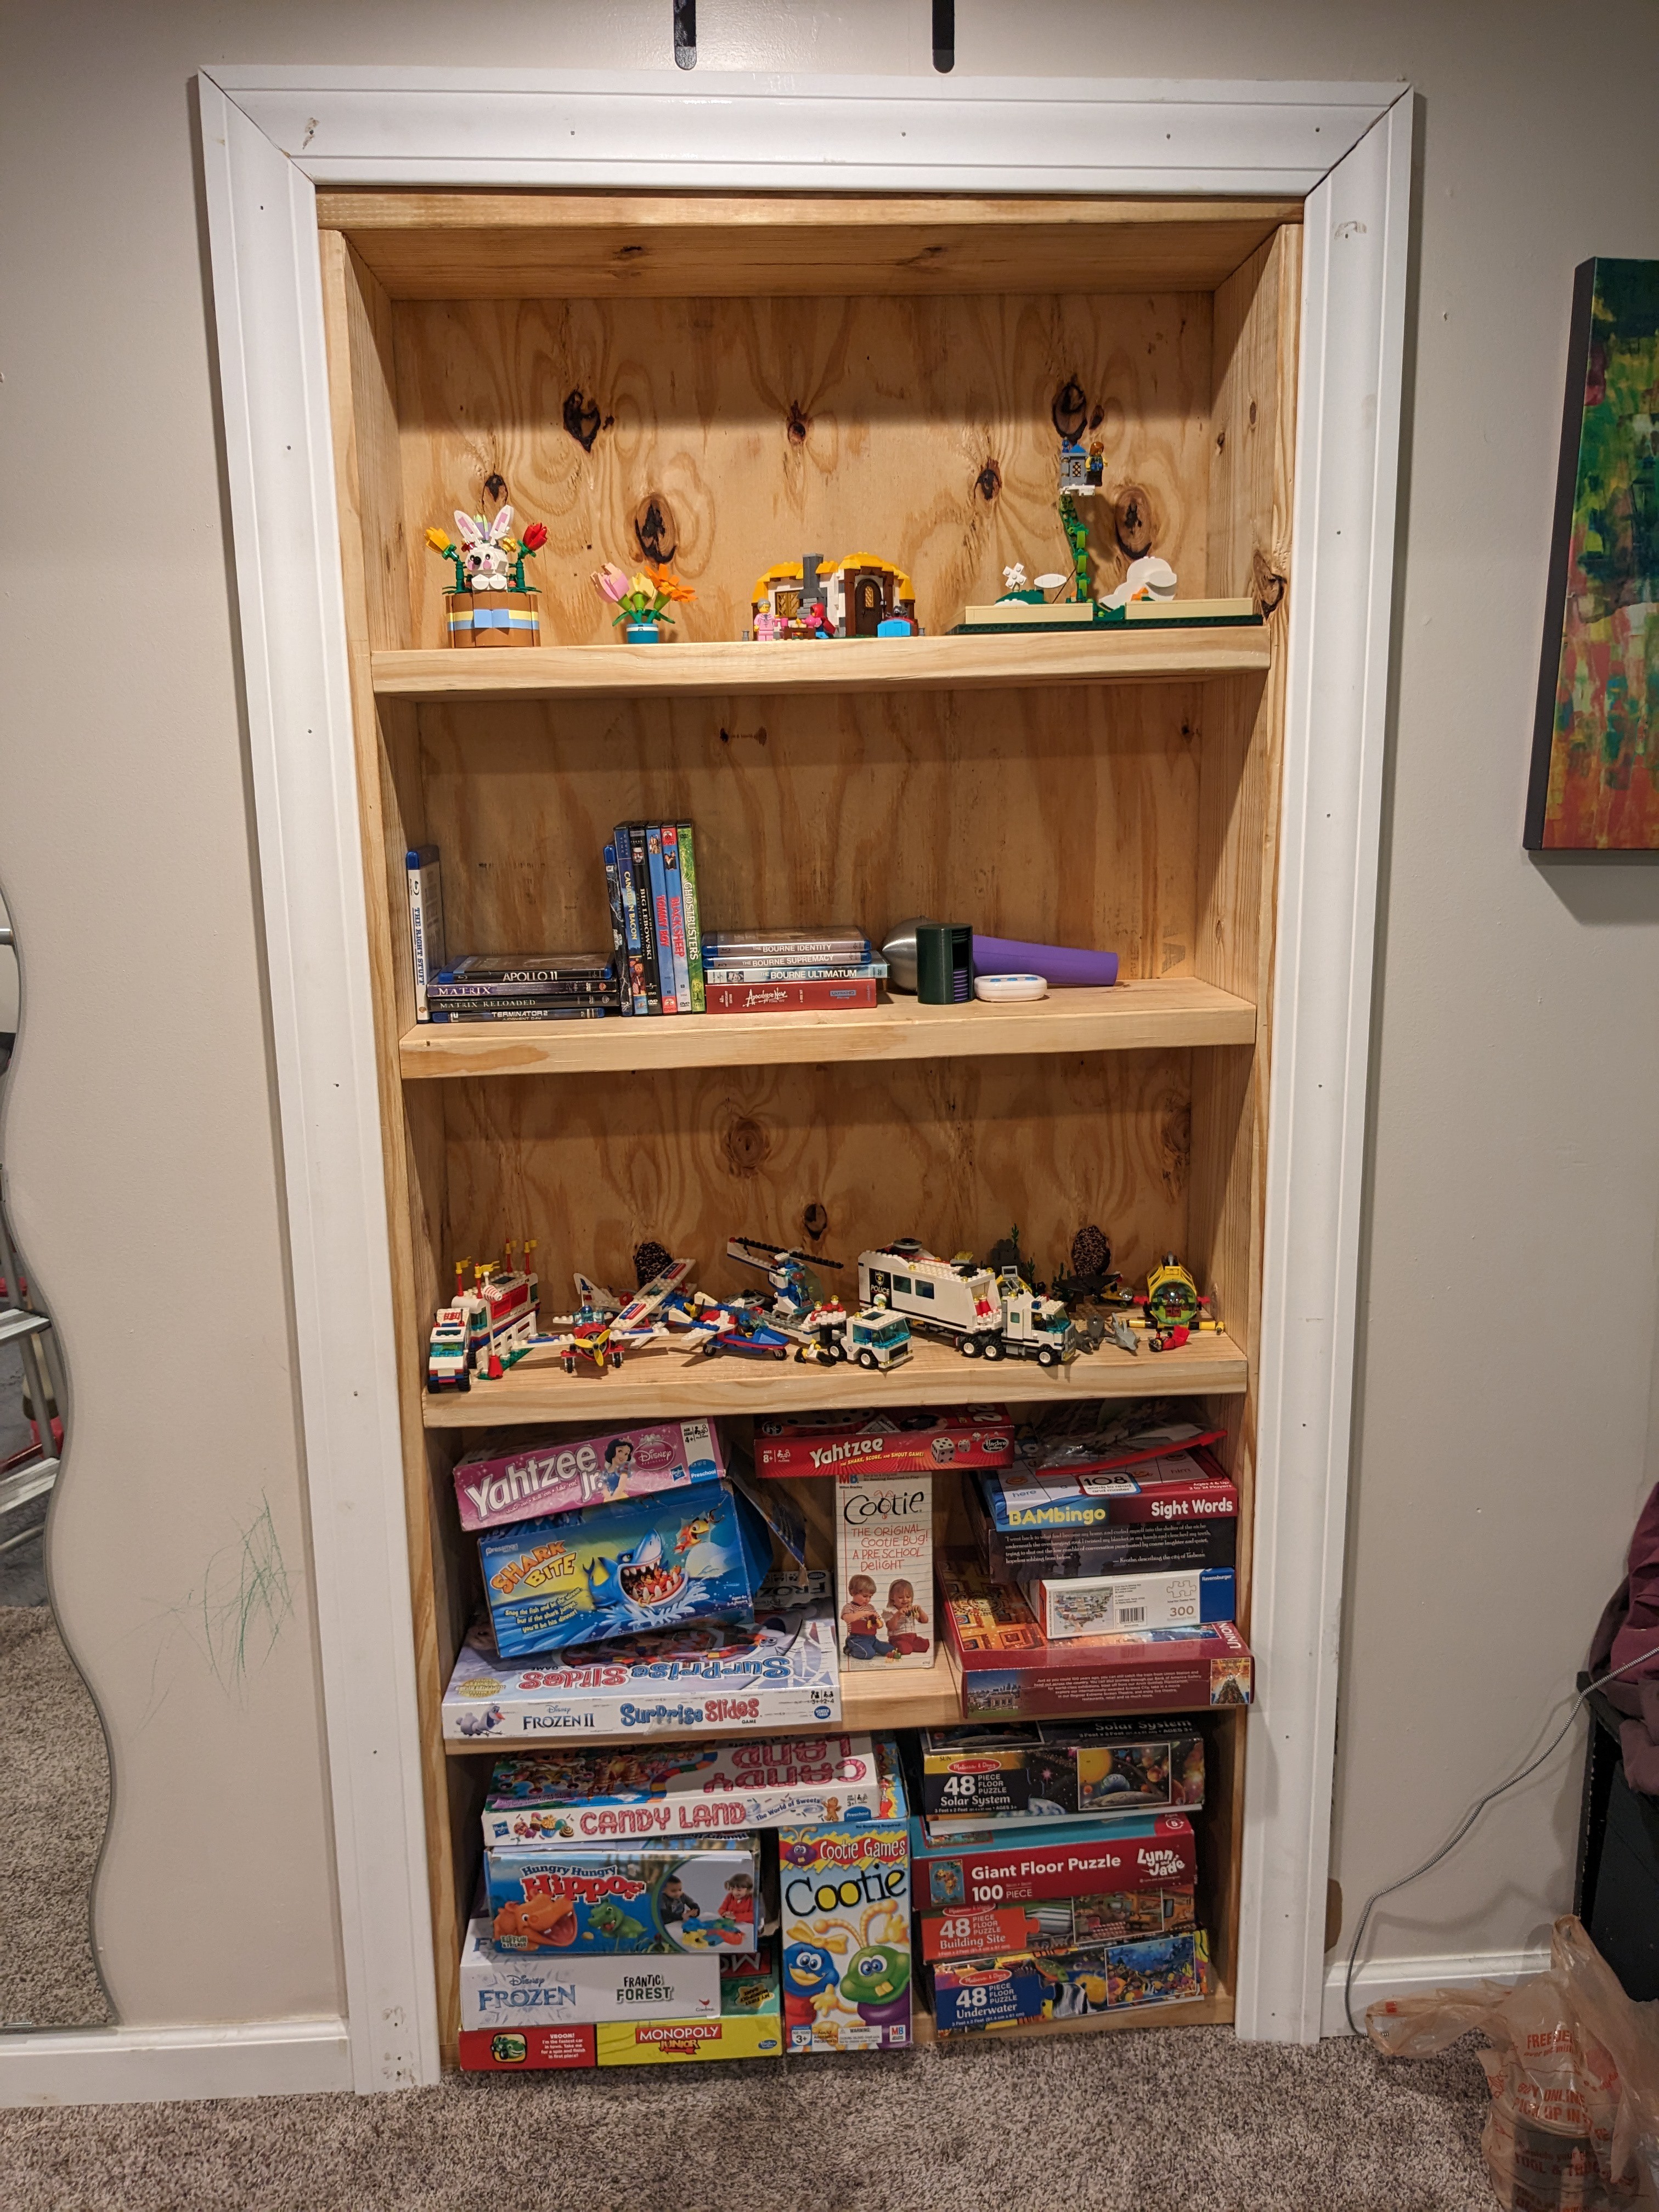
I started with just the physical build of the door/bookcase, since I knew the rest would be fairly easy and I didn’t have anything specific in mind on the operational side, so any compromises I had to make later wouldn’t be a big deal. I was also a little concerned about the physical durability of the whole thing, since I knew I’d be adding a lot of extra weight compared to a normal door and I honestly knew nothing about the quality of the work of whoever framed in the doorway I would be using (not to mention that it had never had a door installed). After some brainstorming and looking through things I already had on hand (Keeping costs down was a priority on this project, since I just couldn’t justify spending much on what is essentially a gag), I landed on using a sheet of plywood for the back and simple 2x10s for the bookcase and shelves. I had 4 leftover door hinges and enough hardware to put it all together, so all I had to purchase was the lumber. (I had planned to use something thinner for the shelves, but all I could find at my local lumber yard was MORE expensive than 2x10s.) After some quick hand calculations to see how much it would weigh, I found it should come in well under 100lbs which seemed very doable for normal door hinges and framing.
A quick run to the store and I was back with all of my needed supplies. After very careful measurements, I spent a morning cutting and assembling the entire thing outside before taking it downstairs for a test-fit. Huzzah, it fit! After mounting it with the hinges, I (unsurprisingly) found that it wouldn’t quite close. Since I used screws for everything, it would have been fairly easy to take it apart and make it narrower, but I opted to try counter-sinking the hinges into the doorway a bit with a router to see if I could make it work. A heap of sawdust later and I had a bookcase that could swing fully closed!
For the locking mechanism, I started off with a small and cheap solenoid door latch I had leftover from a previous project. I ended up designing and 3D printing a latching mechanism for it to catch and after installing it, I was kind of bummed out. After checking my wiring repeatedly, I ultimately found that the latch was just VERY finicky about ANY friction keeping it from engaging to the point that it only rarely worked as intended. After a little research, I landed on a magnetic lock (like those used for security doors) and found one on Amazon for a reasonable price. After waiting for it to arrive and then testing it out, it worked like a treat! It claimed to be rated for 160lbs of force, and while I didn’t test this to it’s limit, it’s never unlocked even with some fairly firm pushing on the door.
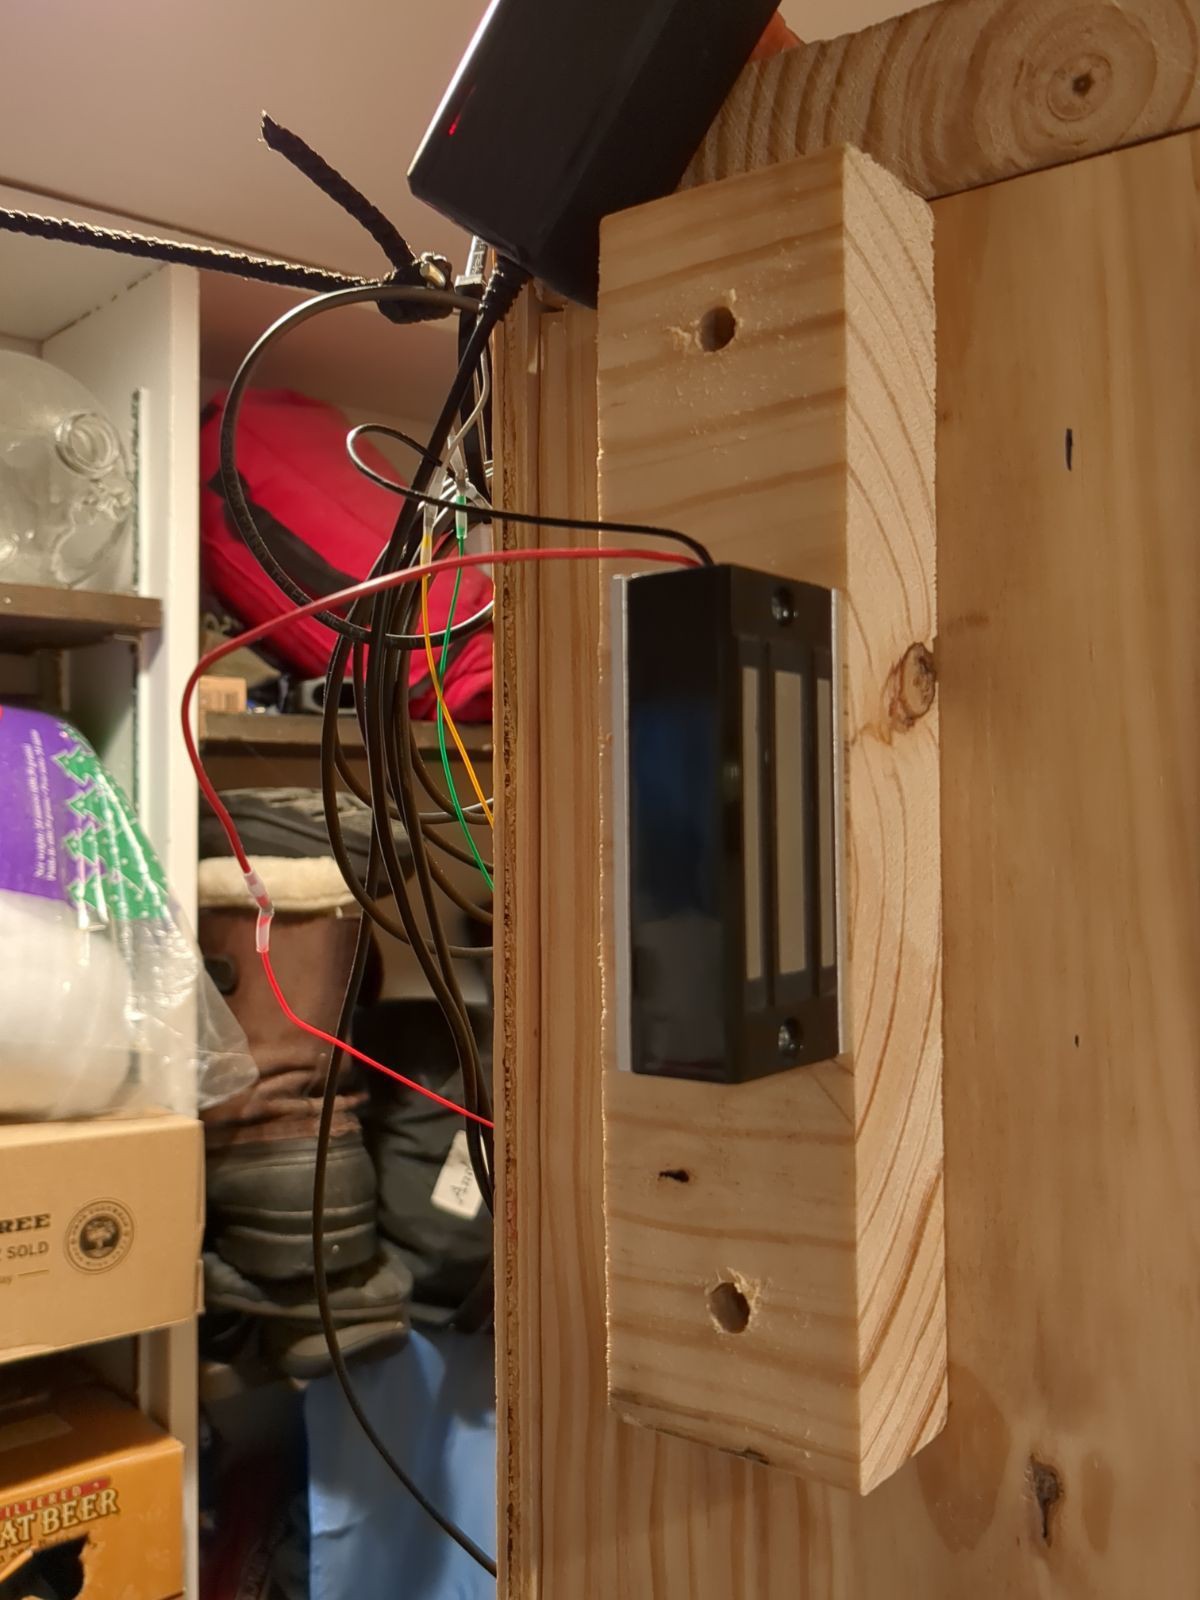
The next thing I wanted was for the door to open on it’s own once unlocked. Opting to use what I had on hand again, I landed on using a small dumbbell weight, a piece of rope and 2 hooks. With one hook on the door and another in the direction I needed to pull it I had a very functional door opener. However, I then ran into my next minor problem. The space outside my office is carpeted and while there was enough clearance for the door to close, it was a little tight and the friction from the carpet kept the door stuck shut even with a fairly large weight attached. Opting to use my router again instead of shortening the whole thing, I was soon able to both hold the door closed with the magnetic lock AND have it slowly swing open when unlocked.
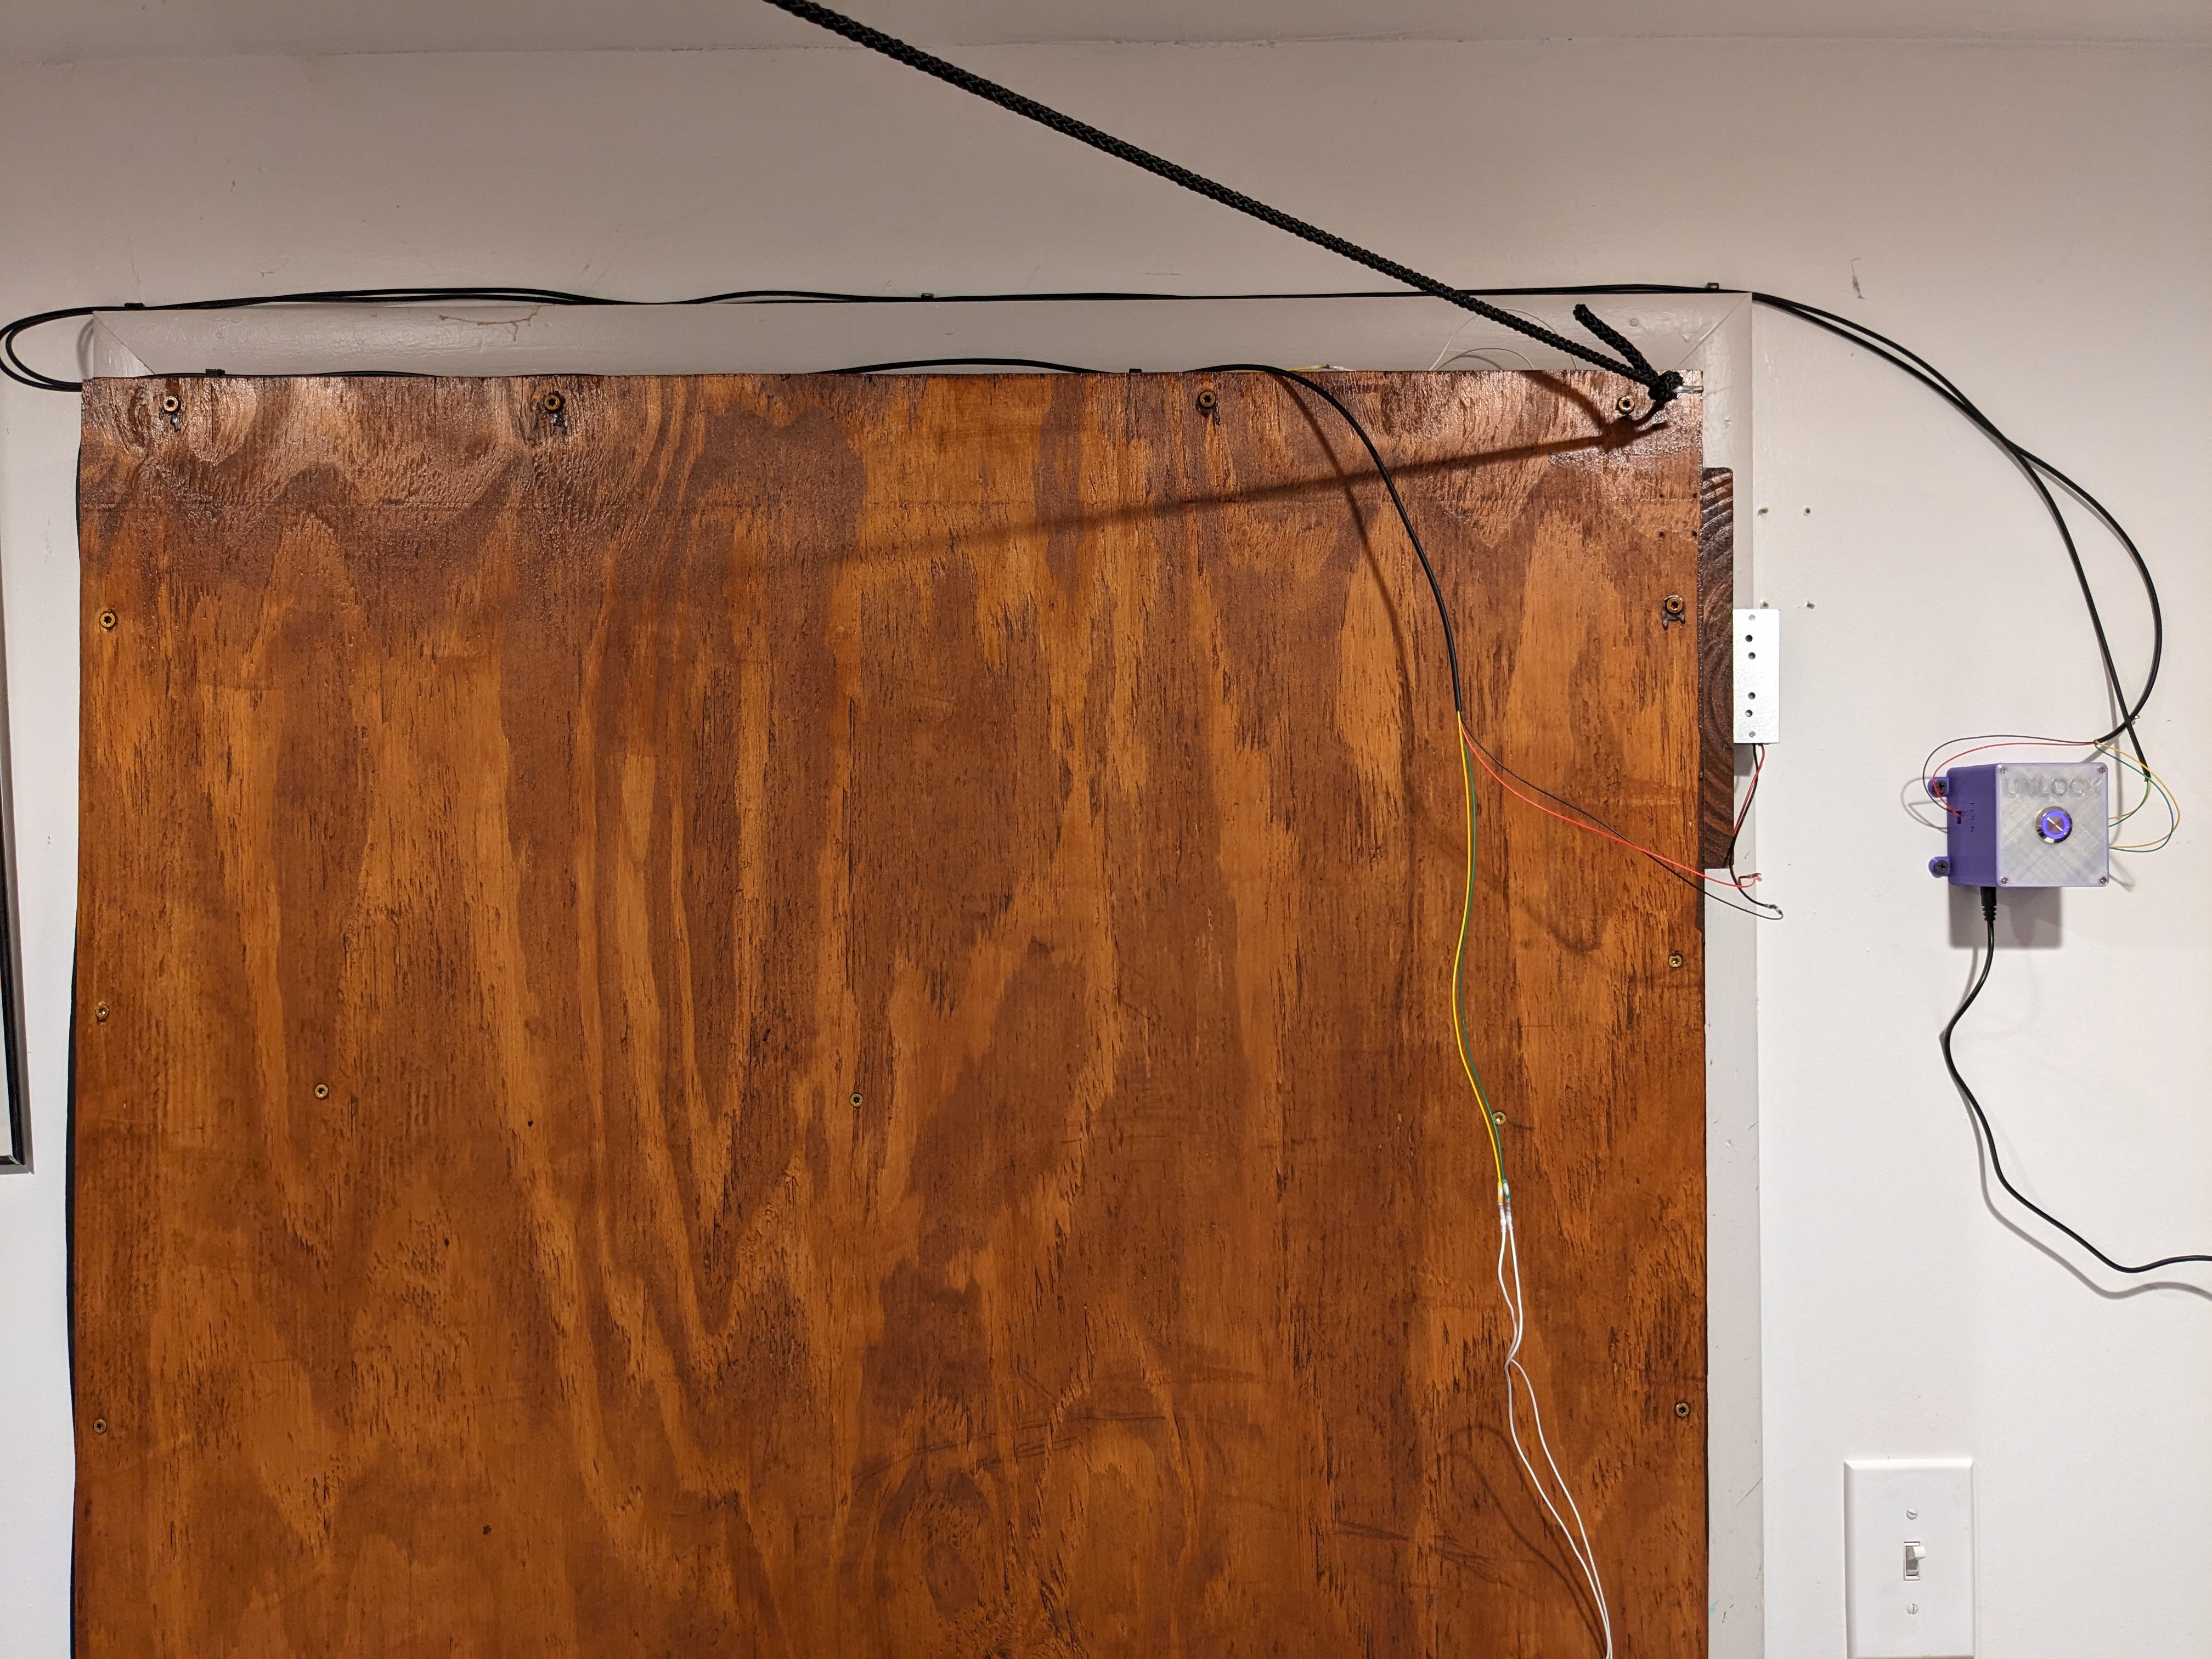
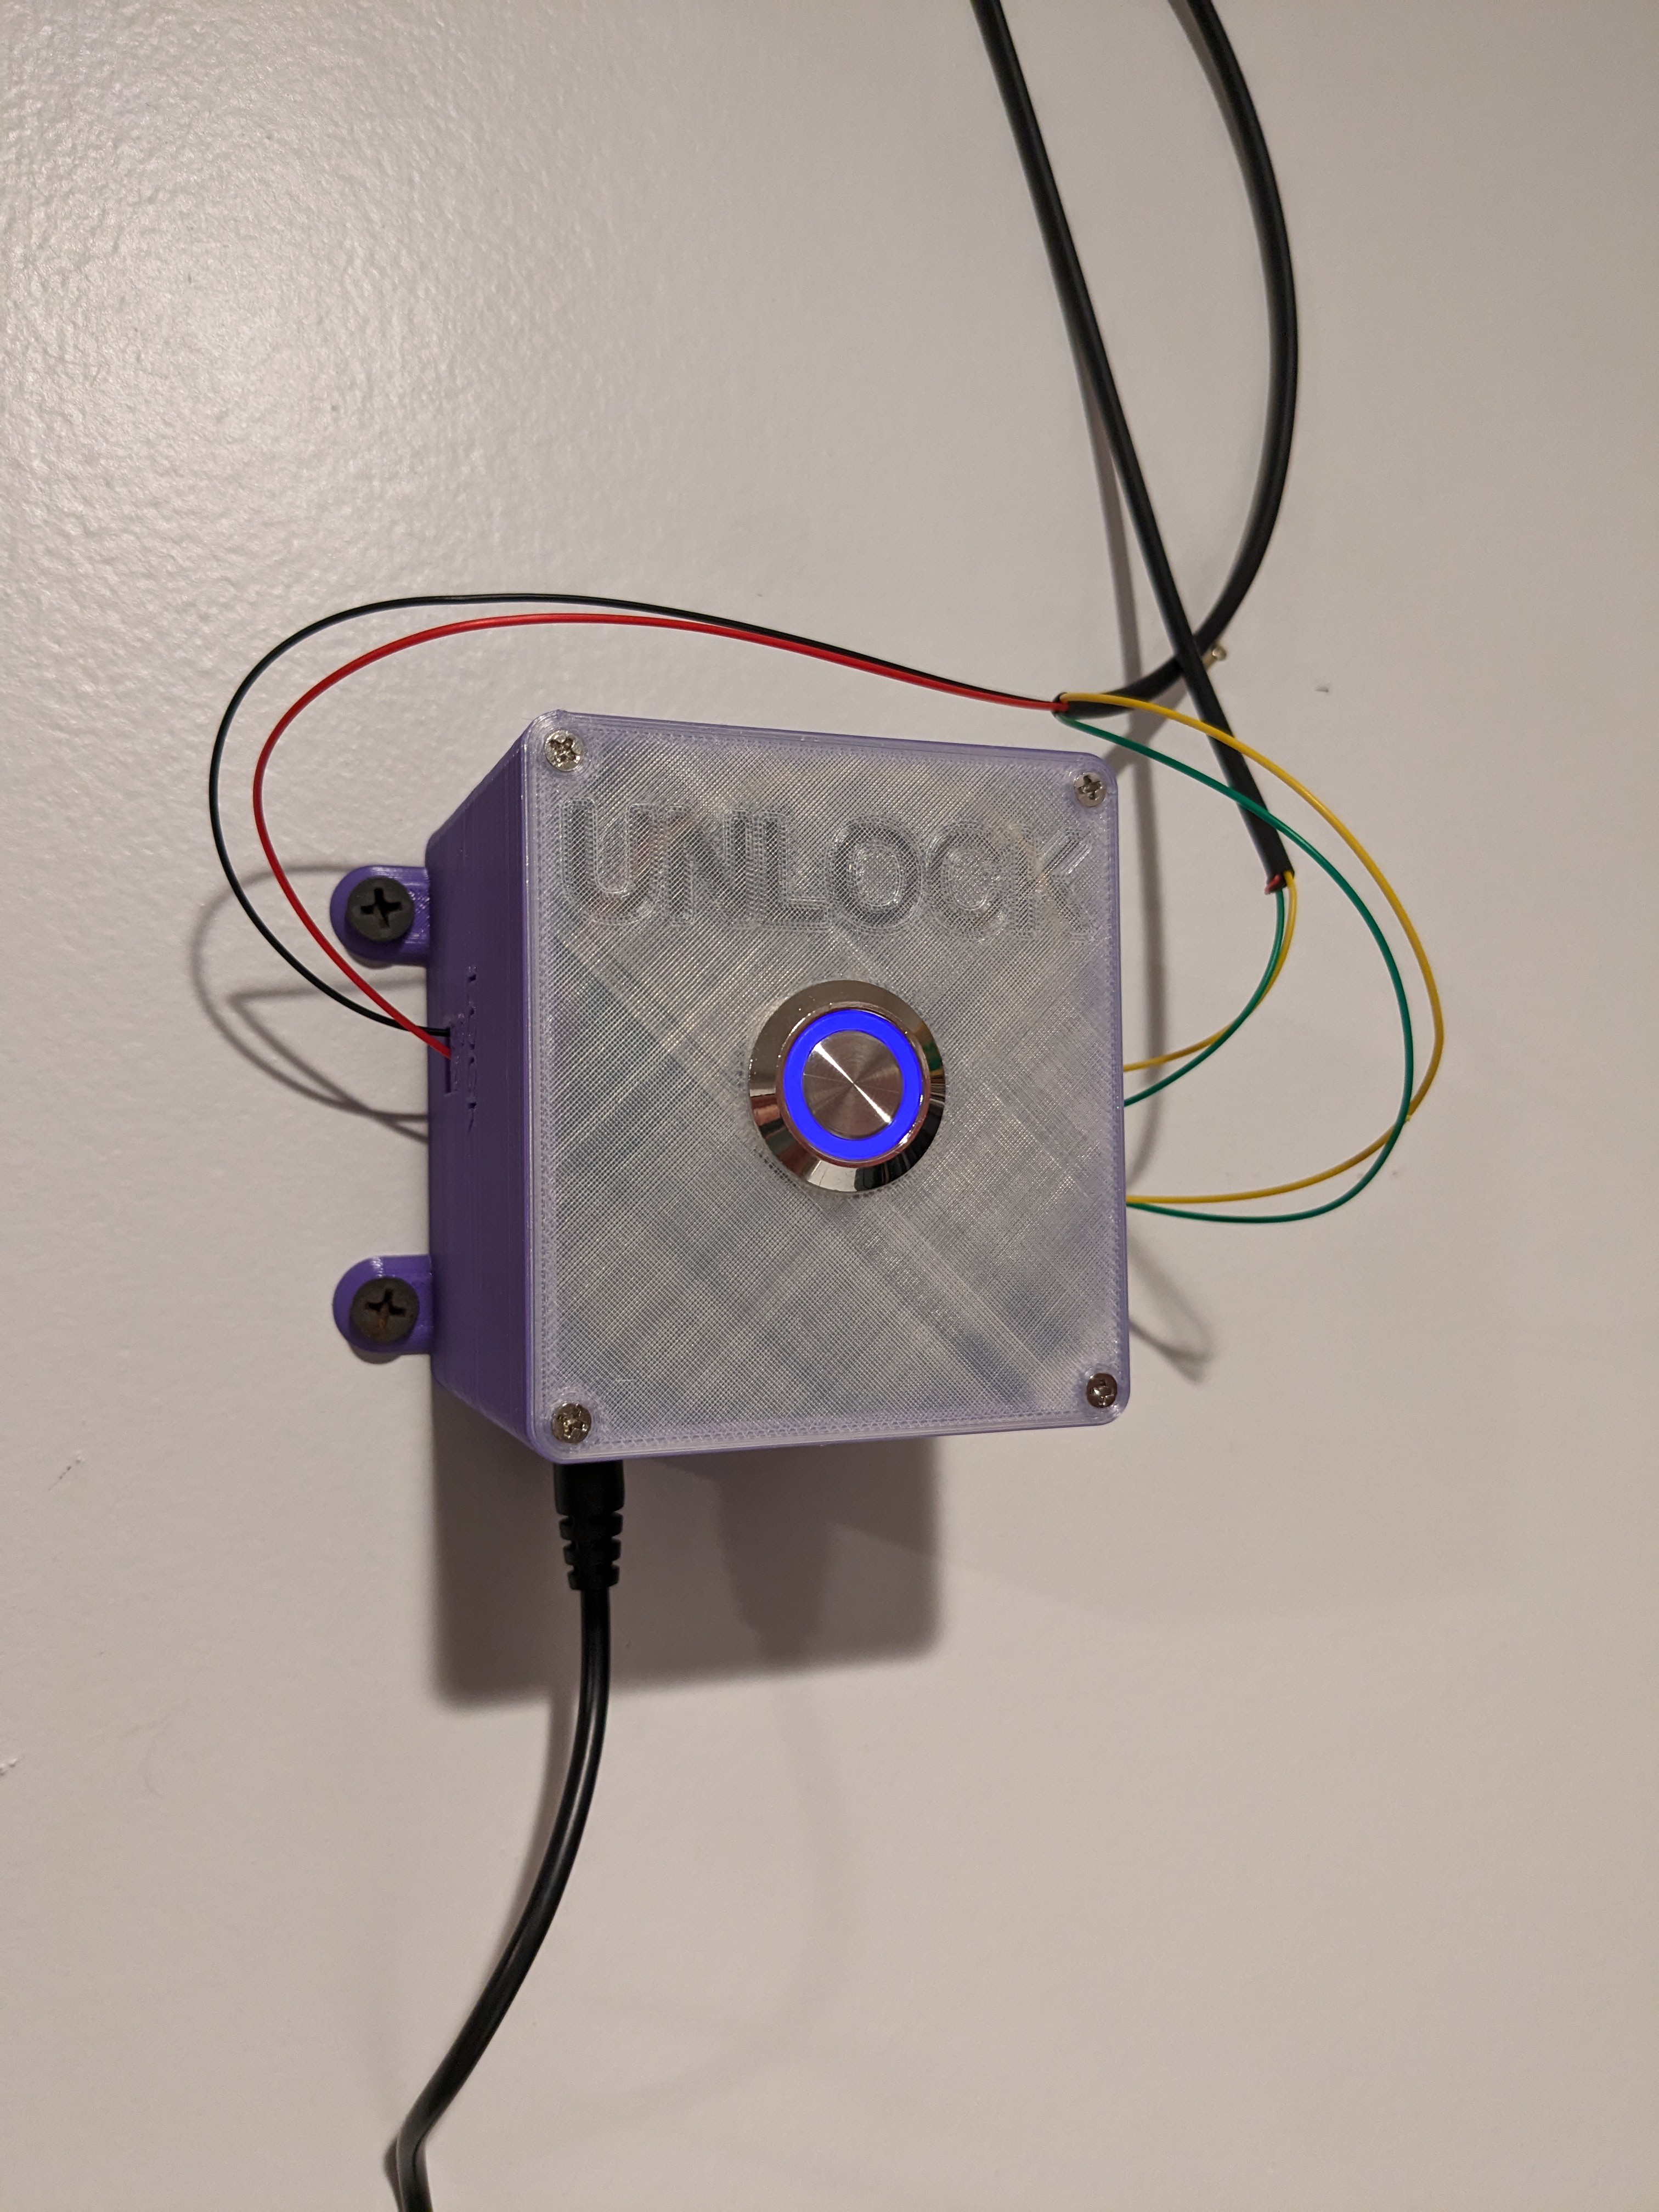
The final piece was how to unlock it. Since my office is in the path to doing the laundry (and the furnace & hot water heater), I knew I wanted to keep it simple for daily use (so no fingerprint/eye scanners or number pads requiring meaningful extra effort; I wanted to go with the tried and true ‘secret book’ trigger. I opted for a reed switch sensor as I had a bunch already and found that the ones I had were capable of detecting the magnet through the plywood on the back. I’m a bit of a ‘space nerd’ and also found the pun amusing, so I opted to use the movie ‘The Right Stuff’ (get it? You have to have the ‘right stuff’ to get in? Did I mention I’m a Dad?) as the trigger. Very conveniently, the movie case had a slot right where I needed it that fit the magnet I had perfectly. I also threw an additional one on so I could tell when the door is open or closed.
On the electronics side, there was never any question that I would be using ESPHome as it’s SOOO easy to use for a project like this and it integrates seamlessly with Home Assistant, giving me greater visibility and use of the sensors and inputs I was adding to make the whole thing work. I’ve also been switching to primarily using ESP32s even when not needed, as I’m able to use the Bluetooth radio as a proxy device but in this case, I already have a Bluetooth receiver in my office so it was a perfect way to use up an ESP8266 I had leftover from a previous project. All of the automation to make the door work is done locally on the ESP device, but obviously I still have the possibility of integrating it into the rest of my home automation setup (see more on this later on).
esphome:
  name: bookshelf-door
  friendly_name: Bookshelf Door

esp8266:
  board: esp01_1m

# Enable logging
logger:

# Enable Home Assistant API
api:
  encryption:
    key: "xxxxxxxxxxxxxxx"

ota:
  password: "xxxxxxxxxxxxxxx"

wifi:
  ssid: xxxxxxxxxxxxxx
  password: xxxxxxxxxxxxxxx

  # Enable fallback hotspot (captive portal) in case wifi connection fails
  ap:
    ssid: "Bookshelf-Door Fallback Hotspot"
    password: "xxxxxxxxxxxxxxxx"

captive_portal:

status_led:
  pin:
    number: GPIO16
    inverted: true

text_sensor:
  - platform: wifi_info
    ip_address:
      name: IP Address
# Send WiFi signal strength & uptime to HA
sensor:
  - platform: wifi_signal
    name: WiFi Strength
    update_interval: 60s
  - platform: uptime
    name: Uptime
  - platform: adc
    pin: VCC
    name: VCC Voltage

switch:
  - platform: gpio
    name: Lock Switch
    pin: GPIO5
    id: lock_switch
    device_class: switch
    internal: true

lock:
  - platform: template
    name: "Lock"
    id: door_lock
    lambda: |-
      if (id(lock_switch).state) {
        return LOCK_STATE_LOCKED;
      } else {
        return LOCK_STATE_UNLOCKED;
      }
    lock_action:
      - switch.turn_on: lock_switch
      - light.turn_on:
          id: button_light_switch
    unlock_action:
      - switch.turn_off: lock_switch
      - light.turn_off:
          id: button_light_switch

binary_sensor:
  - platform: gpio
    pin:
      number: GPIO14
      mode:
        input: true
        pullup: true
    name: "Door Sensor"
    id: door_sensor
    device_class: door
    on_release:
      then:
        - lock.lock: door_lock

  - platform: gpio
    pin:
      number: GPIO12
      mode:
        input: true
        pullup: true
    name: "Book Sensor"
    id: book_sensor
    device_class: lock
    on_press:
      then:
        - lock.unlock: door_lock

  - platform: gpio
    pin:
      number: GPIO13
      inverted: true
      mode:
        input: true
        pullup: true
    name: "Unlock Button"
    id: unlock_button
    on_press:
      then:
        - lock.unlock: door_lock

light:
  - platform: binary
    name: Button Light
    output: button_light
    id: button_light_switch
    restore_mode: ALWAYS_OFF

output:
  - id: button_light
    platform: gpio
    pin: GPIO4
I now had a fully-functional bookshelf and hidden door to my office. All that was left was to stain it, install some new trim to hide gaps between it and the doorway as well as get my electronics off of a breadboard and onto a proper PCB. While the quickest option for such a simple circuit would have been to use a proto-board, I have a hobby CNC machine and also had been planning to make the switch from Eagle to KiCAD so this was the perfect easy project to learn a new workflow for making my own PCBs. After more time than I’d care to admit, I had a custom PCB and 3D printed enclosure to go along with it.


As a final bit of fun, I realized I should really add some audio effects to the process of opening it up. I already had a ‘smart’ speaker in my office for listening to music, and with Home Assistant it’s trivial to make an automation to play something upon unlocking the door. After some brainstorming, it was obvious I needed to use some audio from Young Frankenstein (or is that Fronkensteen?). 15 minutes of downloading a handful of fitting clips and I setup an automation to play a random one upon unlocking the door.