 Aula Jazmati
You can now use your project to make perfect shelves.Introduction:
This project helps you measure the angle of a surface with respect to earth's gravitational field using Hexabitz modules.

If the device measures an angle of 0.0 something degrees it means you have done a nice job at leveling the desk ^_^
The project is also about designing a real product by yourself, this product is similar to another on the market as the search engines showed.
The project is stand-alone device, inclinometer and display built into the same product.

In this tutorial, I will take you through the steps that I followed to make this awesome project. I hope you will like it.
🛠️ Tools:
1. STLINK-V3MODS Programmer (H40Rx):
H40Rx is a programmer module which contains STLINK-V3MODS stand-alone debugging and programming mini probe for STM32 micro-controllers (Hexabitz modules and other MCUs).
It supports the SWD (Serial Wire Debugging) interface for the communication with any STM32 micro-controller located on an application board.
It also provides bridge interfaces to several communication protocols, allowing for instance the programming of the target through boot-loader.

2. Hexabitz IMU module (H0BR40):
H0BR4x is a 3-axis inertial measurement unit (IMU) combined with a 3-axis digital compass module based on STM32F0 MCU, LSM6DS3 IMU and LSM303AGR compass.
3. 6 Digit Seven Segment (H3BR6x):
H3BR6x is a 6 digit seven segment interface module based on STM32G0 MCU.
- Features 0.36 inches, 6 digits, RED, 8-segment display LED, common anode.
- Use this module as an output display device. Connect it to other Hexabitz modules to display information in text or decimal form.
![https://hackster.imgix.net/uploads/attachments/1518089/fgv6riswiay_3rc_PmahdVFCJo.jpg?auto=compress%2Cformat&w=740&h=555&fit=max]() 4. 3.3V/1A DC-DC Power Supply (H03R0x):
4. 3.3V/1A DC-DC Power Supply (H03R0x):
H03R0x is a compact DC-DC buck power supply with a 3.3V/1A DC output and 5-40V DC input. The output voltage is provided through Hexabitz SMD edge-pad connectors (3.3V on top and GND on bottom). The -T module version comes with a 5.08 mm terminal block connector for input voltage, while the -J comes with a DC power jack. Use this module to power all your Hexabitz creations (and other hardware) from a DC source (battery, AC/DC wall adapter, etc.).
 4. 3.3V/1A DC-DC Power Supply (H03R0x):


Measure Tilt Angle Using Accelerometer:
The H0BR4x consist of 3-axis Accelerometer with Micro Electro Mechanical (MEMs) technology. It used to detect the angle of tilt or inclination along the X, Y, and Z axes as shown in the below figures.


Port Buttons/Switches API:
You can connect any mechanical button or switch to any of the array ports at the modules using Hexabitz APIs.
Check out this article for Port Buttons/Switches
Steps 📝
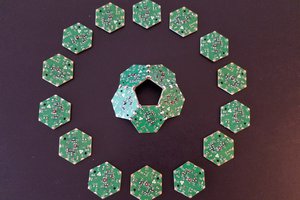
1) Plan the array and assemble the hardware:
We prepare the project components and plan our array design by aligning modules side-by-side. Then we solder the modules together using Hexabitz Fixture.

2) Writing codes with STM32CubeIDE software:
Check out this article for writing code with STM32CubeIDE.
· Fixed topology file: Inter-array communication in Hexabitz is done using a routing table stored in a special header (.h) file. This header file describes the number of modules and how they are connected to each other as well as other important information for the array; hence, it is called a topology header file. Currently, you need to make a topology file manually.
After creating the topology for the two modules (H0BR4x, H3BR6x) and determining their configurations, we add the topology for each module. See this link for help in creating a topology file.
/* BitzOS (BOS) V0.2.7 - Copyright (C) 2017-2022 Hexabitz All rights reserved
 File Name     : topology.h Description   : Array topology definition.
 */

/* Define to prevent recursive inclusion -------------------------------------*/
#ifndef __topology_H
#define __topology_H
#ifdef __cplusplus extern "C" {
#endif

/* Includes ------------------------------------------------------------------*/
#include "stm32f0xx_hal.h"

#define...
Read more »
 Hexabitz
 Ruslan
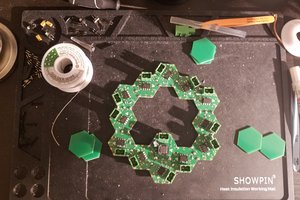

 mit41301