 Paul McClay
I've just uploaded STLs for the Z axis to the files section.
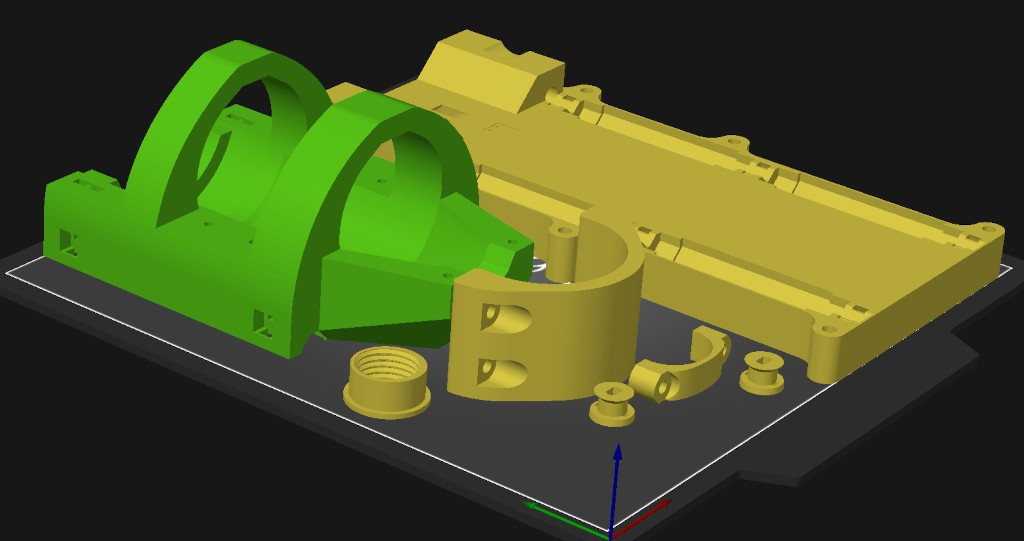
This Z axis works. It's also pretty crude. Unlike the X+Y stage which I've worked through several revisions, I've sliced and printed exactly one set of Z parts[a} and they've worked well enough to let me do other stuff -- like spin revisions of the X+Y parts.
[a] except pulleys; I've printed more pulleys.
If you've built the X+Y axes, then I don't think there's much in the Z axis that won't be self-evident.
The major design deficiency relative to intent is that the tool clamp is not as quick and easy to use as I'd like -- to support the idea that you can use your everyday rotary tool instead of committing a unit to semi-permanent installation.
Oh yeah - it's modeled for 6" zip ties. Almost missed that. 4" ties will probably work.
About pulleys: I'm currently using one motor and running it too hot for PLA. Consequently, I've printed a pulley in PETG. It's working fine. I don't know if it's possible to run the motor cool enough to use PLA. Because I haven't tried. If not, then more likely it's possible to use two motors and run them cool enough for PLA.
The design provides for using two motors. Mainly because the earlier laser-cut version of this basic configuration was uncomfortably vulnerable to dropping the spindle without warning so the redundant motor/pulley/cord was cheap insurance. I think that's less of an issue here because the hoist cord(s) don't pass close by sharp stuff and do run in plain sight. So you have a better chance of seeing trouble before it happens and less chance of provoking trouble. Also, by choice not necessity, I'm using Spectra® cord (UHMWPE) which seems to be practically indestructible.
Non-printable parts:
- see also here
- 2 x rods: 6 mm x ≥165 mm (length not constrained)
- 4 x bearings (3 x would work and might work fine)
- 1 or 2 x 28BYJ-48 motors with
- 5V windings
- convert to bi-polar
- 6 x m3 screws
- 4 x 20 mm (15 ≤ l ≤ 25)
- 2 x 16 mm (14 ≤ l ≤ 18)
- so could be 6 x 15 ≤ l ≤ 18 mm
- 6 x m3 washers feel like a good idea but probably don't make any real difference
- (2 or 4) x m3 x 10-15 mm screws
- string -- notes in "Hoist" part of "Step 4" in this 'ible. Or TMI.
The "nose ring" part is threaded for common Dremel-like clones and might not fit real Dremel tools. It's not essential and I don't know how much difference it really makes.
Tie motor end of hoist cord(s) and install with pulley like steps 14 & 15 here.
Limit switch goes here:
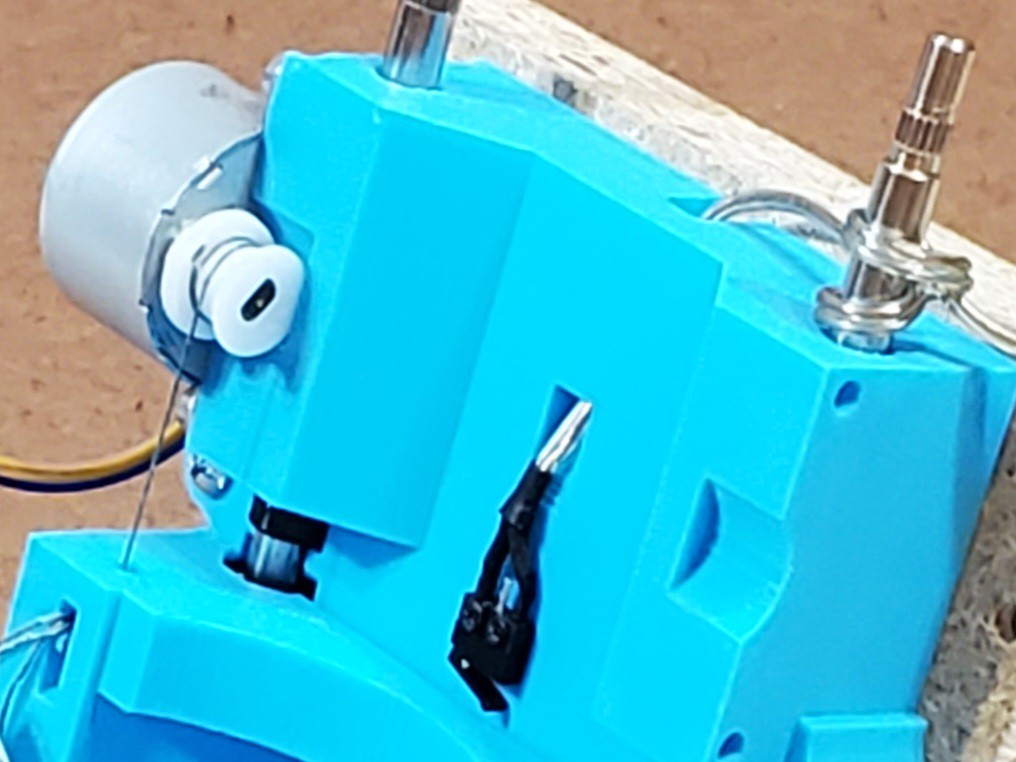
(the turns of hoist cord around the pulley should all be adjacent starting from the flange -- this photo was taken with the axis detached and handled randomly)
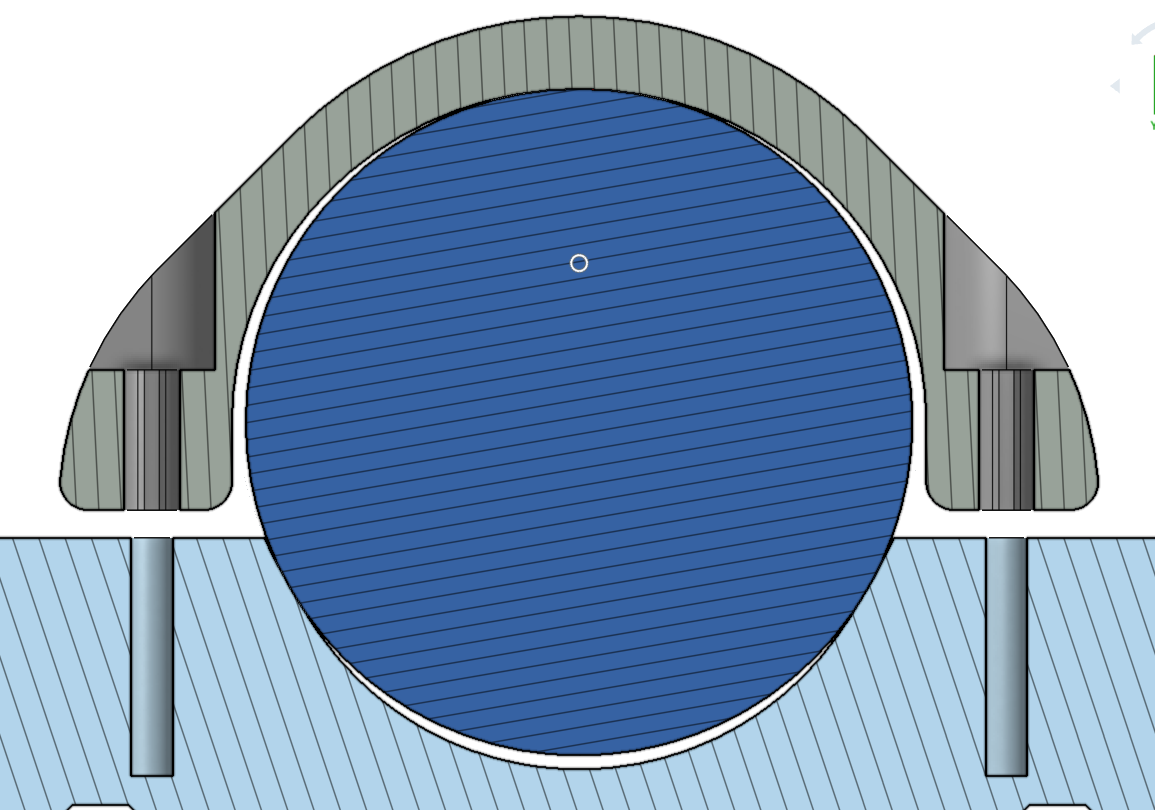
Point of interest: the clamp parts & saddles are not circular but slightly "trilobular".
Discussions
Become a Hackaday.io Member
Create an account to leave a comment. Already have an account? Log In.