There is a lot of debate if a DIY reflow oven even needs a PID controller. The argument goes, either spend the money and buy a professional machine for a few thousand or build your own and just eyeball the temperature with a manual on/off switch. Anything in between isn’t worth it because of the large temperature variations due to the nature of the heating elements, etc, etc. There is probably some truth to this, but who doesn’t love over engineering workshop tools?
Side note: This post isn’t meant to be a guide (read: I am not responsible if you burn your house down). I suggest purchasing a kit from whizoo or someone similar because this probably isn’t worth the time investment.
There are two problems I was hoping the addition of an exhaust fan would solve.
- PID tuning difficulties: The internal temperature of an oven is difficult to control if there is no way to remove heat due to thermal inertia. It takes a few seconds for the temperature to increase after the heating elements turn on and many seconds to stop increasing after they turn off. This makes tuning difficult and usually requires hard coding difficult parts of the reflow process.
- Rapid cooling: Most reflow profiles required rapid cooling after reaching maximum temperature (see below), which isn’t possible without some way of removing heat. Opening the oven door is one workaround that is probably good enough for most people, but an automated solution would be nice.

Hardware
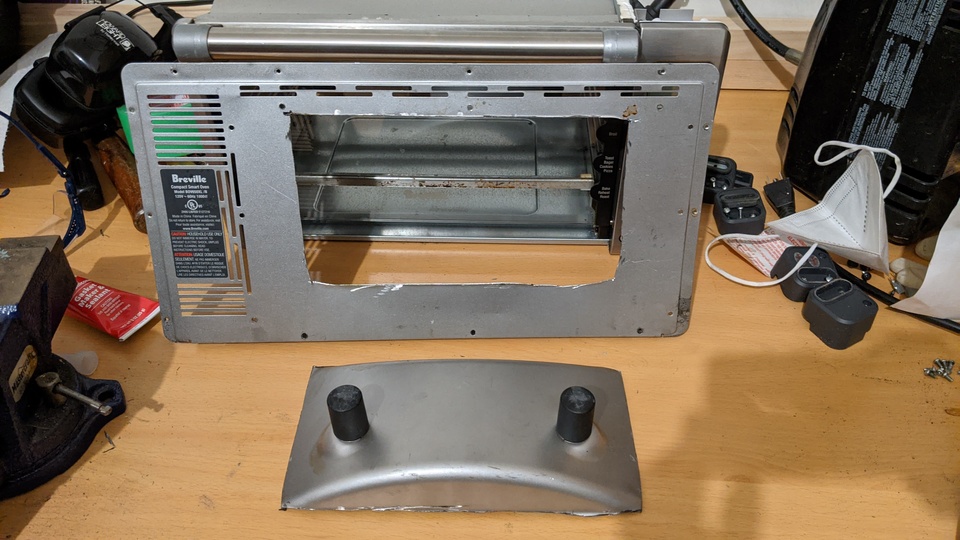
I bought a broken Breville BOV450XL because it has 4 heats quartz heaters.

After disassembling the oven, I cut out the bulge in the back to make room for the exhaust.
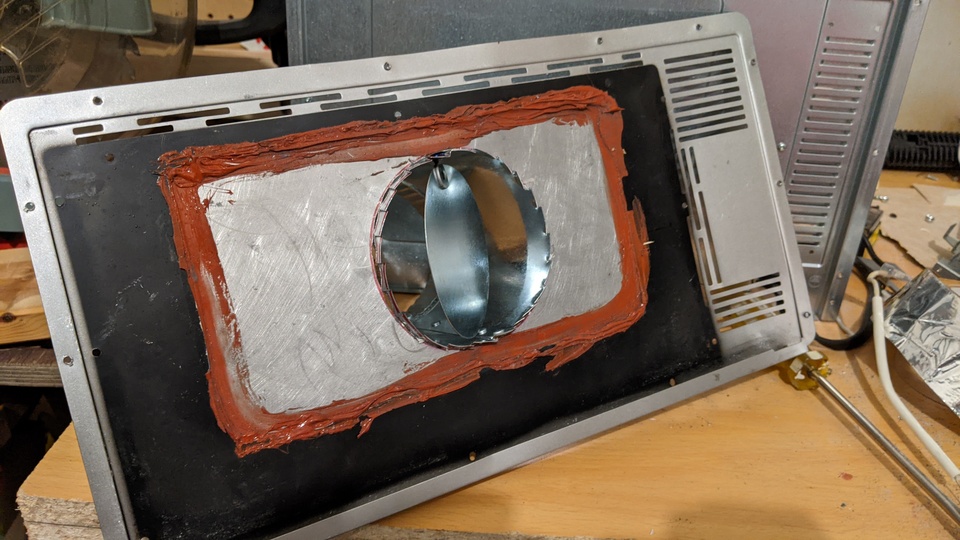
Added some JB weld to attach some sheet metal. I should have cut a hole in the back before I did this.


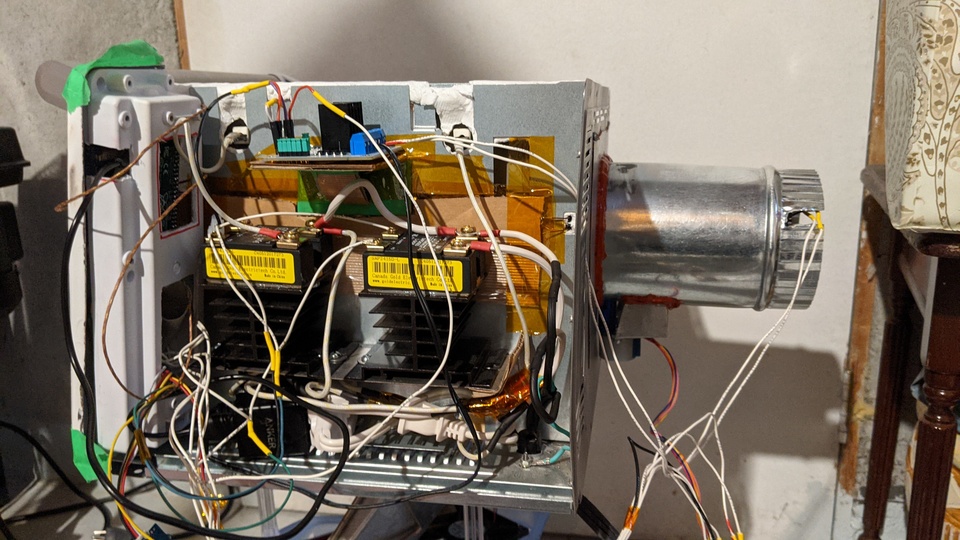
Attached a 4 inch duct with a stepper motor to control the air damper. The air isn’t that hot when it reaches the PC fan so I’m hoping it holds up. I’ve also attach some insulation to the air damper to keep in as much heat when it’s closed.


I used DEI Floor & Tunnel Shield to insulate the inside as whizoo has suggested in their build guide. I opted for the non-adhesive version because I didn’t like the idea of glue inside of the oven even if it’s temperature rated. The outside of the oven was painted with some left over high temperature paint I had and insulated with a ceramic fiber blanket.


I cut a section in the control panel to make room for an Adafruit 2.8 inch LCD. The bottom two holes were filled in with old automotive fiberglass filler I had. The controller is a Raspberry Pi Zero W. A motor driver and solid state relay control the fan and heating elements. They are monitored by a temperature sensor to make sure they don’t get too hot.


The mostly finished product can bee seen in the video linked in the post.
Software
The software is very basic so far. It allows manual control of the oven for testing purposes and displays the temperature on a graph with the current reflow profile. It was more difficult to cross compile Qt than it was to build the application.
Surprisingly, I was able to get away with only using proportional control with the addition of the exhaust fan!


First test
The first test was a success. I was able to solder a couple of fine pitch components like the BMP280 and the SGP40 for another home automation project I’m working on. This board will track home water usage, water leaks and air quality. More details on that soon.
Discussions
Become a Hackaday.io Member
Create an account to leave a comment. Already have an account? Log In.