 Tom
TomIt has been a while since I last provided an update, and there have been a number of developments and interesting things in that time!
Revision 2 CPU Board
Following my previous update where I had identified several changes that were due for revision 2 of COMET68k. In November I ordered the PCBs with high hopes for resolving a number of issues outstanding from revision 1.
To address these points:
- Having added pull-up/down resistors in strategic places, the board now starts much more reliably with the expansion bus buffers in place. I do still seem to be experiencing a bit of instability on power up that I am still investigating, however. It usually requires me to power cycle a couple more times before it will start to work. I have a theory that I am investigating, and hopefully it will be a relatively simple change to the CPLD to fix...
- Having tested the new power-on reset and watchdog timeout flag logic on a breadboard, these flags now accurately reflect what happened after a reset.
- The signal that I routed to the CPLD last minute, and which caused the short between the internal layers is fixed, and has now been permanently assigned as a means of generating a software IRQ to the CPU. With some other changes I made (which slightly modify the memory map from revision 1) I have added an ability to read the link status of the Ethernet controller, and still managed to maintain one signal routed to the CPLD that I can toggle which maybe I can use for something in the future (although I still have no idea what that might be at this moment in time.)
There were some minor issues during construction, namely some pins which did not reflow on some parts. This is probably an issue with my placement technique and maybe the fact that I use a lot of "new old stock" parts that may not have necessarily been stored correctly over time and whos pins are less receptive of solder. Most of the issues were on the Ethernet controller, with a few pins also requiring some touch up on the CPLD, and one pin on the CPU. Technique wise, I probably need to press the components down into the solder paste rather than simply sitting them on top of it...
As of writing I have identified a few more things which could constitute a 3rd revision, however, I do not currently know whether I will actually build a 3rd revision or move on to a more capable (e.g. 68030 based) system.

FreeRTOS+TCP
An early goal of COMET68k was to port FreeRTOS and its TCP/IP stack to my board, and I've managed to achieve this goal. For TCP/IP performance, in my testing I was able to achieve upwards of 200pps or about a megabit of throughput when running a ping flood with various packet sizes. I feel like that is quite reasonable for a 10MHz processor doing almost everything in software (the only "hardware acceleration" being packet transmission and reception handled through DMA by the Ethernet controller).
At the moment I maintain my own copy of the FreeRTOS kernel including my port on github, but I plan to publish this to a repository managed by FreeRTOS themselves which contains community maintained ports. I feel this will be a much better place for this port to be housed, so keep an eye on that for my latest port (which is much enhanced over the port I currently have published). Whether the FreeRTOS+TCP port can also be maintained here is something that I need to determine.
CP/M-68k
While my original (stretch) goal was to get something like uClinux running on my board, this feels a bit beyond my capabilities for the time being.
So instead, over the christmas break, I put some effort in to making CP/M-68k work, and I have written a BIOS to work with my hardware. Although it is a somewhat simplistic OS (compared with a modern MS-DOS for example), it at least provides something for me to work with and test out some of the expansion hardware that I have built, and will provide a platform for testing additional hardware (and software!) in the future.
It is also possible to get hold of the source code for CP/M-68k, and the downloads also contain assemblers, compilers and linkers, so it should even be possible to modify/extend CP/M and write new software for it. The supplied editor is simplistic (a lot like edlin for DOS), and I haven't fully worked out how to use it, but I think a means to get files on and off using something like Xmodem or similar would be the way to go, then I can write code with a more capable editor.
Getting CP/M running was an interesting task in itself, and was not immediately obvious to me about how to actually do it (although I did later clock on to something in the documentation that made it all fall in to place, only after I had picked the brains of a friend who has already done it and gave me some pointers). I'll add a post detailing this process to my list for the future as it may help someone else who is looking to tackle this as well.
I don't know if I'll release the source code for this BIOS, it is a bit thrown together. I need to sit down and re-write it, and modularise it better to make it extendable and easier to maintain.
Expansion Bus
The expansion bus is now fully operational, and for the first time, COMET68k was able to drive something else other than its own on-board peripherals! I built a couple of expansion boards to put the expansion bus through its paces, and so far the results are positive. There is still more work to be done in this area, such as testing interrupts and bus mastership from external sources.
Expansion Modules
WIth revision 2 having its expansion bus functional it became necessary to build some hardware to test it out. This involved designing two VMEbus prototyping boards with some pre-staged components and signal breakouts to remove some of the tedium of the initial buildout of each board, but with (hopefully) enough flexibility to allow me to build a good array of modules that act as both bus masters and slaves.
The pre-staging area took up quite a bit of the board area, so I decided to build two different sizes of prototyping boards, 100x160mm and 100x220mm. These are both standard Eurocard sizes, and although the 100x220mm boards will be useful for prototyping larger more complex designs, ideally I'll avoid building anything on boards that size and concentrate on 100x160mm boards so that they all fit nicely within my subrack.
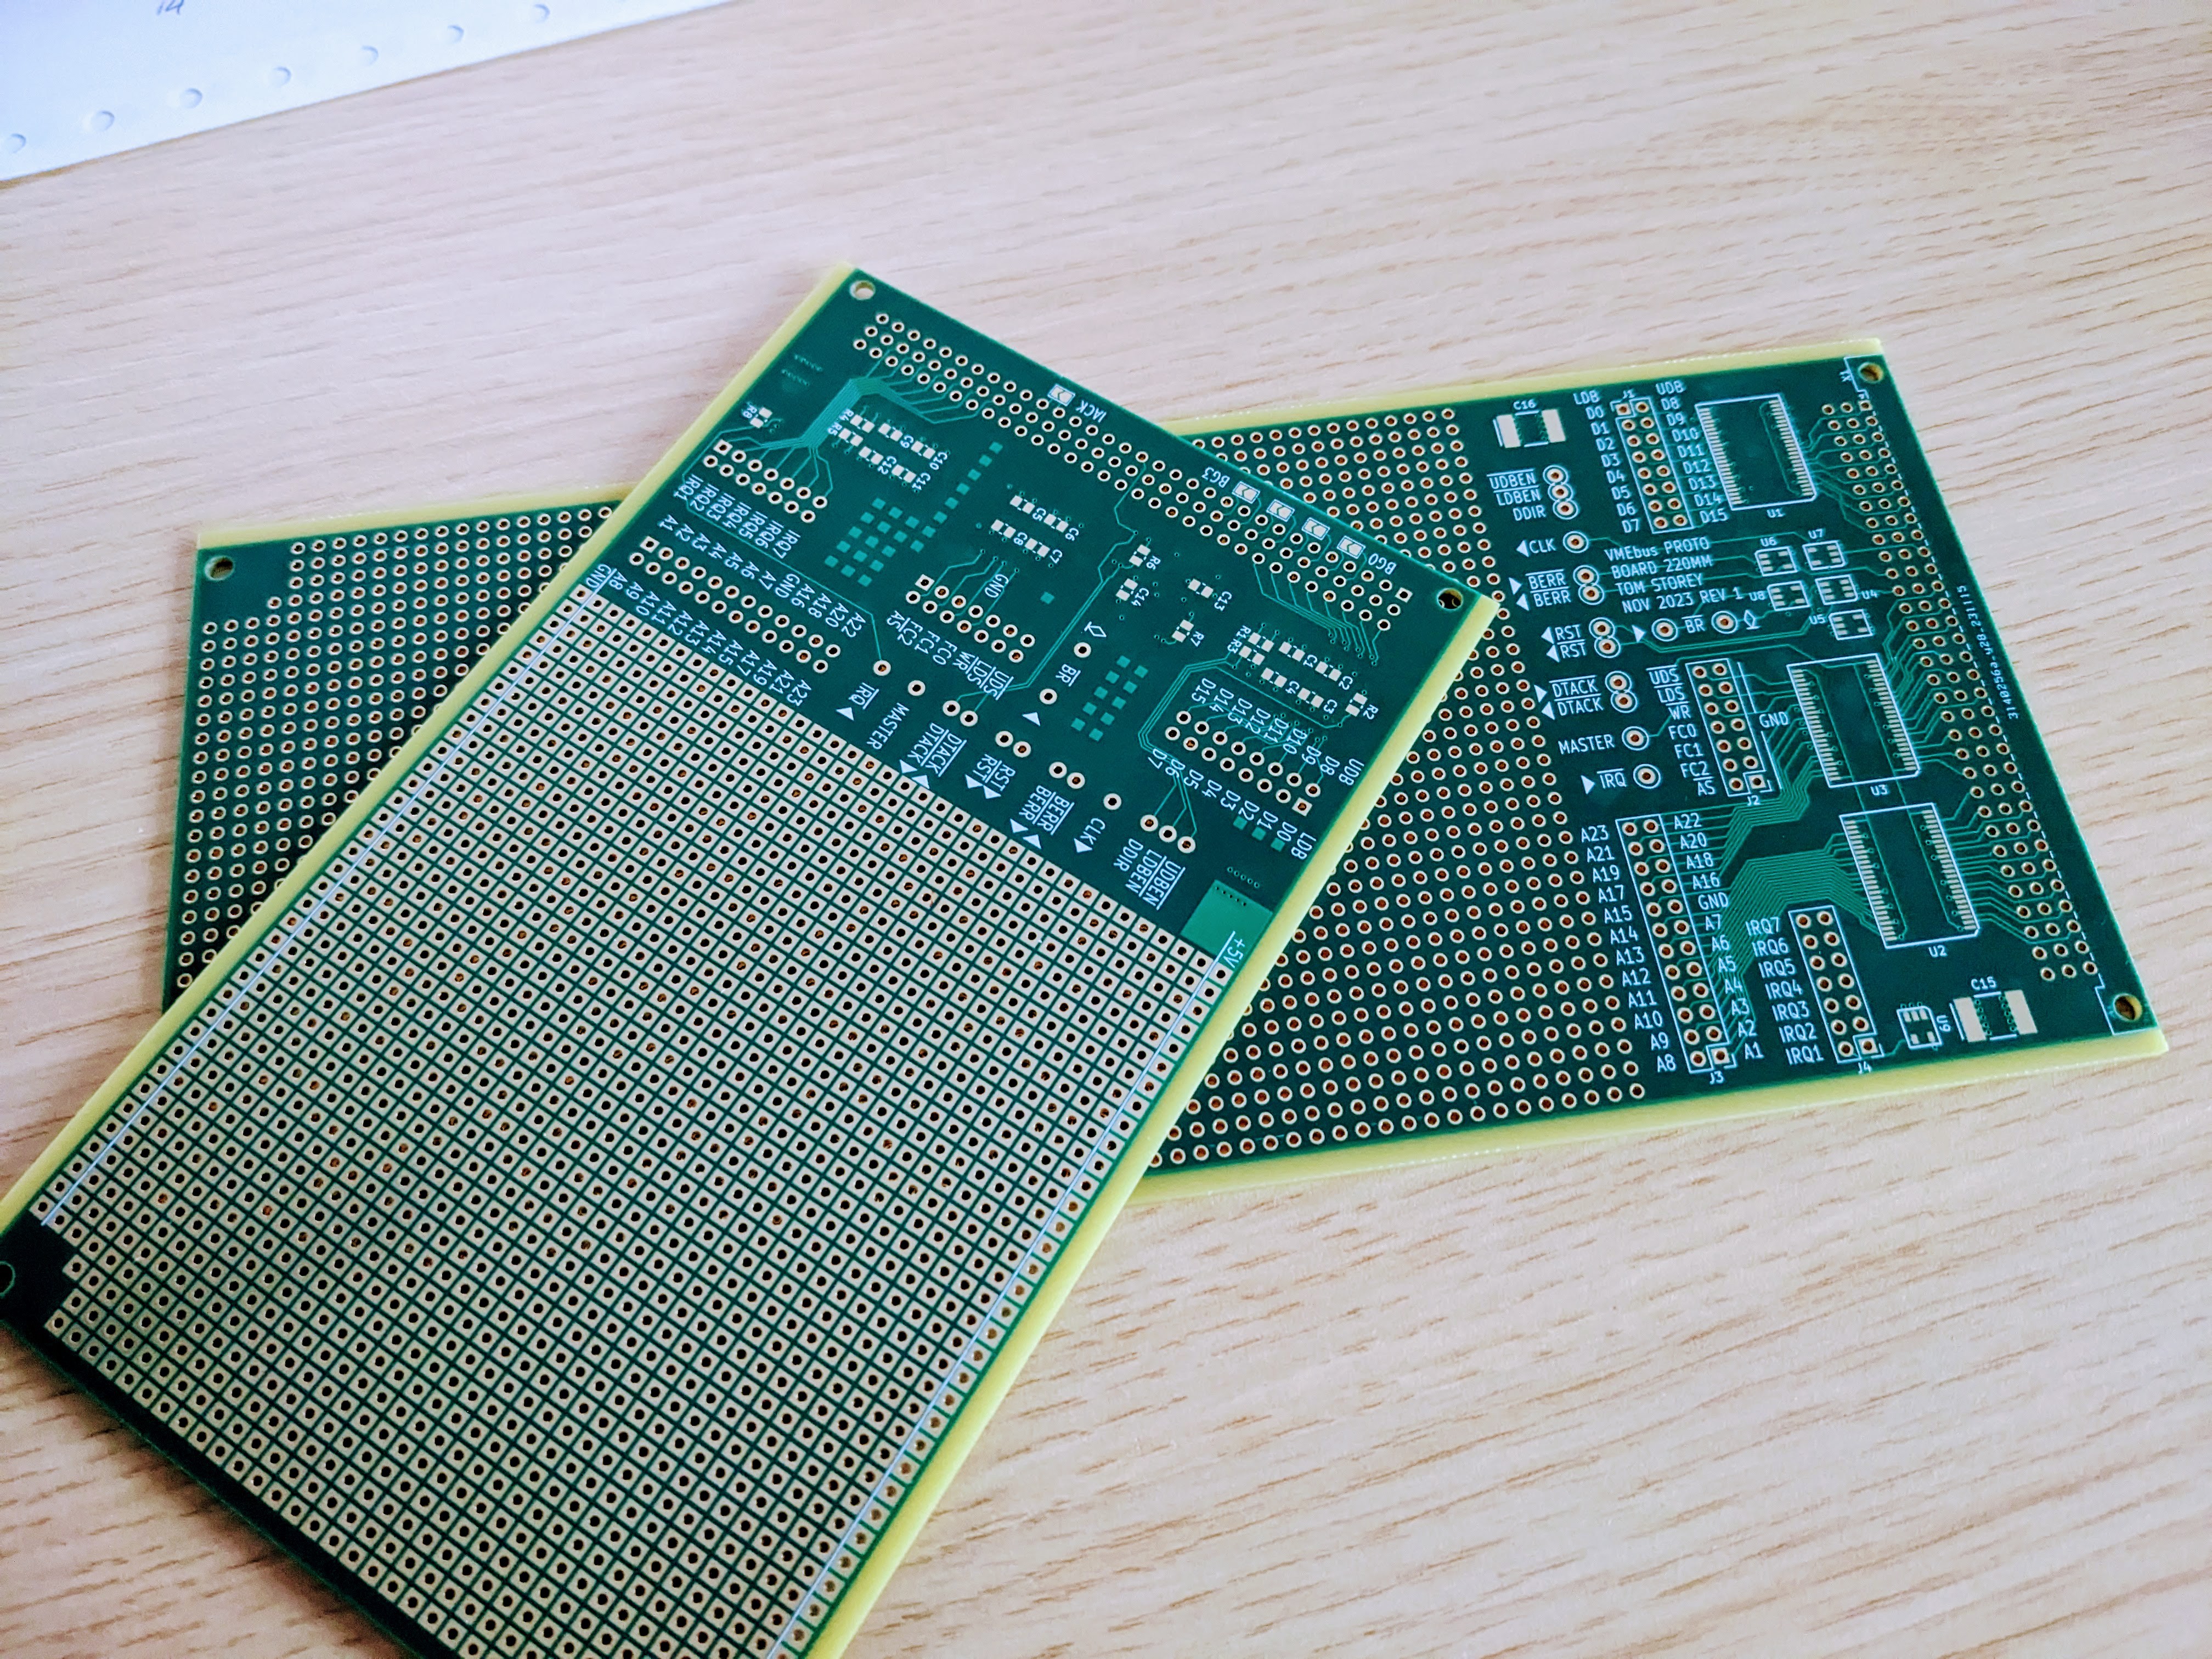

To that end, two boards have been built to date...
Debug display board
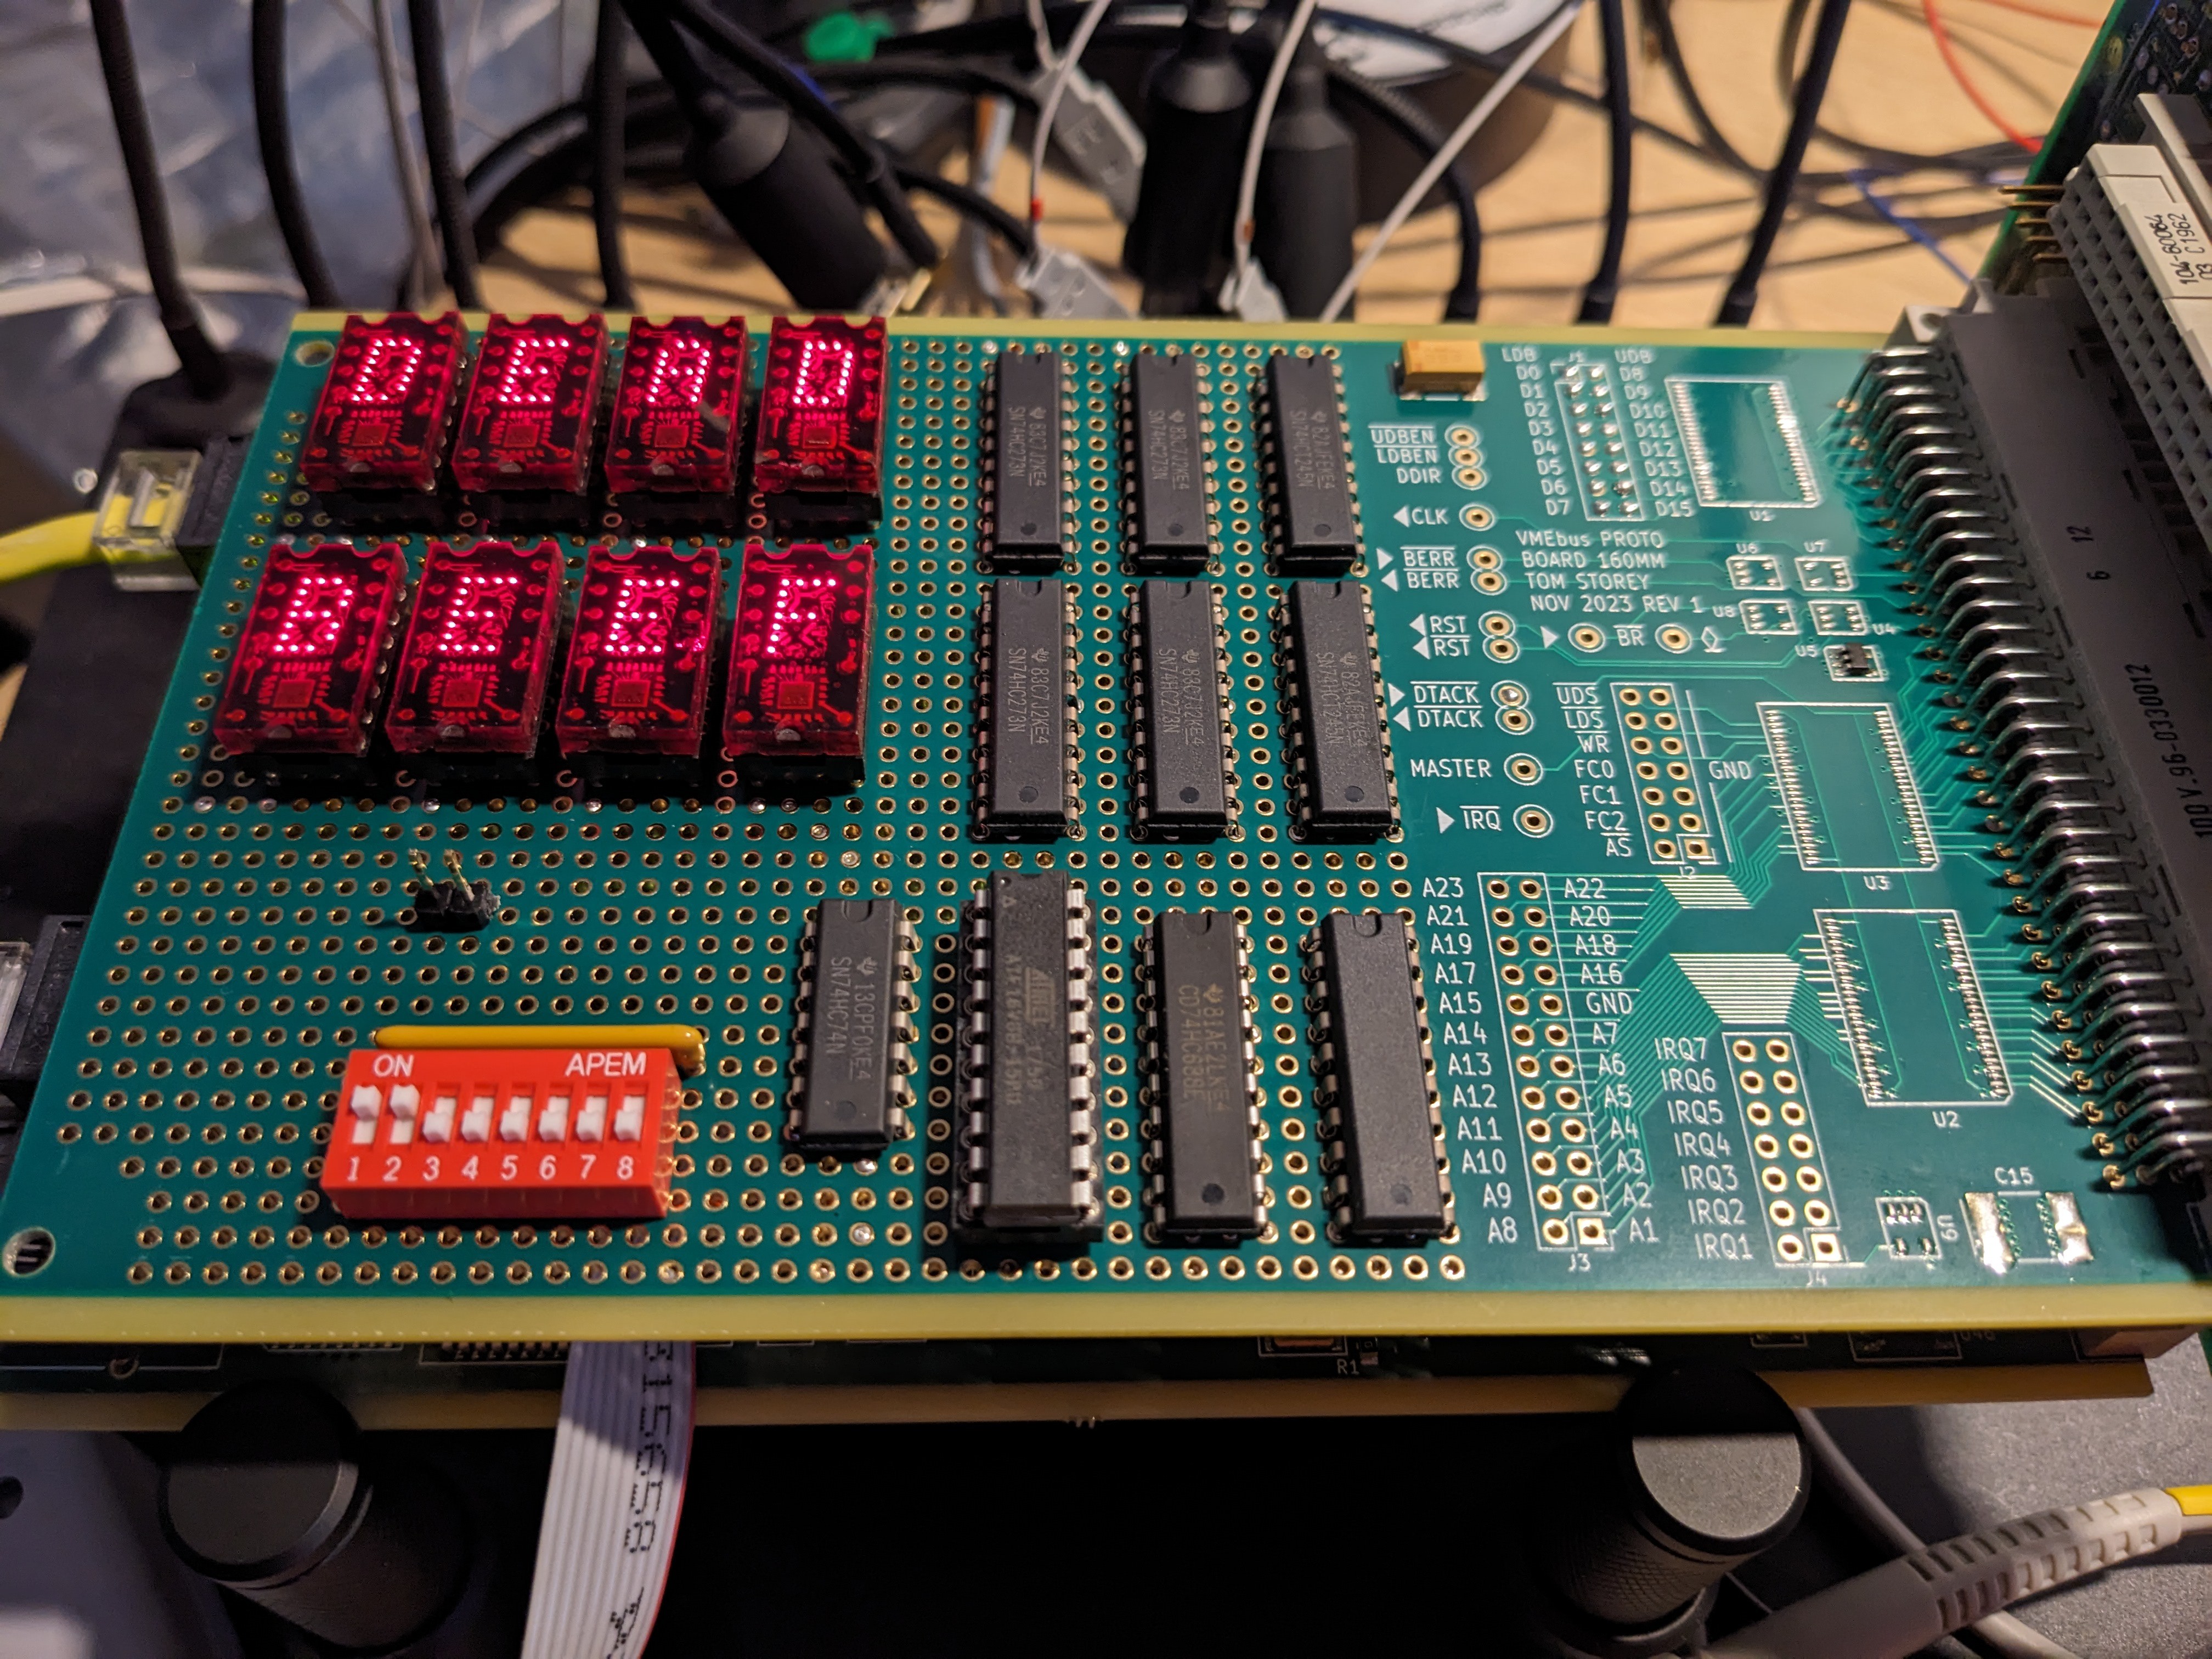
The first board I built was a simple "debug" display board, or perhaps something of a POST analyser card.
It has two sets of four TIL311/DIS1417 style displays that allow writing of either one long value (32 bits), or two individual word values (16 bits). Each word write shifts the value from one set of displays to the next, providing either a single display of one long value, or a short history of two word values.
I also implemented a function which just serves to disable the displays, allowing you to "clear" them prior to starting a new debug session, or if you perhaps only want to display a single word value. This is accessed simply by "reading" the displays, although no useful value is returned by that read.
This board came in handy while developing my CP/M BIOS because it allowed me to track progress of the code and see where things were getting stuck or crashing (or to discover new BIOS functions that I needed to implement).

Compact Flash/IDE board
The second board that I built provides an IDE style interface to allow me to access a compact flash card. Testing a variety of CF cards has so far been successful, however, with COMET68k only running at 10MHz it may be hiding some issues which are yet to rear their heads. A friend who has built a 68030 based system that is running at speeds up to 33MHz has reported a lot of success with many different CF cards except for one, so that does at least provide some confidence.
My CP/M BIOS is able to interact with the CF board to read and write disk sectors, and read/write/verify tests using the "PIP" utility to copy the contents of one disk to another have so far been very positive with no failures over several hours.
I have designs underway for another version that will have a CF socket directly on the board allowing me access to a couple of other interesting signals that aren't provided by the IDE interface, such as card presence, and the IORDY signal which I believe I can tie in to the DTACK logic and which may help to better support slower cards in faster systems.


If you happen to be wondering why I haven't used the pre-staged component positions on the above two boards, it comes down to logic families and voltage thresholds. Most of the parts I have in stock are HC family, which generally require something close to 5V to consider a signal as logic high. A VMEbus backplane floats most signals at around 2.9V due to the termination resistors, and this falls within the non-linear region of a CMOS input. I need to stock up on more HCT family parts and then I can interface more directly with the pre-staged buffer positions (which in my case use FCT family parts).
git Repository
In my previous post I mentioned that I was working on preparing my git repository for public consumption, and this is still a work in progress. I guess my feeling at the moment is that I have a lot of in-flight designs that I would like to try and get to a better state of completion before I release them to the public.
I'll keep working to make this available, as I have had expressions of interest from some people to be able to see my design files, and I am keen to share them.
Please stay tuned! :-)
Discussions
Become a Hackaday.io Member
Create an account to leave a comment. Already have an account? Log In.