 CentyLab
There are two ways to enable Serial debugging on PicoPD:
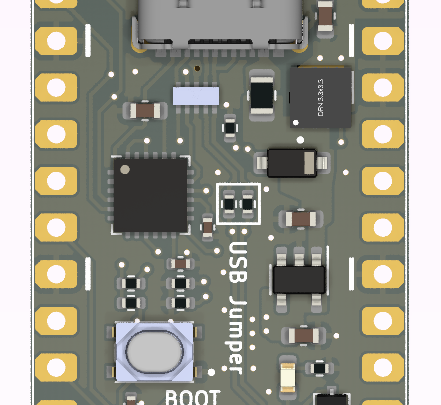
Method 1: Using the provided solder pads at the back
Step 1: Desolder the front "USB Jumper" resistors. They are just 2x 0Ohm resistors that bridge between the RP2040 IC and the USB-C port.
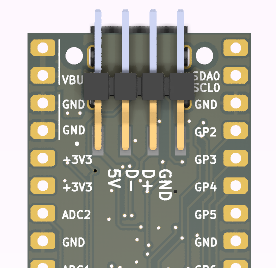
Step 2: Use a USB Type A Plug Breakout Cable, or make your own from any USB cable and connect to the existing pad at the back of PicoPD
Method 2: Use a USB-C Splitter that separates the USB 2.0 signal into another USB-C port. You only need USB 2.0 FullSpeed for the job, but never hurts to get extra speed if needed later. Some existing products:
- USB-C USB-C Power/Data Splitter (USB-HighSpeed)
- USB-C PD Power Splitter (USB-HighSpeed)
You then need a total of 3 USB-C Cables. If you are planning to pull 5A total, ensure your Power and Combined cables are both rated for 5A. The data line can be non-e-mark (3A)
Method 3: Using a UART to USB Converter
Tap on many RP2040 RX and TX lines. These pins can be configured within the setup().
Discussions
Become a Hackaday.io Member
Create an account to leave a comment. Already have an account? Log In.